USCG Sentinel Class
Fast Response Cutter (FRC)

Black Cat Models No.
350018, 1/350th Scale Printed Resin
Reviewed by Devin Poore, August 2024
|
| Designed by the Damen Group based in the Netherlands, the
Sentinel
class FRCs (Fast Response Cutters) are built by the Bollinger Shipyards
in Louisiana. The first of the proposed 67 vessels, the USCGC
Bernard
C. Webber was launched in 2011 and commissioned in 2012. The Sentinel
class, a replacement for the older Island class cutters, are all
to be named for Coast Guard enlisted heroes.
Armed with one MK 38 25mm gun and four Browning M2 machine guns, the
ships are capable of 28 knots and have an endurance of five days underway
for their four officer and 20 enlisted crew. Their missions include port
security, law enforcement, drug interdiction, marine safety, environment
protection, and the Coast Guard's bread and butter: search and rescue.
Over 50 of the vessels have been delivered and commissioned since 2012,
with eleven of the ships still under construction or under contract. |
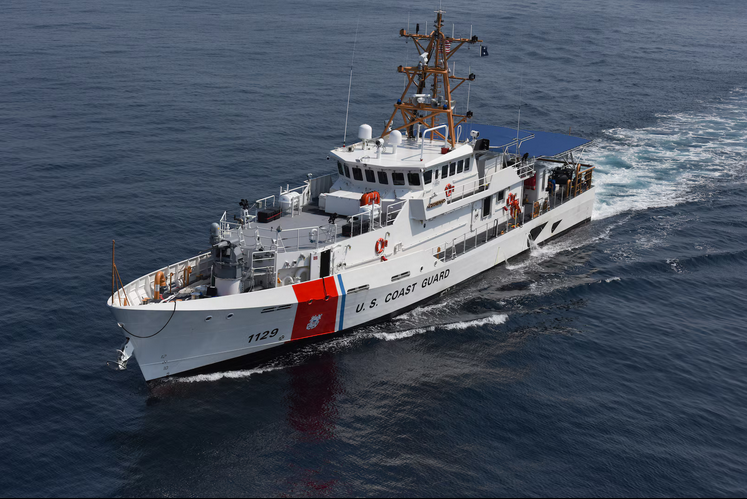
The USCGC Forrest Rednour underway
|
| HULL |
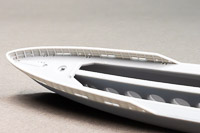
| The hull is a once-piece print, hollow. It was hard to
get an exact measurement with my calipers, but the thickness of the decks
and hull are between .060" and .070" thick (approximately 1.8mm). A thick
central beam runs the length of the hull interior, making it quite stable
and sturdy. Openings in the forward bulwarks are... open, as are the incredibly
fine chocks, which is excellent as I have reviewed many resin and even
styrene kits that make these items solid, to be drilled-out by the modeler.
The bulwarks themselves are thin and straight, with fine reinforcement
detail on the inner side. As this is a 3D print, it was supported during
the printing process. The supports have been removed, but there are remainders
of the connection points along the bottom of the hull and the very stern.
The entire stern will have need some flat sanding-block love, as the support
contacts are prominent and varied, but the entire area affected is less
than a square inch.
There are slight layer lines visible on the bottom of the hull and at
points along the main deck. These are very faint, and should disappear
under a coat of primer and a light pass with a sanding stick.
All of the online sources I found list the full-sized Sentinel's as
154' (46.8m) in length. Overall length of the model's hull comes in at
5.23", which is nearly spot-on for 1/350th scale. |

|
 |
 |
 |
 |
 |
 |
| SUPERSTRUCTURE |
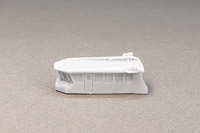
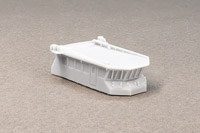
| The main superstructure consists of two printed components:
a deck house and bridge. Details are sharp with watertight doors, hatches,
and hand rails finely depicted and thinner than any photo etch would be
able to depict. Bulwarks are extremely fine. Like the hull, slight recessed
lines give a nice parts placement guide. As with the hull, there are some
print artifacts to be dealt with. At the forward curve of the deck house
there are slight stepping lines that show more as a difference in light
reflection than physical artifacts, as they aren't detectable to touch.
The bottom mounting surfaces of both the deck house and bridge do have
a bit of a wavy appearance, again, from the attachment points of the printing
supports. Both will need to be lightly sanded with a sanding block to even
them up, just be sure not to sand them flat as the deck house has sheer
to match with the hull's main deck.
As can be seen, I quickly stuck these parts to the hull and even without
tape or clamps, they fit nicely. Once sanding is done, they should match-up
seamlessly. |
 |
 |
 |
 |
 |
 |
 |
| SHIP PARTS |
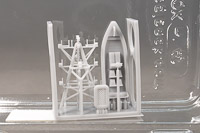
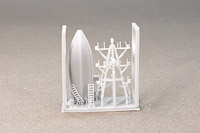
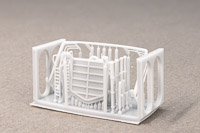
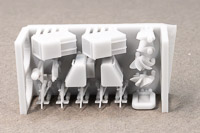
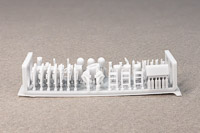
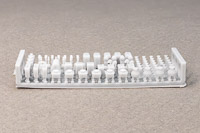
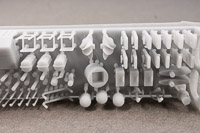
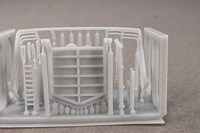
| The remainder of the printed resin components come on five
separate printing rafts. These are secured inside of two plastic clam shell
cases, as Black Cat uses for all of their accessories, to ensure that everything
arrives unbroken. The parts are extremely delicate, exemplified by my breaking
free one of the ladders while removing the parts from the cases for photography.
The ladder itself is fine and still usable, it just came free of its supports.
These rafts are called out in the instructions as Bar A, Bar B, Bar C,
Bar D, and Bar E. A includes all of the small bits, such as hatches, life
rings, bitts, ventilation pipes, etc. Bar B included larger deck fittings
and the screws, among other parts. Bar C has the rudders, another set of
screws, and the forward gun mount, and the M2 mounts. Those M2 mounts show
the only warpage visible in the entire kit, as the barrels on two of the
pieces are bent slightly to one side. These can likely be straightened
with a little heat. Bar D contains the printed railings and door for the
RHIB well deck at the stern. Finally, Bar E has the one-piece mast assembly
and ladders (the one I broke loose), a life raft, and the one-piece RHIB.
Other than the mentioned warped barrels on two of the M2 mounts and the
ladder I broke free with my fat fingers, every piece in this extensive
set of fittings is cleanly printed, with no visible deformities or surface
bubbles. It's all very impressive. |
|
 |
 |
 |
 |
 |
 |
 |
 |
 |
 |
 |
 |
 |
 |
 |
| PHOTO ETCHED BRASS AND DECALS |
| The photo etch is almost entirely deck railings and guard
rails around various structures. The railing is very fine, so care needs
to be exercised in cutting it free. The two deck awnings are brass as well.
At first I thought the rigid nature of the brass wouldn't translate well
to a canvas covering, but photos of the actual ships show these awnings
stretched extremely tight, so brass will do fine.
All of the parts are clearly numbered, which correspond to annotations
in the instruction sheet. The only rails I had trouble identifying in the
instructions are the main deck railings, as in my copy they aren't as clearly
annotated as the railings in other steps, but they are the longest and
most easily identifiable rails, so even if you have the same issue spotting
them in the instructions that I did, they're still easy to find and place.
The decal sheet is small, but has a lot to offer. Names and hull numbers
for seven boats are included, along with decals for the hull identification
stripes, Coast Guard insignias, and even the black exhaust stain guards
for the after hull. One omission is the lack of any national insignia flags.
Sure, they're easy to come by and most people have some in their stash,
but it's struck me odd to not include them.
Three short sections of brass wire are also included as antennas. |
 |
 |
 |
 |
| DECK MASKS |
| Confession time: I've been bugging Ben at Black Cat Models
for some time now about deck masks. I find they make the process of painting
a ship so much easier, neater, and more enjoyable. And, if someone is designing
the ship kit digitally, then they already have the necessary line work
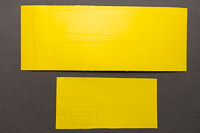
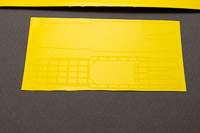
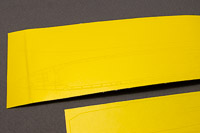
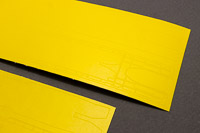
to cut masks. The Sentinel kit comes with two sheets, one for the
main deck, and one for the 01 level on top of the deck house. Each sheet
has two masks, one that covers the entire deck, and another that has multiple
panels to depict anti-skid covering.
The masking material itself is a thin, adhesive backed, paper type,
not vinyl. They remind me of aftermarket masks I've purchased from Flyhawk
and other vendors, so they should be easy to work with. |
 |
 |
 |
 |
| INSTRUCTIONS |
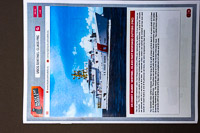
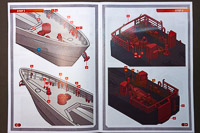
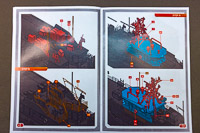
| Instructions are the typical Black
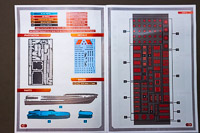
Cat full-color booklet. Sixteen pages cover a short history of the class,
a parts layout with numbers of all pieces, printed, brass and decals, and
eleven construction steps. As per other models, each part is numbered and
color coded (red for printed part, orange for brass, etc) and shown in
detailed perspective views. As stated earlier, on first studying the instructions
I did have difficulty picking out the main deck railing install (Step 3),
and I completely missed Step 11 which shows the screw and rudder installs.
Long story short, with so many small parts, read the instructions carefully
before beginning construction. Everything you need to know to build the
kit is in those pages, so make good use of them.
The last two pages of the instructions have color profiles in perspective
as well as plan and profile. Color call outs are made with PMS (Pantone)
and FS numbers where appropriate. |
 |
 |
 |
 |
 |
 |
 |
 |
|
 |
| CONCLUSIONS |
| I still prefer that hulls be printed, cleaned-up, then
cast for kits, but in this case, due to the small size of the subject and
the ability to print the hull hollow, it works. The print clean up is minimal.
And it's not like we never had to clean up resin cast hulls in the past;
instead of dealing with resin mold split lines and air bubbles, now we're
dealing with print supports and layer lines. As long as the positioning
of the printed parts are well considered -- as they are here -- this is
the easier task.
As I worked on the review of the kit, I had to keep reminding myself
that it's 1/350th scale and not 1/700th. At just over 5" long, it's a small
kit, and there are a lot of parts. Despite the fine nature of some of those
parts, such as the printed mast, brass railings, etc., I think this would
be a good subject for a first or second printed resin kit. As long as one's
careful and works slowly, especially with removing the printed parts from
the print supports, this should build up into a nice model.
Highly recommended. Thank you to Black
Cat Models for this review sample. You can find their kits online at
various retailers, which are linked at their website via their logo to
the right. |

|

© ModelWarships.com
|


