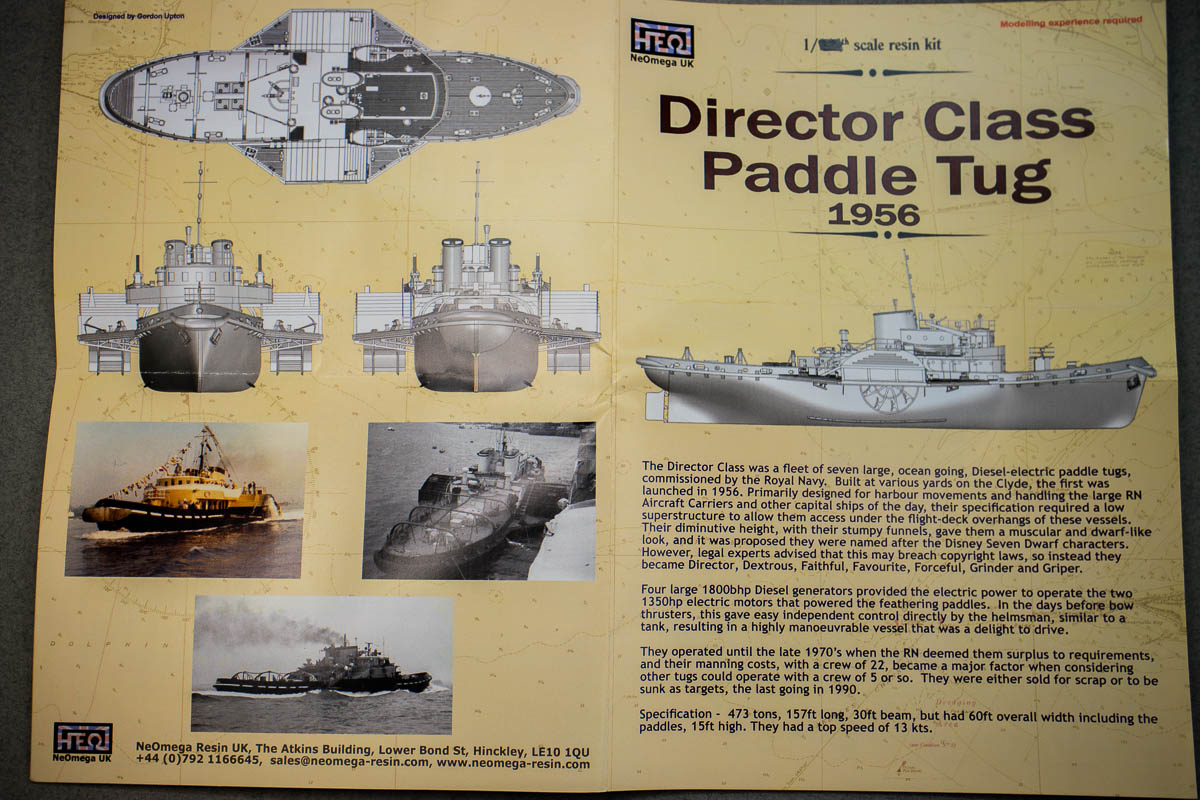
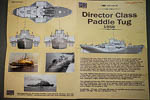
Director Class
Paddle Tug
1956
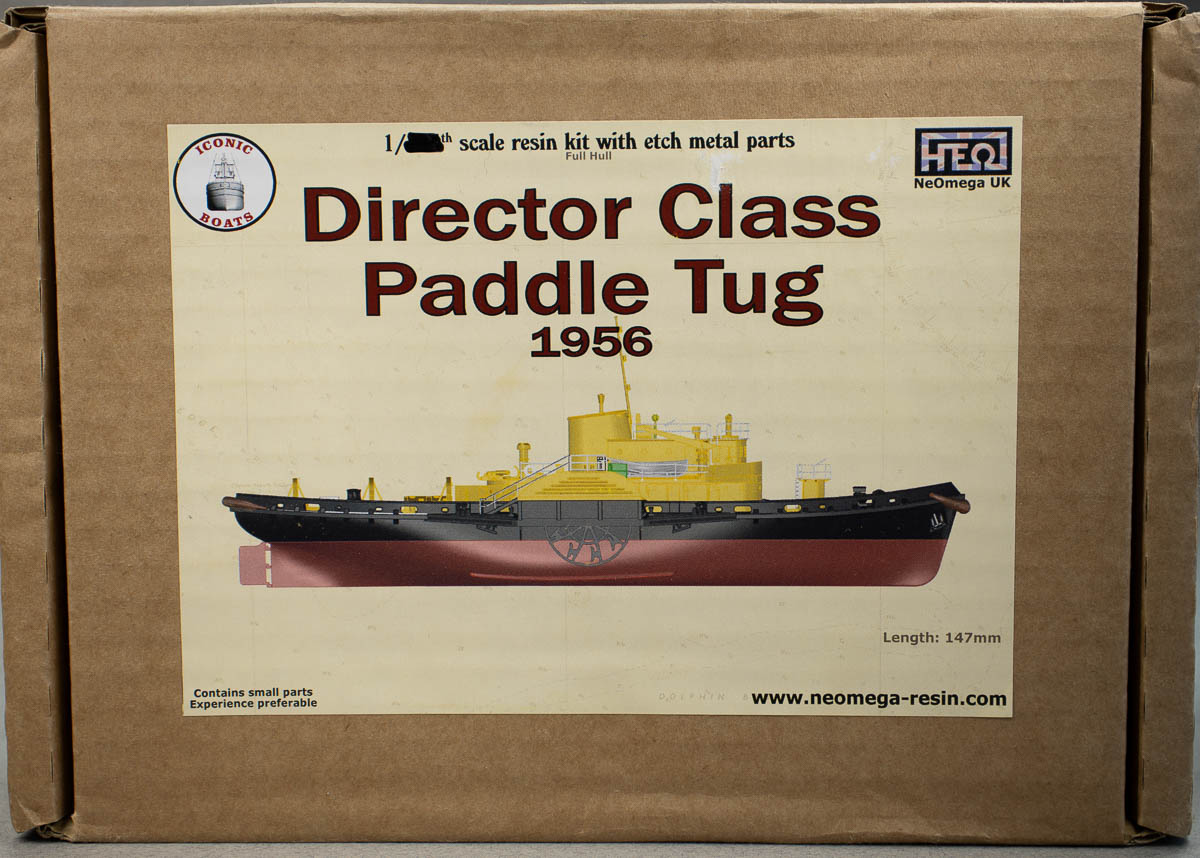
NeOmega Resin, 1/350th
Scale Cast and Printed Resin.
Reviewed by Devin Poore, June 2024
|
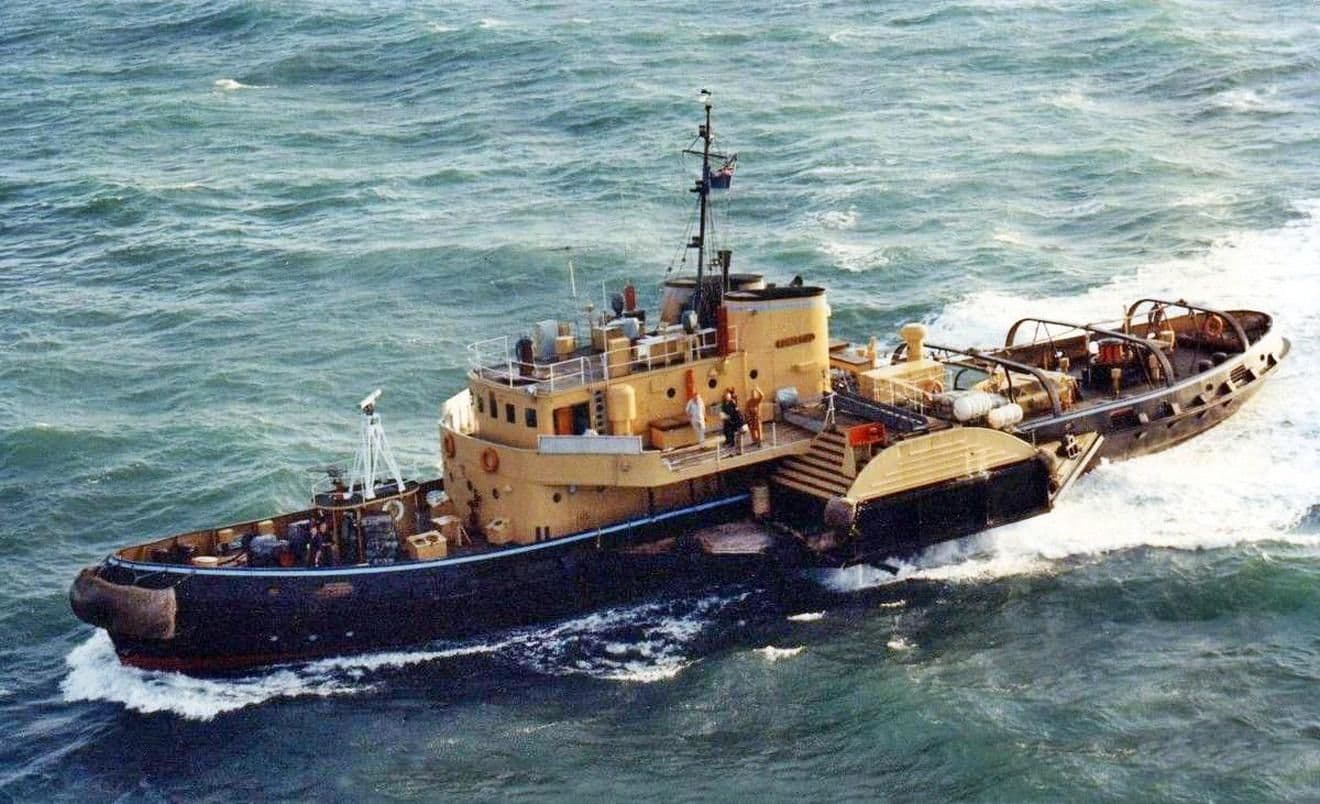
| Commissioned in the 1950s, the Director Class consisted
of seven, diesel-electric, paddle-driven tugboats. Designed mainly to operate
in harbors and support aircraft carriers, the ships had short, squat superstructures
and stacks, to allow them to work in close to the carrier's hulls without
interference from overhanging flight decks and sponsons. In the days before
bow thrusters, the twin paddles could be independently controlled, allowing
for amazing manoeuvrability.
The tugs served into the 70s, until the RN deemed them surplus. They
were all sold for scrap or sunk as targets, the last one being disposed
of in 1990.
*Note: This history has been shamelessly gleaned from the kit's instruction
sheet. I can find hardly any mention of these ships in my references, or
even online. There doesn't even appear to be a Wikipedia entry for them! |
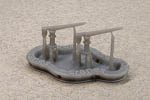
HMS Forceful Underway in
1983
|
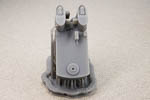
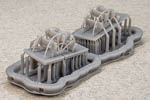
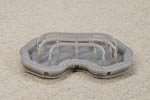
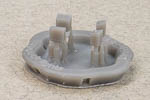
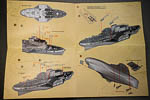
| HULL |
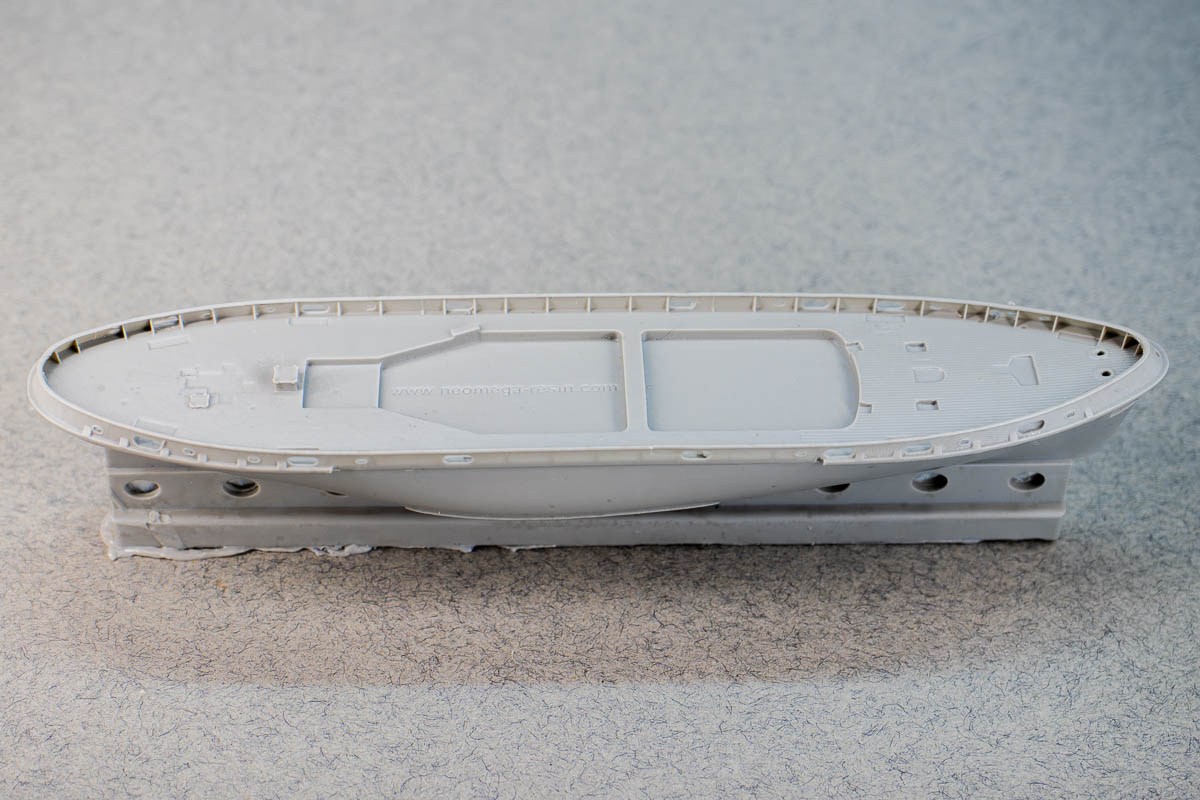
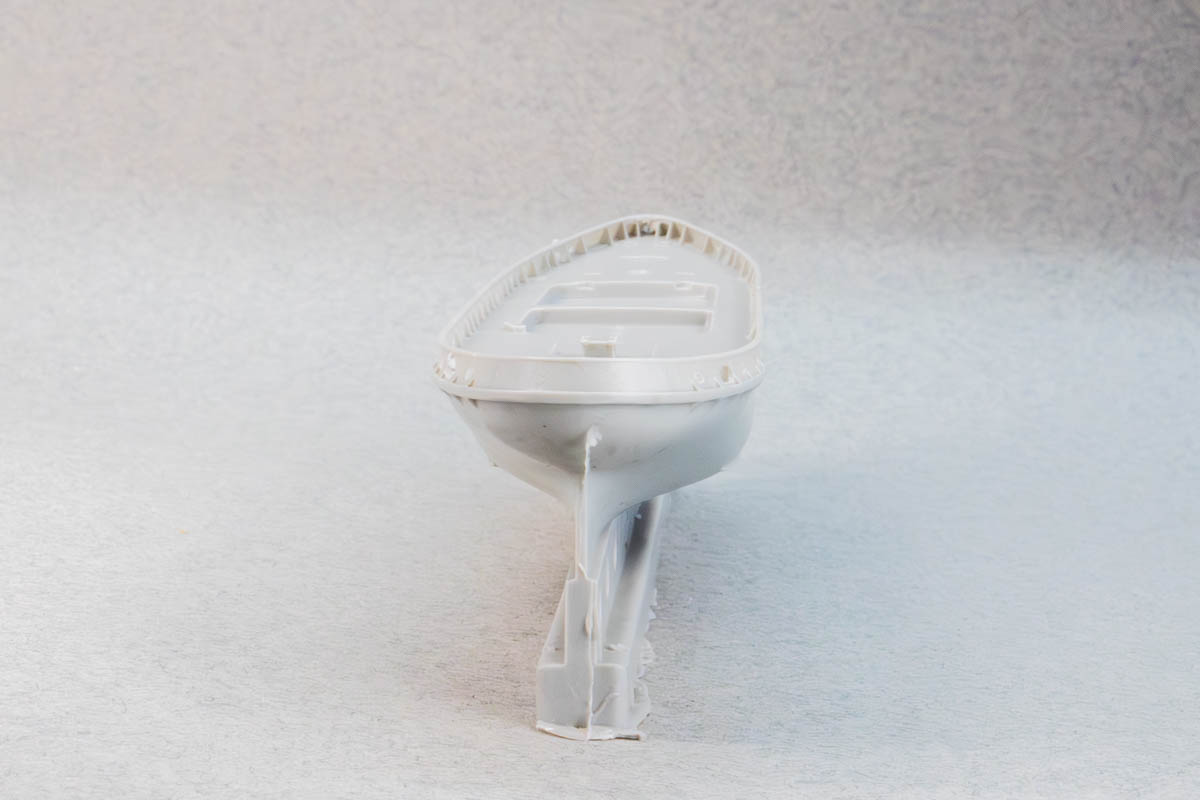
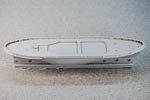
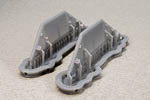
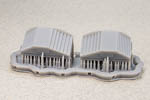
| Neomega have supplied the hull of the tug as a cast resin
piece. This is the way I prefer to have my kits that rely on the majority
of the components being 3D printed. Using a 3D print as a master for the
hull, the kit manufacturer can then sand away the print artifacts, allowing
for a cleanly-cast hull.
The hull detail is very well rendered, with the gunwales extremely thin
yet rigid. Deck detail consists of mainly wood planking, which is finely
rendered on the bow. Locator holes for the 3D deck equipment are sharp.
The only possible issue my casting shows is a slight pebbling texture on
the stern. It's not fine enough to represent nonskid, and looks like perhaps
an issue with mold removal, but it's a very small area. It can be easily
sanded away, or more likely will be hidden under the brass grating that's
applied over it. The outer hull is attached to the casting sprue, which
will have to be carefully removed. Besides the bilge keels and recess for
the anchors, the surface is completely smooth with no signs of bubbles
or pitting.
Based upon the instruction manual, the actual Director class
measured 157 feet in length. Overall length of the kit comes in at 5.3",
which is accurate for 1/350th scale. |

|
 |
 |
 |
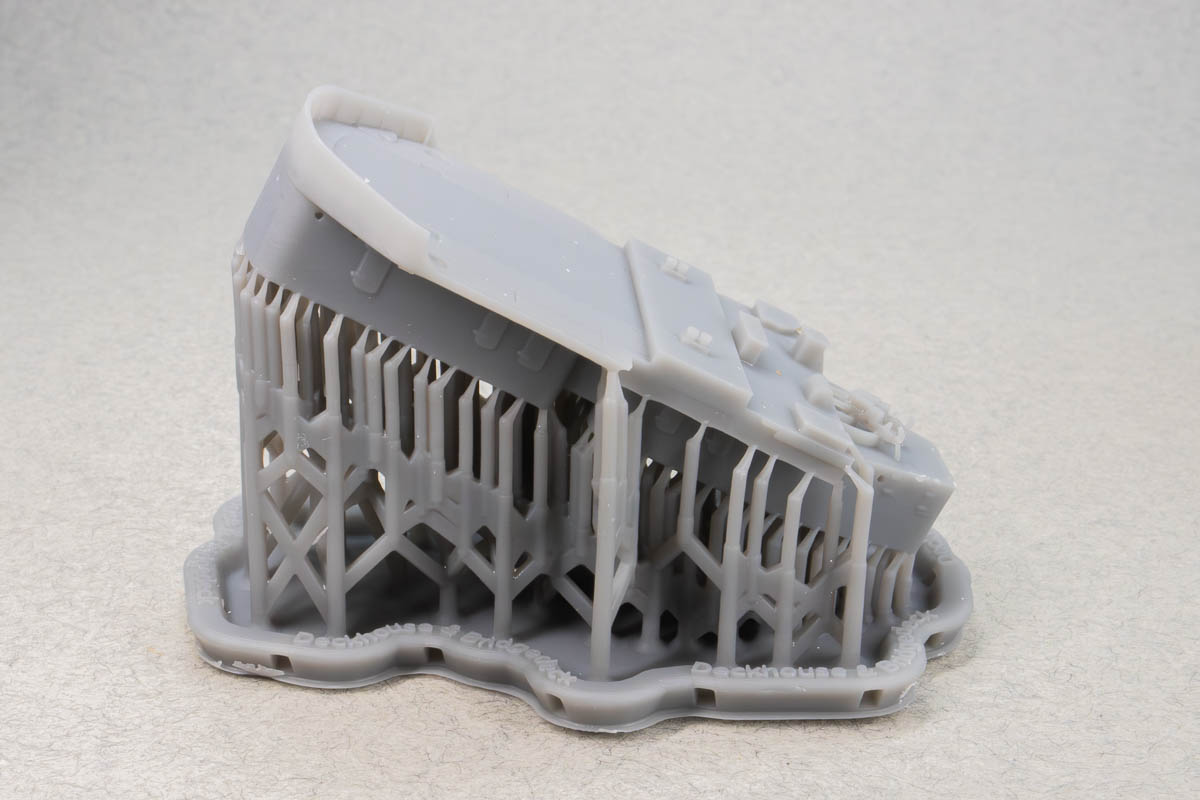
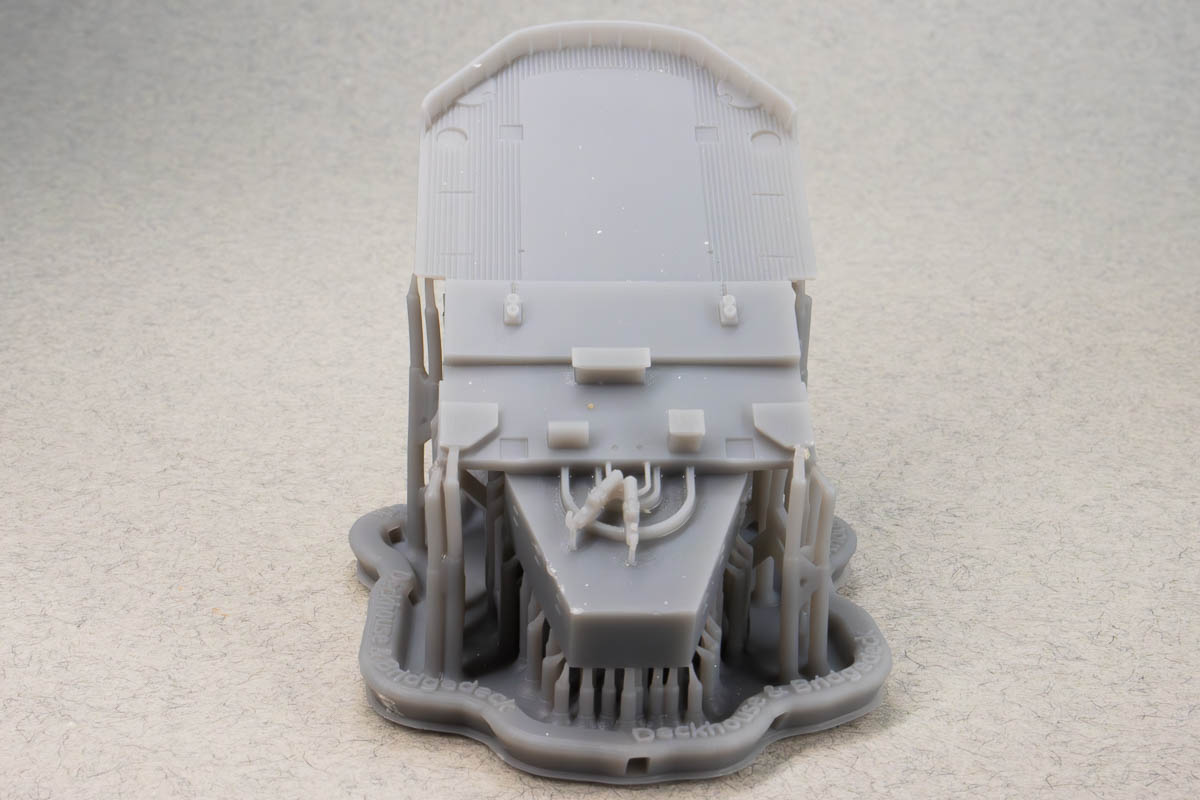
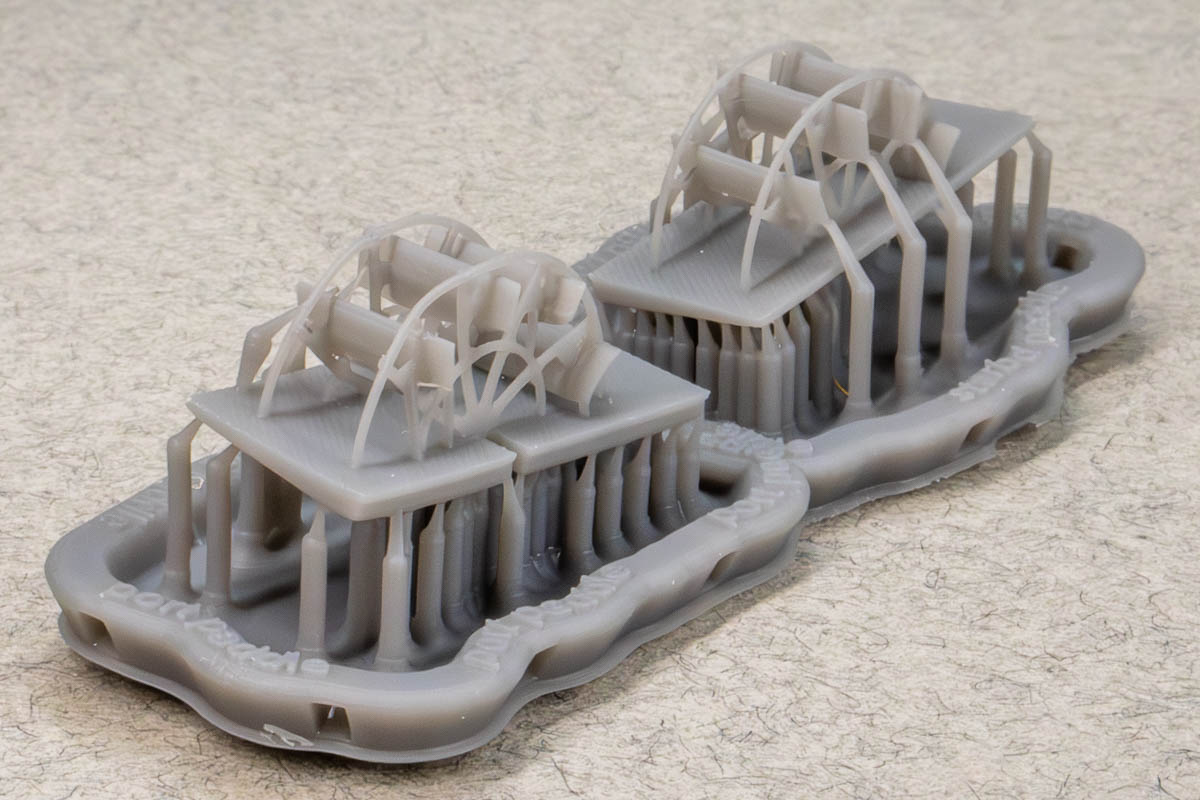
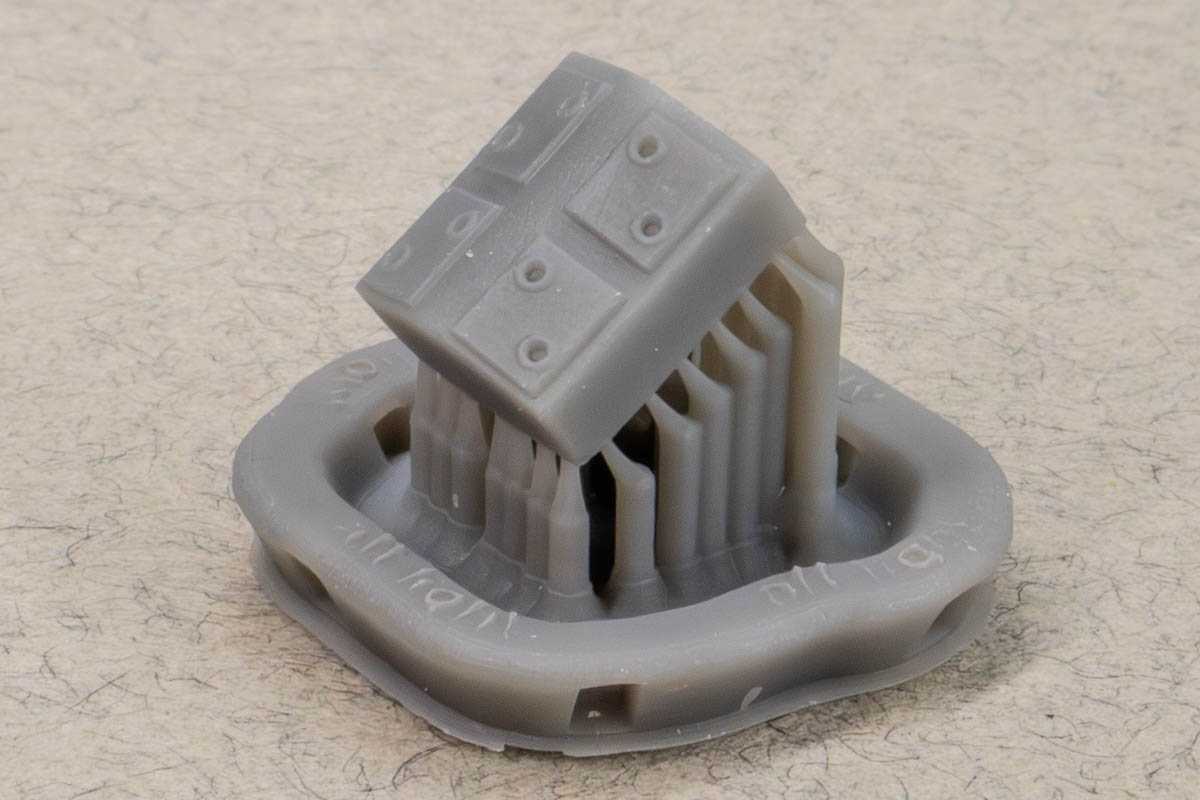
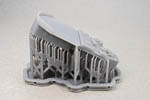
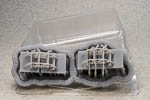
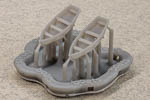
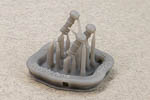
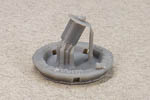
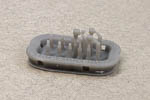
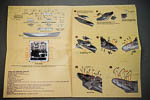
| PRINTED RESIN PARTS
- SUPERSTRUCTURE |
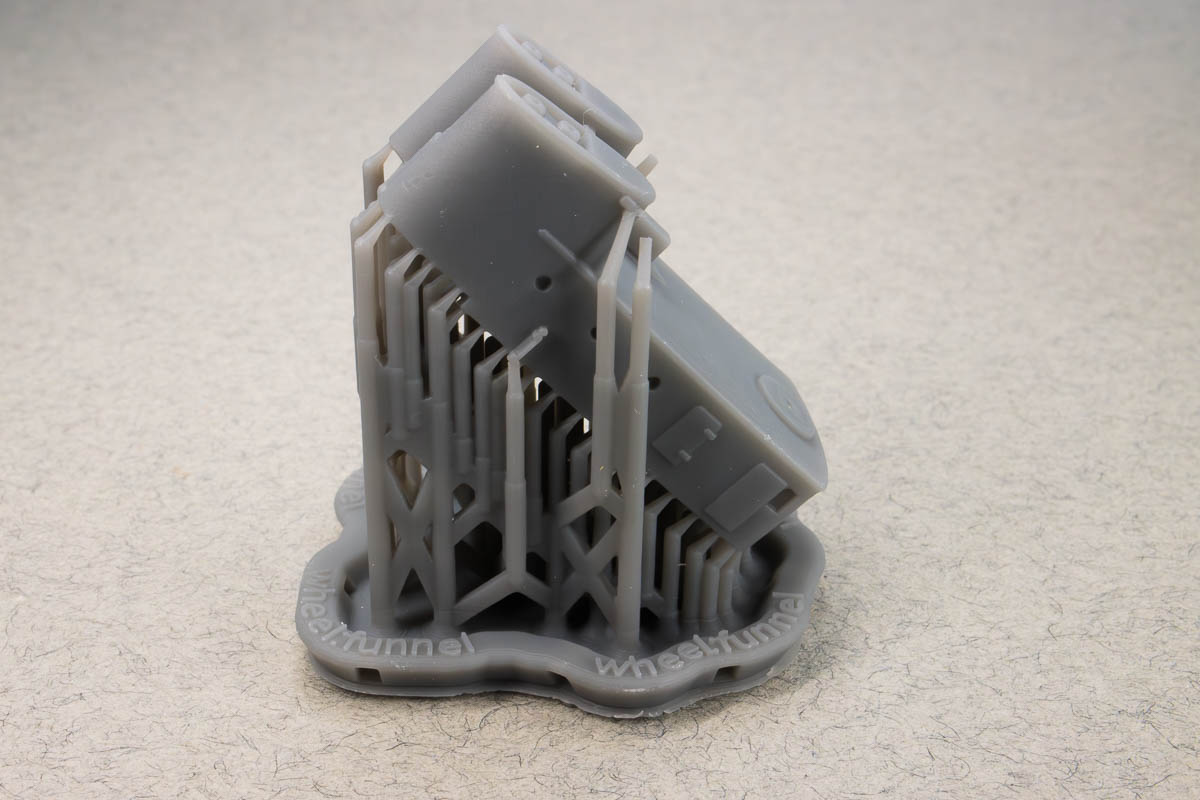
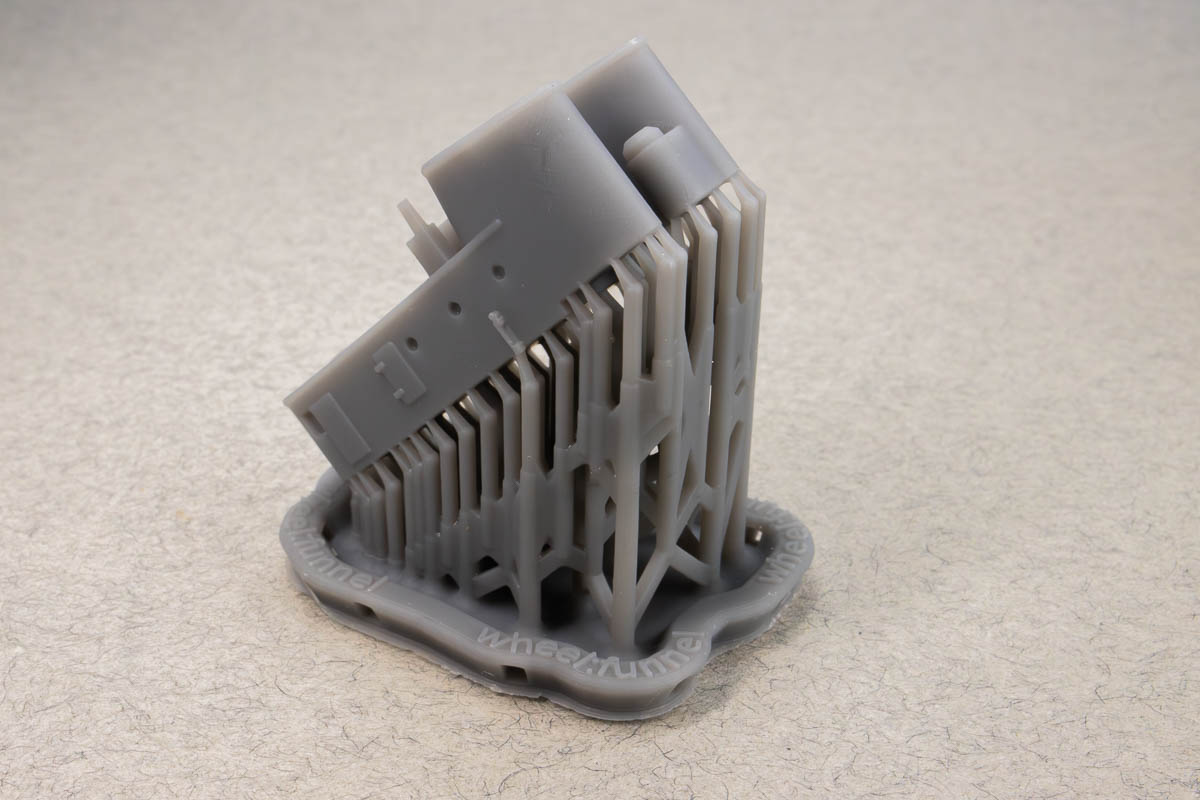
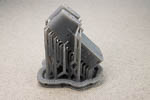
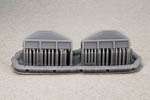
| The two largest printed parts in the kit make up the superstructure.
Both are clearly marked on the printing raft (one of the nice touches with
parts printed on Formlabs printers), making them easy to correlate with
the instructions. The larger of the two is the engine room and main cabin,
which sits on the main deck. Again here is very finely rendered wooden
deck planking, a thin bridge windscreen, bitts and other deck structures.
The sides of the structure have sharply rendered door detail, as well as
sharp and appropriately deep portholes.
The smaller part is the wheelhouse and funnel assembly. It, too, has
deck planking, and a few small structures, including the funnels, included.
The sides of the structures have the same sharp door detail. The portholes
in this section are a bit larger, and are a little softer in their edges.
Maybe this is accurate to the ship, but even if not, a few twists of a
drill bit will sharpen them. |
 |
 |
 |
 |
 |
 |
|
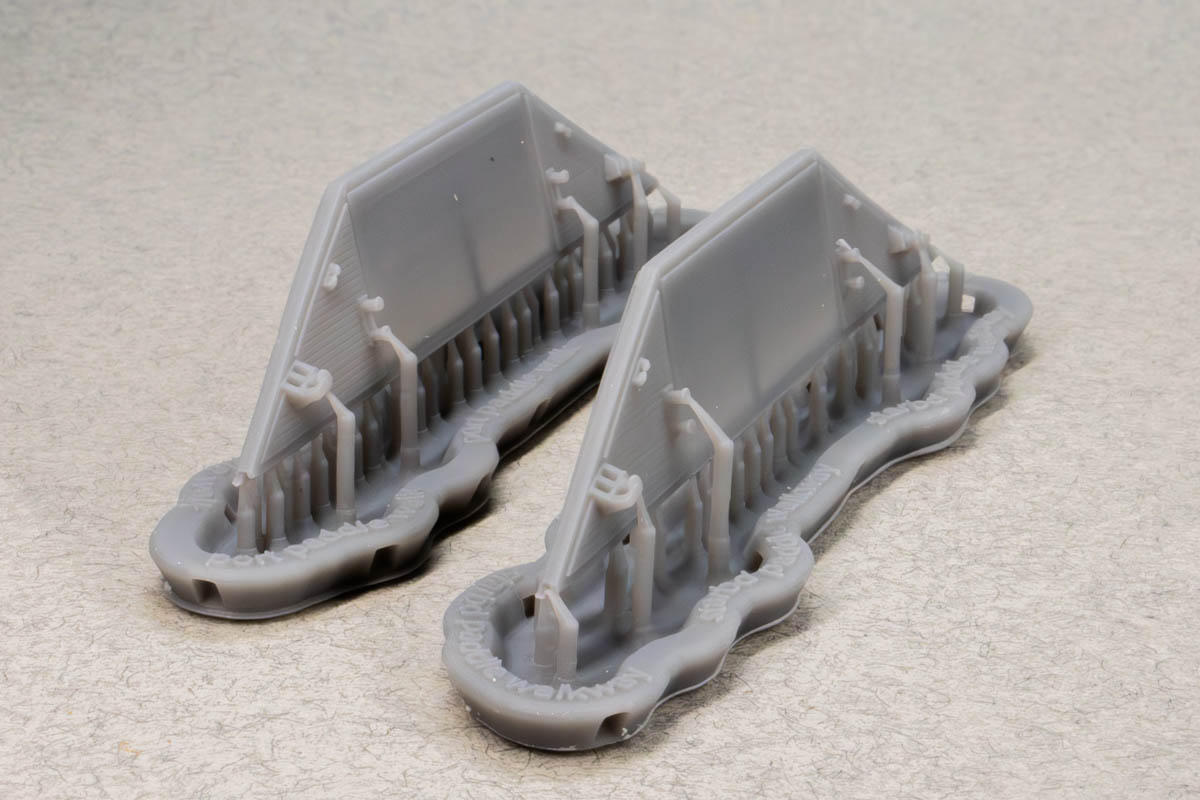
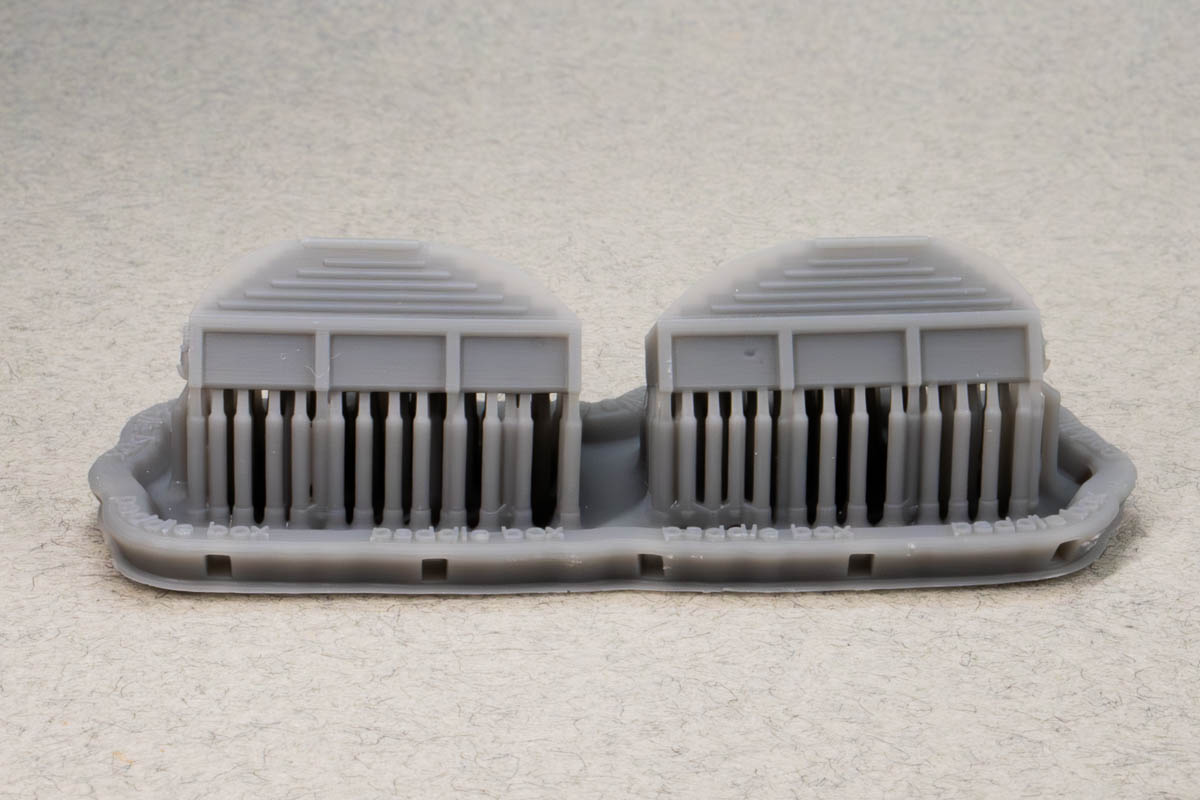
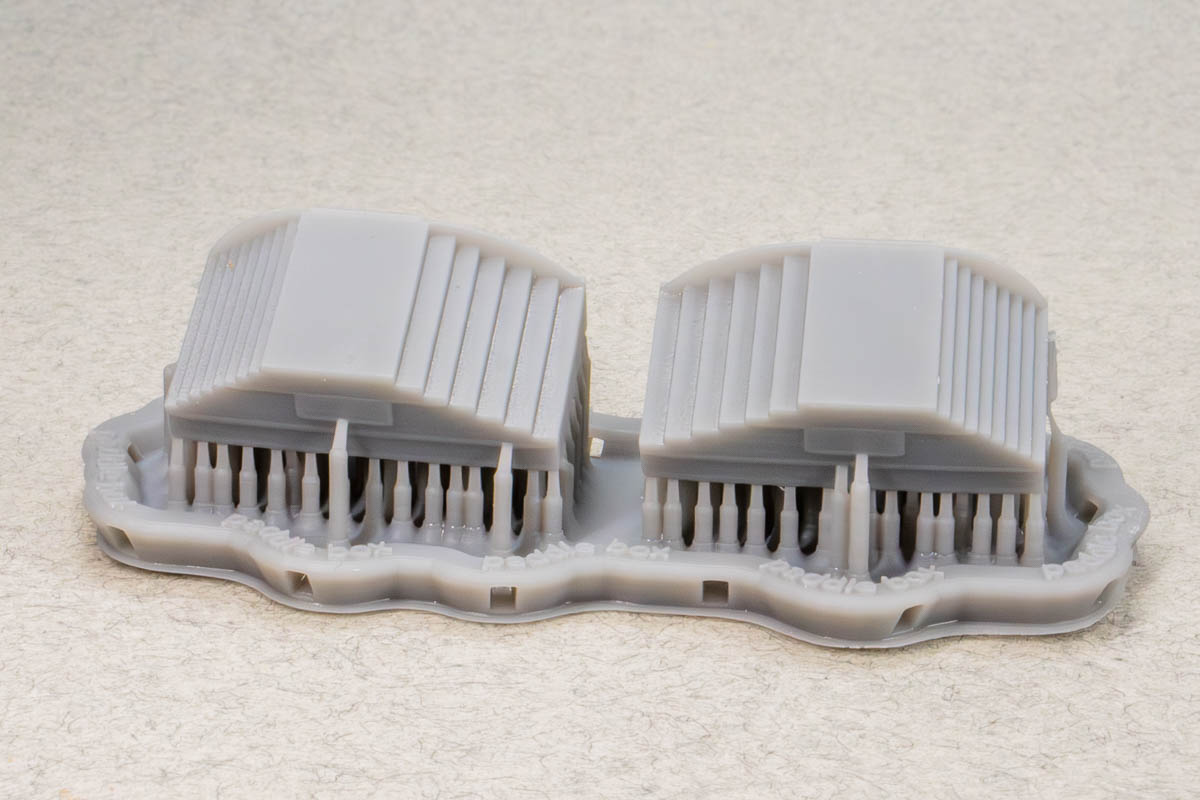
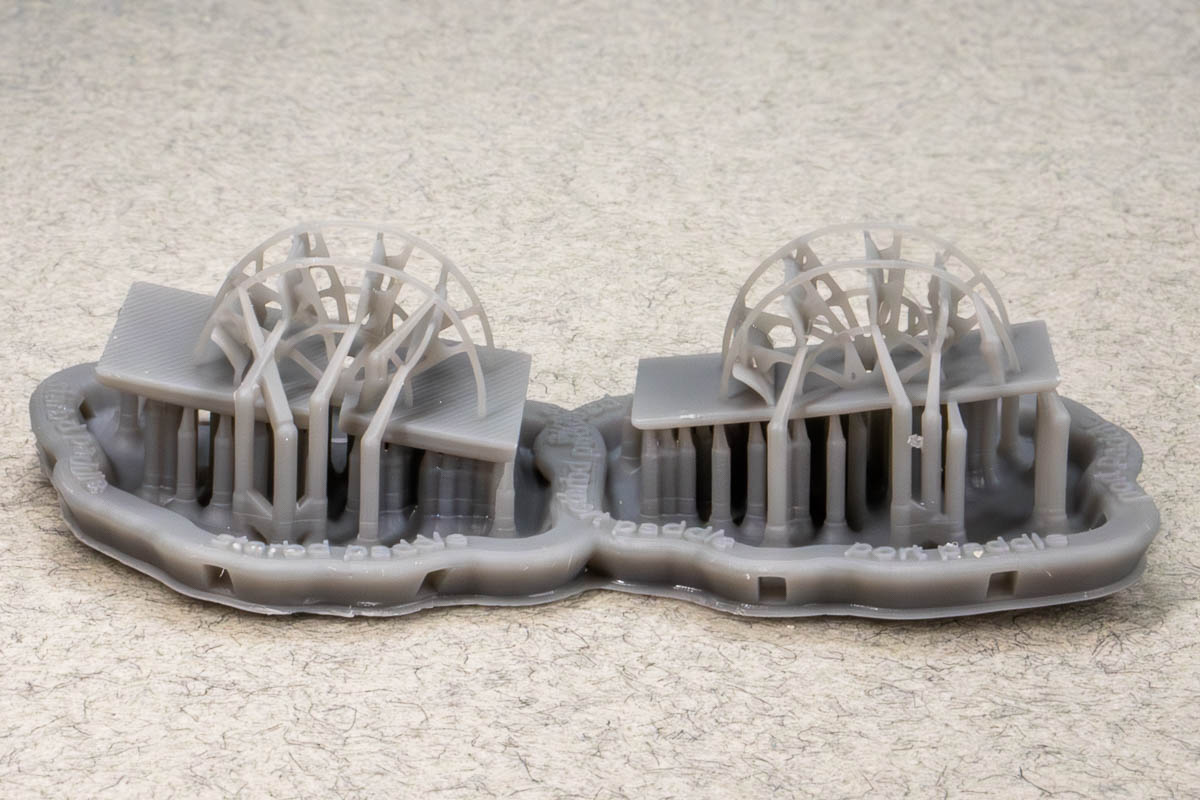
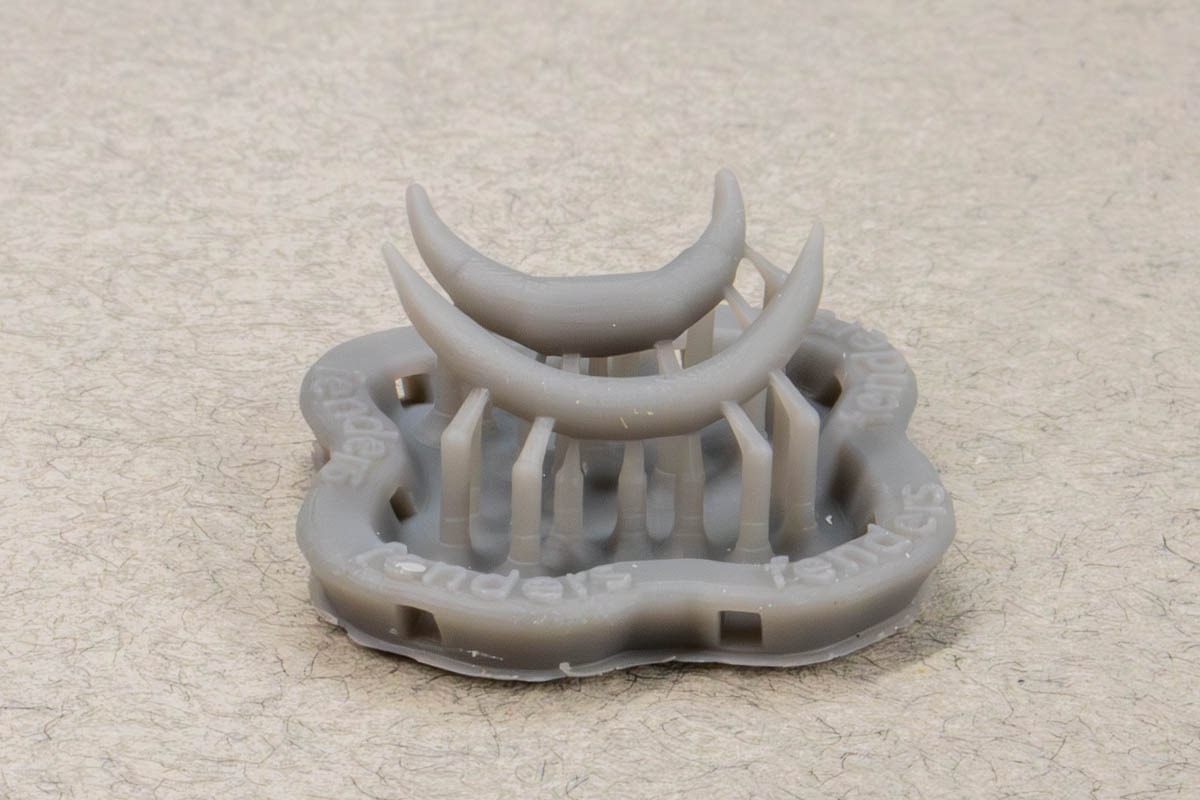
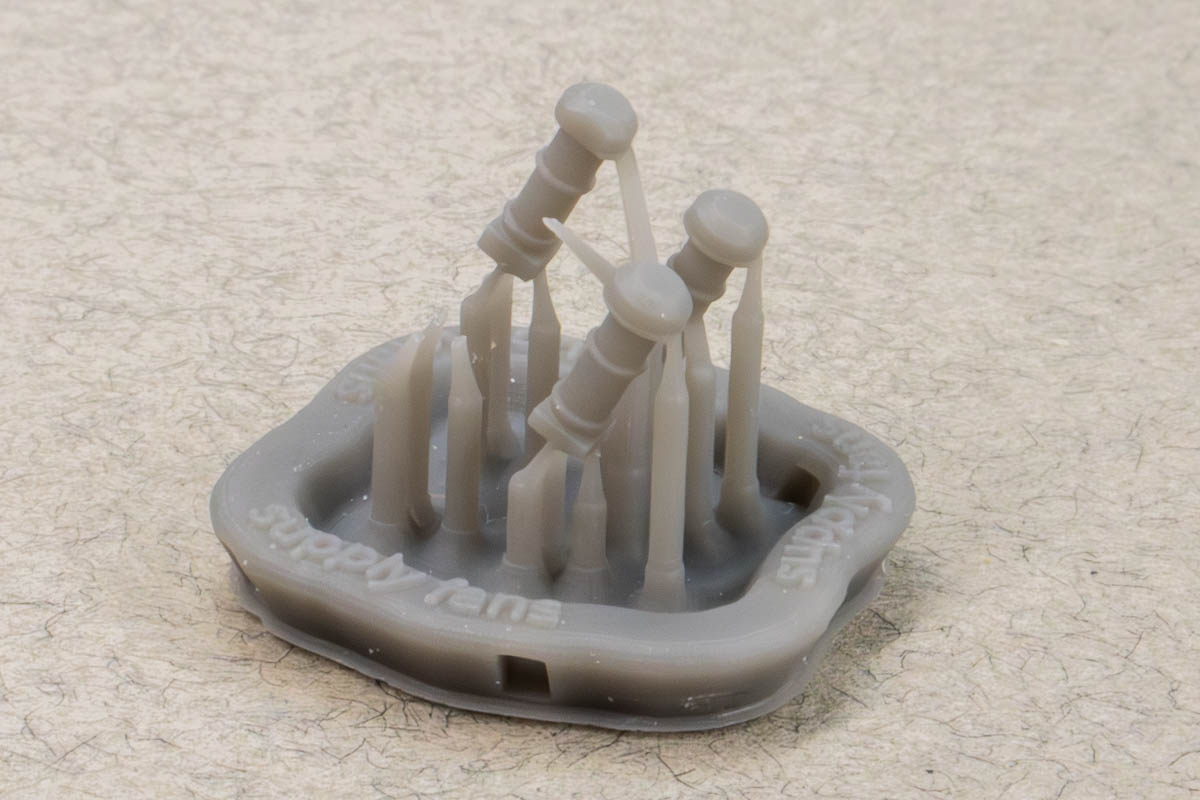
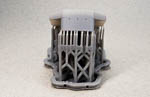
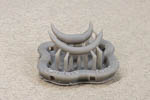
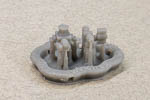
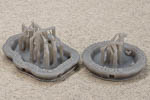
| PRINTED RESIN PARTS
- PADDLES and OTHER PARTS |
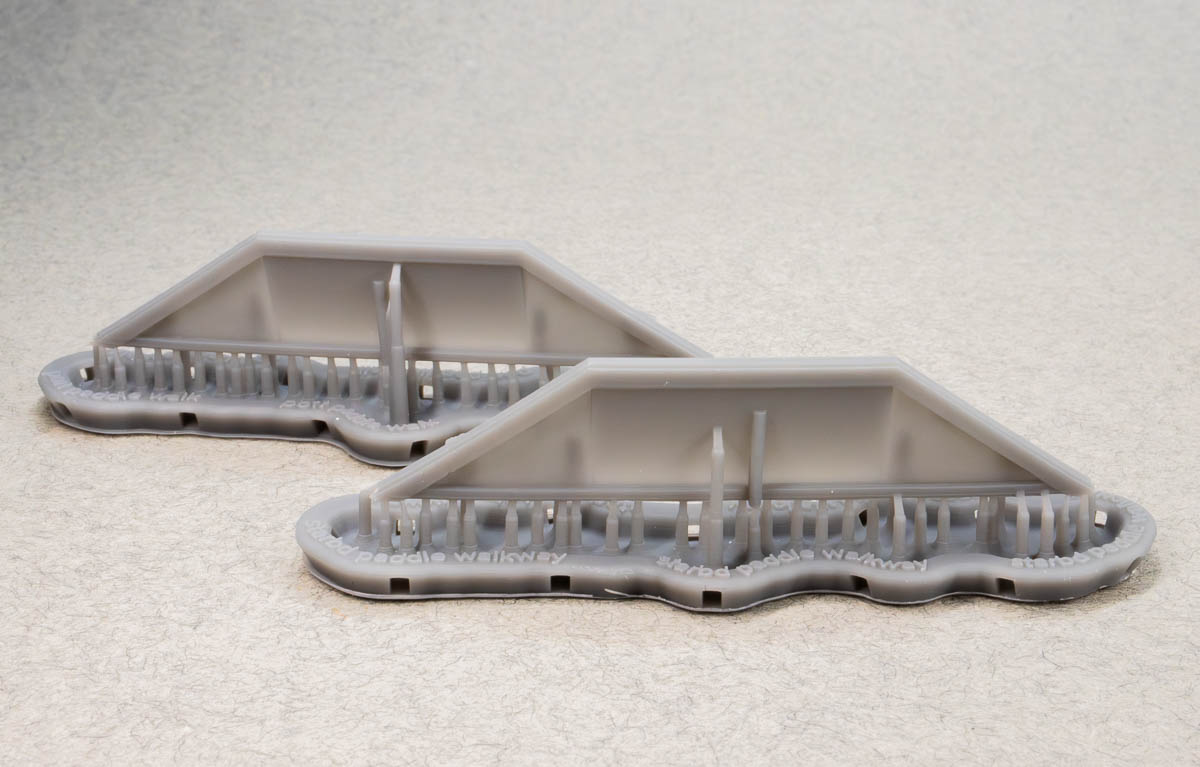
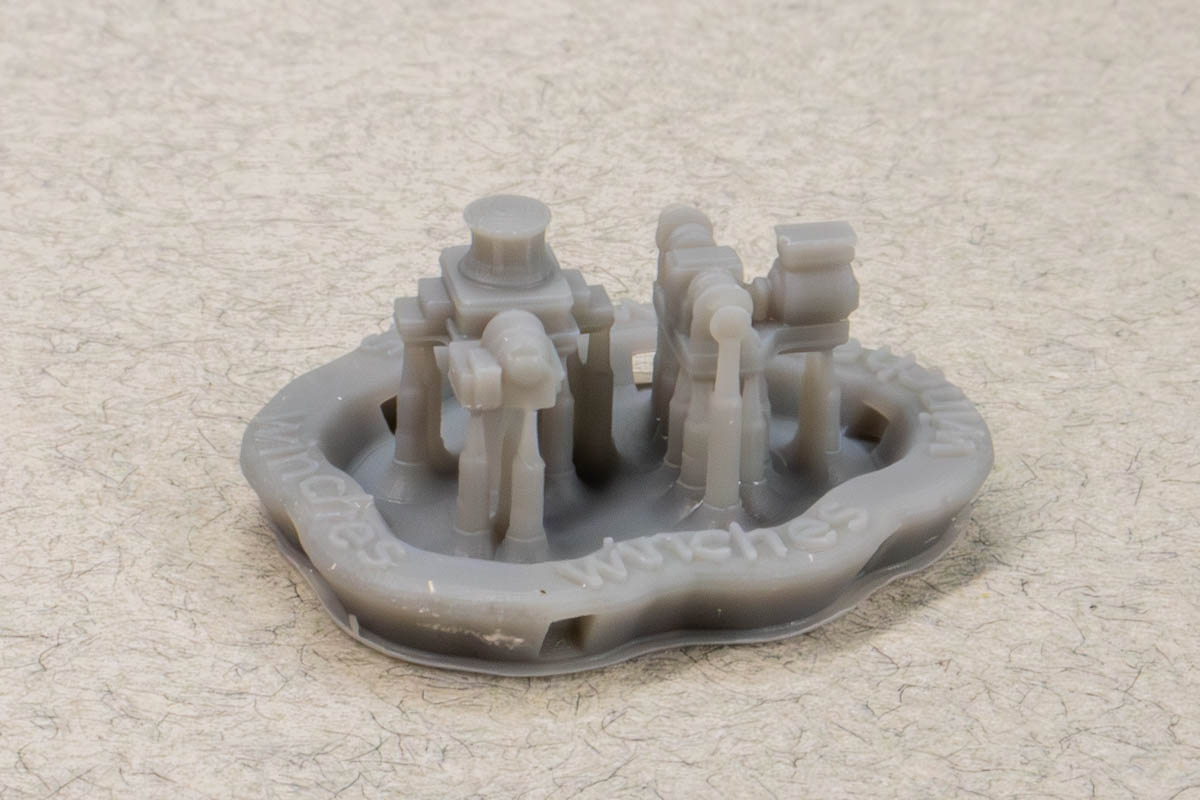
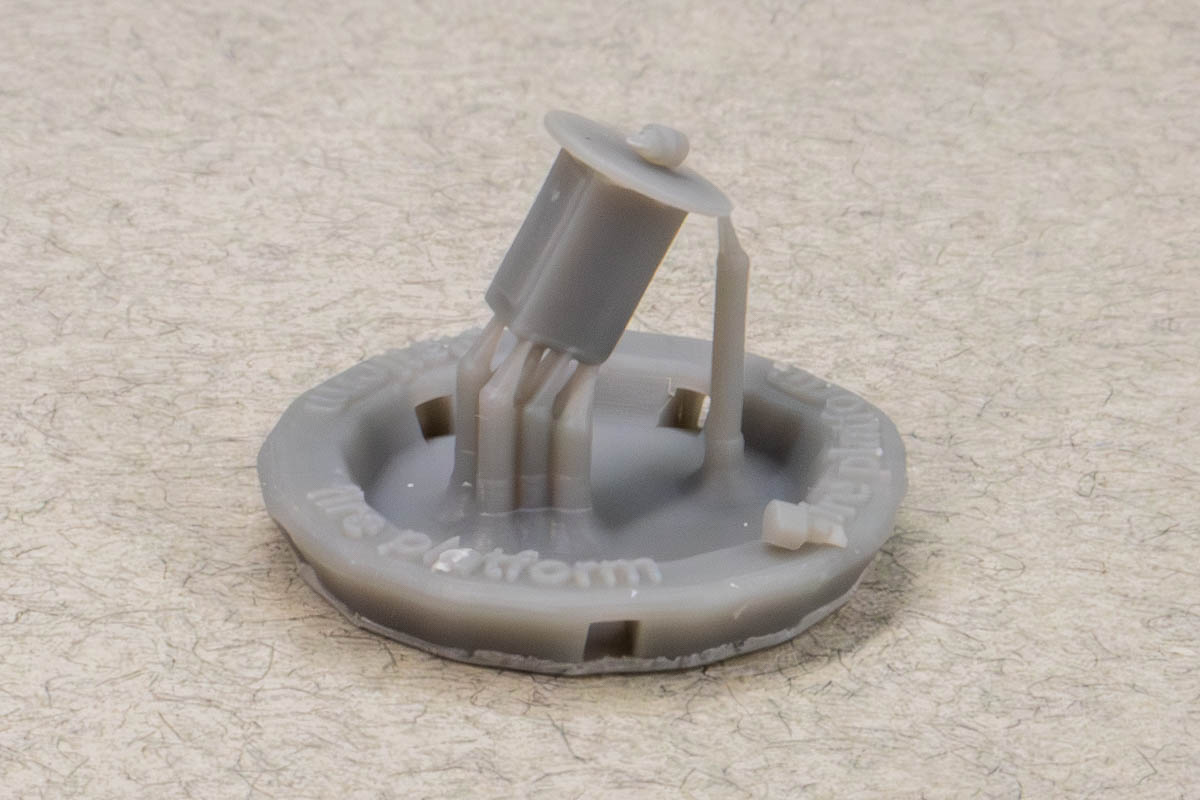
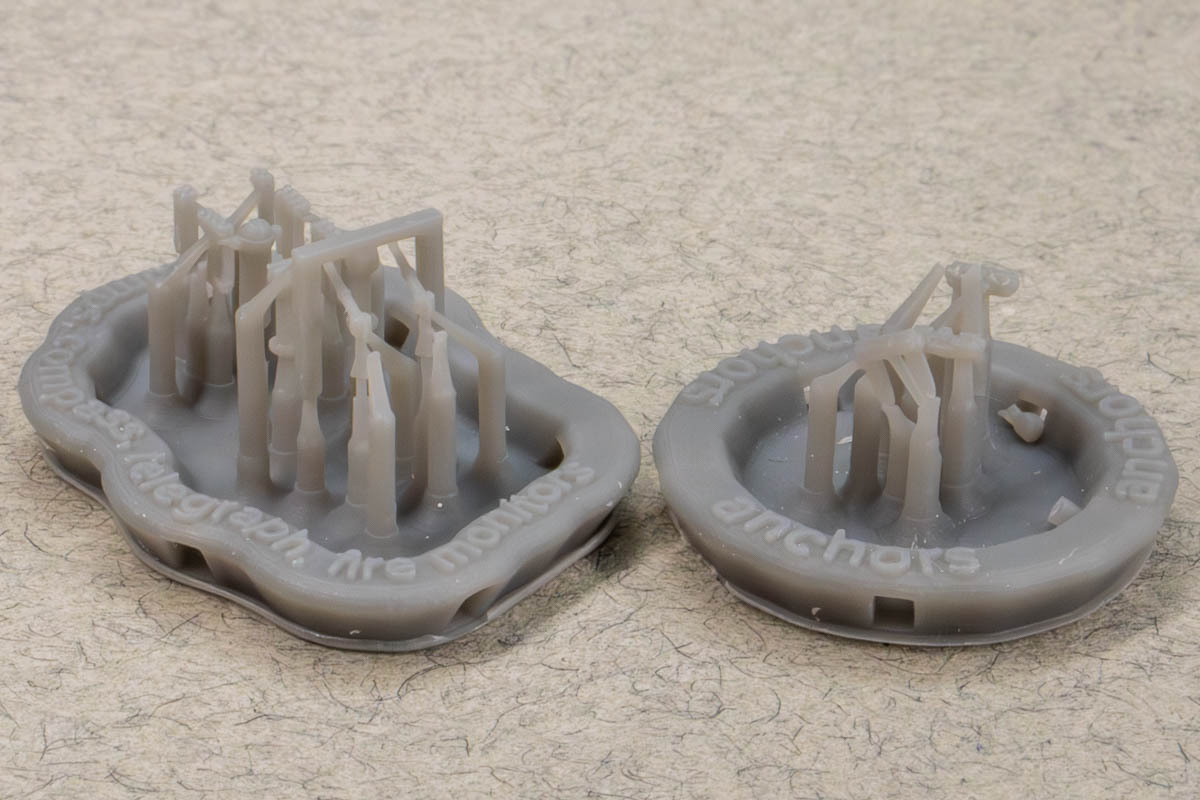
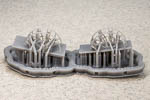
| The majority of the rest of the kit are the smaller printed
components. The paddles and box assemblies are made up of three parts each,
consisting of the paddle decks, the paddle boxes, and the wheels themselves.
The paddle decks are thin and sharp, with no visible warping. Just to be
safe, I wouldn't cut these from their supports until they're to be attached
to the paddle boxes and hull. They're very fine and they shouldn't
warp once detached from the supports, but I've seen odder things happen.
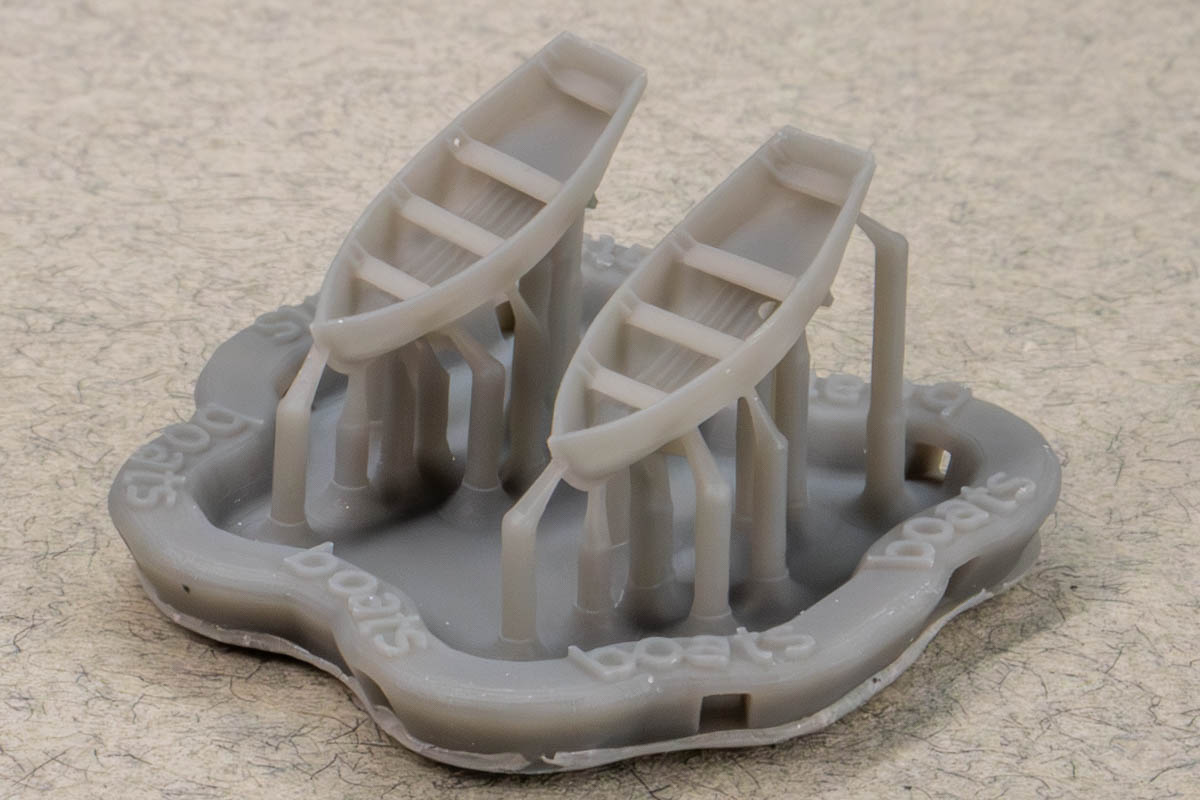
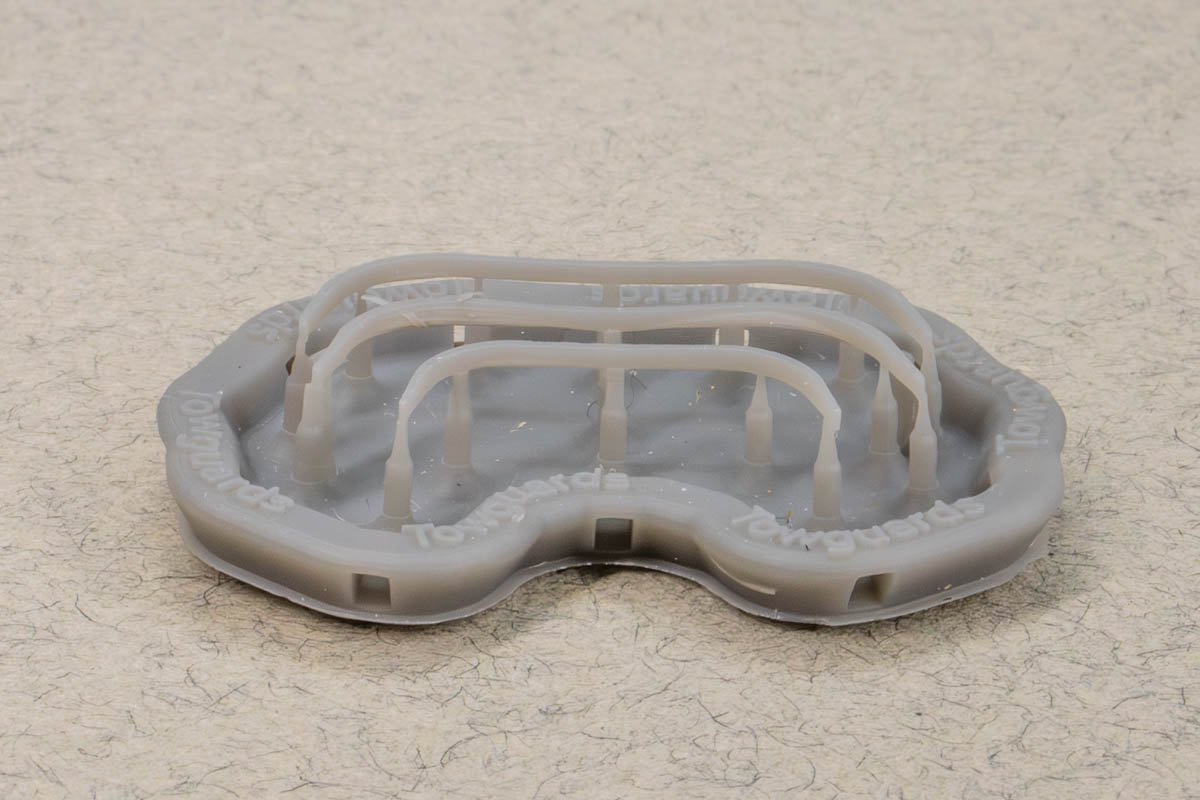
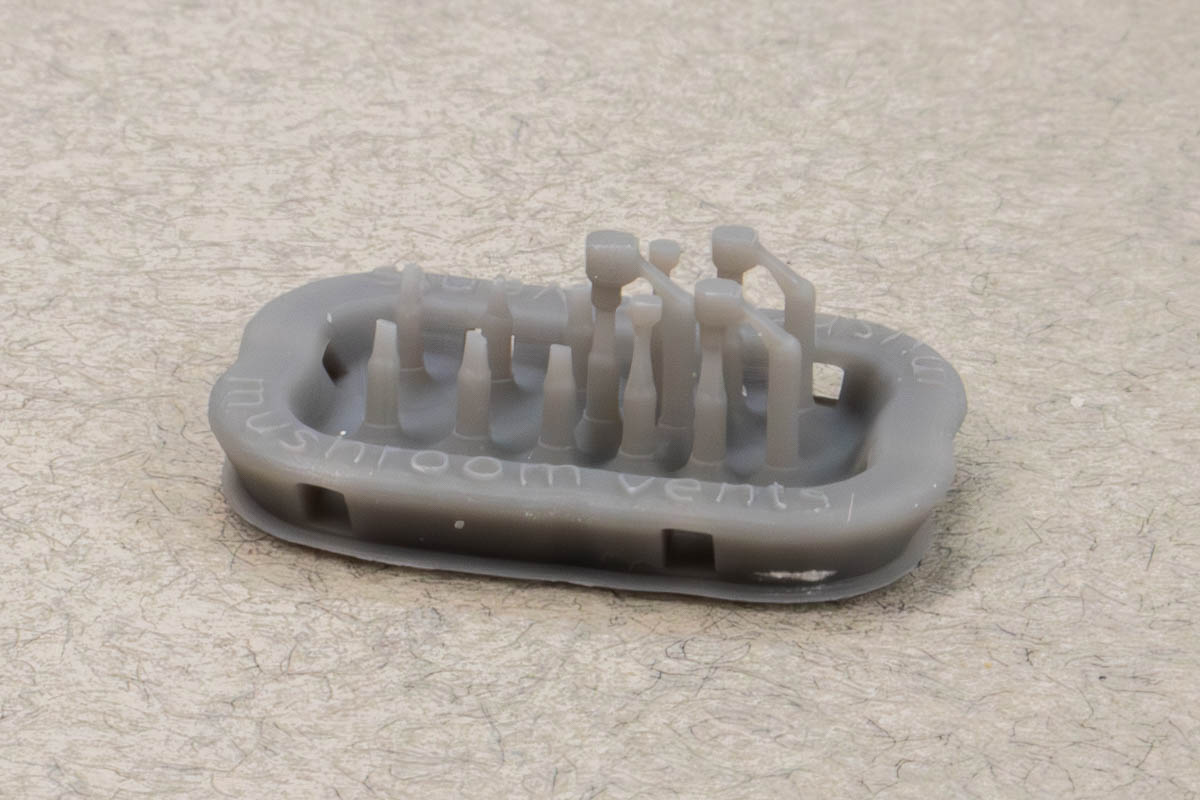
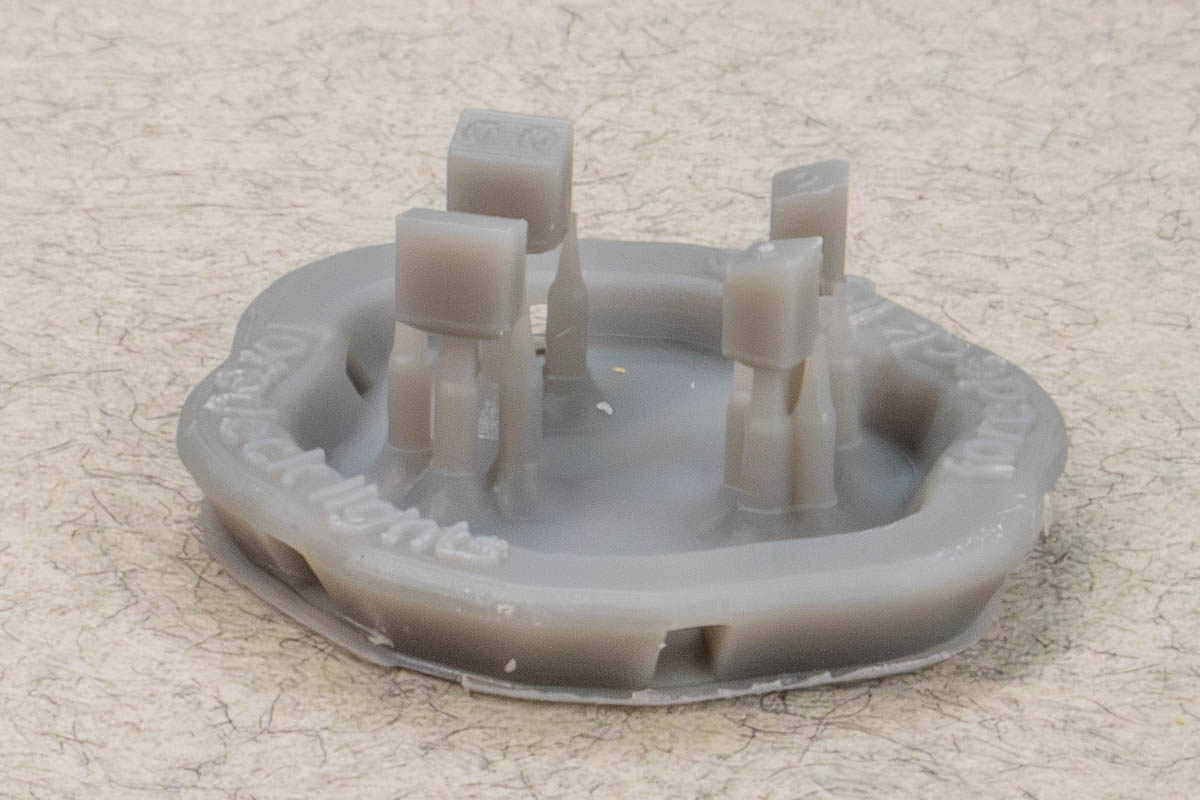
The rest of the parts are the small bits that give a ship model its
clutter and charm. Everything is included, such as deck bollards, tow guards,
mushroom vents and fans, cranes, boats, fire monitors, etc. The mast is
even included as a finely printed one-piece item which looks great, but
I'll be replacing it with a soldered brass assembly; one that will stand
up to the strain of rigging. As with the superstructure parts, every print
raft has the name of the part included, so it's easy to sort what goes
where. It's not like numbered parts on a styrene sprue, but it's darn close.
The only issues encountered with the small parts is that a few of the
mushroom vents have broken free from their supports, but they're loose
and unbroken in their bag. Also, one of the cranes is slightly warped.
That can be sorted with a bit of heat and bending it back into position. |

|
 |
 |
 |
 |
 |
 |
 |
 |
 |
 |
 |
 |
 |
 |
 |
 |
 |
 |
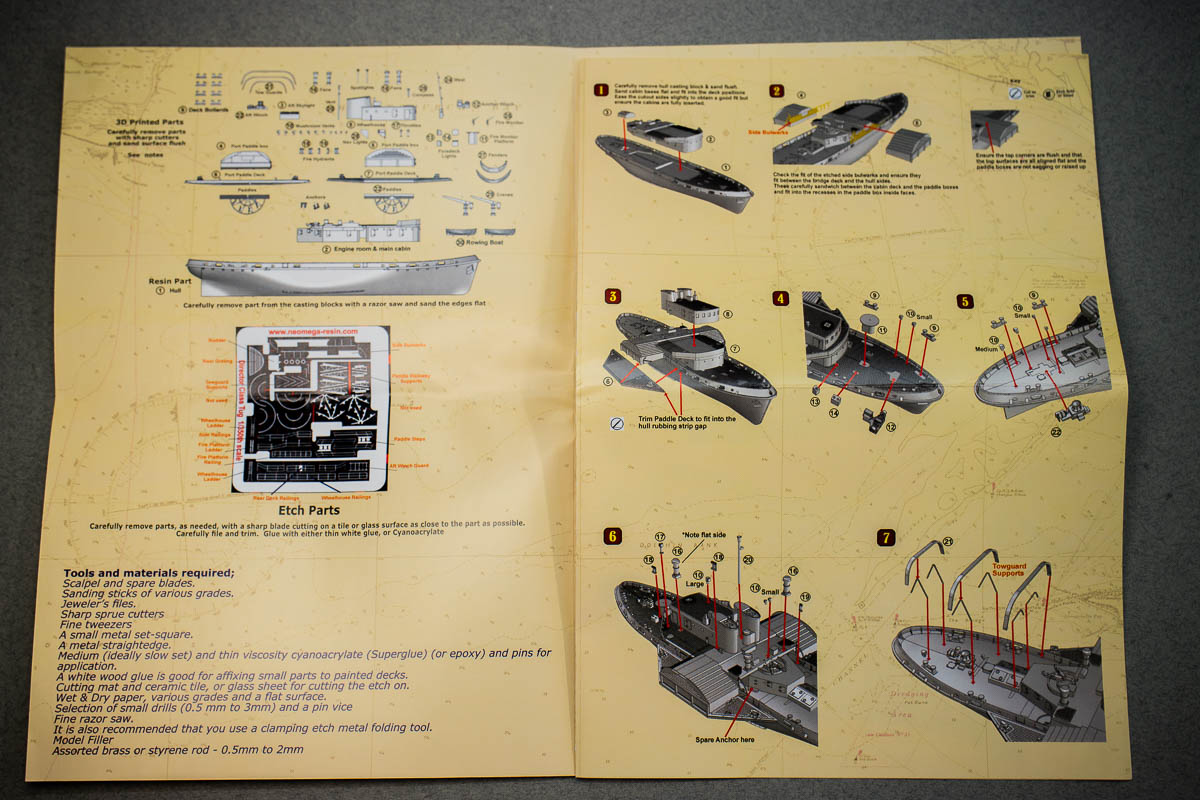
| INSTRUCTIONS |
| The instructions are color, eight pages, A5 sized. They
start with the history of the class, followed by a parts inventory, where
every piece is called out with a label that matches with those on the printing
rafts. Construction is laid out in twelve numbered steps. Assemblies are
clearly shown, with each part called out by its corresponding number. The
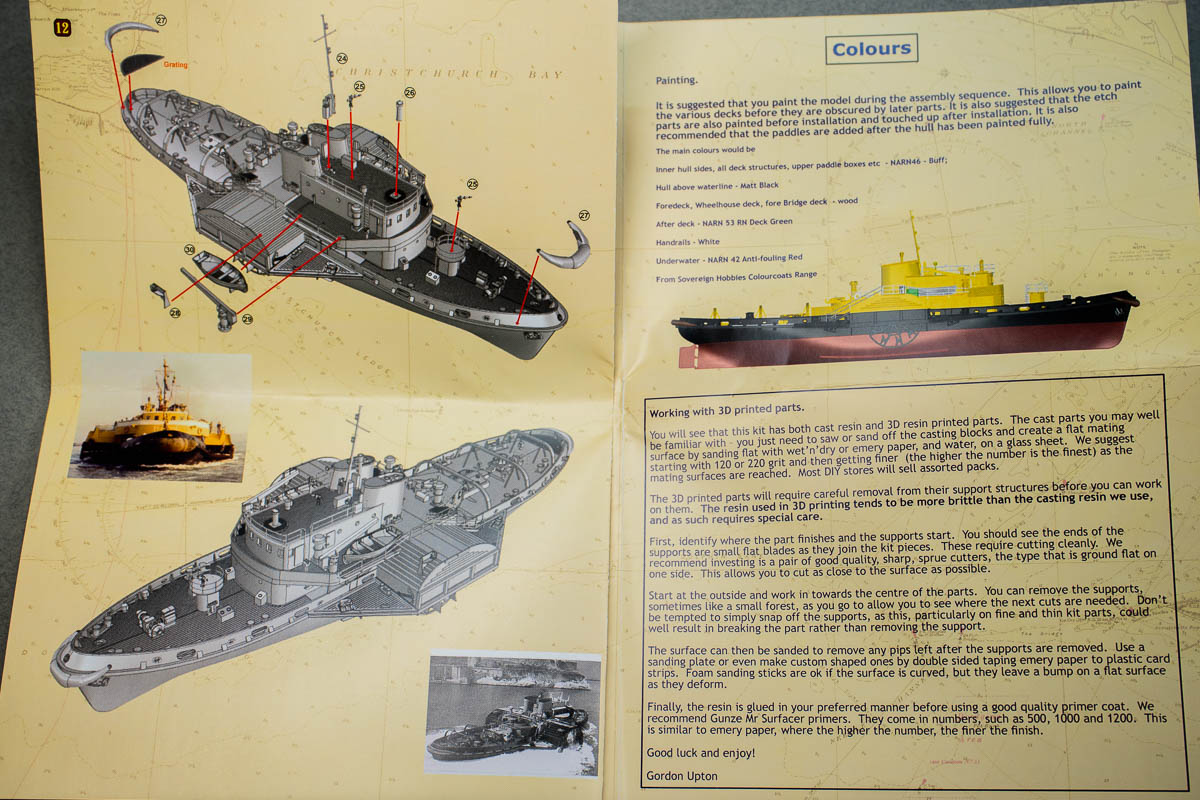
final two pages of the instructions show color suggestions, with NARN number
callouts. There's also a section devoted to working with 3D printed parts.
They're more brittle than cast resin, especially parts printed on the Formlabs
printers, so read this section first. As a test, I snipped the supports
from the wheelhouse and funnel assembly, and didn't encounter any excessive
brittleness or cracking. I recommend everyone that plans on working with
printed parts invest in a good set of single-edge nippers, like
the popular God Hands out of Japan, or the Micro
Sprue Cutters from MicroMark (which are what I use). |
 |
 |
 |
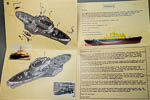 |
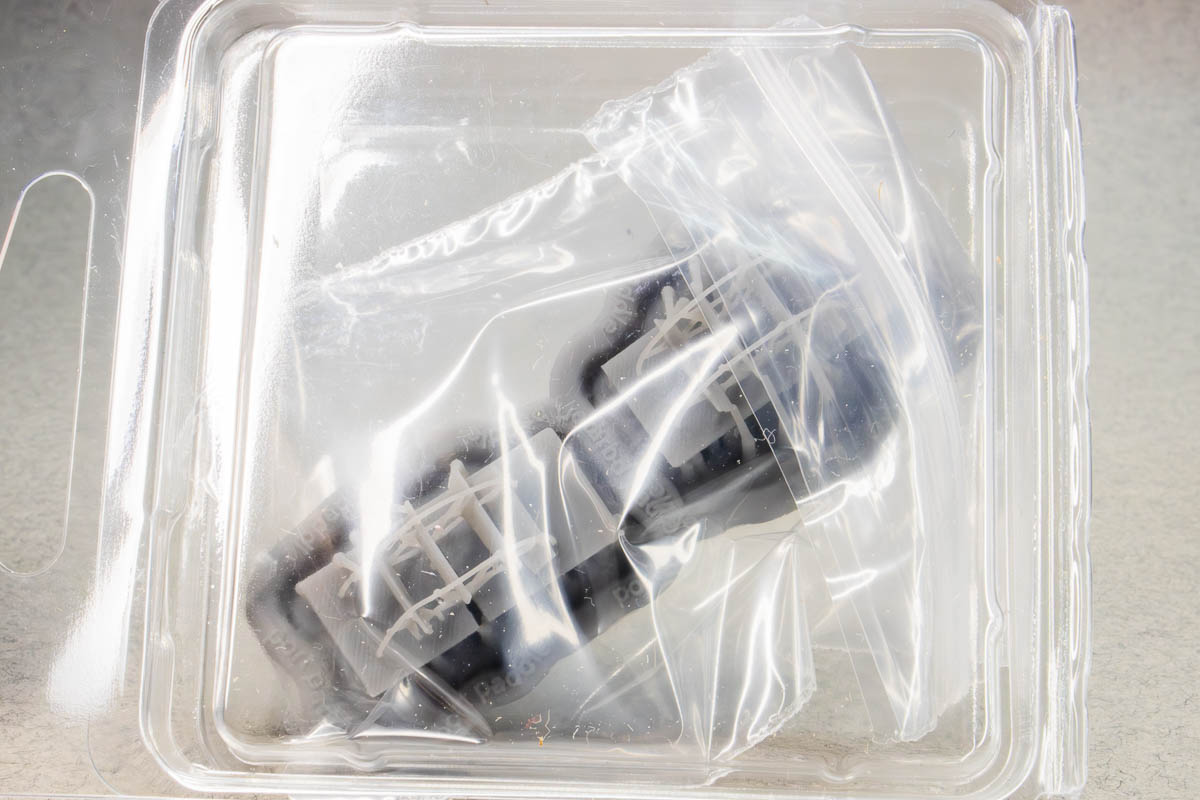
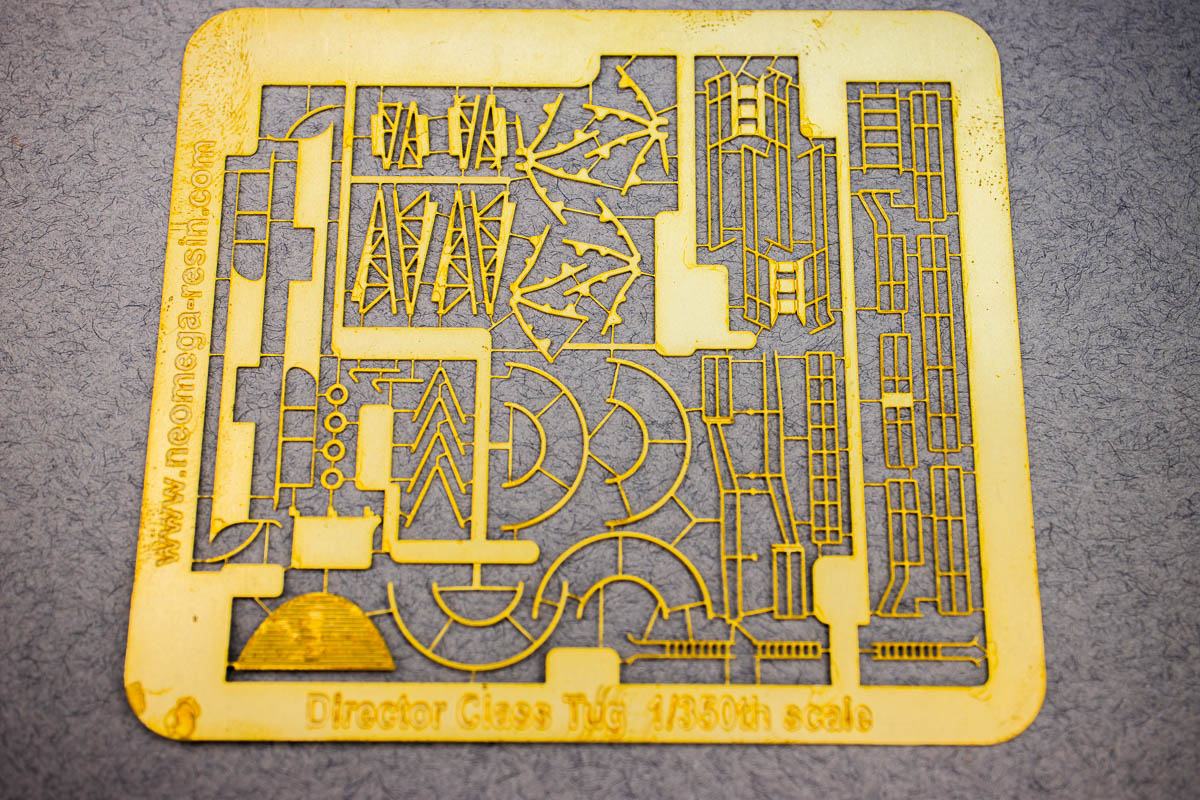
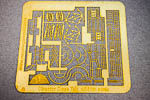
| PHOTO ETCHED BRASS |
| The brass photoetch is a small sheet, only 2.8"
x 3.2", with several of the parts marked as "not used" in the instructions.
What you'll mainly find here are the handrails, ladders, the rudder, and
other various small details. The brass is .010" thick and stiff, which
tells me it should be easy to work with, even on the thin handrails.
There are no decals included. In some photos it appears as if the ship's
names or registration numbers were placed on the stacks, which would have
been a nice detail to include, along with some flags, but that's a minor
complaint. |
 |
| CONCLUSIONS |
| Neomega does kits of small boats, mostly 1/144th scale
craft such as trawlers, torpedo boats, and the like. This is their first
1/350th scale kit. The detail is exceptional, the subject matter is odd
and cool (my biggest criteria for buying a kit), and everything you need
to build it is in the box, unless you go the route of replacing the mast
brass tubing/rod. With its smartly broken down sub-assemblies and concise
instructions, I think this would be a good candidate for a first-time resin/3D-print
model project.
Highly recommended. The review kit is courtesy of my own wallet. I saw
it on Neomega's stand at last year's Scale Model Challenge in the Netherlands,
and just had to have this odd and cool kit. Neomega's kits can be purchased
directly from their website at the link to the left.
|
Neomega
Resin

|

© ModelWarships.com
|