|
Reviewed
August 2022
by Martin J Quinn
|
| HISTORY |
|
| One of those ships
that really needs no introduction, the Japanese
battleship Yamato has attained almost mythical
status, and is a popular subject for armchair admirals,
who wonder how she would have faired against an Iowa-class
battleship in a duel,
especially if Admiral Halsey hadn't left the entrance to
San Bernardino Strait unguarded, during the Battle of
Leyte Gulf in October 1944.
Here's a snapshot of what
Wikipedia has to say about the behemoth:
"Yamato (大和) was the lead
ship of her class of battleships built for the
Imperial Japanese Navy (IJN) shortly before World War
II. She and her sister ship, Musashi, were the
heaviest and most powerfully armed battleships ever
constructed, displacing 72,800 tonnes at full load and
armed with nine 46 cm (18.1 in) Type 94 main guns,
which were the largest guns ever mounted on a warship.
Named after the ancient Japanese Yamato Province, Yamato
was designed to counter the numerically superior
battleship fleet of the United States, Japan's main
rival in the Pacific. She was laid down in 1937 and
formally commissioned a week after the Pearl Harbor
attack in late 1941. Throughout 1942, she served as
the flagship of the Combined Fleet, and in June 1942
Admiral Isoroku Yamamoto directed the fleet from her
bridge during the Battle of Midway, a disastrous
defeat for Japan. Musashi took over as the
Combined Fleet flagship in early 1943, and Yamato
spent the rest of the year moving between the major
Japanese naval bases of Truk and Kure in response to
American threats. In December 1943, Yamato was
torpedoed by an American submarine which necessitated
repairs at Kure, where she would also be refitted with
additional anti-aircraft guns and radar in early 1944.
Although present at the Battle of the Philippine Sea
in June 1944, she played no part in the battle.
The only time Yamato fired her main guns at
enemy surface targets was in October 1944, when she
was sent to engage American forces invading the
Philippines during the Battle of Leyte Gulf. While
threatening to sink American troop transports, they
encountered a light escort carrier group of the U.S.
Navy's Task Force 77, "Taffy 3", in the Battle off
Samar. The Japanese turned back after American air
attacks convinced them they were engaging a powerful
US carrier fleet.
During 1944, the balance of naval power in the Pacific
decisively turned against Japan, and by early 1945,
its fleet was much depleted and badly hobbled by
critical fuel shortages in the home islands. In a
desperate attempt to slow the Allied advance, Yamato
was dispatched on a one-way mission to Okinawa in
April 1945, with orders to beach herself and fight
until destroyed, thus protecting the island. The task
force was spotted south of Kyushu by US submarines and
aircraft, and on 7 April 1945 she was sunk by American
carrier-based bombers and torpedo bombers with the
loss of most of her crew."
For more details on the design and
history of Yamato, see her Wikipedia page:
https://en.wikipedia.org/wiki/Japanese_battleship_Yamato.
|
|
|
| |
|
The
Gallery/MRC Yamato
As can be expected, due to her
elevated status, Yamato has been offered many
times in kit form, most recently with a 1/700 offering
from Pontos.
The most popular scale for Yamato kits seems to be
1/700, but the kits have also been released in 1/500,
1/450, 1/350 and 1/200 scale.
The Gallery/MRC 1/200 rendition of
Yamato comes in a large (and I mean large)
box. On the cover there is a painting of
Yamato at either sunset or sunrise, presumably
preparing for her final mission. Upon opening
the lid, you'll find smaller boxes nested inside, with
the instruction booklet and decals laid on
top. The largest of these boxes holds the
hull, which is padded with foam at the bow and stern,
and wrapped in clear plastic for
protection. The rest of the parts are
apportioned off to different boxes, depending on shape
and size. All of the sprues are either in
clear plastic bags or bubble wrap. Many of the
more delicate parts are wrapped again with thin white
plastic for added protection.
|

|
|
|
| THE HULL |
|
|
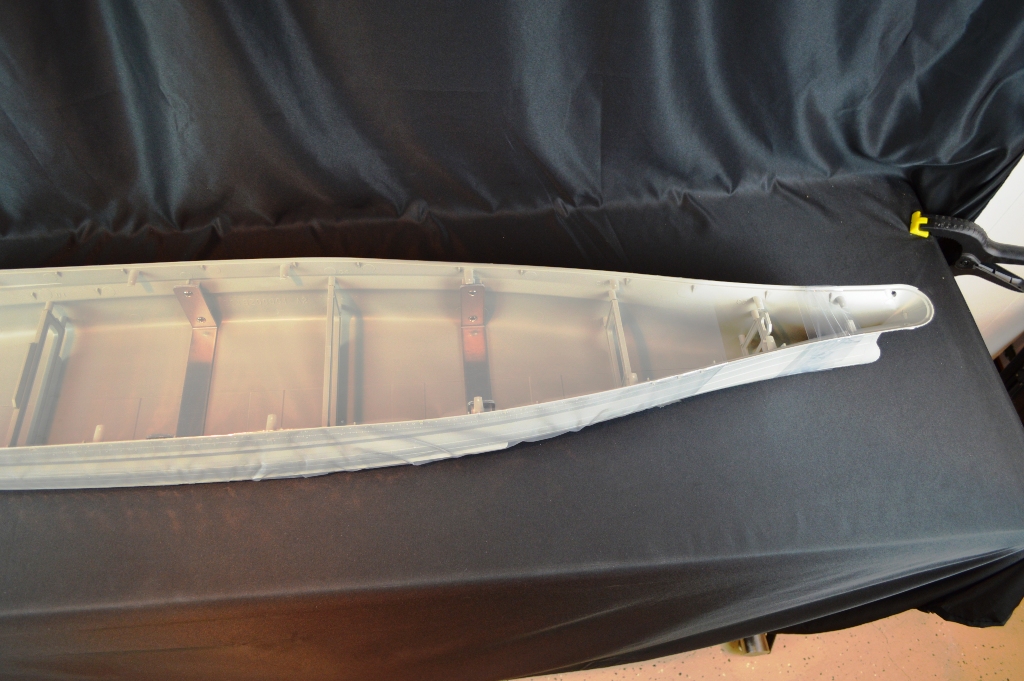
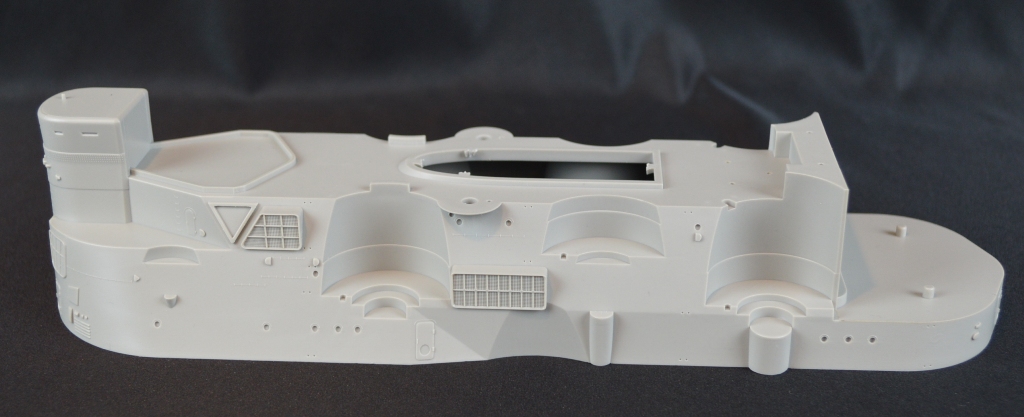
As you might expect with a 1/200
scale model, the hull is massive! It's a
two piece affair, almost 52 inches long and over 7 1/2
inches wide, which scales out pretty close to the real
thing. While the hull is split in two,
it's already held together by large "U" shaped metal
braces, which are, in turn, screwed into the sides of
the hull. The hull isn't exactly put together
though - it's up to you to glue it together and clean
up any seams. Which "seams" like it's going to be a
chore.
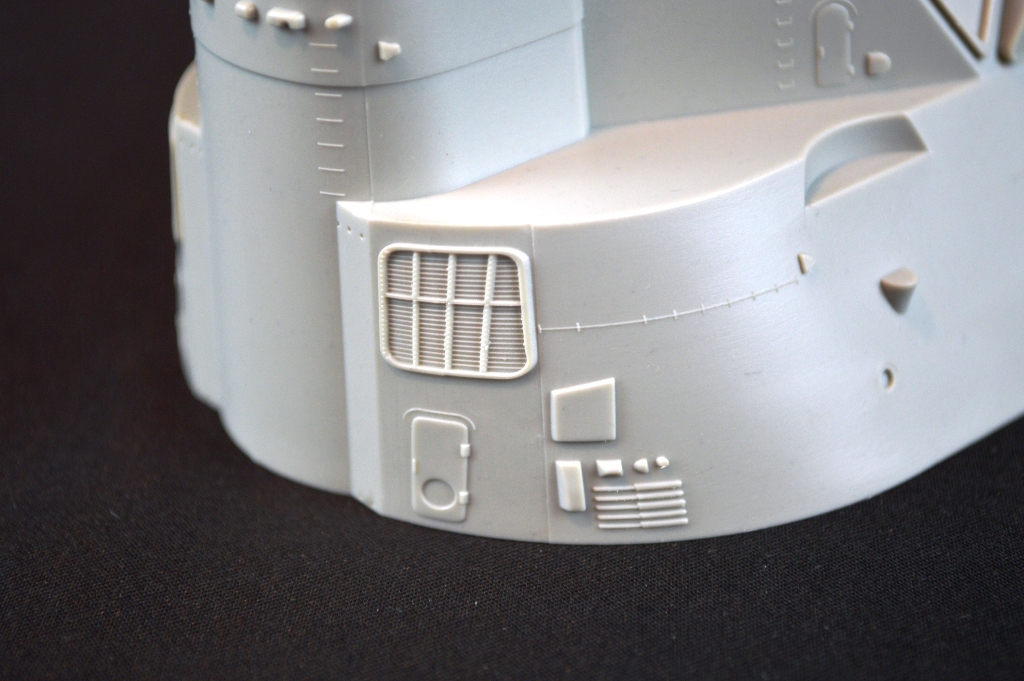
There is some fine detail molded
into the hull, like the degaussing cable. There
is also hull plating present. I don't find it to
be too overstated, especially for this scale, but I've
seen some complaints about this on the internet.
I think once paint is on, it will look
fine.
|
|
|
| DECK PARTS |
|
There are four deck
parts included, labled ZA, ZB, ZC and ZD:
- ZA - Main Deck
- ZB - Aircraft handling
deck
- ZC - Fo'c'sle
- ZD - Hangar deck/Boat
Stowage
|
|
|
| ZA - Main Deck - The
planking on the main deck is well done, with very subtle
butt ends. So subtle that you have to turn the
deck to catch them in the light to see them.
That's going to be a recurring theme in this review -
there is quite a bit of subtle detail molded into it
this kit. |
|
|
| ZB - Aircraft
handling deck - There is a engraved pattern, like
a grid line on the majority of this deck, and very nice
diamond tread plating. A nice touch is
recessed holes in the deck, for perfect placement of the
photo-etch aircraft trolley rails. |
|
|
| ZC - Fo'c'sle
- The smallest of the decks, it also has the diamond
tread plating. |
|
|
| ZD - The
hangar/boat stowage deck - The hangar area has
the same molded into slots at the deck above it, for the
trolley rails. The outer parts of the deck
have the same diamond tread plating as the other decks,
while the center of the deck has a grid pattern on
it. The same type of grid pattern is seen on both
the Pit Road and Fujimi 1/700 scale Yamato
kits, as well as the 1/10 scale Yamato at the Kure
Maritime Museum. |
|
|
| SPRUE B |
|
|
The rudders, struts (the shafts
are metal, and in a separate bag), the scrollwork at
the bow and stern and some parts for the boat stowage
area (like the doors) are included on this
sprue.
|
|
|
| SPRUE D |
|
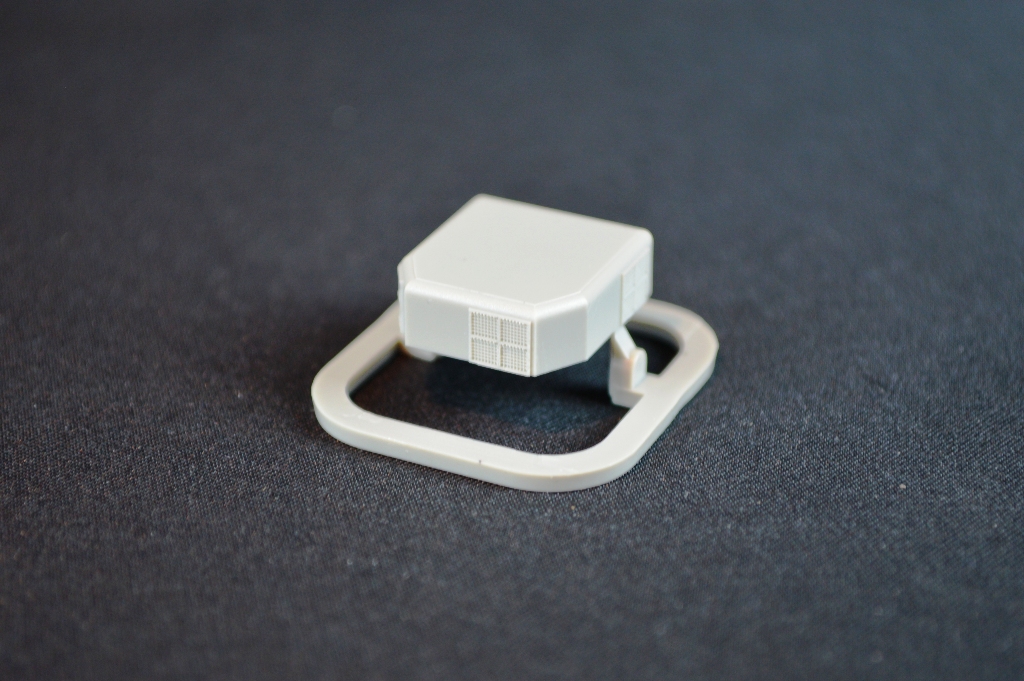
| There are vents,
ships boats, and boat cradles here. Detail is
good, especially on the inside "screen" portions of the
vents, as well as the boat cabins. This
sprue has a large empty area on it, as if something was
left out or removed. |
|
|
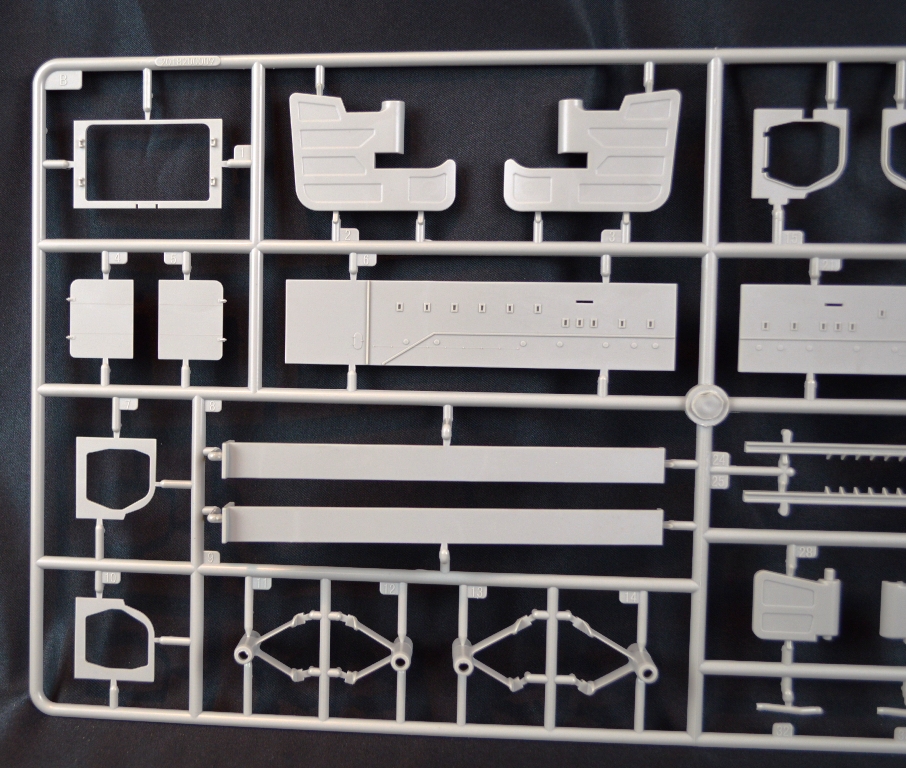
| SPRUE E |
|
| Here you'll find
sponsons the top level of the tower bridge and wind
deflectors, along with various platforms that attach to
the bridge. |
|
|
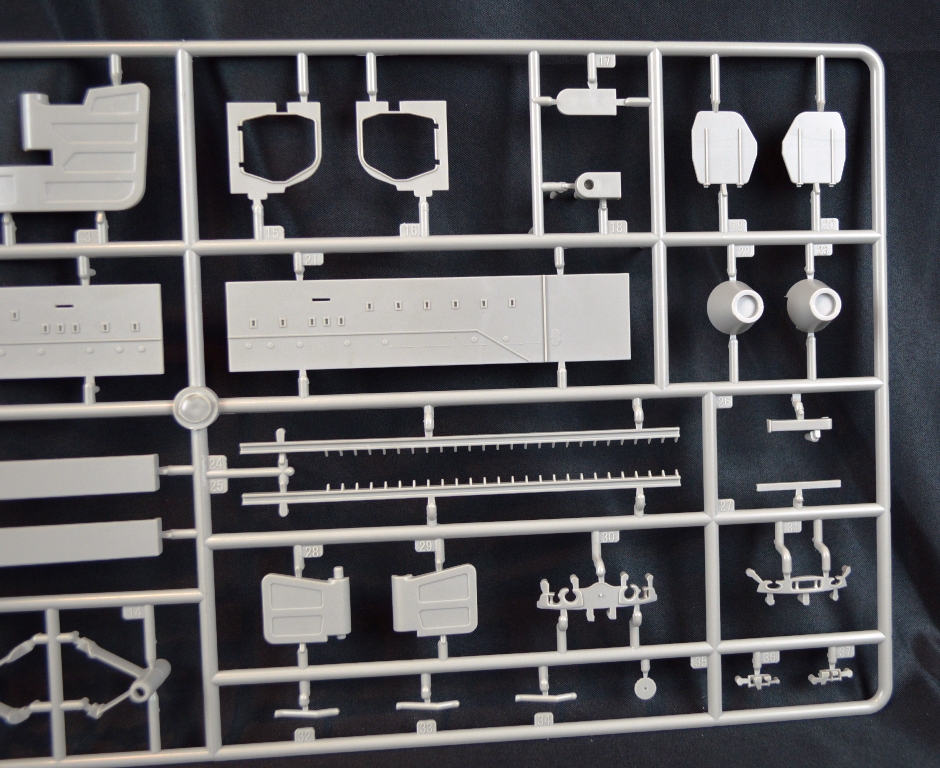
| SPRUE F |
|
| This small sprue has
parts for the massive funnel. Surface detail is
really good. |
|
|
| SPRUE G |
|
| There are additional
parts for the funnel here, as well as more sponsons and
vents, platforms and piping which goes along the sides
of the hull. The detail on the decking and
inside faces of the splinter shields of the platforms is
nicely done. |
|
|
| SPRUE H |
|
| Masts, booms and the
bars to prevent the arcs of fire for the AA guns from
hitting the superstructure are here. All the parts
are very delicate and finely molded. |
|
|
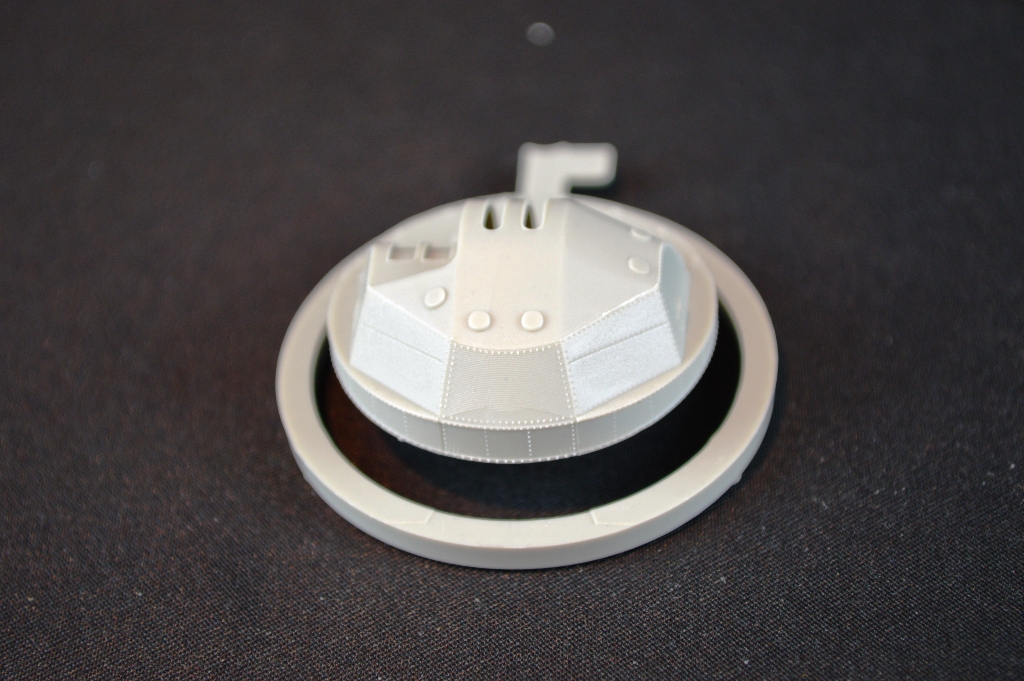
| SPRUE J (X2) |
|
| The catapult, boat
davits, props (one prop blade was snapped off, but
should be easy to fix) and the supports that hold up the
overhanging section of the aircraft handling deck are
here. The supports are particularly nice, with
small lightening holes in them, though the prop hubs
have mold lines which will need attention. The
catapults may be the finest injection molded versions
I've seen, with really nice surface details. Very
impressive. |
|
|
| SPRUE K (X2) |
|
| More ships boats and
associated cradles. A few of these boats are
the size of 1/700 destroyers! |
|
|
| SPRUE L (X4) |
|
| This sprue has the
secondary battery 6.1 inch turrets. Note that
there are 4 of these sprues, so there are four 6.1 inch
turrets. Perhaps an "as launched" version, or a Musashi,
is in the works (I'm sure the more ambitious among us
may be able to back date the model to an earlier
configuration). Along with the turrets, which have
nice surface details, are the barrels, with blast bags,
12.7cm and 25mm AA guns and searchlights. The
faces the searchlights have really great detail. |
|
|
| SPRUE M |
|
| Additional sponsons,
guns tubs, "sandbags" for the open AA guns, and some of
the larger components of the superstructure.
The diamond tread plating on the decks of the gun tubs
is very subtle and very nicely done. There are,
however, some sink marks on one side of the aft gun tub
platform. |
|
|
| SPRUE N |
|
| This holds the port
and starboard bases for the AA guns, installed on either
side of the superstructure. This part features
nice tread detail on the decks. |
|
|
| SPRUE P |
|
| More masts and gun
barrel stops. |
|
|
| SPRUE Q (X5) |
|
| More gun tubs, some
ready ammo boxes (in two sizes), directors, 25mm AA guns
with open muzzles on the barrels and the bases for the
deck edge AA guns. The decks of the gun tubs
have the really fine plating texture on them.
|
|
|
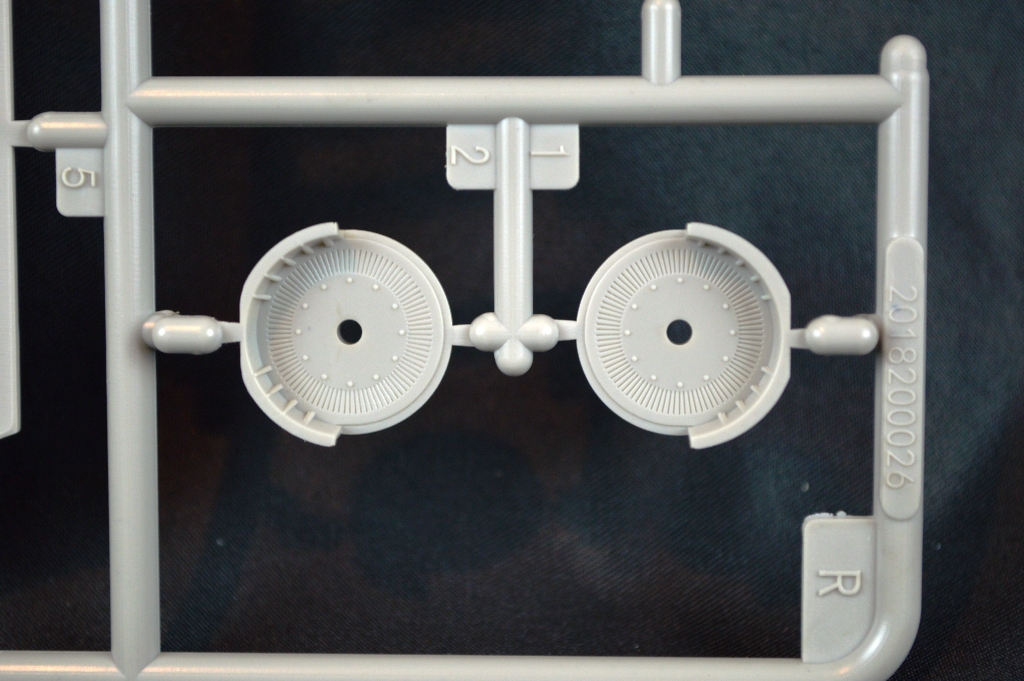
| SPRUE R (X3) |
|
| This sprue has the
parts for the main battery - the raison d’être for these
huge ships. The upper portion of the turrets are
HUGE. They are literally bigger than a
1/72 German Stug III assault gun!! Along with the
tops, the base, barrels and blast bags are also
included, as are the two AA platforms that top turrets 2
and 3. Nice detail on the turrets, including
recessed holes for the photo-etch railings that go on
the top (the turrets will also receive a heavy dose of
photo-etch parts to dress them up), while the AA
platforms have that subtle tread plating thing going
on. The blast bags and barrels will need
some cleaning up - there are pronounced mold lines on
both of them. At this point in the review,
I'd say the barrels are the weakest point of the kit,
and would recommend finding suitable after-market
replacements for the barrels. |
|
|
| SPRUE S |
|
| Gun tubs and sponsons
are on this sprue. There is ribbed detail inside
the splinter shields and even more of the subtle diamond
tread plating on the decks. |
|
|
| SPRUE U (X6) |
|
| These hold the parts
for the 12.7cm AA guns, which feature open muzzles on
the barrels and more of that plating detail on the deck
parts. There is also very nice detail on the
gun mount and shield. |
|
|
| SPRUE W |
|
| More gun platforms,
and, yes, more of that plating detail. There are
also more vents and smaller bases for deck mounted AA
guns. |
|
|
| THE "Z" SPRUES |
|
| There are actually
multiple Sprue labeled "Z" in the kit, with everything
from the massive central superstructure base to small
directors and gun mounts. |
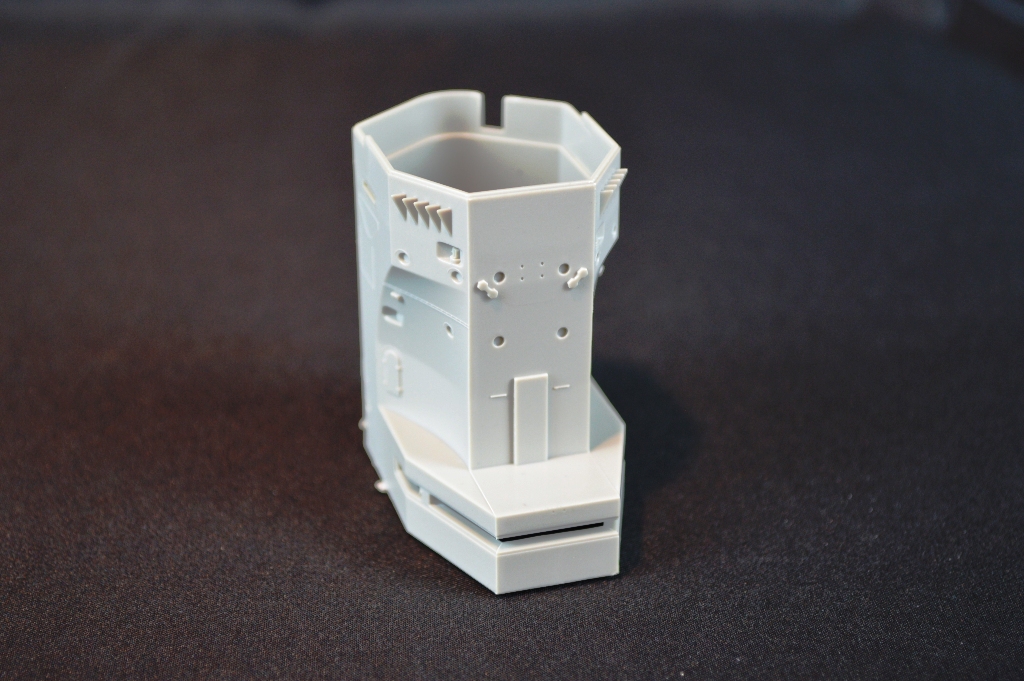
| SPRUE ZE |
|
| The base for the
central superstructure. There is some good detail
here - the "screens" in the vents are really nice - and
this part will also be dressed up with photo-etch
add-ons. Though the W/T doors look like they might
be molded upside down? |
|
|
| SPRUE ZF |
|
| The instructions show
this as a sprue, but in the kit the two parts come
already snipped off whatever sprue they were on, and are
bagged together. Combined, they make up the
bulk of the tower bridge. Same comments as above,
in regards to details and photo-etch. |
|
|
| SPRUE ZG |
|
| Here you'll find the
structures that hold the secondary battery and the main
battery rangefinders. |
|
|
| SPRUE ZH |
|
| More gun directors
and a structure that sits atop the aircraft handling
deck. Unfortunately, there's a prominent mold seam
going right through a hatch on one of the parts.
|
|
|
| SPRUE ZJ |
|
| More directors (with
a lot of AA guns comes a lot of directors) |
|
|
| SPRUE ZK |
|
| Various enclosed AA
guns, in different sizes. Each mount,
numbers 1 through 4, come bagged, each number in its own
bag. Some of the mounts look identical, but
have different numbers. I'm guessing they are each
meant for a specific place on the ship, hence the
numbering convention. |
|
|
| SPRUE ZL |
|
| The mounts for the
25mm guns, which have nice detail. |
|
|
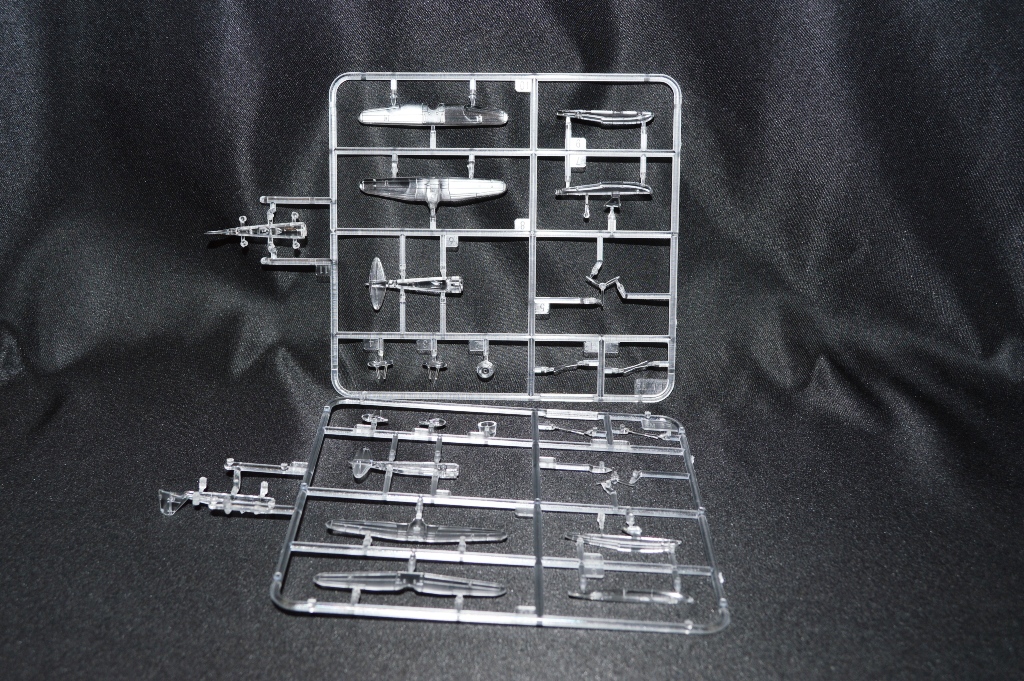
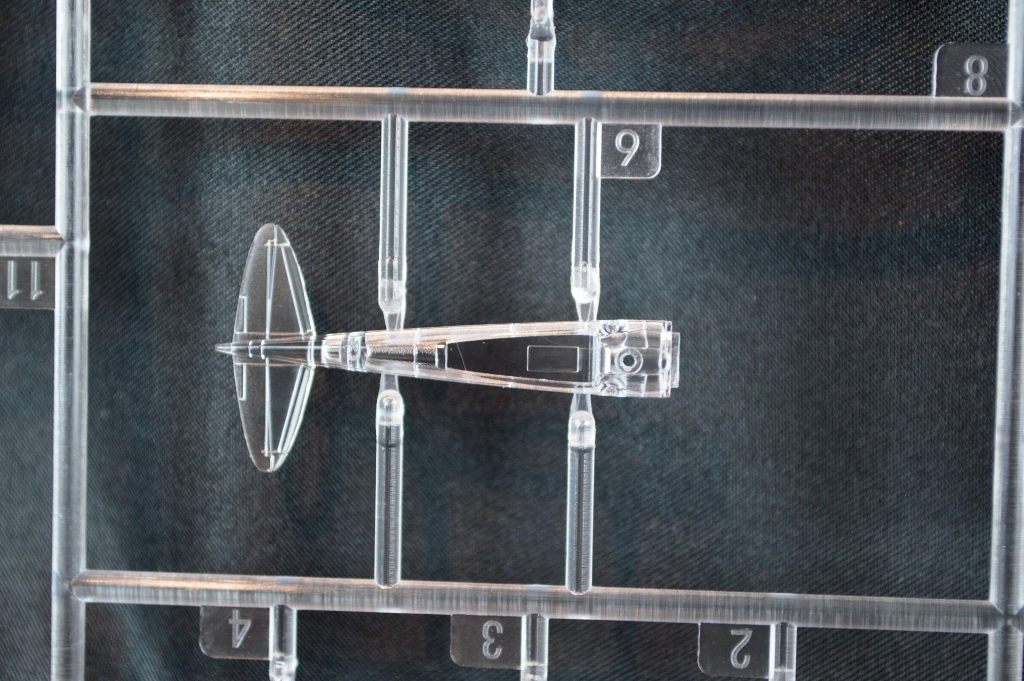
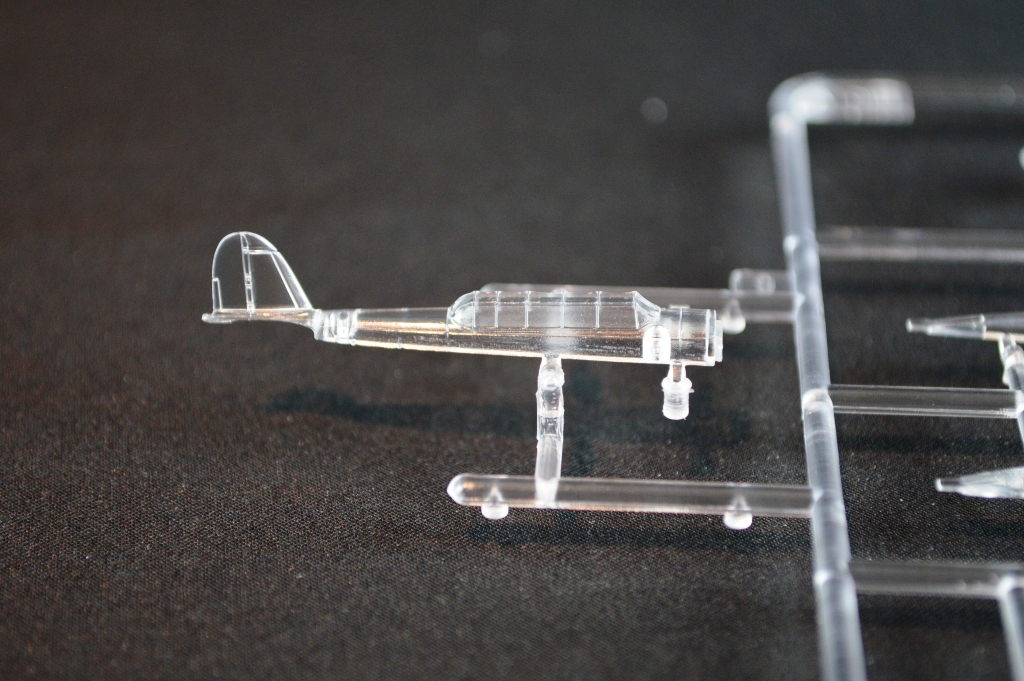
| AIRCRAFT |
|
There are four aircraft
included in the kit - two Mitsubishi F1M "Petes" and
two Aichi E13A "Jakes" - both in clear plastic.
These are some of the nicest clear plastic aircraft
I've seen, with nice panel lines.
|
|
|
| NAME PLATE |
|
| A name plate is
included. Surprisingly, for such a large
model, there is no display stand. |
|
|
| PHOTOETCH |
|
|
There are a whopping 14
photo-etch frets included in the
model! There are railings (galore),
vertical ladders, inclined ladders, funnel cap,
aircraft handling crane, radars, cable reels, braces,
lattice support columns, boat props, aircraft trolley
rails and bridge windows (and more). It
all looks nicely done and is quite extensive. While
there are after market upgrade sets in the pipeline, I
think most modelers will be happy with what comes in
the kit.
|
|
|
|
|
| METAL PARTS |
|
| The propeller shafts
are metal rods. There is also some brass
anchor chain included. You may want to upgrade the
anchor chain with something from the
aftermarket-market. |
|
|
|
|
|
| DECALS |
|
|
There are two small decal sheets
included. One is for the aircraft, the other for
the ship. The latter includes the markings for
the funnels and the banners Yamato carried on
her last mission. They'll do the job, but the do
appear to be a little on the thick side.
|
|
|
| INSTRUCTIONS |
|
|
The kit includes a 92 page
instruction booklet, in which the model, interestingly
enough, is never called by it's name. It's
referred to as "Battleship [No.1]". The
instructions are similar to what we've seen from
Gallery/HobbyBoss/Merit/Trumpeter in the past, with
exploded view diagrams showing you where everything
goes, over 117 different steps. There are
two painting and marking guides included in the kit -
a large one that comes folded, and a smaller 8 1/2 by
11 sized version, that is printed on a heavier paper
stock. These refer the modeler to paints
from Mr. Hobby, Vallejo, Model Master and others in
the instructions.
|
|
|
| CONCLUSIONS |
|
| This is a gigantic
kit of the largest battleship ever built. Given
the increasing popularity of 1/200 scale, it's not
surprising that it's finally made it's appearance.
It's certainly the biggest and baddest model of Yamato
kit to come to market (to date). Is it the
best? I haven't seen enough of the other Yamato
kits on the market to make that statement, but it
certainly is very good kit. It has really fine
details, like the degaussing cable, the deck tread
plating, the detail inside all the vents, the piping and
more. I was, on the other hand, not impressed with the
main battery gun barrels and blast bags, and there are
some mold lines here and there, always seemingly in
awkward spots. The model also has lots and lots of
parts (over 2,800!), which should keep one busy for
hours and hours and hours. It has a extensive photo-etch
set that has everything you need to build it, along with
a logical and easy to follow instruction booklet.
Speaking of the photo-etch, I like how they they molded
recessed attachment points into the parts, to assist
with the placement of the PE.
I have seen some comments on the
internet, knocking the kit over its accuracy. I
can't speak to that, as, comparing it to photos and
line drawings, it looks like the Yamato.
I think most modelers will be satisfied with what's in
the box. The only real drawback is the price
point: the kit retails for $829.99. That's
a big chunk of someone's modeling budget. I think that
this kit, due to the size and especially the price,
will mostly appeal to hardcore IJN fans and Yamato-aholics.
Overall, I am impressed with what
I've seen, and would definitely recommend this kit to
the aforementioned IJN/Yamato fans, battleship fans,
or anyone who's looking for big project to keep them
busy for a few months. This is Gallery
Models/MRC's 1:200 Battleship Yamato, kit number
64010. As mentioned above, it retails for
$829.99. The model is available directly from Model Rectifier Corporation,
or from many of our fine sponsors. Many
thanks to MRC for the review sample!
This is an review of the box
contents only. Your mileage may vary, once you
start construction.
|

|