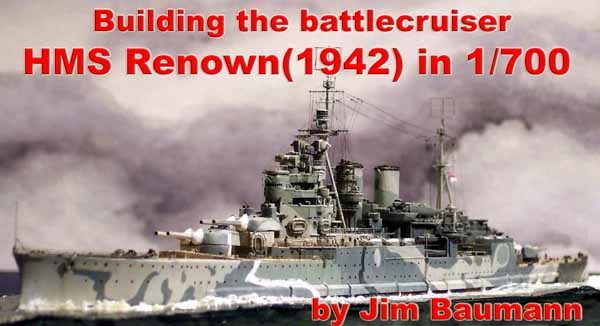
Historical synopsis
HMS Renown was laid down in 1915 and launched 1916. after fitting out and trials she joined the Home Fleet for the remainder of World War 1. She was transferred to the Atlantic Fleet for a succession of Royal tours throughout the world through the 1920's. Thereafter she served with the Atlantic and Home fleets as well as briefly in the Mediterranean until May 1936 whereupon she paid off before a major refit. Upon her recommissioning in August 1939 she joined the Home Fleet at the outbreak of World War 2 , being detached shortly after to join Force K in the South Atlantic to hunt German commerce raiders; her 'apparent' prescence being a contributary cause to scuttling herself after being cornered at Montevideo. Renown rejoined the Home Fleet , shortly to be action off Narvik with Scharnhorst and Gneisenau, scoring damaging hits on the latter. August 1940 saw Renown being transferred to Force H at Gibraltar as flagship supporting the Malta convoys. she partook in the action off Cape Spartivento and the bombarment of Genoa.. In May 1941 she was called upon to assist in hunting the Bismarck, though she did not engage the elusive German Battleship. after furtheer convoy service she returned home for a nother refit. She spent periods of time with both the Home Fleet as well as Force H before being transferred to Eastern Fleet at the end of 1943 covering various operations before returning home in 1945. After the war she was reduced to reserve and partially disarmed. She was finally broken up for scrap in 1948. |
||||||||||||
| The construction of the 1/700 Model of HMS RENOWN
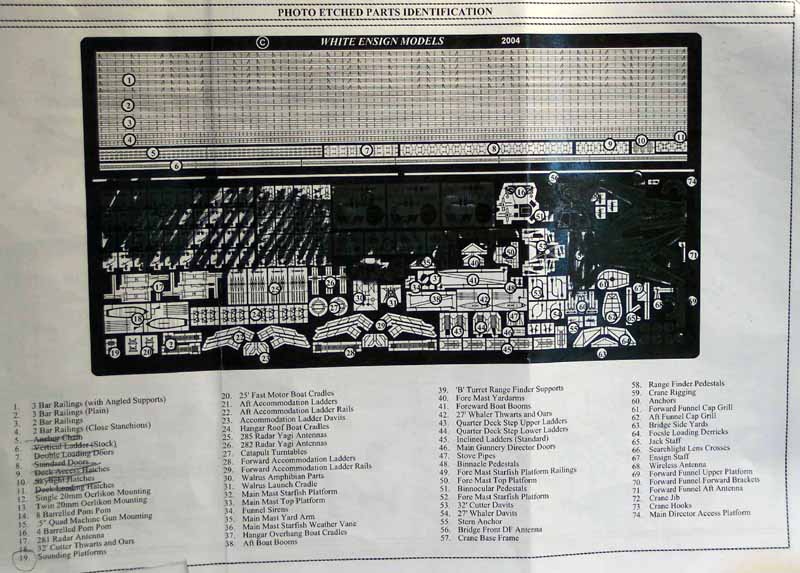
I pre-ordered my 1/700 resin kit of HMS Renown kit from WEM when it was still merely a rumour.... The 1/700 scale resin kit of HMS Renown released by White Ensign models was eagerly anticipated by many RN fans for a very long time. Delayed by mastering and production problems, after a lenghthy gestation period the patience of the lucky purchasers of the kit was indeed well rewarded! I was fortunate in receiving my kit from the first batch. Upon opening the box I was greeted by an exquisite hull casting, as well as many very well-rendered superstructure and small parts. The photoetch sheet is extensive, and its A5 size belies the huge amount of detailed parts contained within therein. |
||||||||||||
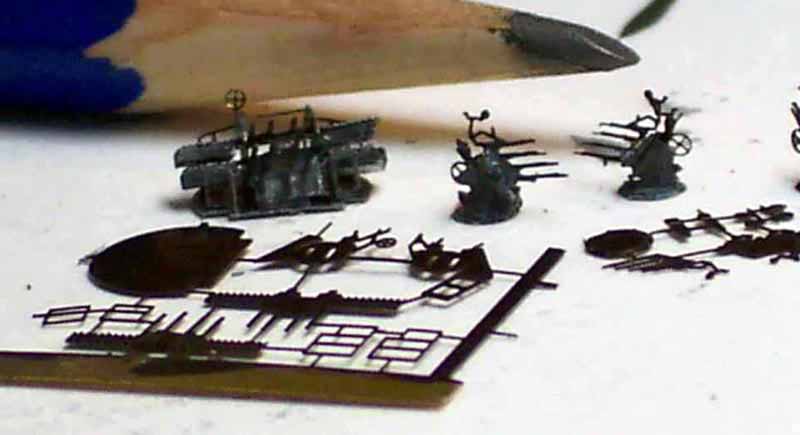
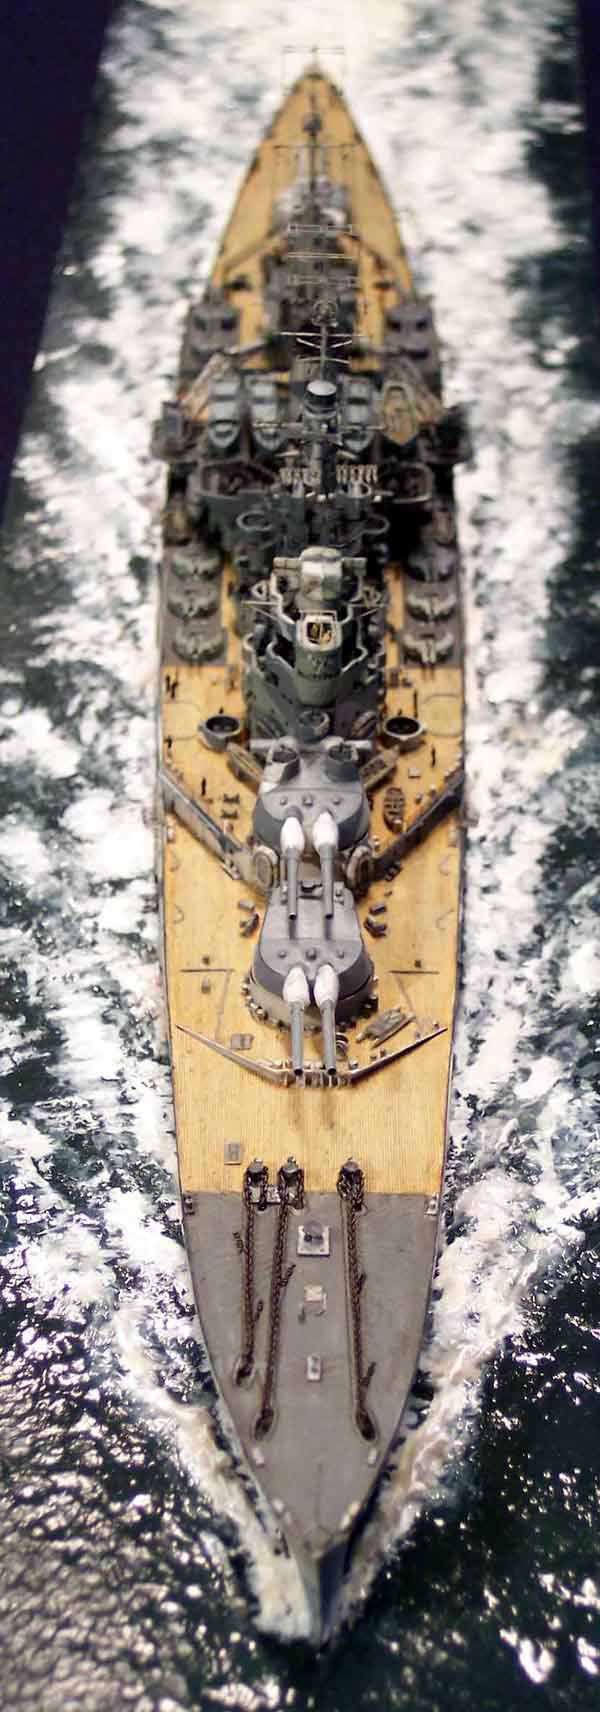
| The photo shows how I kept track oof the used and unused parts. I decided my model of HMS RENOWN would portray the ship as she would have appeared in the middle part of 1942 while sporting the wonderful camouflage scheme that is shown in the colour rendition of the scheme in port & starboard elevations in the instructions. The camou scheme is amended and improved over the version shown in the generally helpful but on occasions misleading Profile Morskie (PM) drawings and illustrations. I used as my primary source of info the photographs of the ship in a variety of publications. The primary source for the general arrangement drawing I chose to use was the line drawing in Raven/Roberts' "British Battleships of World War 2" (R/R), as it appeared to correspond more closely on minor detail matters with the photos of my chosen timeframe. That said, however, no drawing is 100% perfect: checking photos I found a couple of minor discrepancies in the R/R drawings.... | click images
to enlarge |
|||||||||||
 |
||||||||||||
| As with any model kit there is always more detail that can be added
over and above the box contents...which in part contributed towards the(for
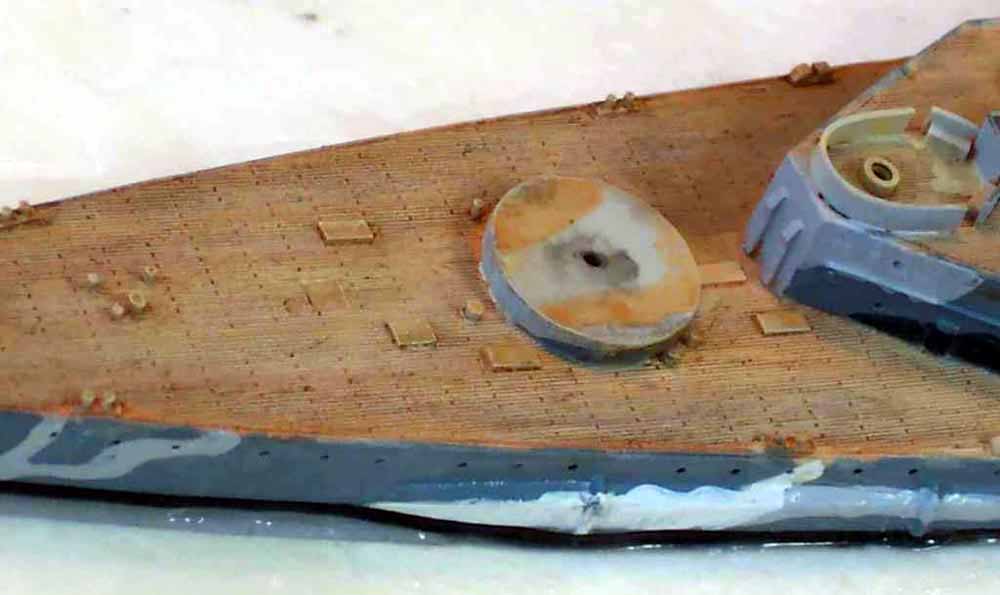
me! lengthy build time of nearly 3 months. I commenced the build by adressing
the painting of the beautifully represented deck, complete with plank butt
ends, a feature of virtually all timber decked ships that is rarely if
ever seen in small scale modelling, and is often so overdone in larger
scales that the butt end pattern stands out far too much in relation to
the fore and aft caulking lines. So right from the start subtlety was the
keyword: checking photos of contemporary timber decks showed the virtual
invisibilty of the feature in ariel photos, it only becoming visible when
in closer proximity. I wanted to recreate this effect, so ruled out any
deliberate highlighting of the butt ends, and worked simply to paint, 'caulk'
and shade the deck as normal. This allowed the shadow of the depressions
in the casting of the plank
ends to speak for themselves without any paint! Overall I am very pleased with the resulting deck, the buttend s only appear to the eye when one gets the tip of the nose onto the mast-top!! |
 |
|||||||||||
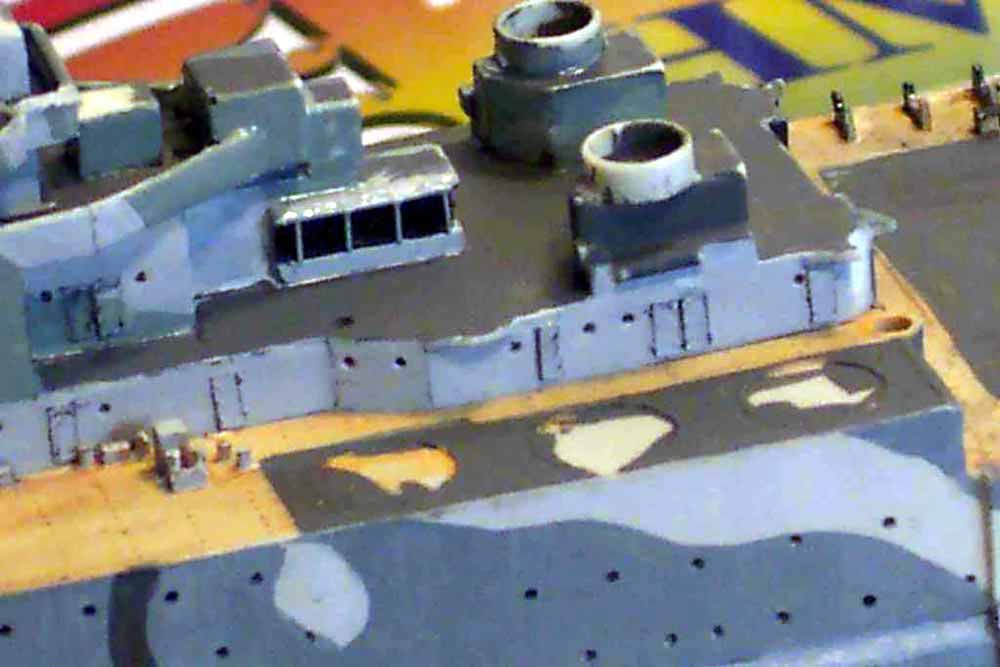
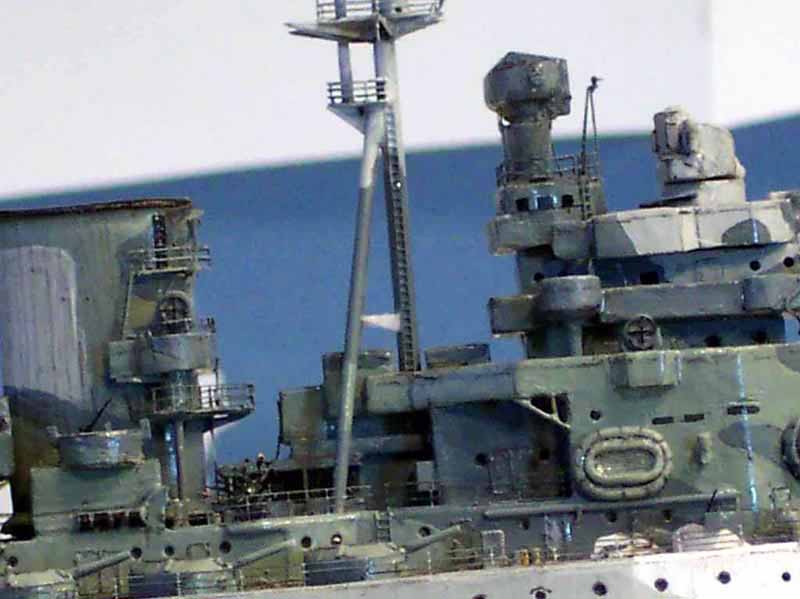
| I started the actual construction by assembling the bridge tower structure, carefully painting and detailing doors and scuttles as I went before they became inaccessible. I added the pipework and ship's crest visible below the bridge windows; the windows I carved out and replaced with some ladder-stock for a crisper look. | 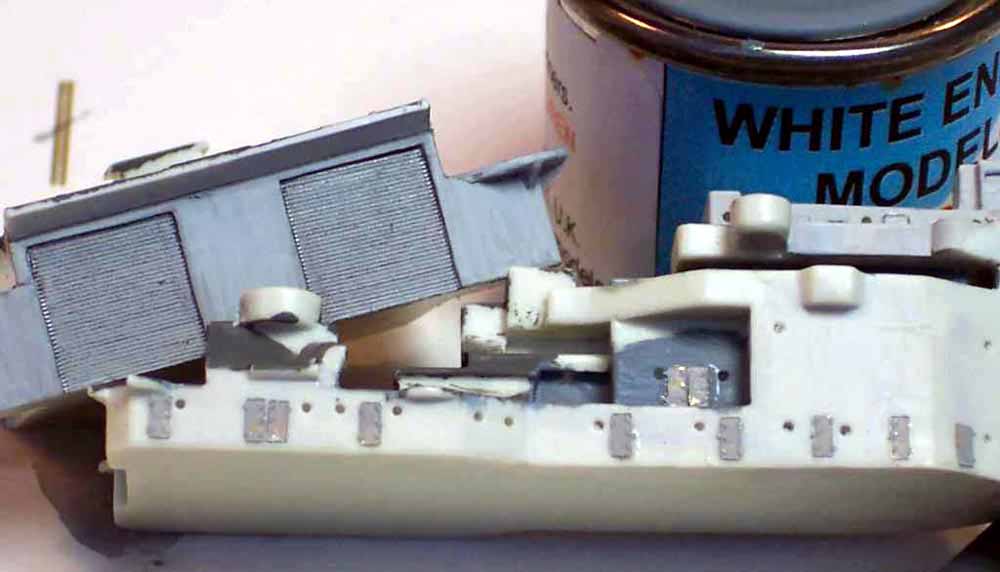 |
|||||||||||
 |
||||||||||||
| The remainder of the structures had doors added and the outlines were checked and re-checked to ensure all was square. The bridge side faces were a little featureless, and checking of photos and plans showed these to have had some additional scuttles as well as oblong openings which I represented with paint. There were also various protrusions, and I duly added these. The aircraft hangar doors are very well done indeed, and I brought out the corrugated effect with pencil shading. |  |
|||||||||||
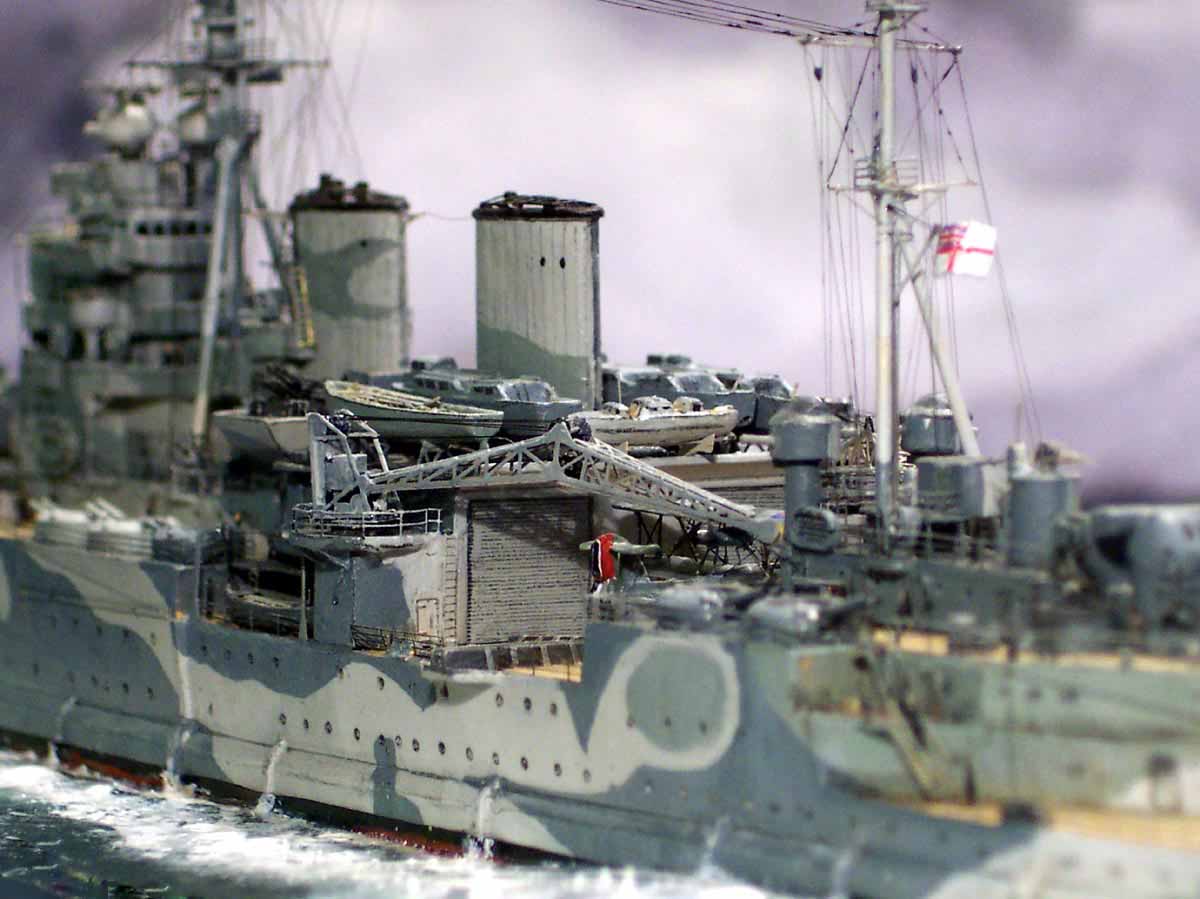
As my ship would be depicted underway at speed, the doors
were closed and the plane stowed. I changed my mind later when I re-read
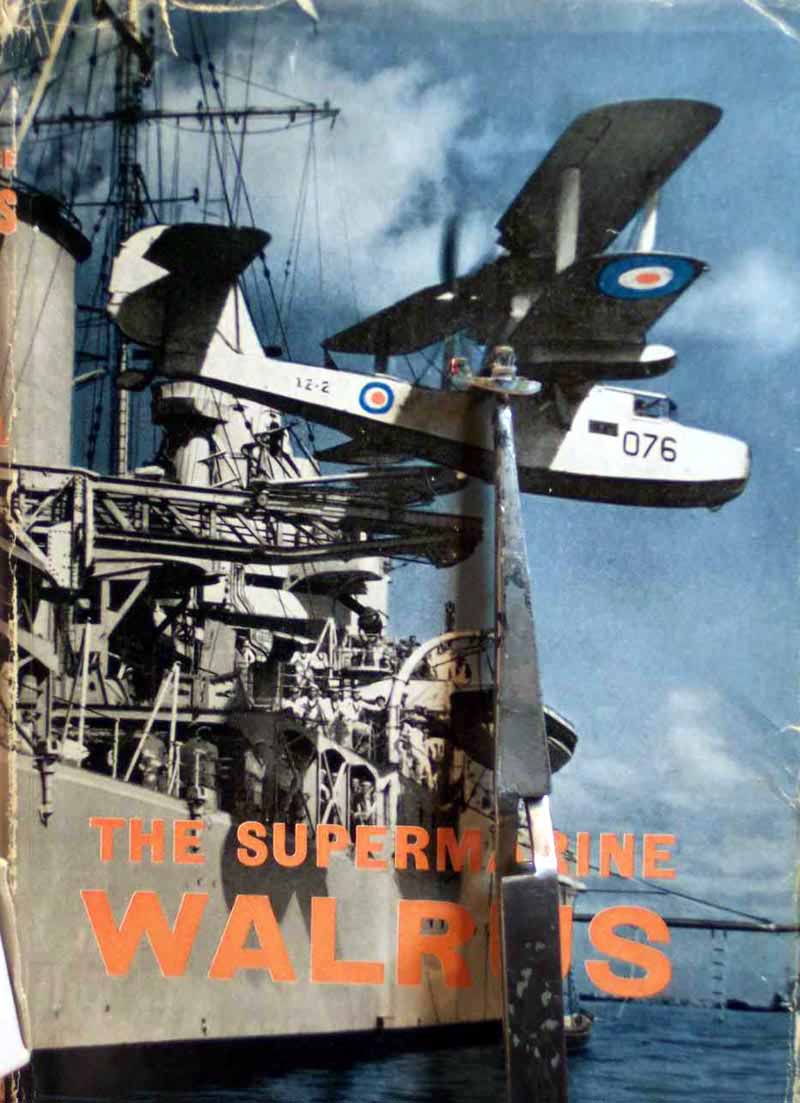
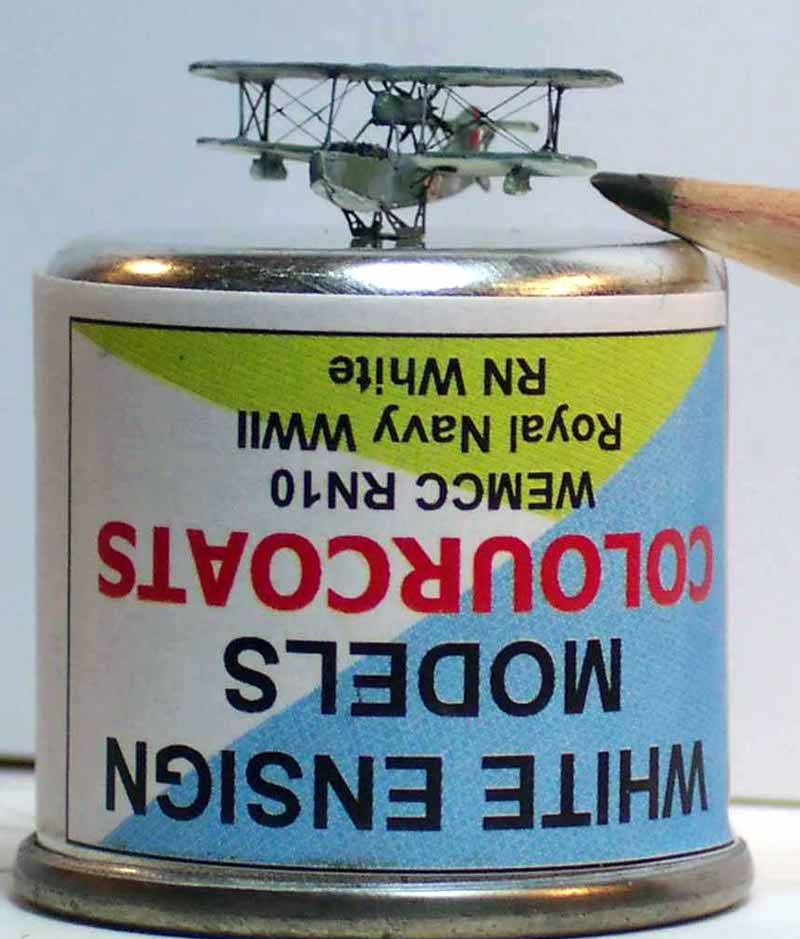
the caption to a photo showing Renown at speed: "...note the Walrus on
the catapult....."! I used the Walrus castings and PE supplied with the
kit, but cut away the moulded engine and mounting block, so as to be able
to mount the new engine (carved from sprue)on struts according to photos,
and then rig with stretched sprue accordingly. The markings came from the
excellent decal sheet from Pitroad.
|
||||||||||||
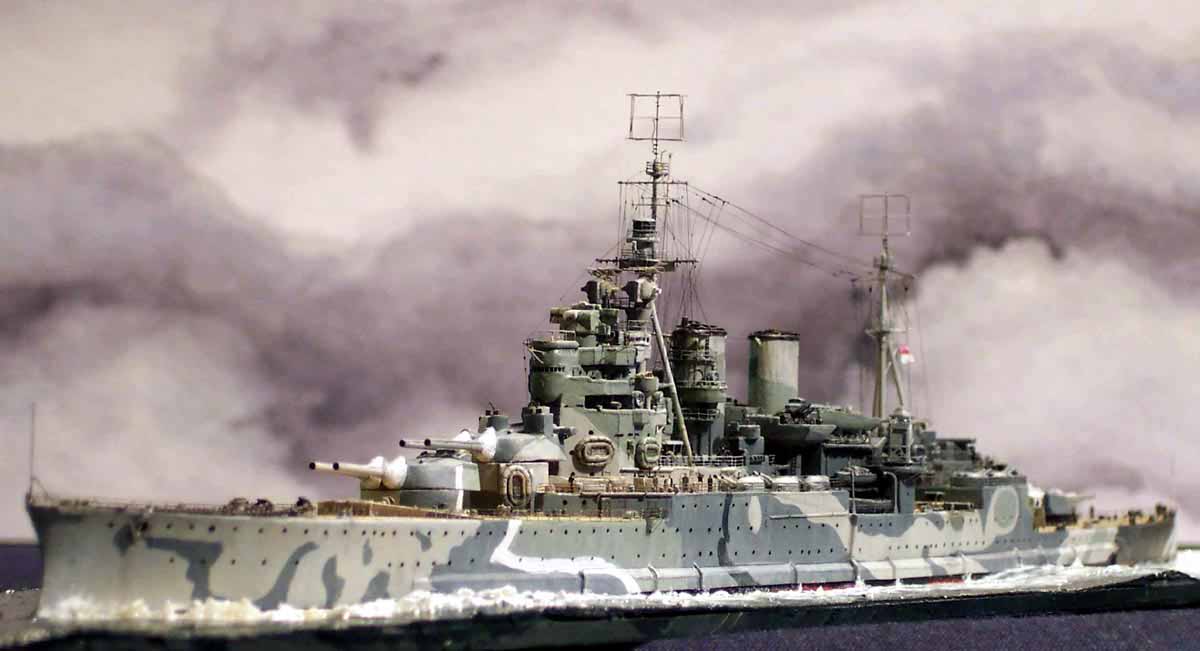
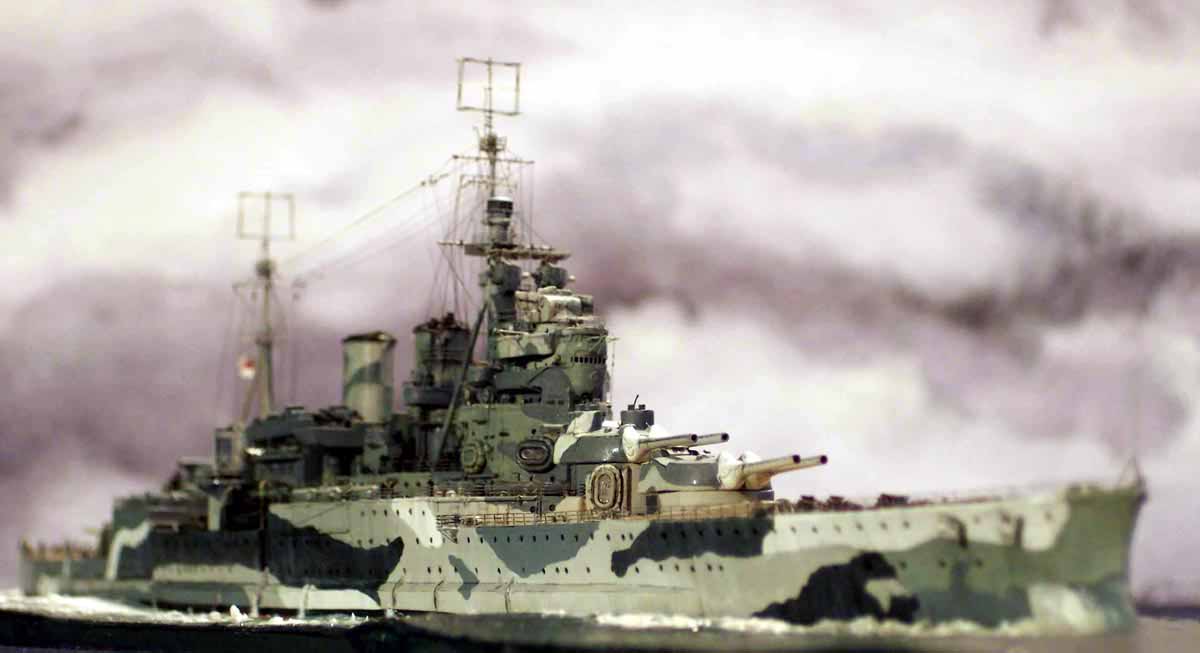
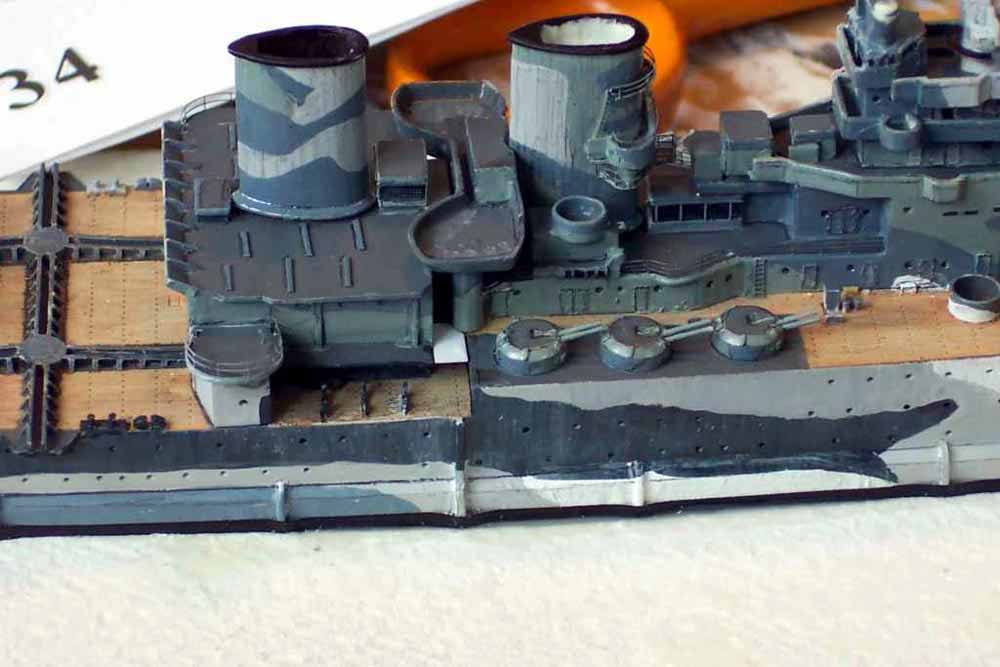
| At this early stage I applied the complex camouflage scheme: I only handpaint, never having had the patience to fiddle about with an airbrush. Masking the pattern of peculiar shapes and curves on these tricky surfaces would have (I suspect!)led me to build a pre-war variant.... Despite checking, re-checking, overpainting and re-re-re-checking the camouflage scheme with a variety of photos, I can still see discrepancies that are visible in some photos of the real ship and not others.... | ||||||||||||
| I followed broadly the drawings in the instructions, verifying and
correcting according to photos. The decks at some stage with this colour
scheme seem to have carried a partial camou layout; however, no aerial
views seem to exist that might verify this 100% in pattern or colours.
There are photos existing which appear to show the camouflage scheme creeping
onto the deck. I was tempted to portray this but felt that it was just
too much stabbing in the dark!
It was shortly hereafter that I made my first mistake, namely, cutting away the bracing supports that were cast-on at the centre forward edge of the breakwater, believing that I could make them even thinner and sharper. Subsequent examination of photos show these to have been a T-section, with the flat of the T showing forward. Well, mine are thinner, but crisper...? |
 |
|||||||||||
| My conclusion: leave them well enough alone!
I was fortunate at this stage in aquiring a set of Clipper 15" brass gun barrels from e-bay. While there was nothing inherently wrong with the resin barrels, 'twas merely a coincidence. It did, however, save the drilling out of the muzzles.... |
||||||||||||
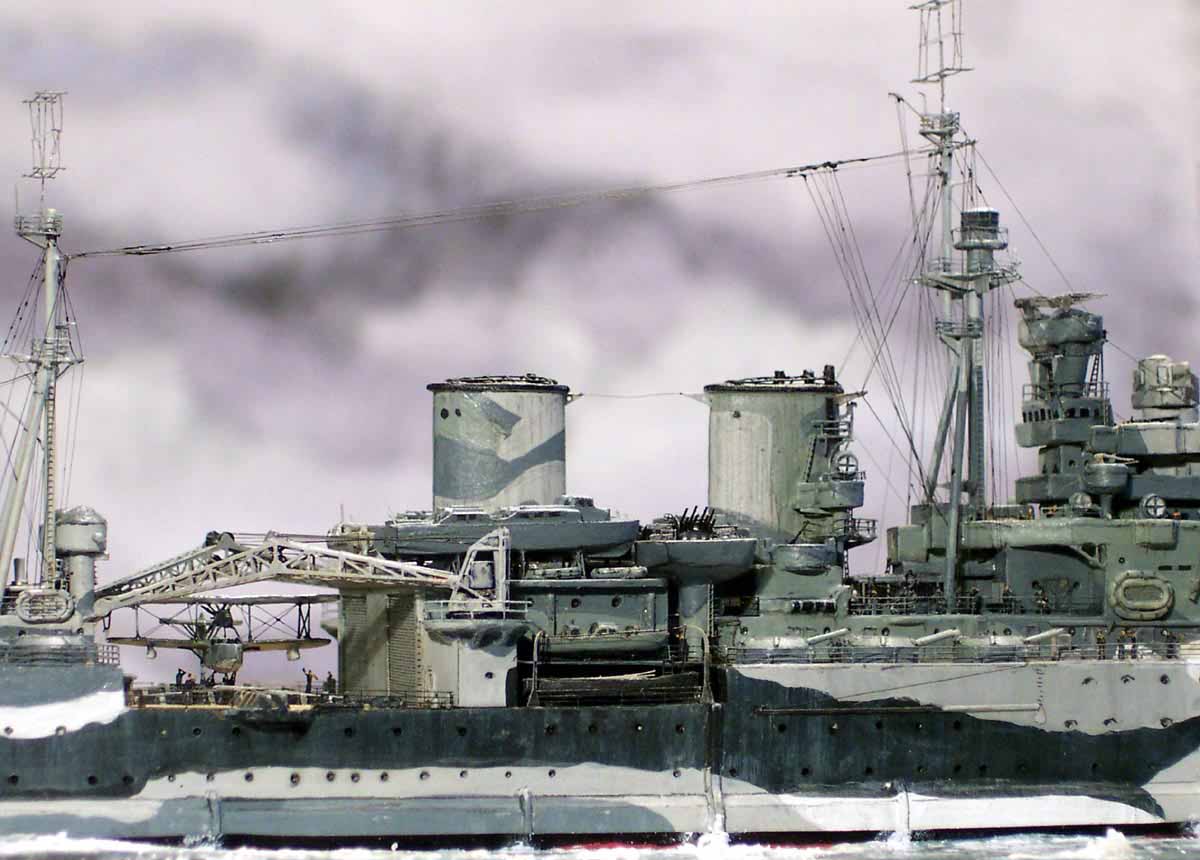
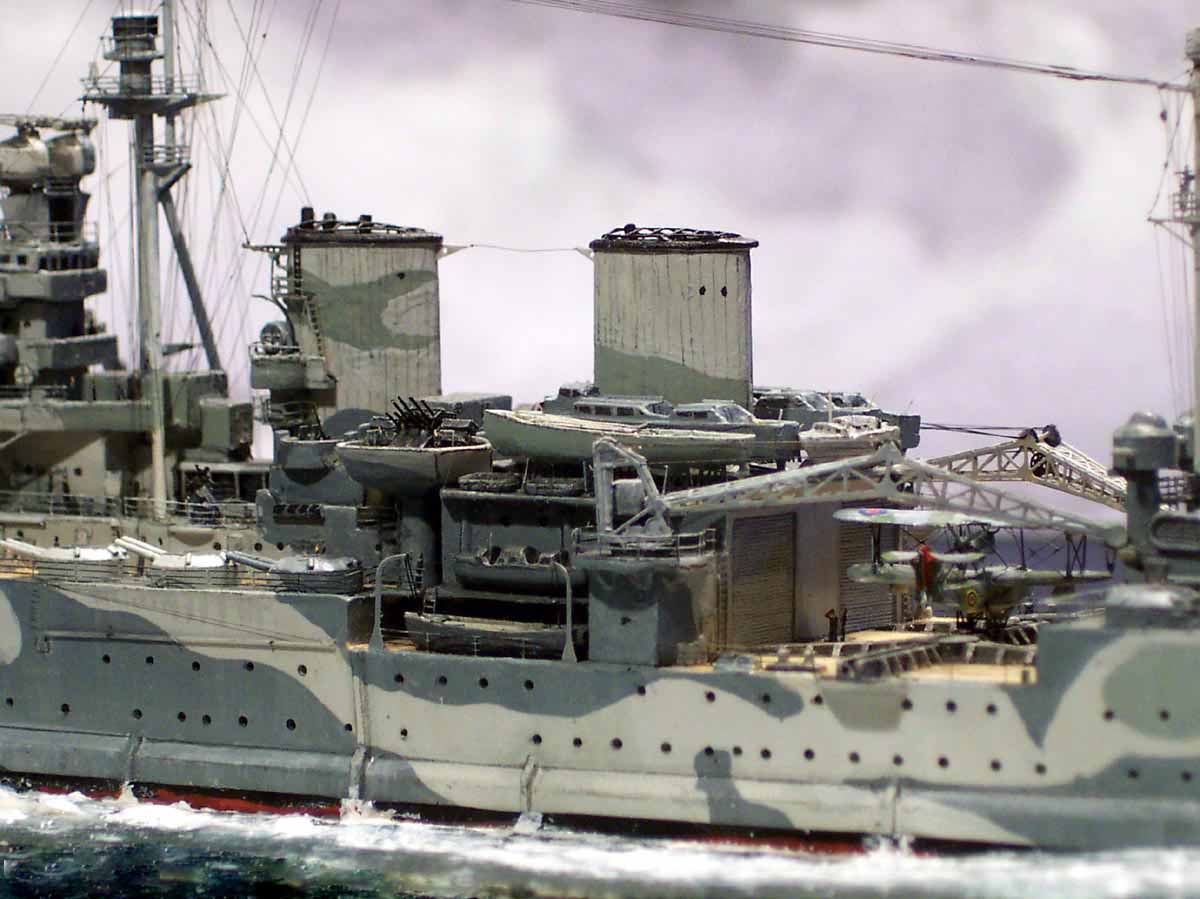
| Construction followed broadly the sequence in in the instructions.
I hollowed the insides of the funnels out with a burrheaded motor tool.
Photos of Renown's funnels often show the numerous facets of the individual
plating runs. I wished to imply the prescence of these, so I pared away
a large number of 'flats' with a Stanley blade, later highlighting them
with pencil. The cast-on platforms I thinned down from underneath, adding
supporting triangular gussets fabricated from paper. The searchlight davits
I made of fuse wire, and the PE funnel sirens had their pipes made from
sprue. I also installed the internal steam pipes in the forward funnel
according to plans and photos.
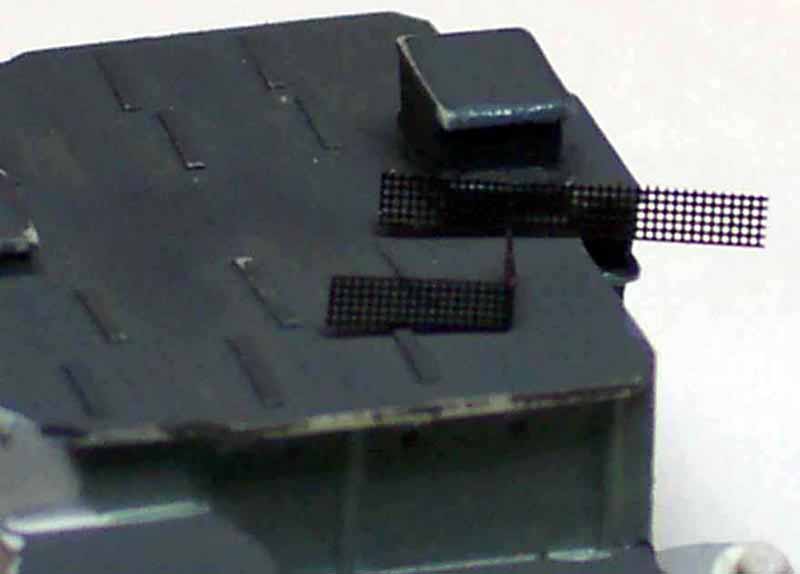
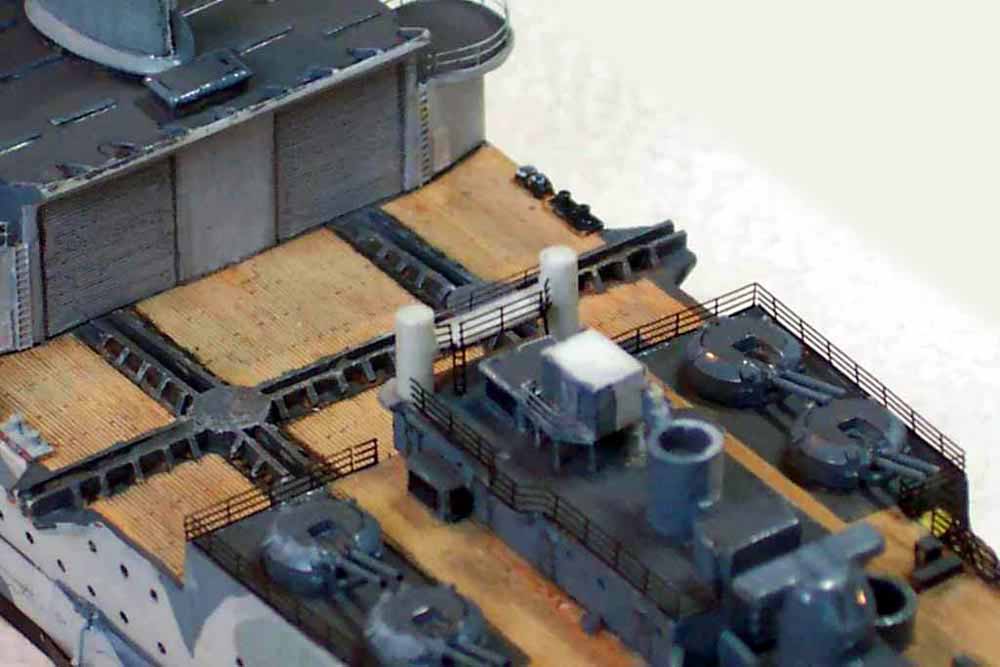
The cast Oerlikon tubs had the boxes added as seen in drawings; I thinned down the wall thickness by paring away with a knife blade from the inside face. Careful checking of photos allowed me to place the doors so as not to obstruct the stairs/ladders and companionways; these were fashioned in part from the supplied items supplemented by others from my scrapbox for even more finesse. The various ventilator outlet blocks had some very fine PE meshing added (it's obviously not in scale, but does add a pleasing effect of texture), the divisions between were added from handrail stanchions from a 1/350 PE set. Despite the casting being festooned with mushroom vents etc., in the area aft of the bridge and the hangar I added yet more deck hatches and some more vents. |
 |
|||||||||||
 |
||||||||||||
 |
||||||||||||
 |
||||||||||||
| Cable reels were added according to the plans in a variety of locations.
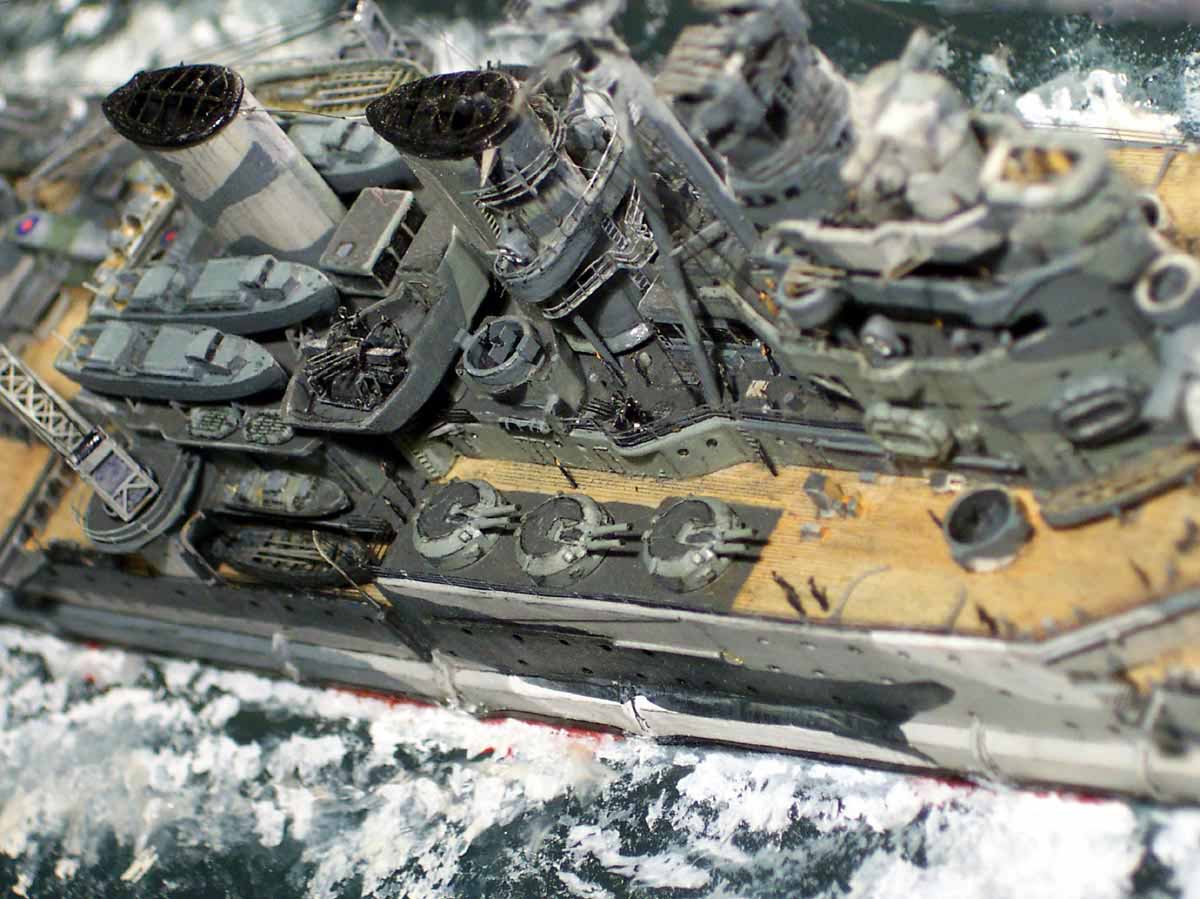
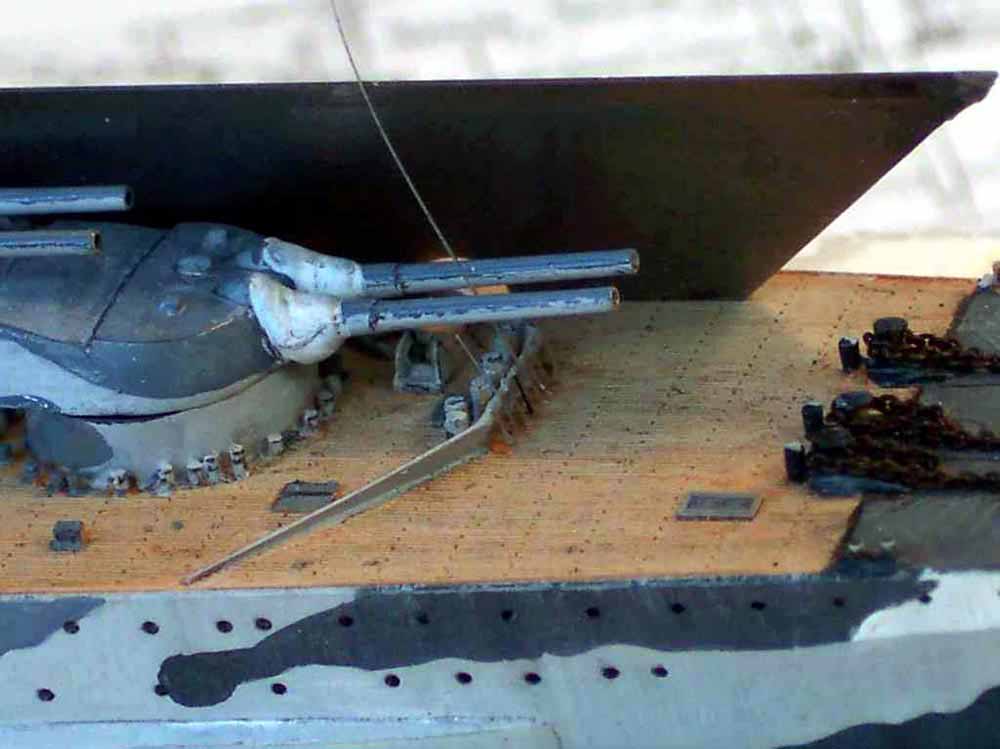
One of the high points of the kit in my view are the exquisite 4.5" HA turrets; liberally littered with detail they capture the shape of the gun mount very well. The hardest part was to obtain a sharp demarcation line between the dark tops and the sloping camouflaged sides. After various failures, a pencil run around the edge of the bevel gave a perfect line. The kit supplies four identical directors, which when fitted with Yagi ariels would be correct for early'43, but...fortune smiled upon me (it transpired!) in that it propelled one of the kit items from the tips of my tweezers into regions unknown (lost!); upon examining the shape more carefully now and checking photos it became evident to me that in early 1942 the tubs had the framed canvas covers and no yagi's, so the opportunity presented itself to scratchbuild two identical items with the covers in place! |
 |
|||||||||||
| I chose for this model to build the 8-barrrel pom-poms from the supplied PE sets, but added depth to the undersides of the ammo trays with strips of Evergreen strip (afterwards I noticed this was also suggested in the instructions!). The assembly of these fine items is always a bit of an adventure, but they add to the delicacy of the finished model. | 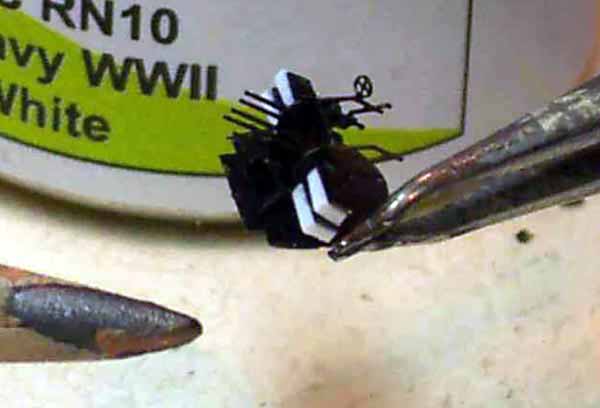 |
|||||||||||
 |
||||||||||||
 |
||||||||||||
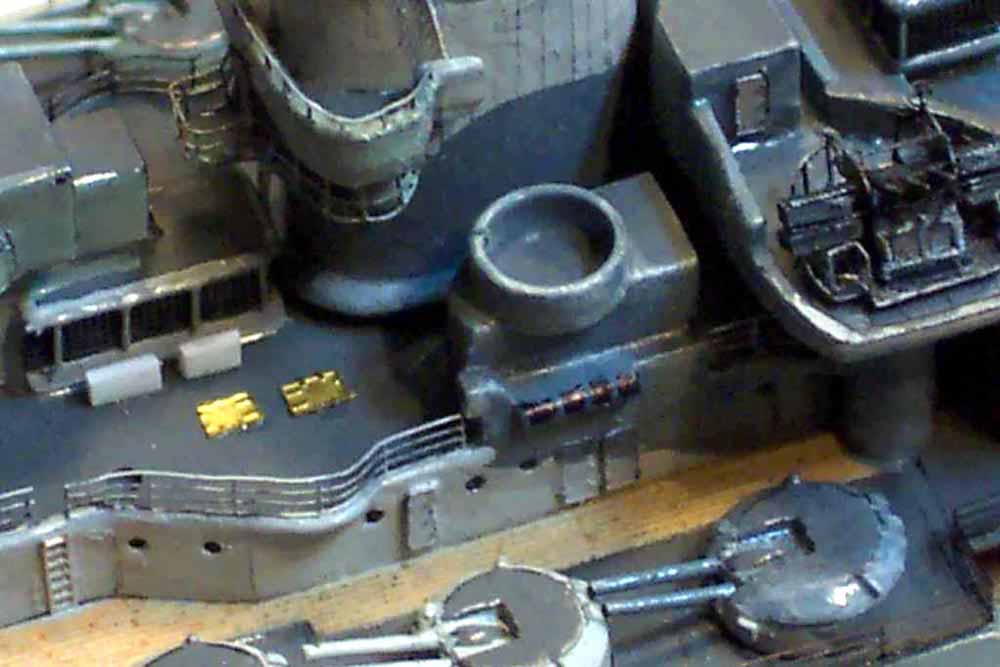
| The fine 0.5 Vickers mounts unfortunately all but dissapear from view in the camouflage scheme. The aft set adjacent to the aft rangefinder need to have their tubs decked, raised and railed, and there is a disparity between the PM and R/R drawings here. My decision was supported by photos in Northcott's Ensign 8, a very useful but sadly now rare and expensive booklet. | 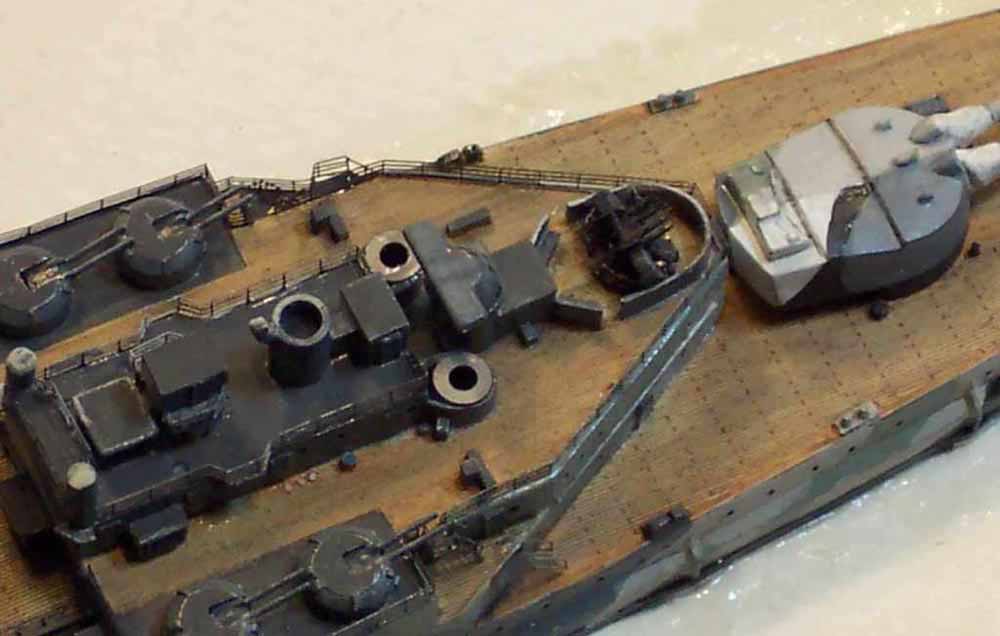 |
|||||||||||
| The ships boat complement as supplied varied from the fit in the R/R drawings which I chose for my model, so I substituted the open boat for an additional 45' fast motorboat from the WEM Pro 700 series spares box. Some photos showed these with canvas covers draped over them, but I felt that this would look 'wrong' in a small scale model. The PE fret contains nice seperate thwarts for all the boats; the 42' launch I hollowed out and inserted fine brass fret-strip thwarts. Carley float positions seem to vary from month to month when viewing photos, and I affixed additional rafts on the aft superstructure as well as on the hangar roof under the 45' boats; the very slight angling out of true of the double set on the forward barbette starboard side is correct according to the photo I worked from! | 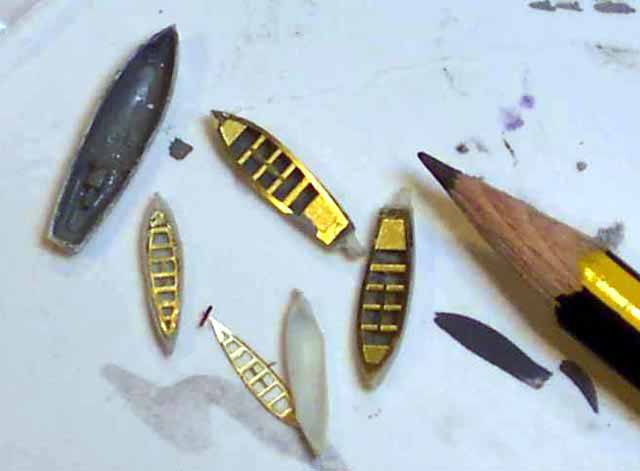 |
|||||||||||
 |
||||||||||||
| The PE crane-jibs were a delight, the mounting girder structure
neatly dropping over the resin motors and winding gears to give a good
sense of depth. I chose, however, to rig them with sprue in my usual manner,
and added some old GMM pulley wheels. I affixed the railings as the build
progressed, using some of the WEM-supplied items as well as GMM Gold-plus
ultrafine, colouring all rails with a black indelible permanent marker
first, then affixing them to the model. Later drybrushing stanchions only
or the whole rail gives, in my view, a very light and airy effect without
the clunkiness of paint build-up. I made the awning supporting framweork
atop the upper bridge from single bar GMM handrail and stretched sprue.
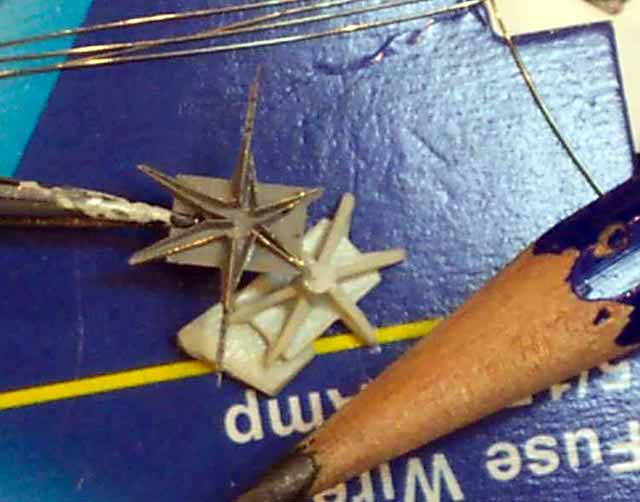
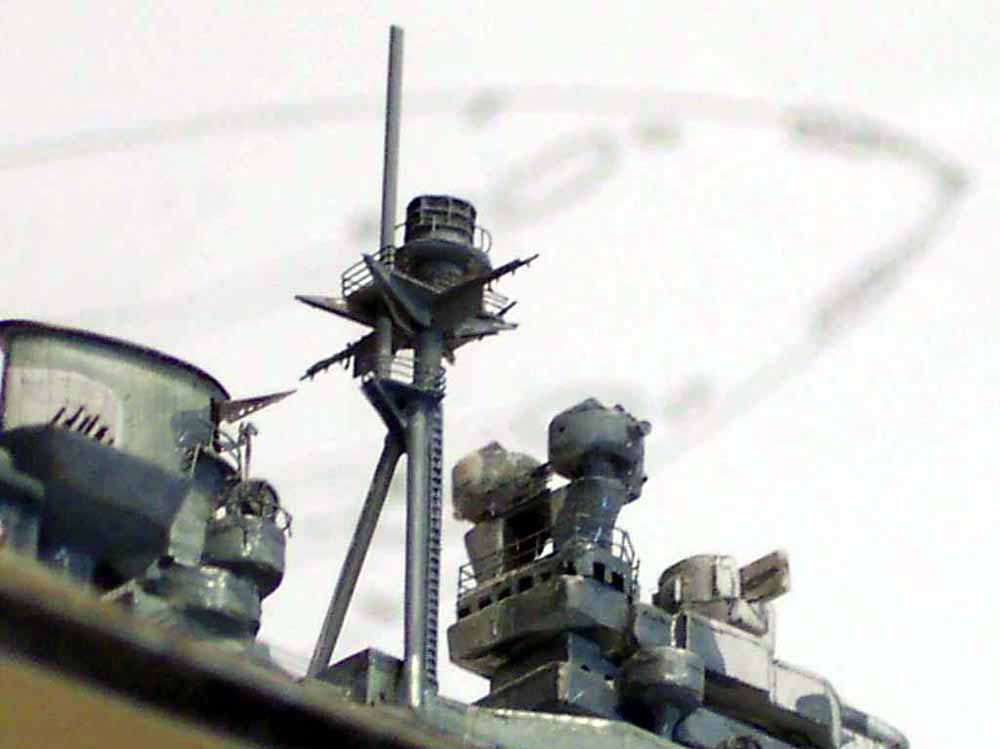
The masts were constructed as usual from fine metal tubing, using the foremast starfish from the excellent PE option, although the alternate resin item could have been used. The instructions suggest using the resin juncture for the top of the tripod, a good idea, but I wanted the supporting triangles for the topmast to be hollow, so made these as well as the lower mast braces from paper, which after installation were infused with CA, giving total adhesion as well structural integrity. |
 |
|||||||||||
 |
||||||||||||
 |
||||||||||||
| The radar lantern appeared to be a very good shape, but a little sparse in surface texture. I remedied this with a little PE applied. One point of note: on the mainmast starfish there are some fine PE supporting gussets supplied, for which both the R/R and the PM drawings are misleading here. Photos show these to be struts; I made these very simply using sprue. I chose to add the railings and struts for the upper platforms seperately as this allowed me to work on the struts and the remainder of the ship without crushing the vulnerable mast-tops. | ||||||||||||
| I furnished the foredeck with 52 link-per-inch chain after drilling out the hawsepipes; checkchains I made from PE chain. The stunning bracing strips on the foredeck were lightly drybrushed, with a very crisp demarcation resulting; I faced the lack of these on my Repulse model, where I had to resort to a paint effect. I also added an additional mushroom vent. |  |
|||||||||||
|
||||||||||||
| I used the supplied PE binocular mounts, adding the Aldis
signalling lamps (made from solder strip)along with many other small ladders
and bits and pieces, none of which on their own are really visible, but
add to the total overall look of intricacy of the finished model.
|
||||||||||||
All rigging was stretched sprue, finished off lastly with
the fine PE aerials from the fret, the crossmembers of which I made of
stretched sprue.
|
||||||||||||
 |
||||||||||||
| References:
Ensign 8 Renown and Repulse by Maurice Norhcott
|
||||||||||||