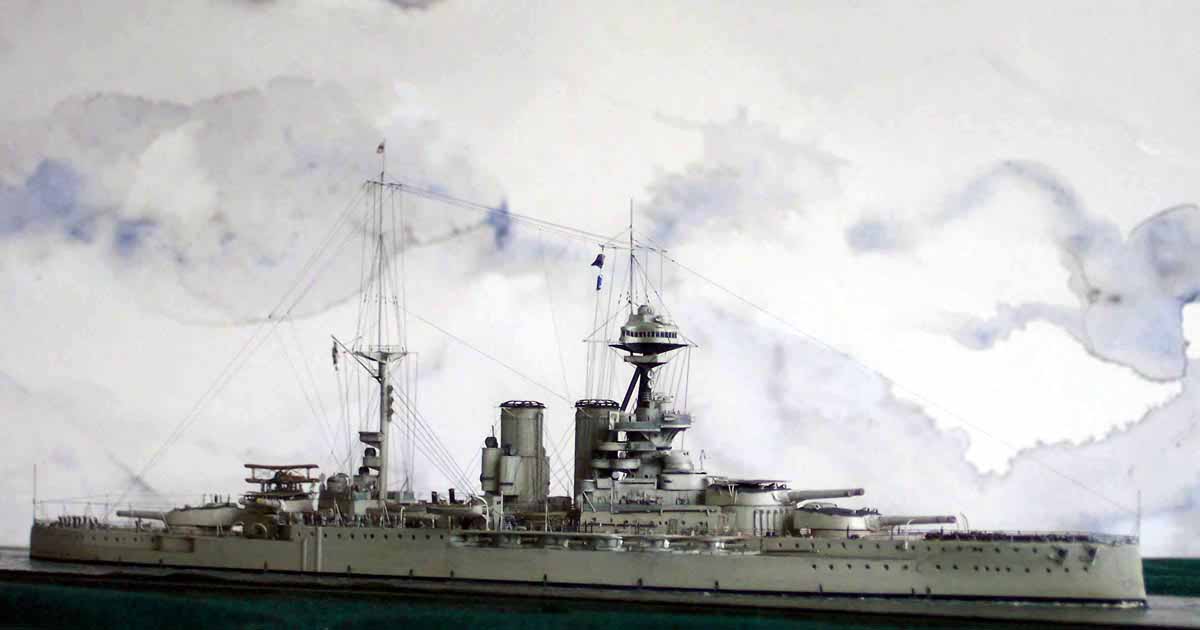
| HMS Queen Elizabeth was completed in
January of 1915 at Portsmouth Dockyard as the first of a class of five
near-sisterships. This class was the first to mount the new 15" gun and
to be oil fired; giving a top speed of 24 knots. Initially deployed to
the Mediterranean to calibrate her guns she became involved in the Dardanelles
campaign bombarding the forts in the narrows and in support of the landings
there. Due to being in re-fit 22 May - 4 june missed the battle of Jutland
.The surrender of the German High Seas Fleet was signed onboard QE 15 November
1918. She was the Flagship of the Atlantic fleet 1919-1924, where after
she became flagship Mediterranean Fleet.. Refitted in 1926-27 her external
appearance was altered considerably by the trunking of both funnels into
one huge stack...but that is the subject of another model another time...
She served in WW2 and was sold for breaking up in April 1948 |
|||||||||||||||||||||
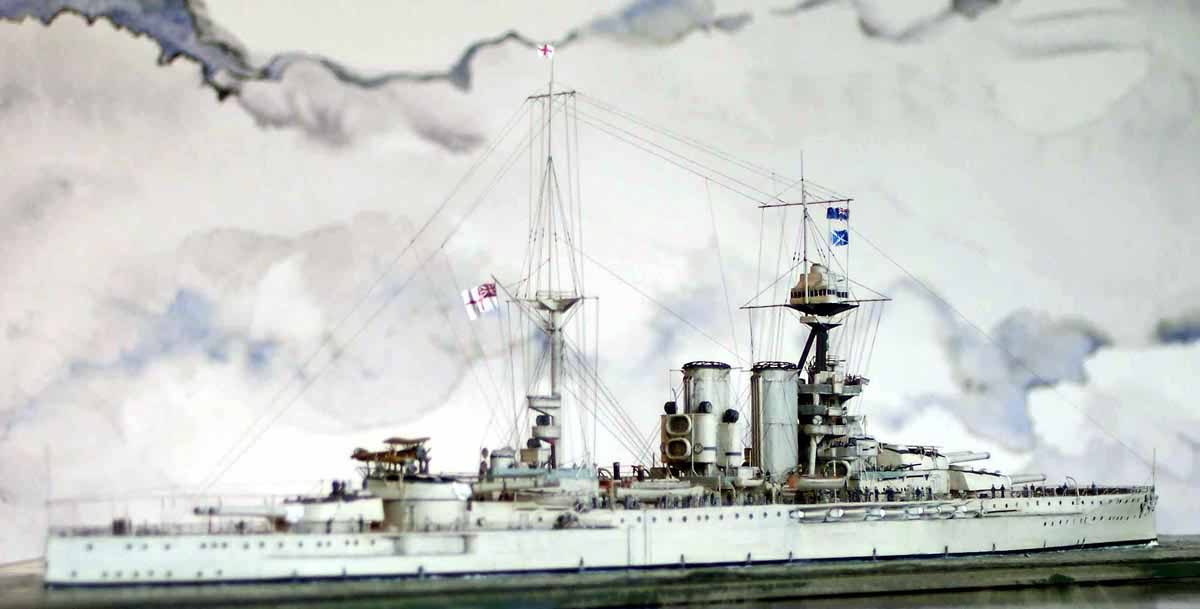
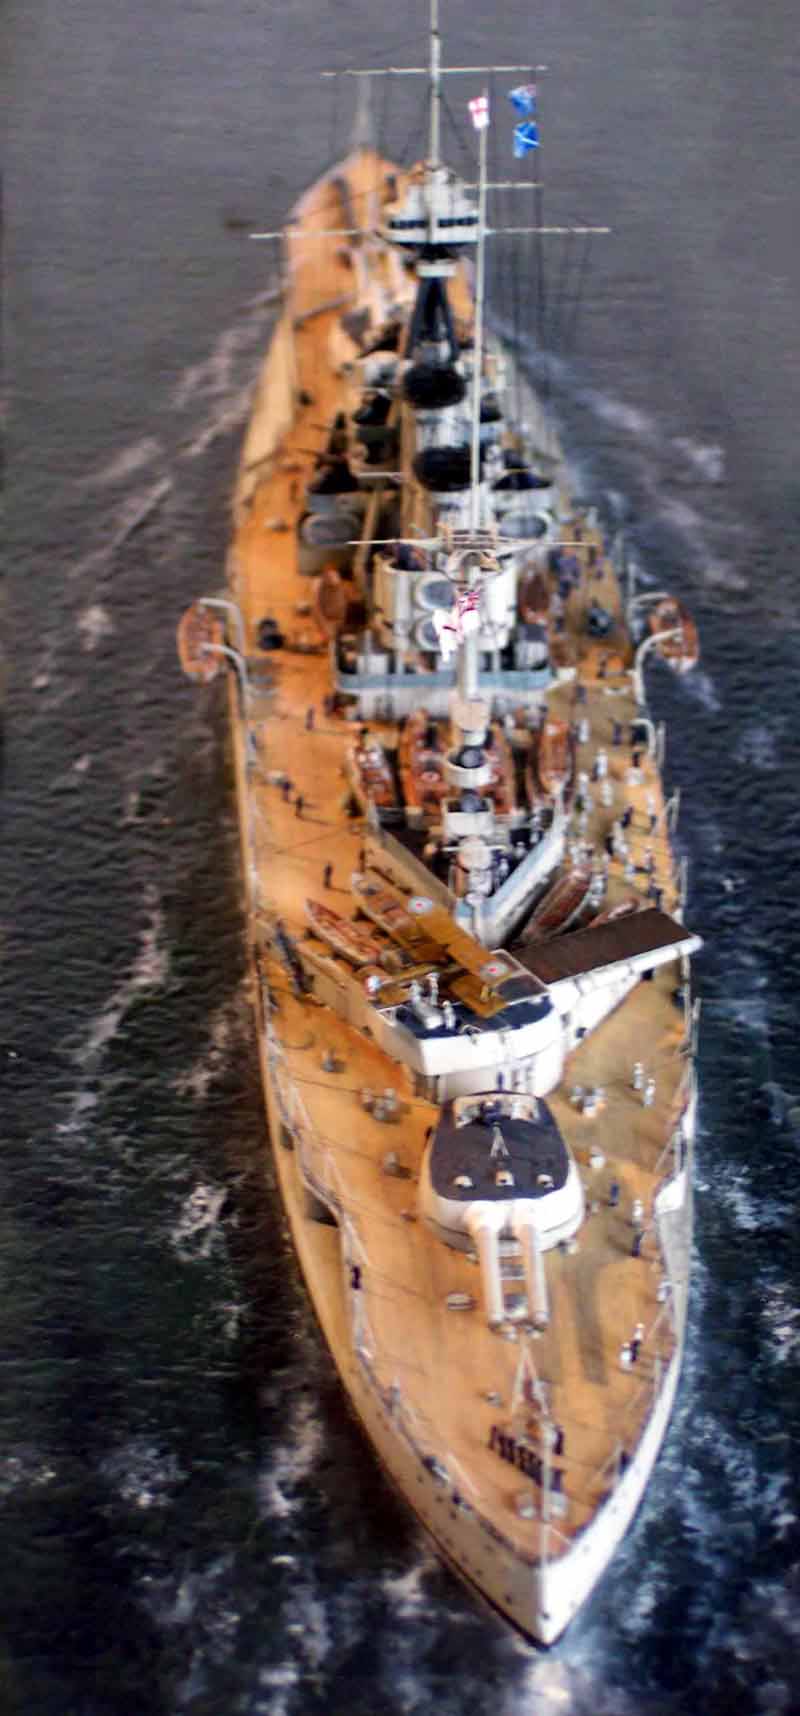
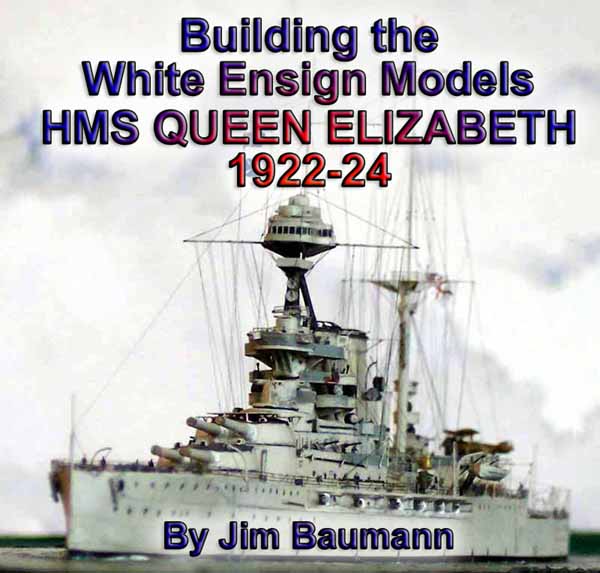
| This is a brief synopsis of how I built my model of the Flagship Atlantic Fleet HMS Queen Elizabeth as she would have appeared in 1922-24 using the excellent WEM 1/700 kit of the same ship as in 1918. I could have saved myself a lot of work had I been satisfied with the scale fidelity of a previous version of the ship that I own... alas...! | Click images
to enlarge |
||||||||||||||||||||
 |
|||||||||||||||||||||
| Unlike may of my other modelship builds, the ups and downs therewith , in this instance it was merely a case of altering small aspects to allow me the correct era to fit the ( in my view!) spectacular aircraft ramps and adding yet more small details over and above the comprehensive detailing supplied! While no sophisticated 1/700 kit is actually easy to build... this model had no nasty surprises or instances of un-design..! The resin castings were very sharp and needed minimal preparation. I chose to drill out all the portholes to give a still sharper definition and allow the filling with paint. | 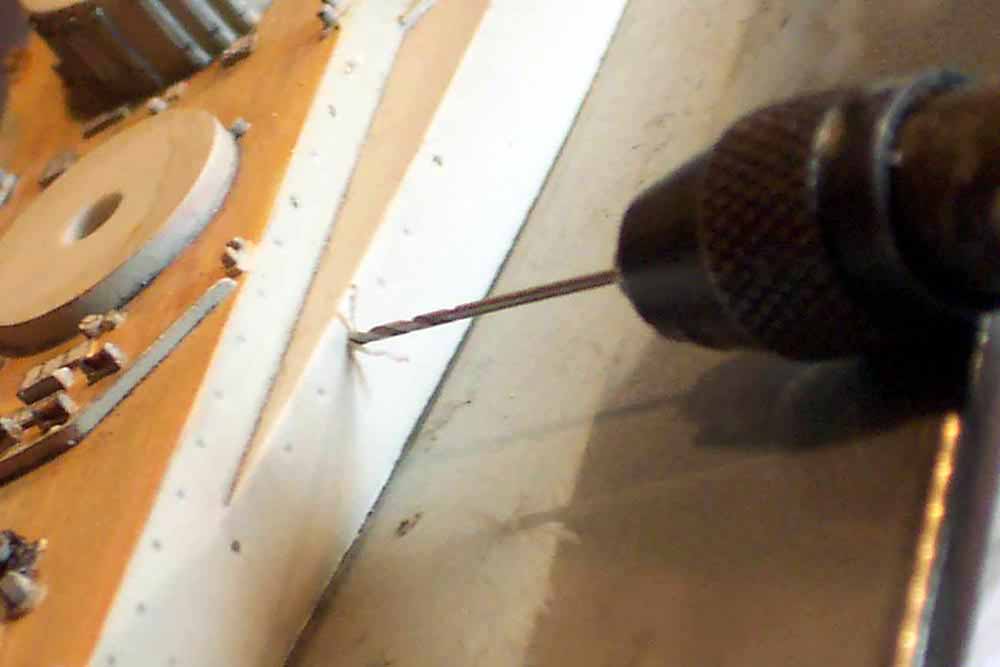 |
||||||||||||||||||||
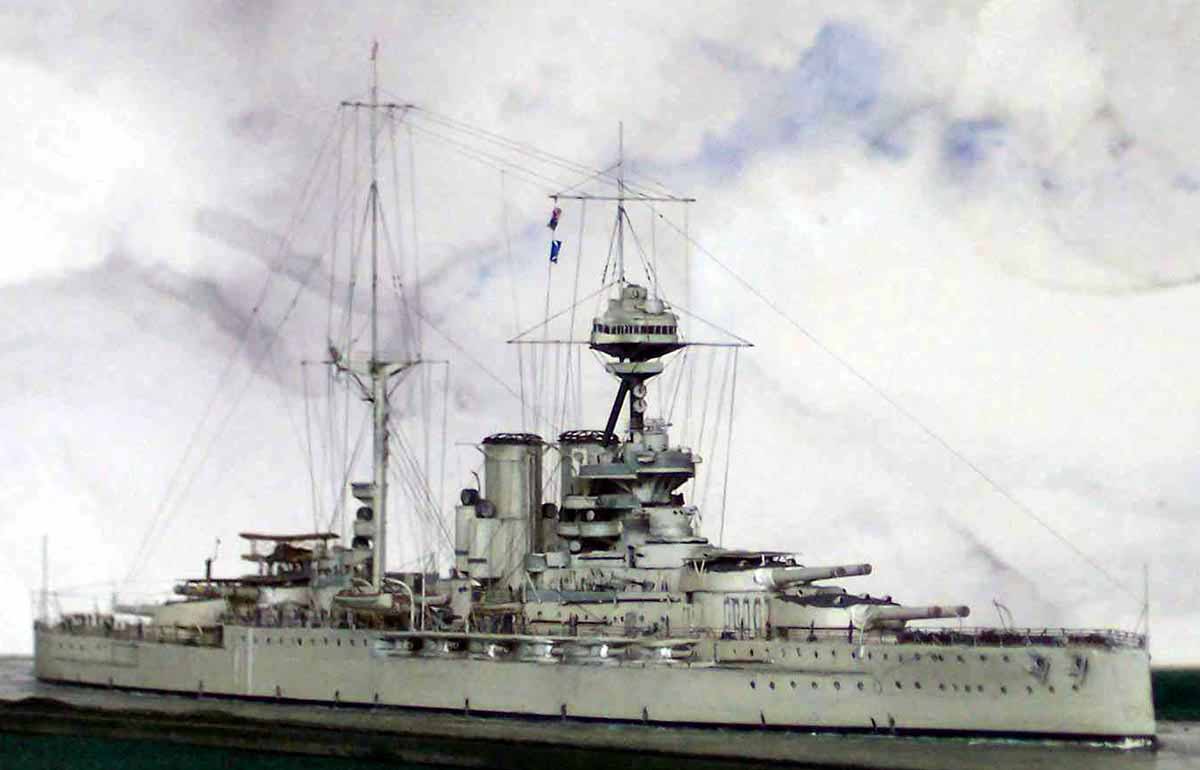
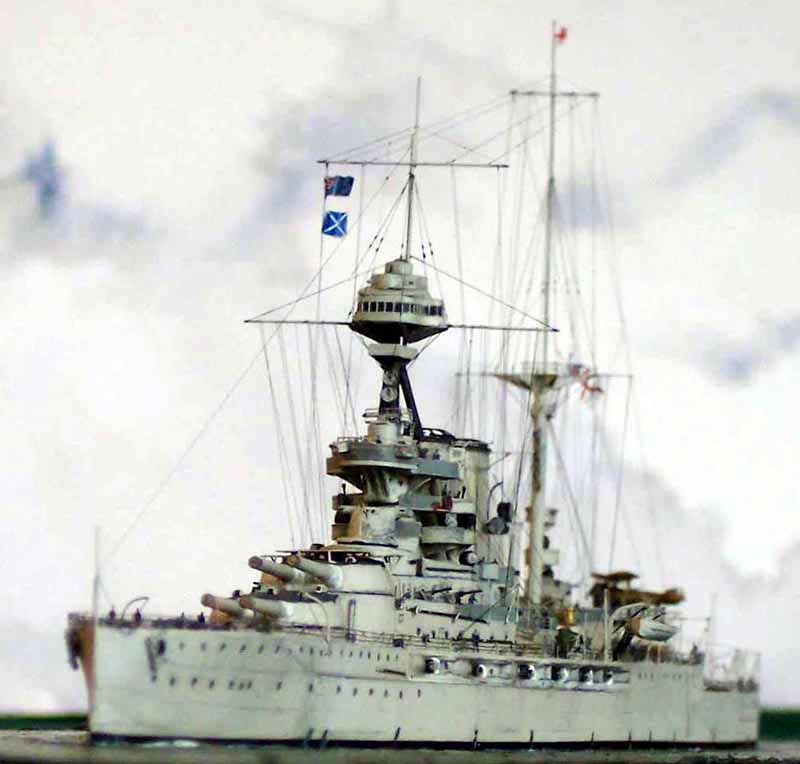
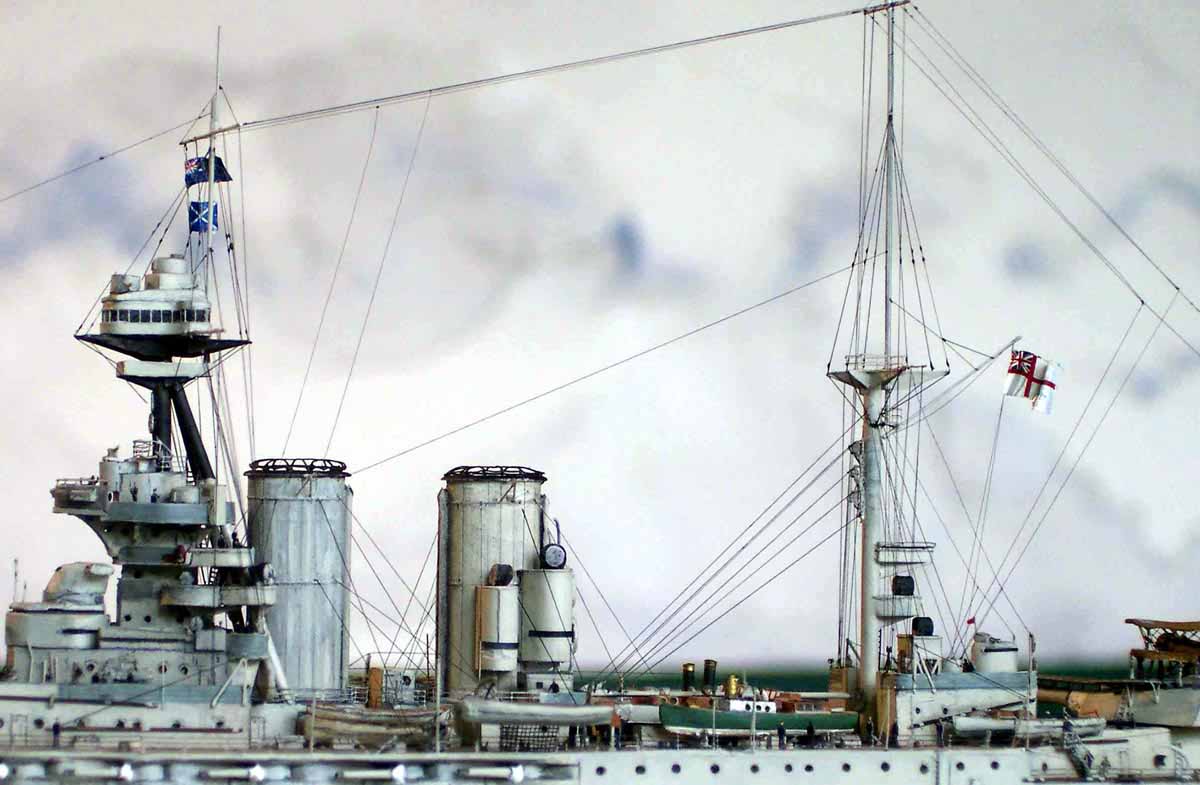
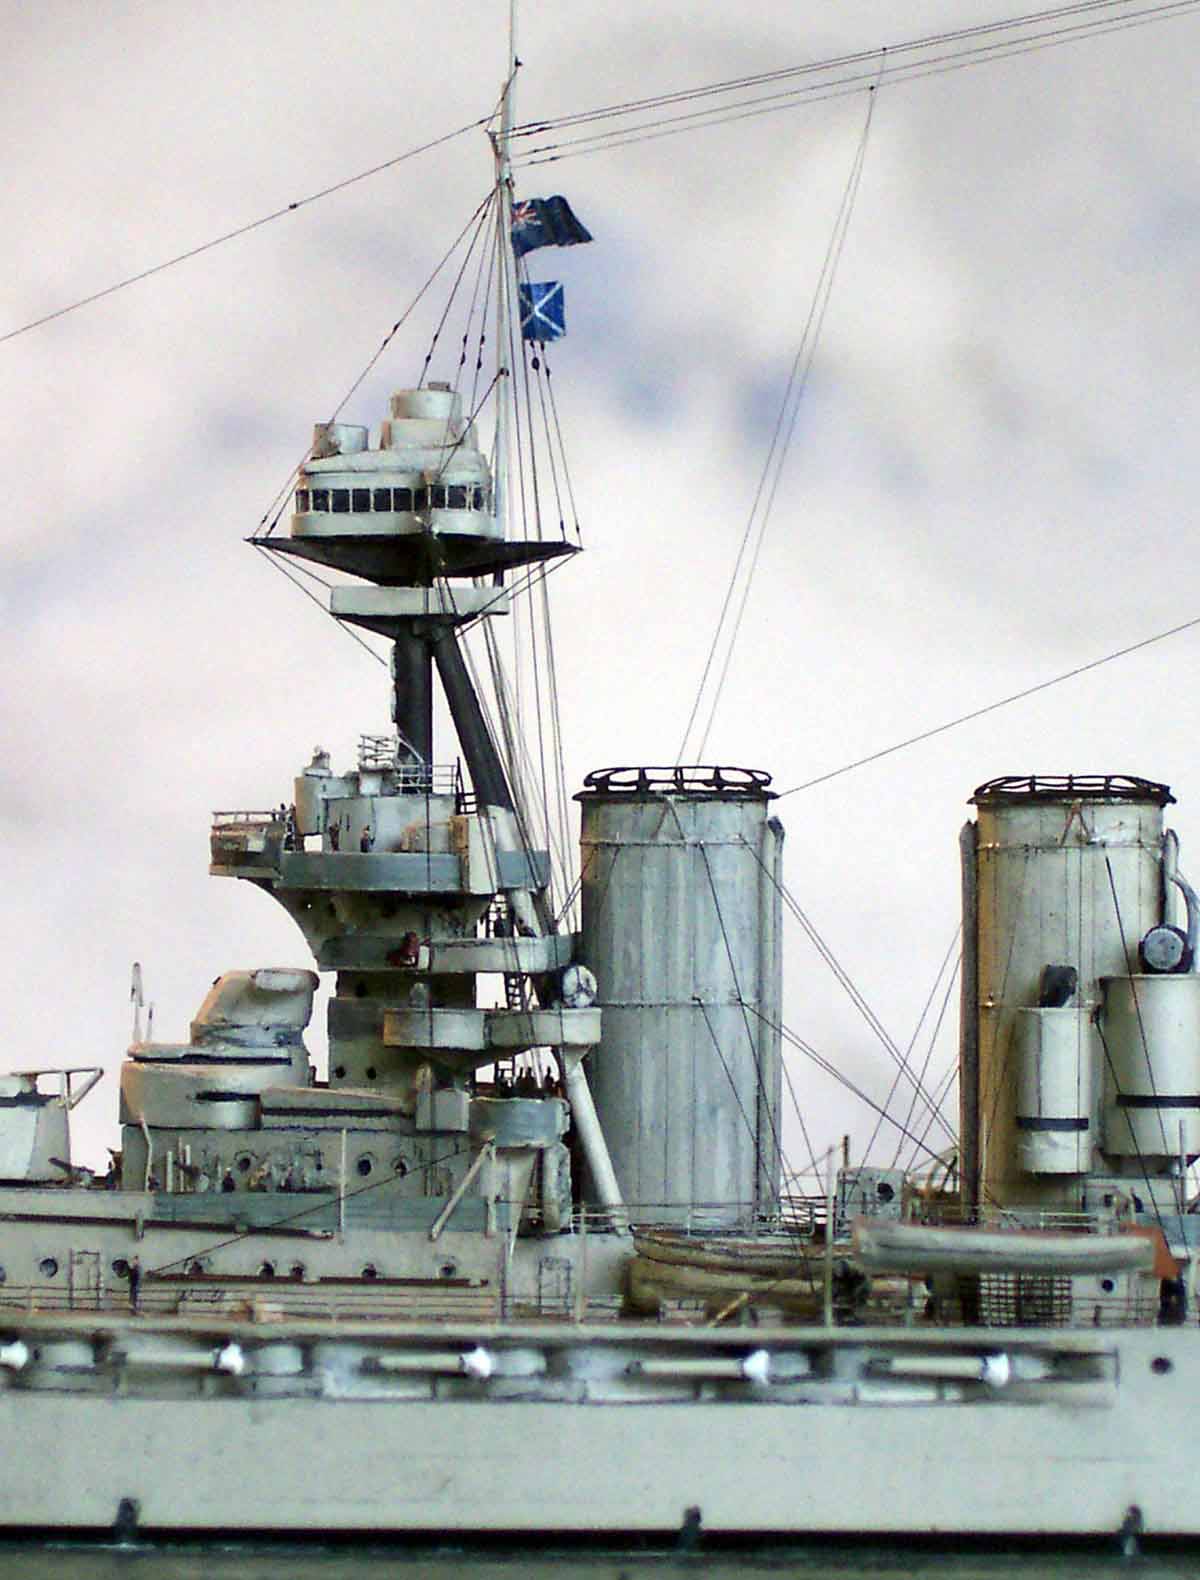
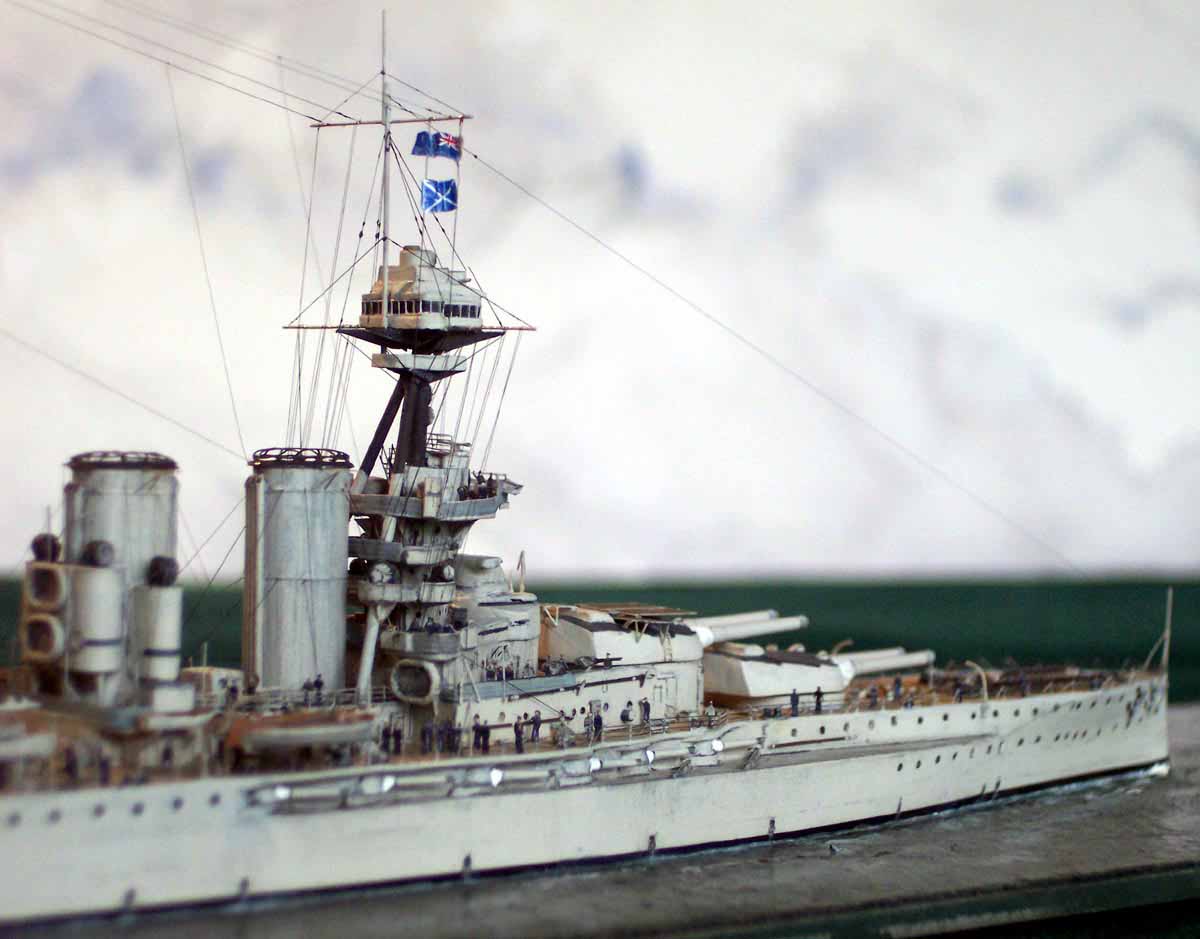
| Fundamentally I followed the comprehensive instructions as well as referring to various books, drawings and photos throughout. The kit depicts the ship as in 1918, at a time when she carried a much smaller foretop with slits as opposed to the enlarged spotting top with windows all round as she was in 1922-1924 as I chose to show her. | |||||||||||||||||||||
| The new top was enlarged using styrene sheet and PE 1/350 ladders as windows--various manufacturers of PE have different rung-spacings and widths, I used some from the WEM Koenig set as the window spacing was almost spot on. | 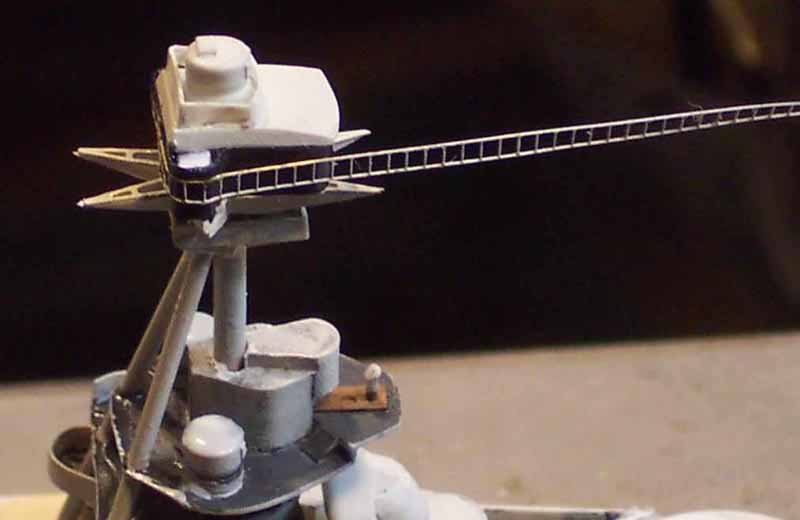 |
||||||||||||||||||||
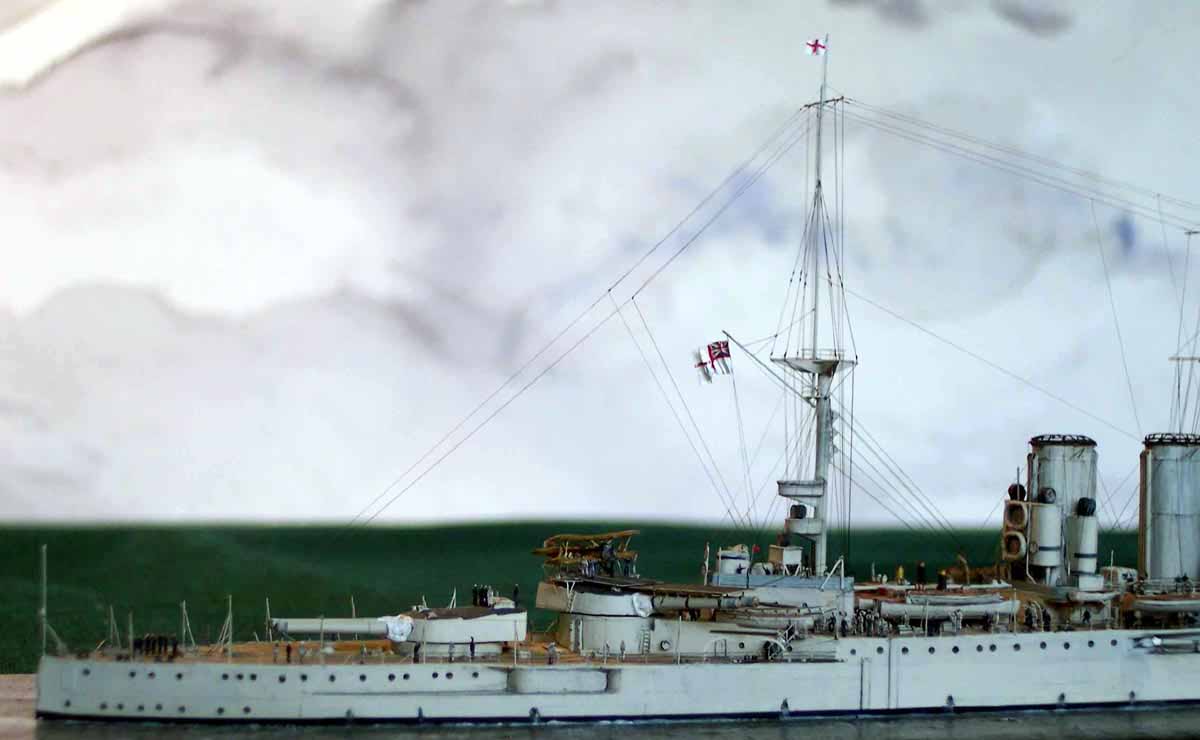
| Her mainmast was also significantly taller and there were additional
searchlight platforms as well as numerous additional protrusions on the
bridge-the purpose of most of which eludes me!
All of the splinter shields had the flared wind deflecting edges added, this was done using very thin wire and then back filling with white glue, when painted and lightly shaded it gave a pleasing look and added to the texture of complexity of the mode. |
 |
||||||||||||||||||||
| Bridge structure supporting gussets were drilled out. | 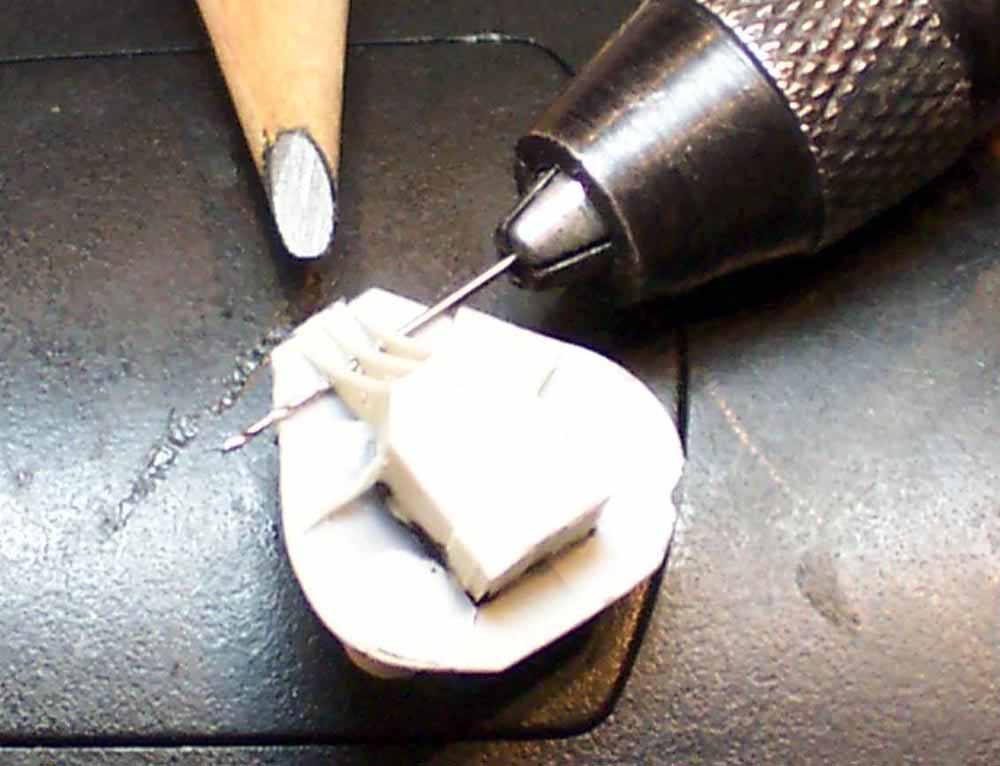 |
||||||||||||||||||||
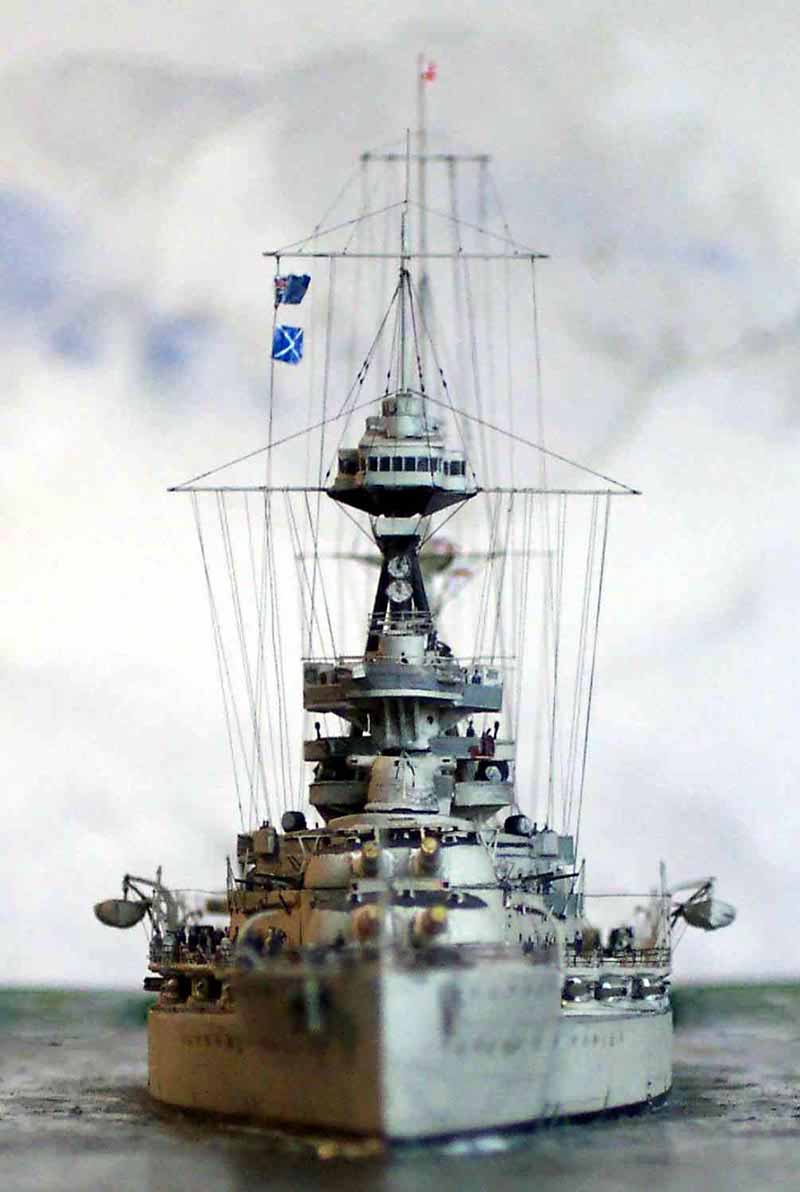
| The most time consuming part was making the tripod mast and aligning all the legs through all the platforms and subsequently adding all the inter level stairways. Drilling the tripod leg apertures through the resin decks was tricky as the decks are wafer-thin and could easily break. In the end I used a dremel type motortool running at incredibly high rpm with a small grinding burr--this virtually eliminated any pressure on the decks and allowed me to make rather larger holes than initially intended these were back filled with white glue once the tripod legs were in place; white glue being self-levelling eased this procedure. | 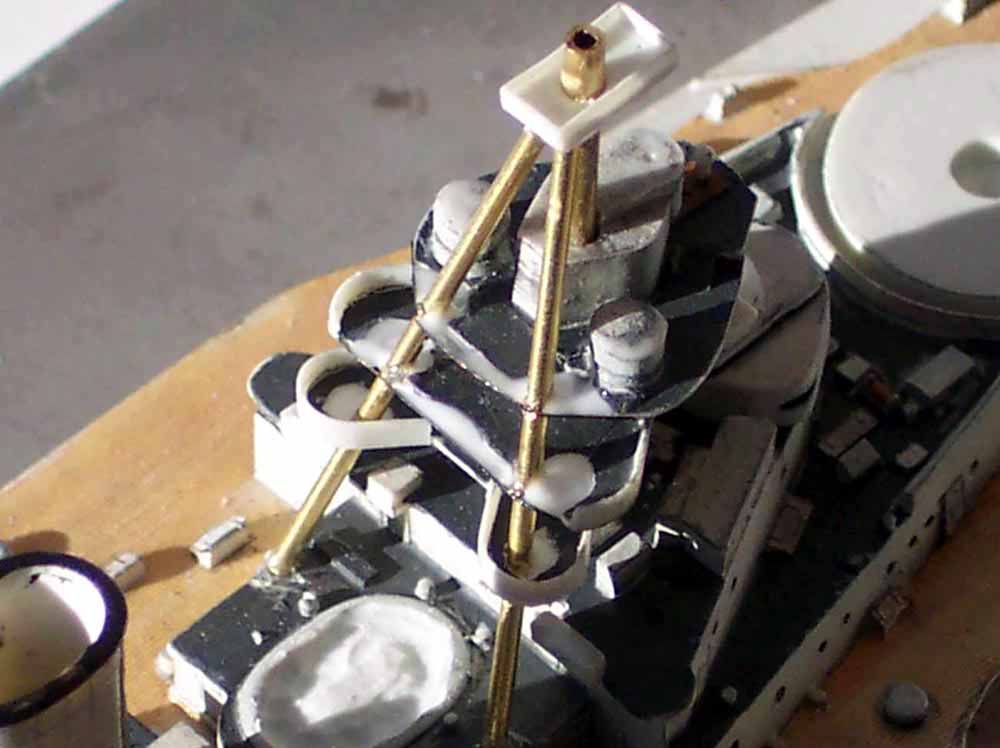 |
||||||||||||||||||||
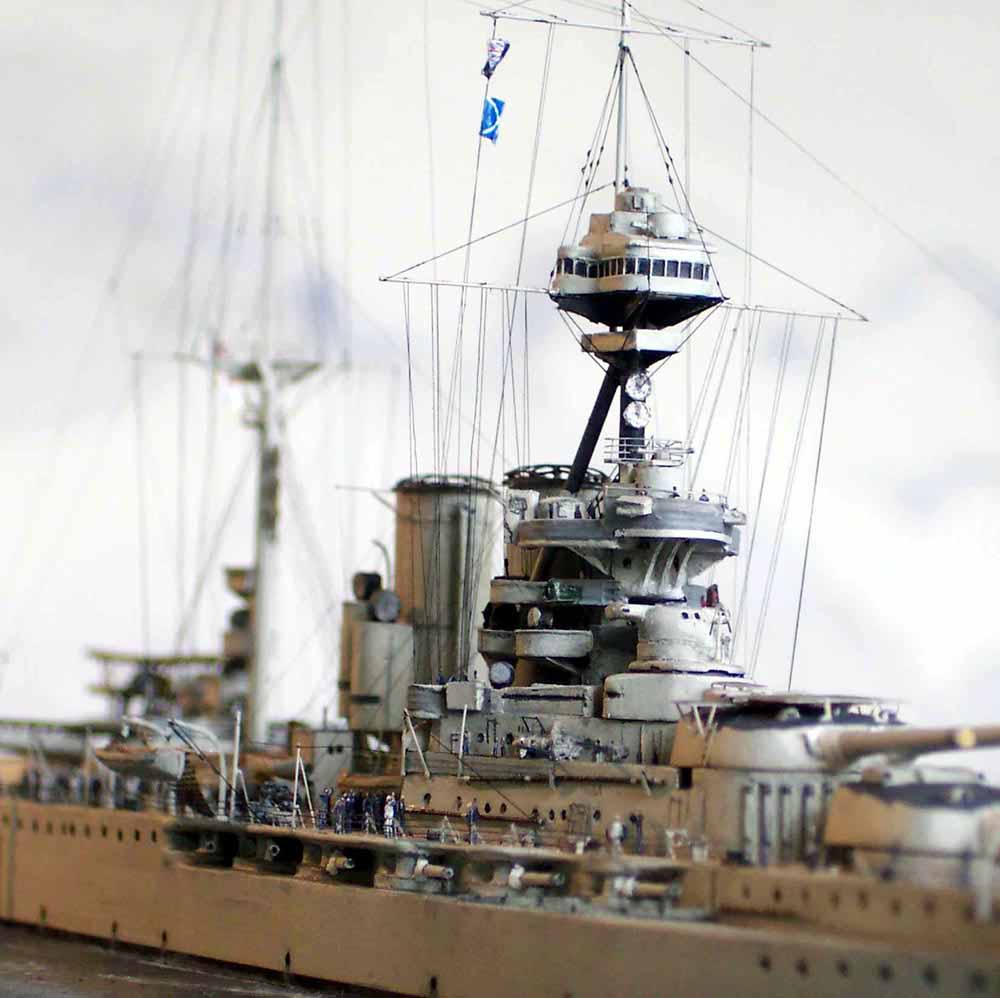
| All the railings around the bridge structures had at the ships timeline being modelled been fitted with canvas dodgers-these were portrayed by pre-painting the railing in hull color, then infilling the gaps with white glue which dries clear and then painting the outside in a slightly darker shade the technique works really well with white or tan dodgers as the original railing color can be seen on the inside... The downside to the fitment of dodgers was that I was unable therefore to be able to use the very fine( Photoetched) splintermatting that she carried in wartime. I am sure they will be utilized in the future on another project! while working on the bridge I added all the triangular gussets I could identify using brass slivers from the waste PE surrounds. | 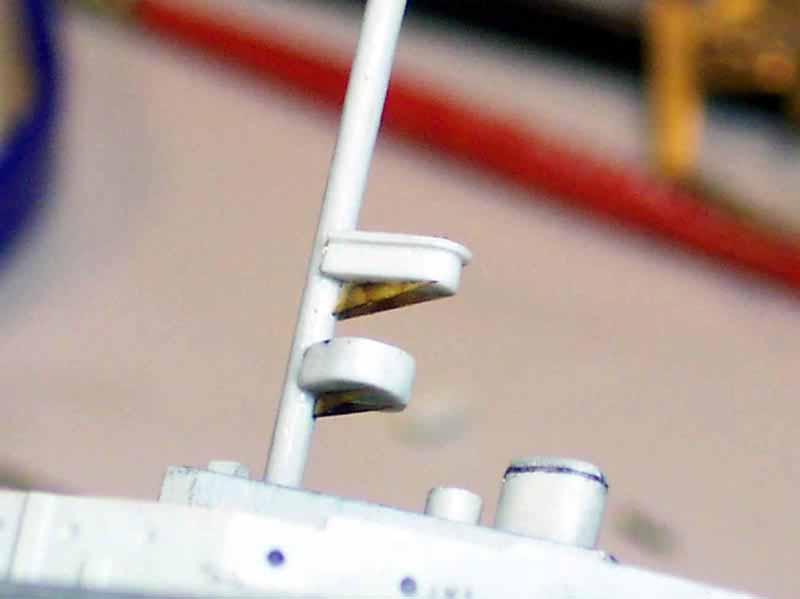 |
||||||||||||||||||||
| the additional searchlight platforms on the bridge were made of brass PE fret waste and given a floor of white glue. | 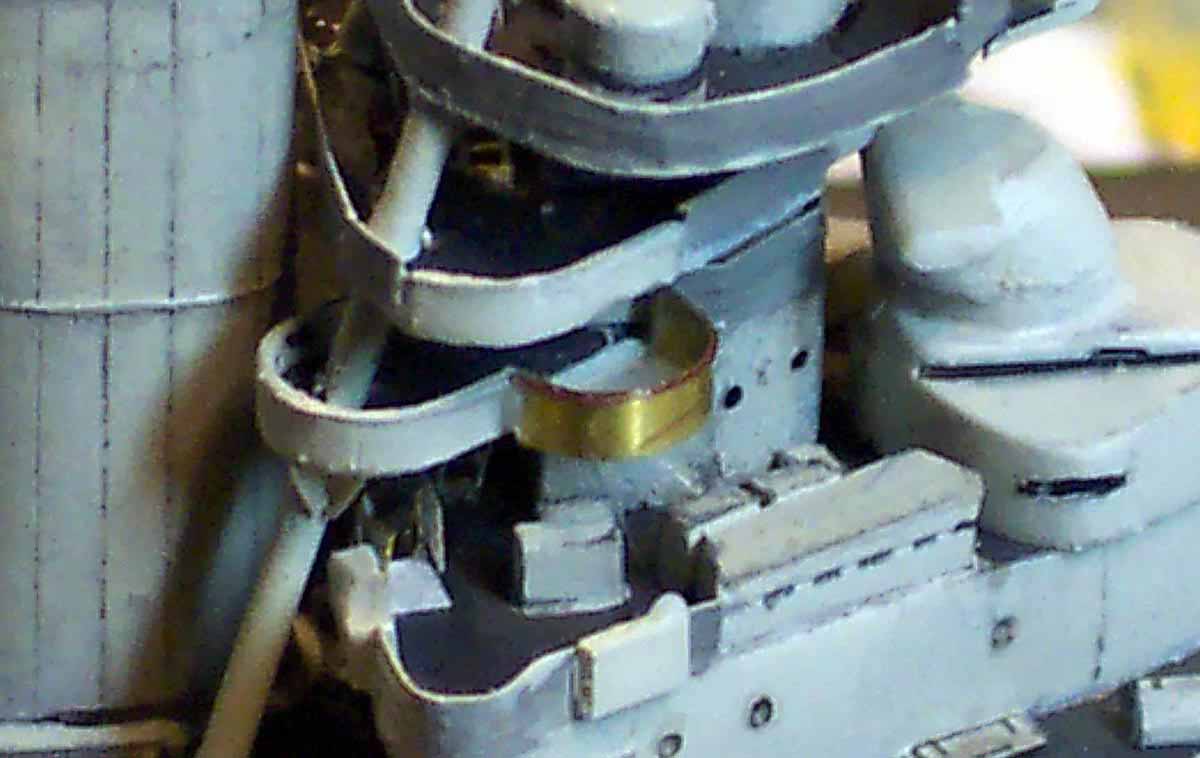 |
||||||||||||||||||||
| Both Photoetched starfish assemblies whilst fiddly give a sharpness not achievable in solid medium although resin starfish are enclosed with the kit | |||||||||||||||||||||
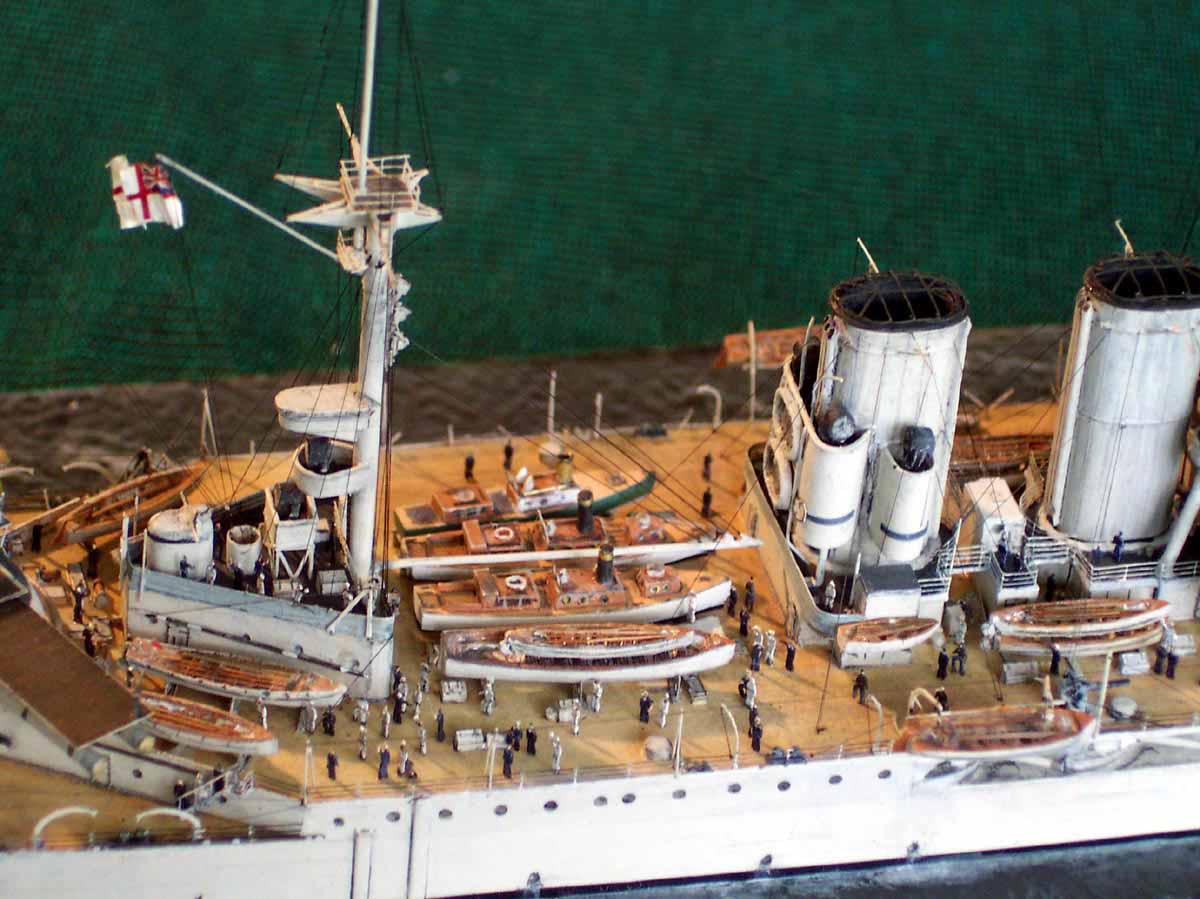
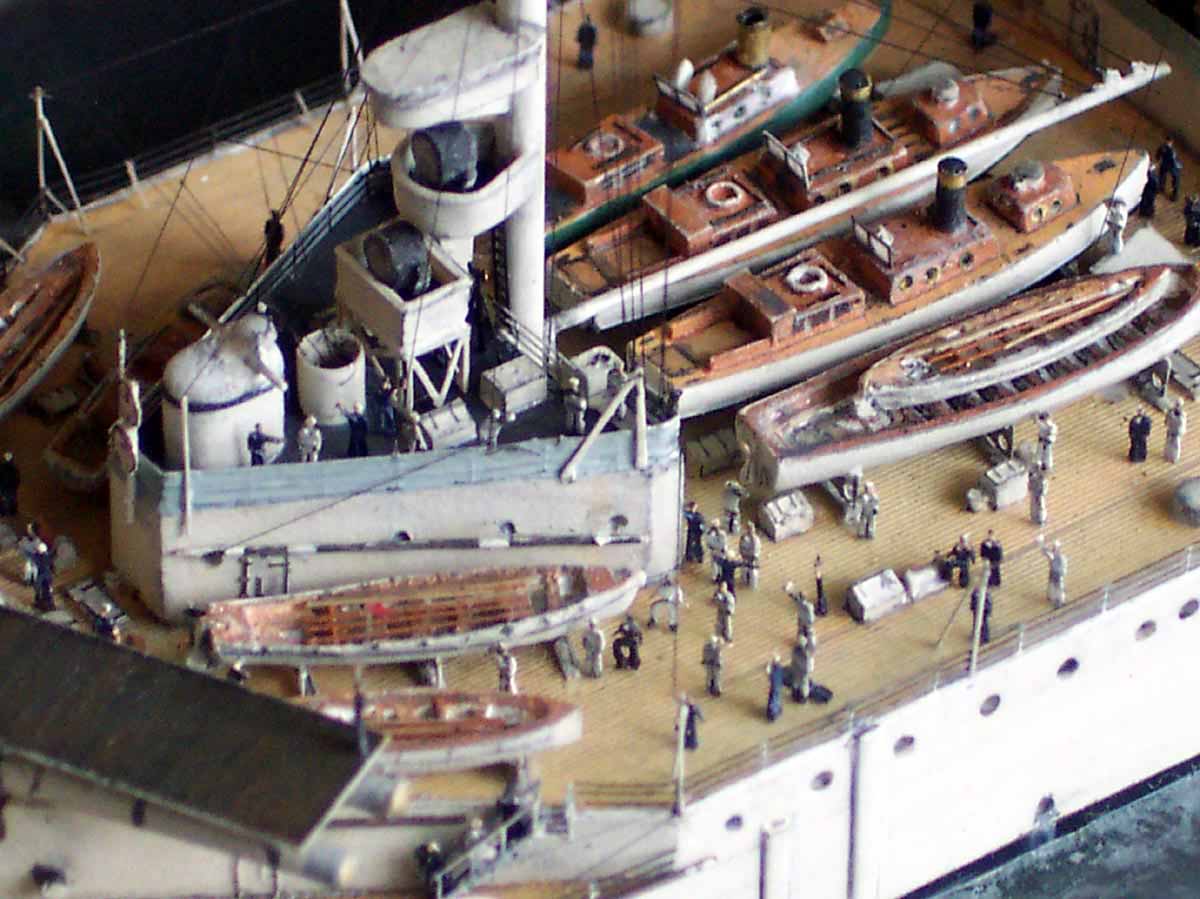
| The remainder of the build proceeded without any problems ships boats are always a tedious part of the procedure for me. I added brass capped funnels, handrails on coachroofs and windscreens for the launches as well as oars made of stretched brown sprue. The seat benches were given the impression of an undercut by carefully shading with pencil. The scrambling nets supplied for the sea boats were in PE- I chose to use some very fine gauze from a cake decoration-coloured with indelible black marker they give a light airy almost invisible look. | |||||||||||||||||||||
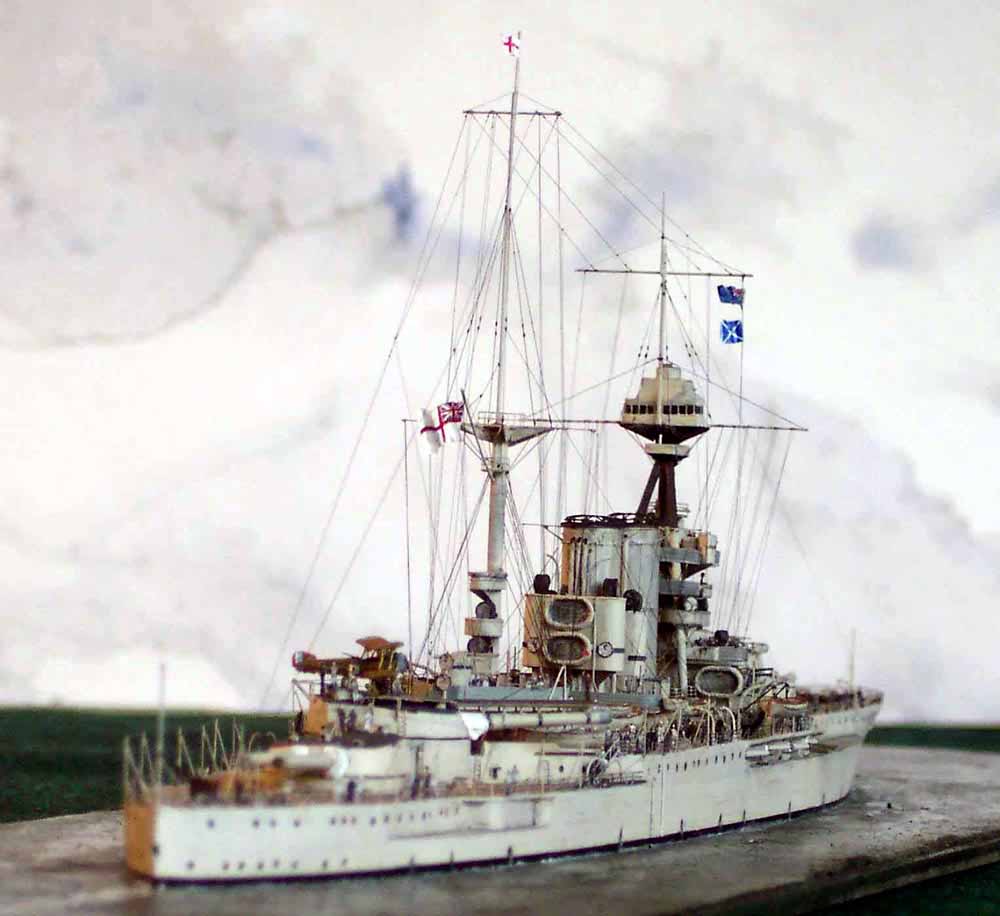
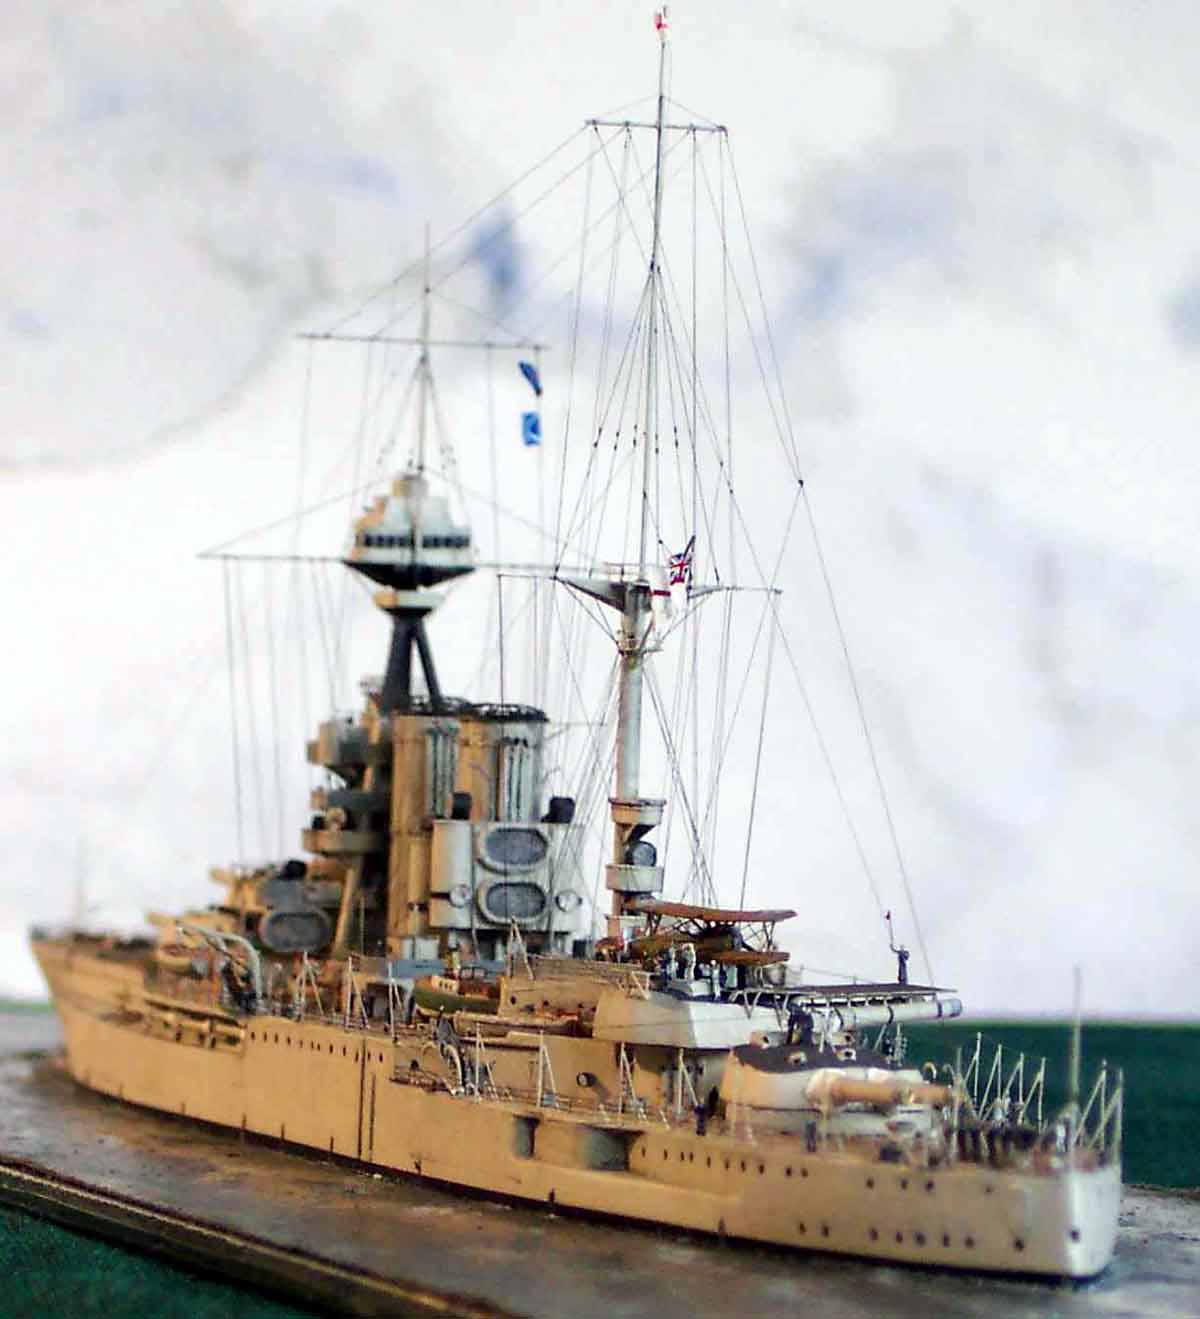
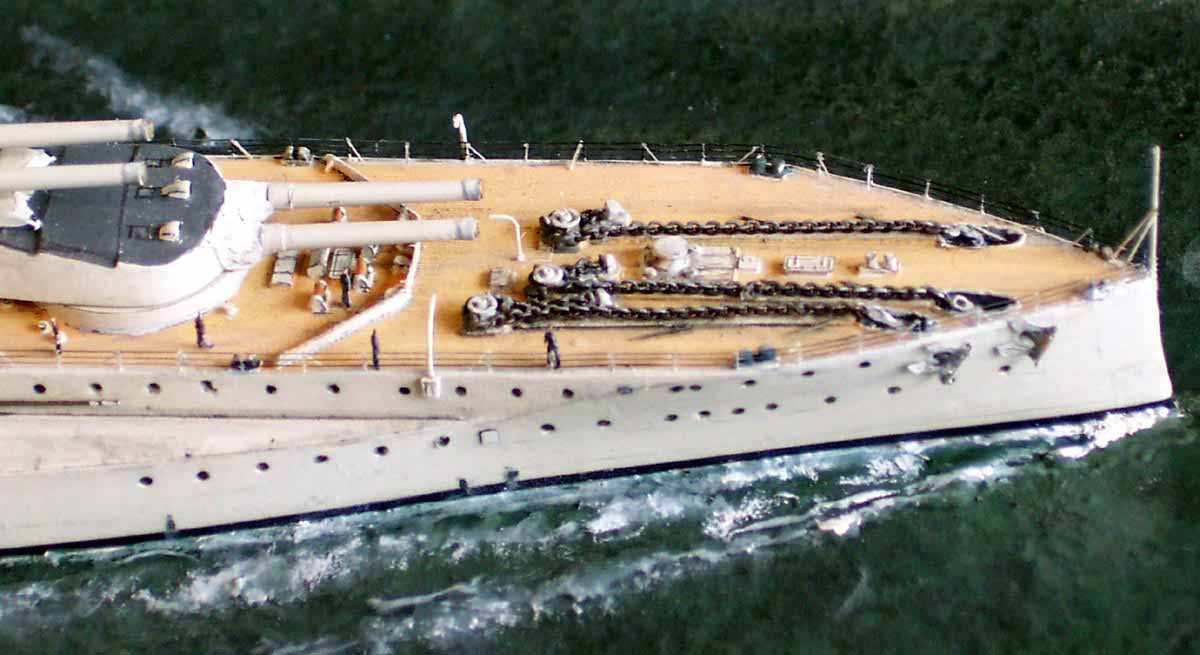
| The PE aircraft launching platforms were a delight, photos show that they were fitted on both turrets B and X in various stages of assembly. I chose to portray the 1 1/2 Strutter about to be launched adding a Sopwith Camel to B turret would have upset the visual balance of the model in my view. I was fortunate in having a Strutter left over from my Furious 1918 build although it would be an easy scratchbuild as aircraft parts such as struts and undercarriage were supplied on the PE fret | 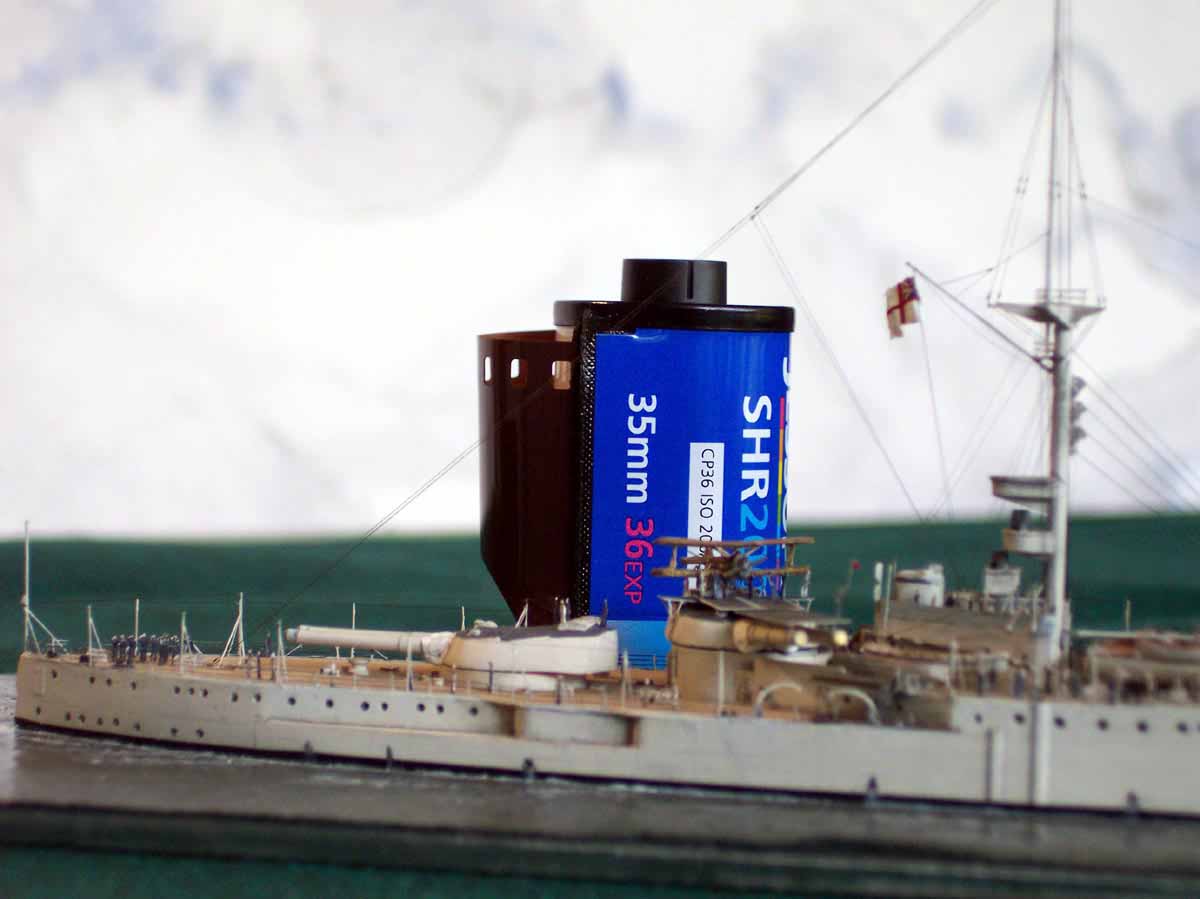 |
||||||||||||||||||||
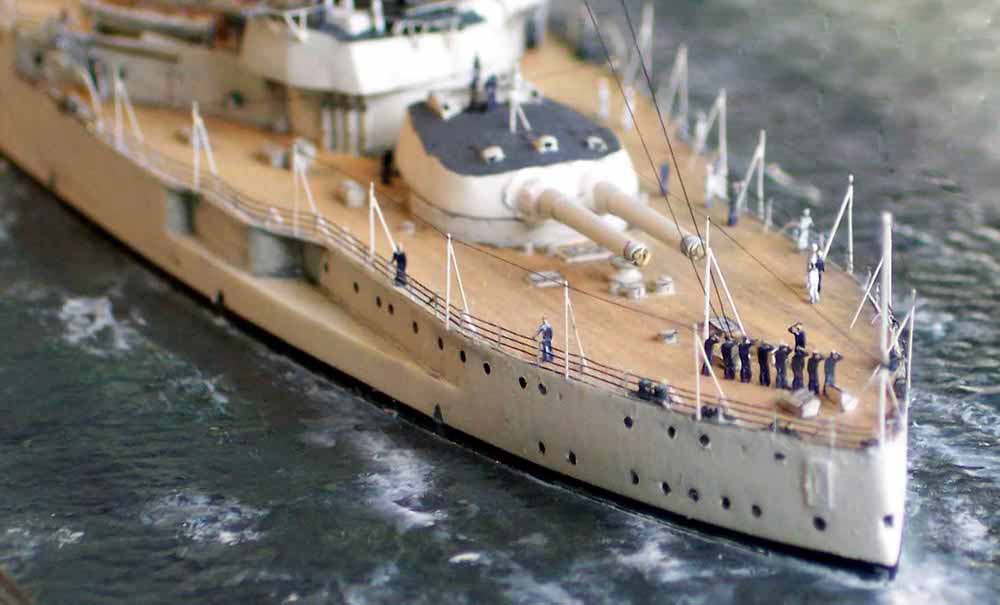
| The main gun barrels were replaced with some very fine
brass offerings from Steve
Nuttall, the secondary guns were the resin kit items with the muzzles
drilled. Blast bags were made using white glue, sighting slits were made
using tiny pieces of black self adhesive matte vinyl tape from RC Cammett
I fitted Tompions to the main barrels using PE circles ( wheels) from the WEM aircraft PE set, these when given a dab of white glue to represent the ships crest and a light black wash to take the brightness off worked quite well. |
|||||||||||||||||||||
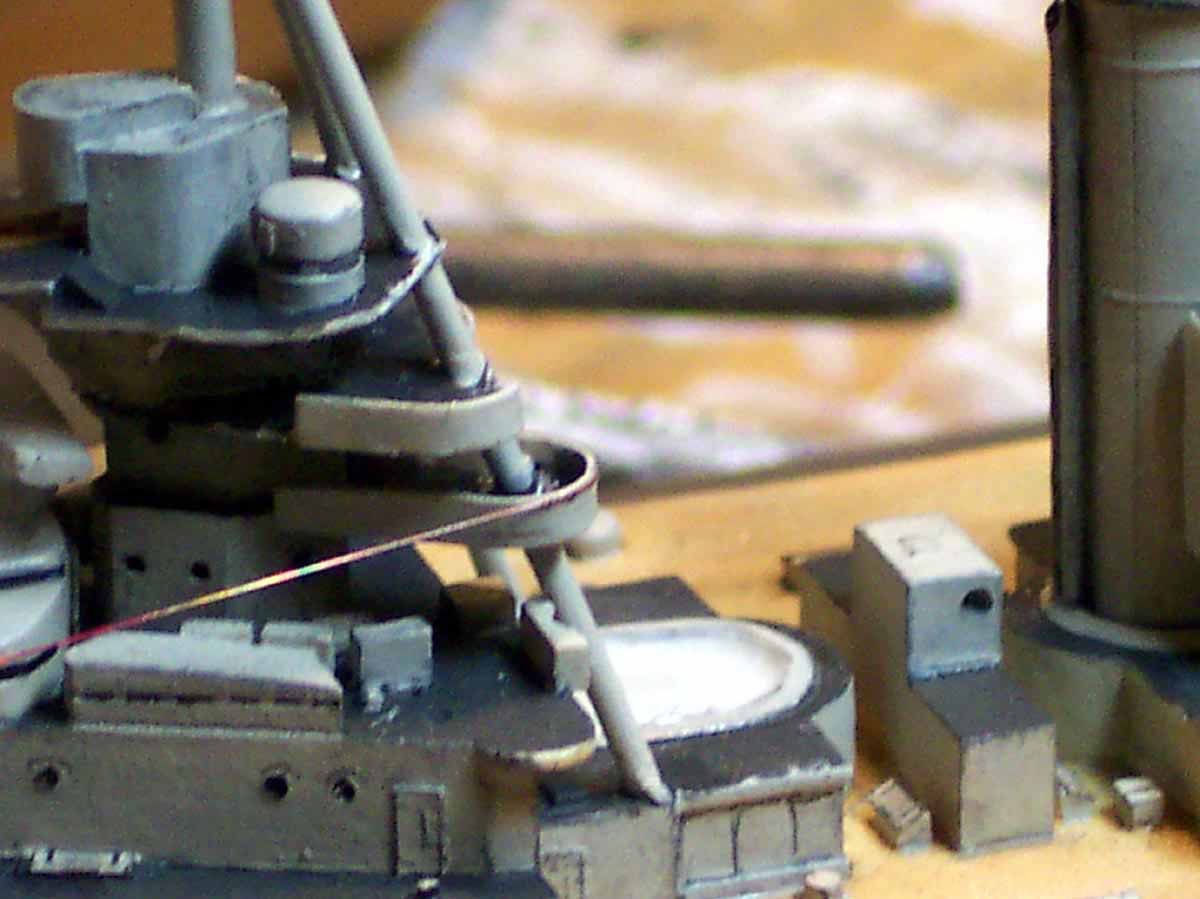
| Aft there is a nice PE foldup supporting framework, I eliminated the lower connecting pieces as they would not be present on the real thing this adds greatly to realism. | 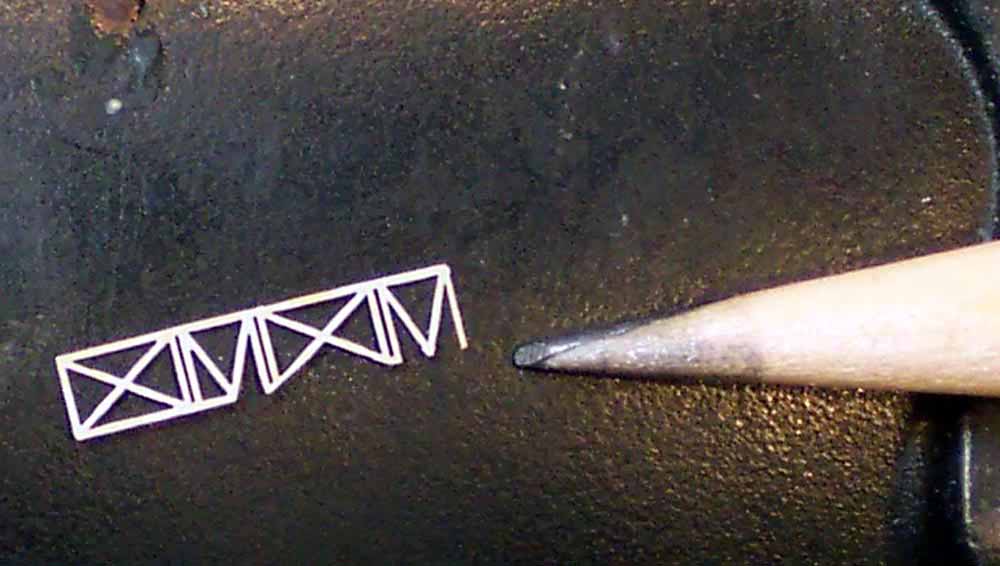 |
||||||||||||||||||||
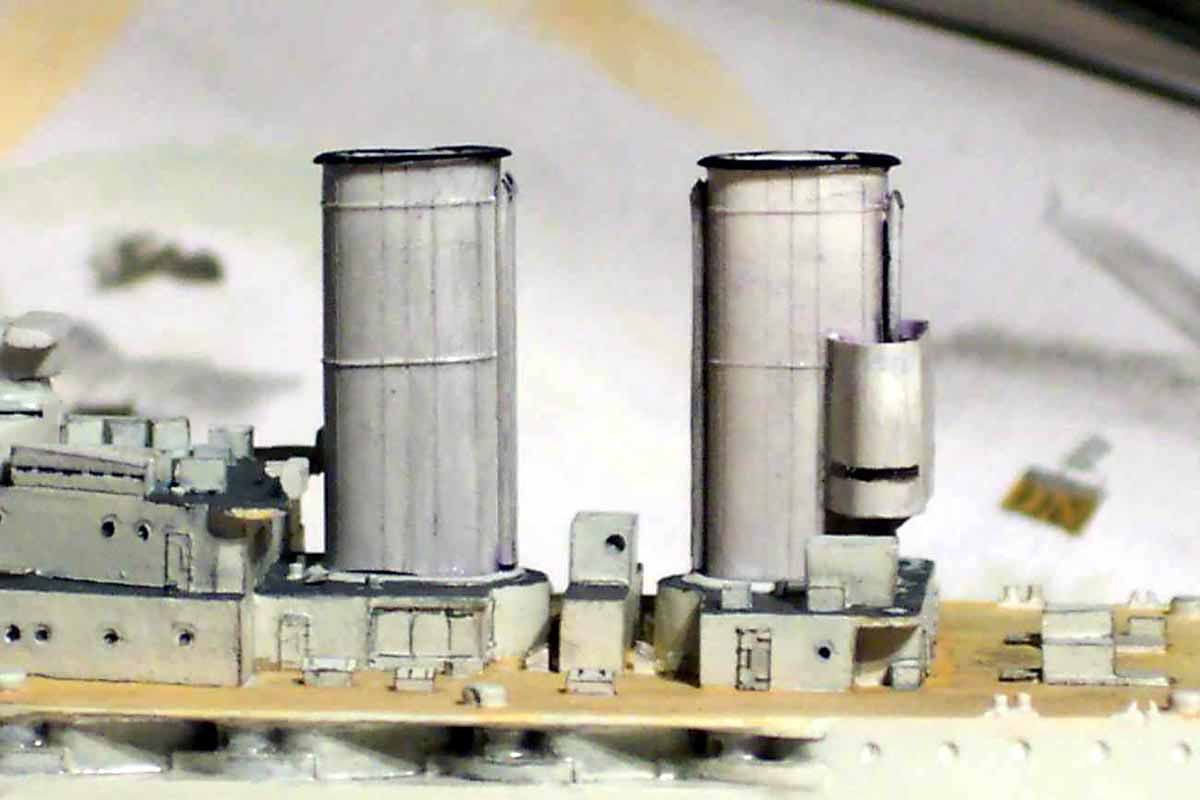
| As is usual I hollowed out the funnels using a motor tool. | 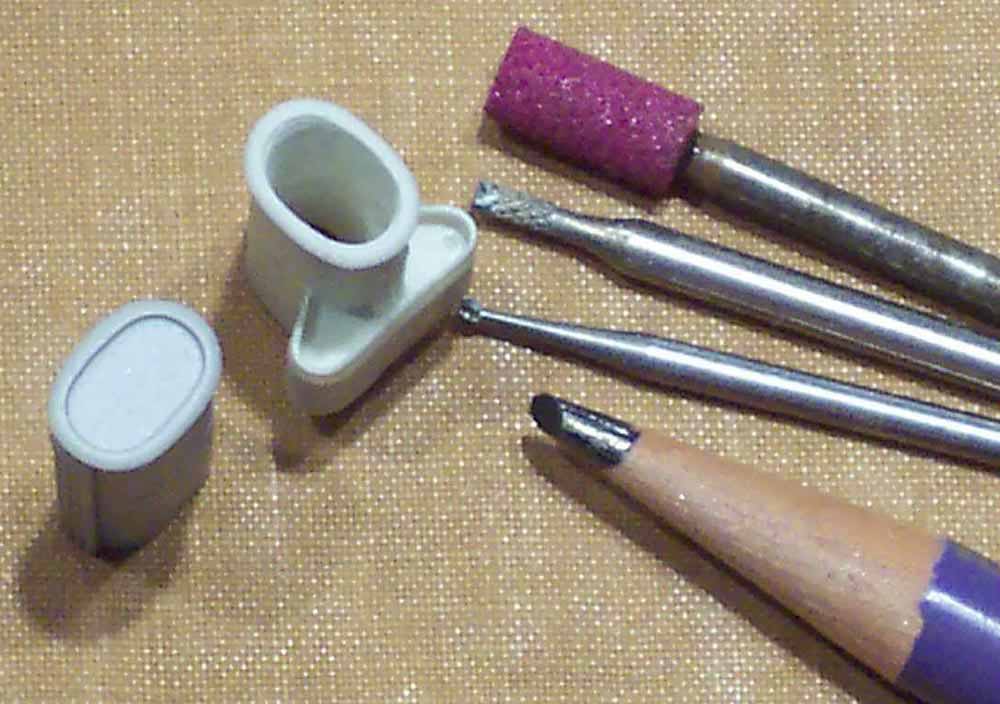 |
||||||||||||||||||||
|
this a messy and a dusty business and fraught with risk of penetrating the funnel sides although this time I had a heart stopping moment of a different kind in my impatience to get things moving I ignored all my own normal procedures and simply ground away without cooling breaks in between the end result being a rather strangely warped trapezoid funnel which resisted all attempts of rectification a panicked e-mail to WEM secured a replacement in the overnight post a cautionary tale of too much heat applied to resin..! |
 |
||||||||||||||||||||
| At the period portrayed she carried additional 4 x AA fwd of the bridge, these were made and installed along with two paravanes and extra pipework below range finder. The Coffepot searchlight towers on the aft funnel had wind deflector edges added, drain tubes and pipework as well as the davits for lowering the searchlight. The excellent PE range clocks were painted and then given a gentle smudged with a finger covered in fine ground pencil tip as well as all hatches and doors this brings out the relief etch and simulates the shadows cast on the real thing. | 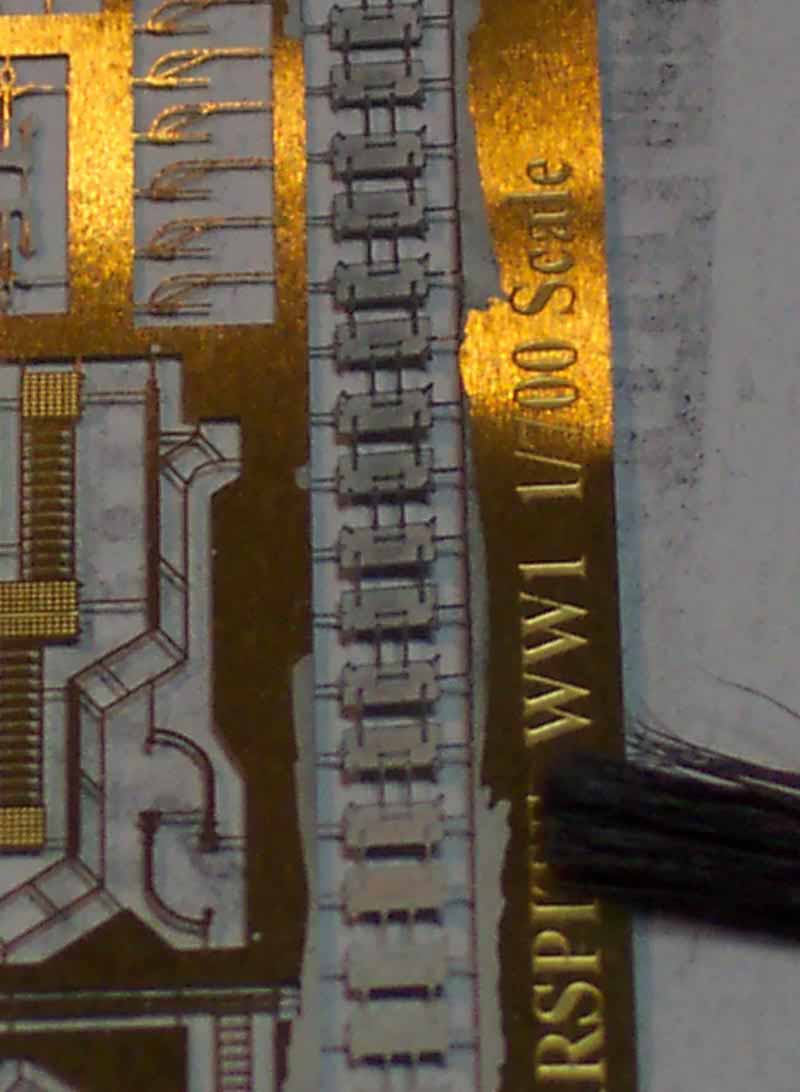 |
||||||||||||||||||||
| Plating runs are sometimes seen in some photos of the ship, I attempted to represent these with very lightly by running a pencil along some masking tape and the erasing most of the line. I | 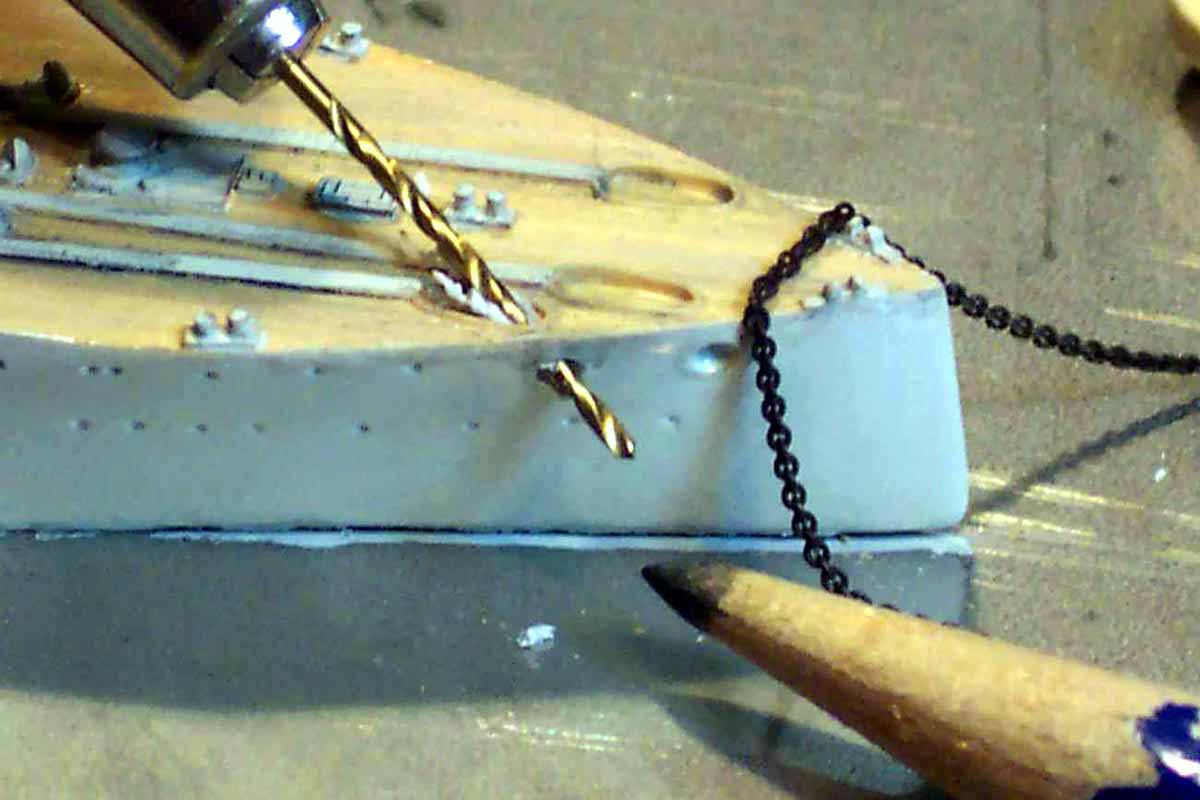 |
||||||||||||||||||||
| On the foredeck I made new capstans with surface detail from Model Railway brass washout plugs and fitted chains to connect with the anchor heads via the drilled hawsepipes, the main cables were then fitted with check chains made of stretched sprue. | 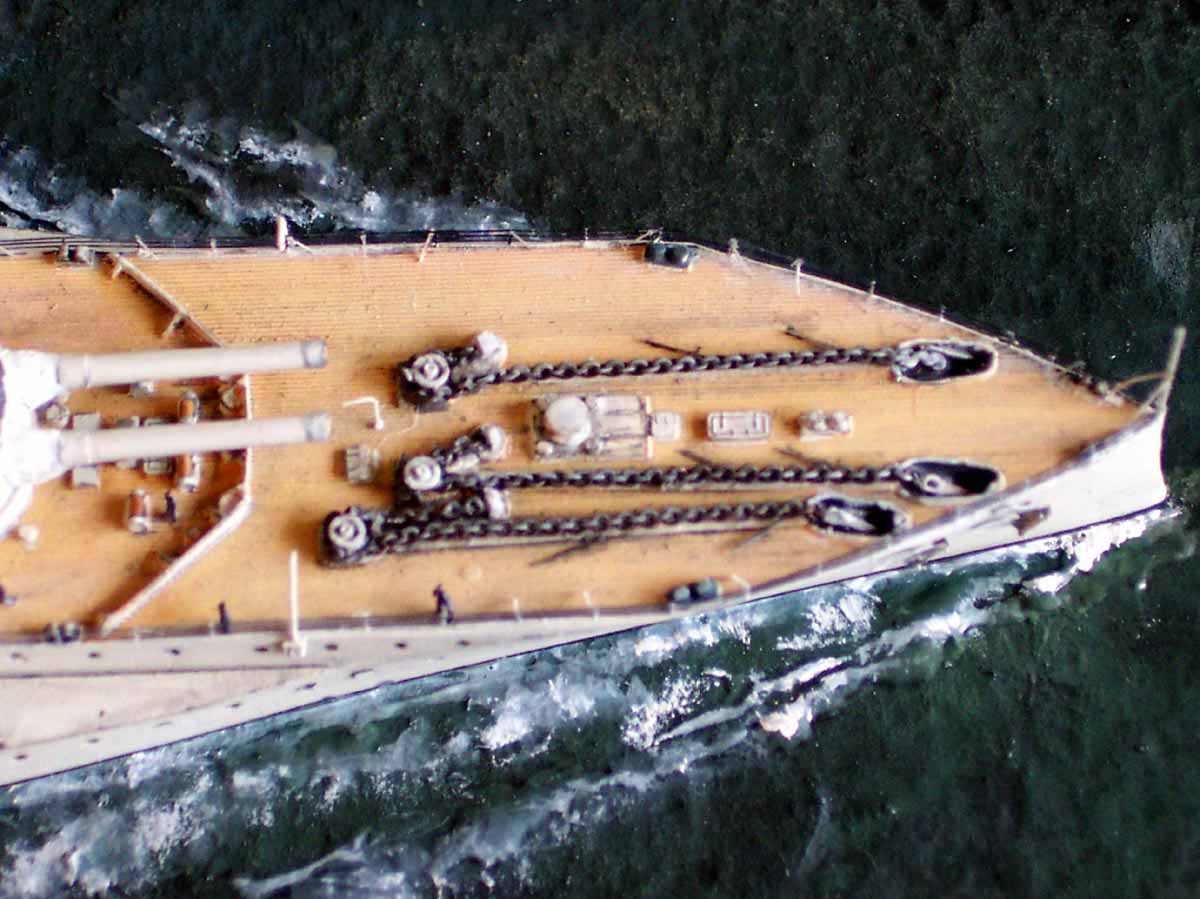 |
||||||||||||||||||||
 |
|||||||||||||||||||||
Additional detail added were the semaphore arms ahead of
the range finder as well as various small struts and poles which along
with the awning stanchions were all made of brass 1/350 fine handrail longitudinals
painted and cut. The railings were GMM superfine Gold plus, they were colored
using an indelible marker pen to avoid thickness build up, dry brushed
from above only and the stanchions individually painted. This gives in
my opinion a fair impression of stanchions with cables, as the cables are
almost always much darker than the stanchions. The stanchion supports inboard
which are at various angles were made of light gray stretched sprue
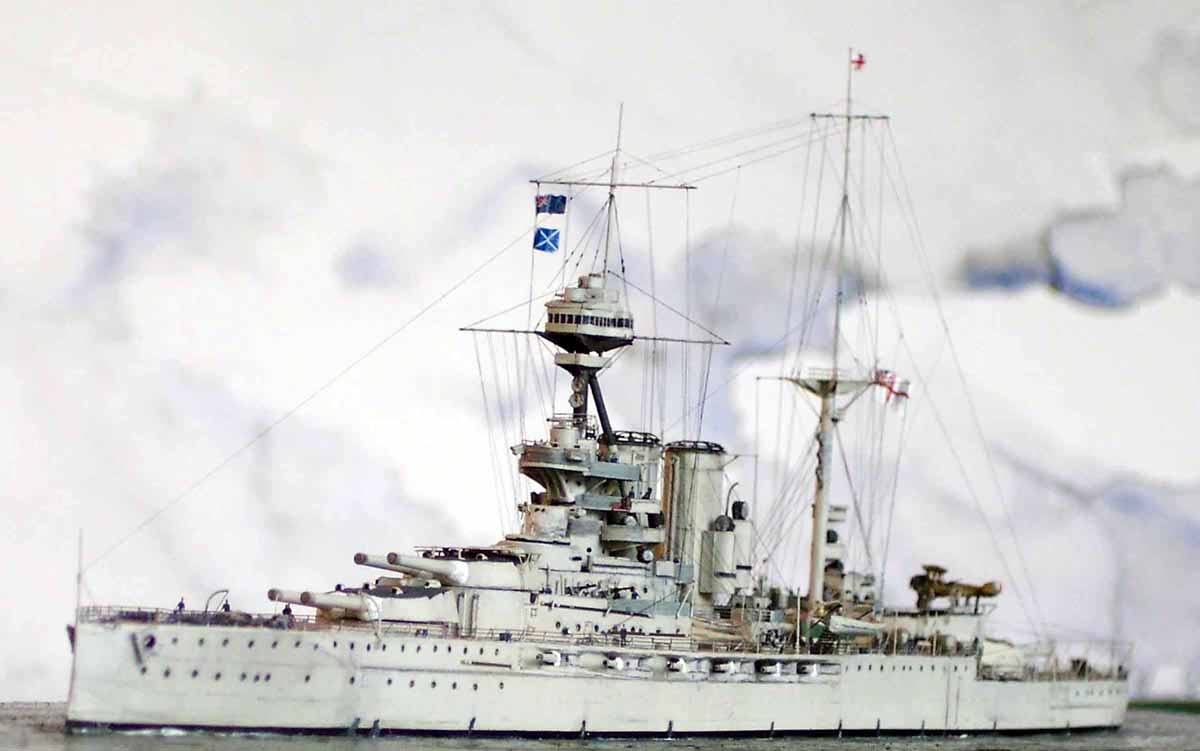
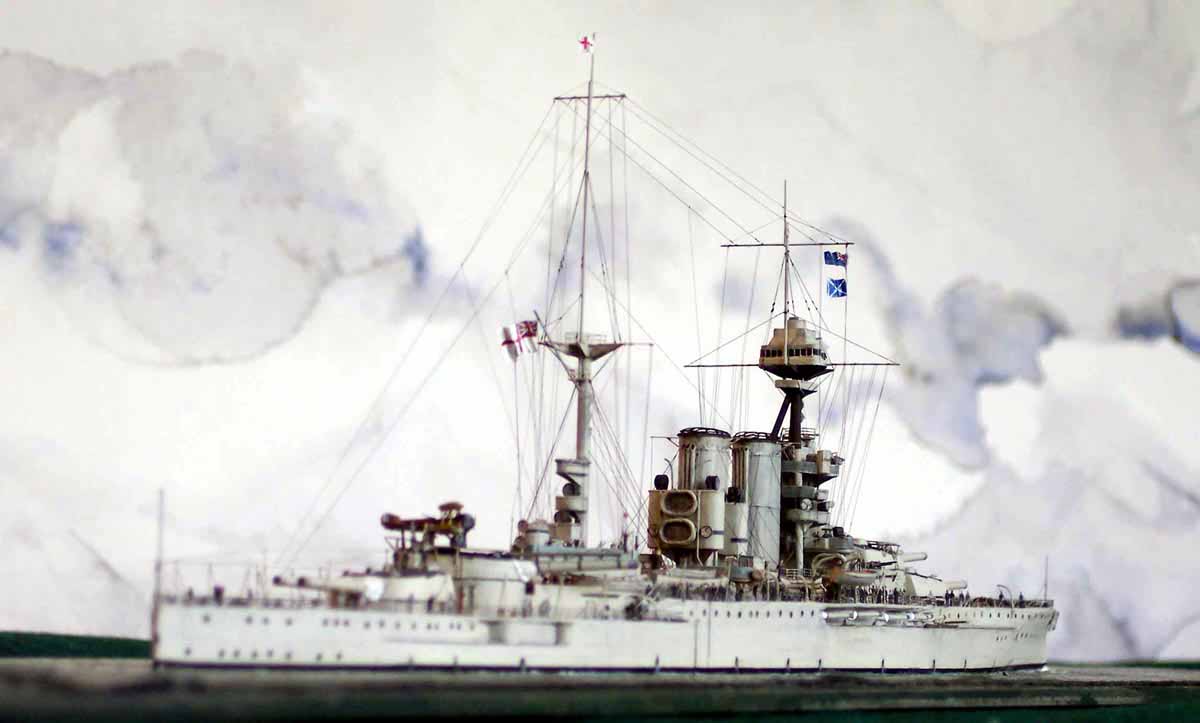
The ship was mounted as always onto a stainless steel plate covered in watercolor paper which represents the calm sea, screwed down throughout from underneath to prevent the ships hull warping later in life. The PE crew was from GMM, Flags from my demising stocks of Duane Fowlers Dunagain decals...
All rigging was stretched sprue, the attachment and joining of which was carried out using Revell professional liquid cement, this being not too runny or solid and then tautened using the smoke from an incense stick as the (very controllable) heat source
All in all a truly enjoyable building experience, no problems were encountered and no major structures had to be cut away or rebuilt. The basic starting point is very good indeed and with only minor embellishments builds into a fine finished item virtually from the box; a rare thing indeed for resin ship models My model I feel does reasonable justice to the fine vessel that the real ship was. I am indebted to Robin Bursell who tirelessly scanned numerous photos from books long out of print to furnish me with as much aircraft launching ramp detail as possible. |
|||||||||||||||||||||
| The primary books consulted were:
PJ Cambell The Queen Elizabeth class Raven /Roberts British battleships
of WW2
|
|||||||||||||||||||||
![]()
© ModelWarships.com