| HISTORY |
|
|
HMS Hood needs no
introduction. If not the most famous warship of the past 100+ years,
Hood is probably one of the top 10 best-known warships of all time and
very likely the most famous British warship of all time, aside from HMS Victory.
According to Wikipedia,
"HMS Hood (pennant number 51) was a battlecruiser of the Royal Navy. Hood was
the first of the planned four Admiral-class battlecruisers to be built during
World War I. Already under construction when the Battle of Jutland occurred in
mid-1916, that battle revealed serious flaws in her design despite drastic
revisions before she was completed four years later. For this reason, she was
the only ship of her class to be completed, as the Admiralty decided it would be
better to start with a clean design on succeeding battlecruisers, leading to the
never-built G-3 Class. Despite the appearance of newer and more modern ships,
Hood remained the largest warship in the world for 20 years after her
commissioning, and her prestige was reflected in her nickname, 'The Mighty Hood'."
Regrettably, Hood,
like other ill-fated ships, such as the USS Arizona and USS
Indianapolis, is better known for her tragic demise, more than her years of
faithful and illustrious service.
For more on Hood, visit her Wikipedia page
here, which is where
this information was pulled from. You can also visit the HMS Hood
Association webpage here.
|
|
|
|
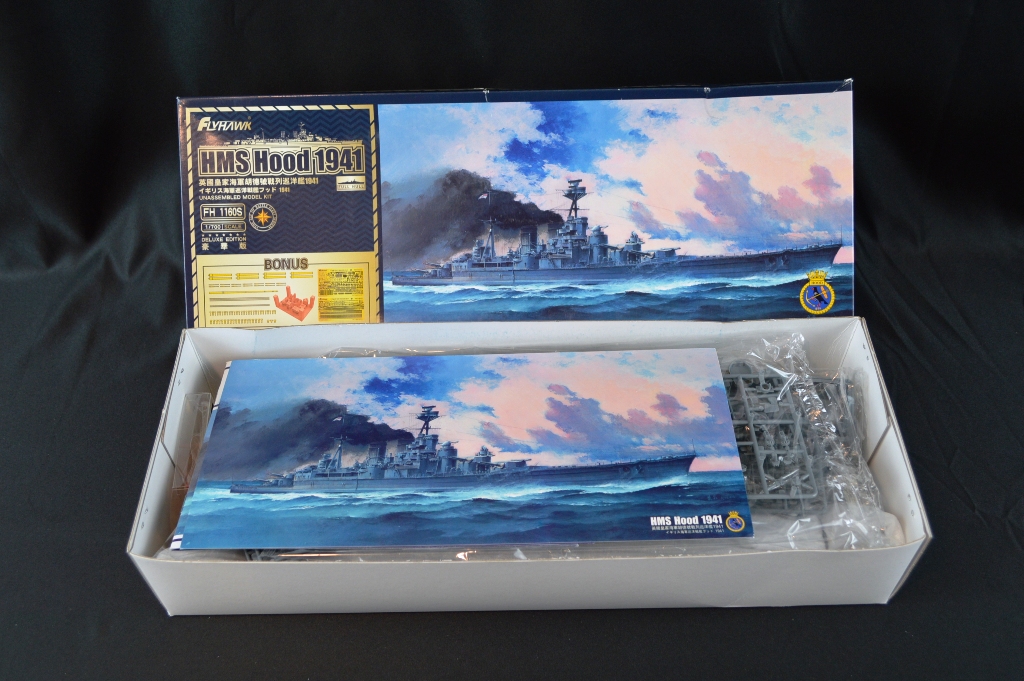
The Flyhawk Hood
Flyhawk’s 1/700 HMS Hood comes in a black
cardboard box with artwork showing Hood underway, main battery turrets
and rangefinders trained to starboard. Inside the box is the usual copy of the box
art, which is suitable for framing. Being a "Bonus" edition, along with the
injection molded parts, which are all wrapped in cellophane bags, you'll find a flat clear envelope with photo-etch and
a small plastic box with both brass and 3D printed parts. Rounding
things out are the kit instructions and a metal W/L
plate. |
|
|
| THE HULL |
|
|
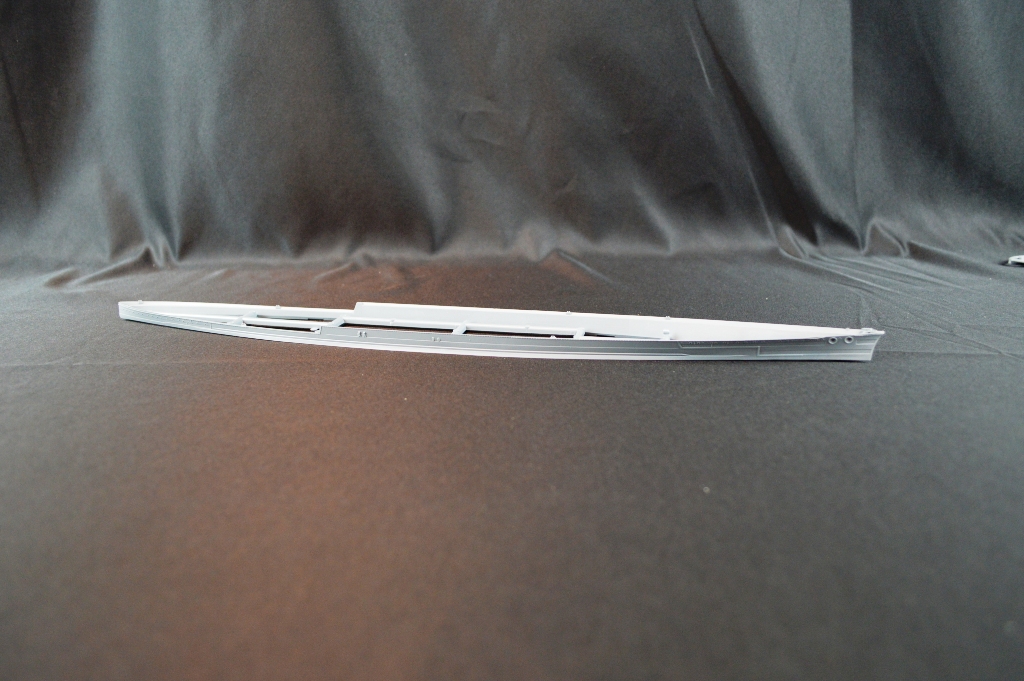
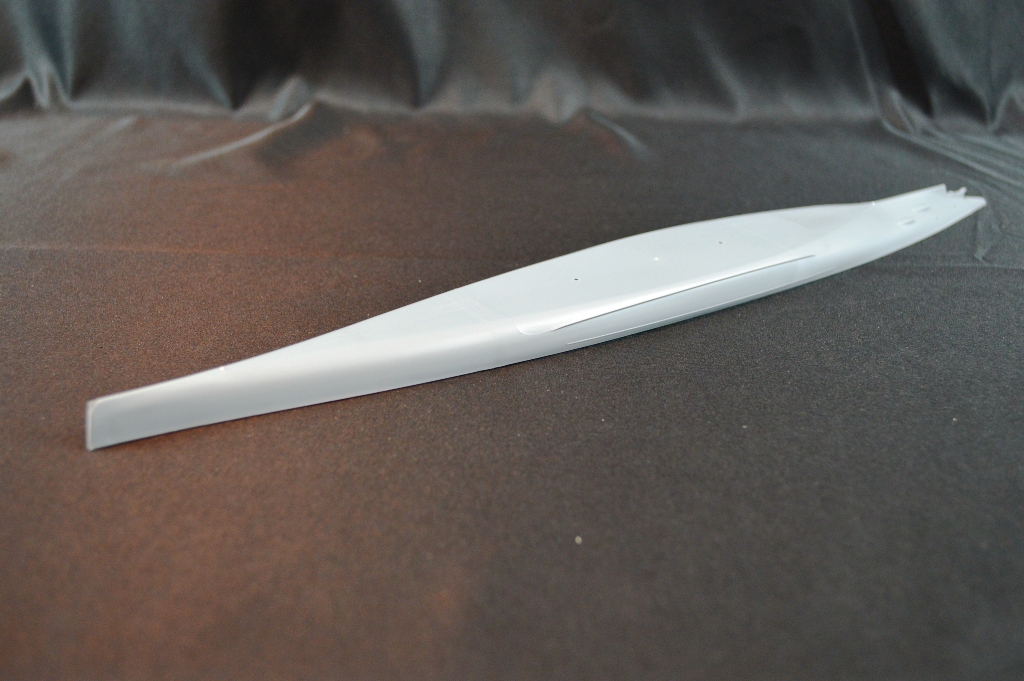
Included in the kit are a and upper and lower hull,
along with a waterline plate. The hull scales out pretty much perfectly in
length
and beam to the real ship. The upper hull has portholes with eyebrows
over them, chocks integral to the hull, hull plating and a lovely looking
degaussing cable. There were a few small spots of flash by the
chocks that should be easy to clean up.
The lower hull has some mold lines on it. If you
are building the full hull version, these will need to be sanded smooth.
There are also two pre-drilled holes in the bottom of the lower hull for the kit
supplied display stand.
The waterline plate and waterline weight are typical
700th scale fare.
|
|
|
|
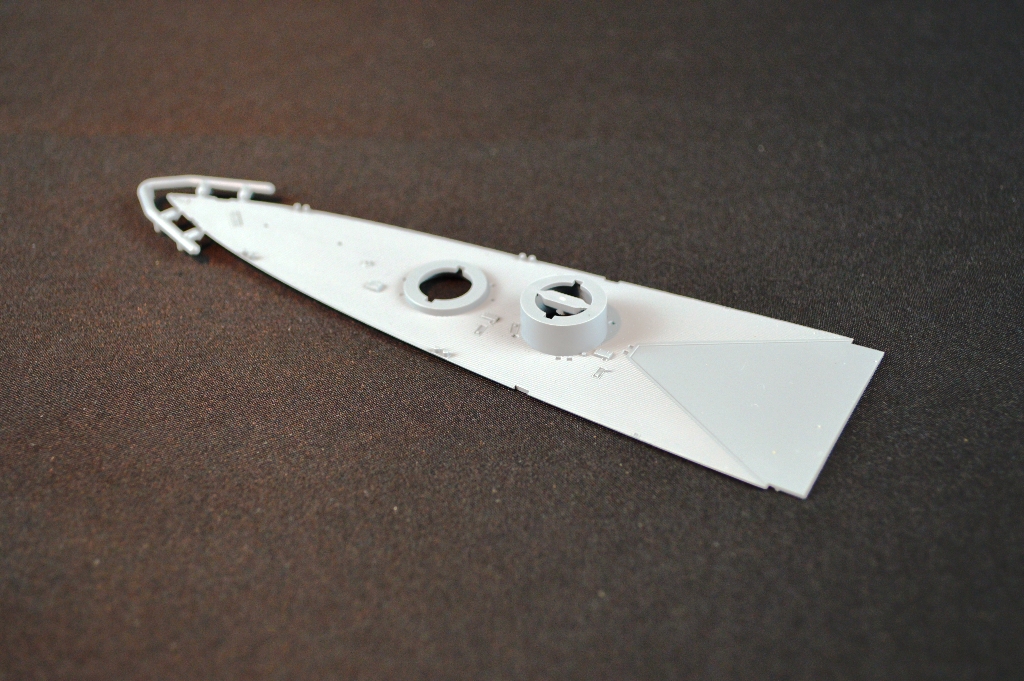
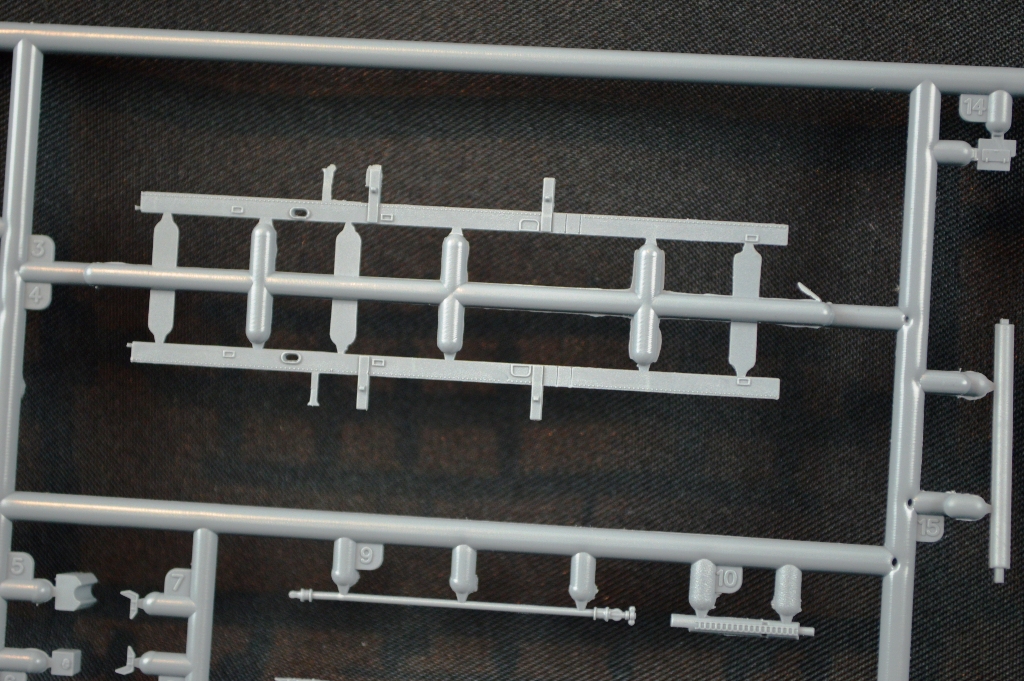
DECKS |
|
There are three parts that make up the decks.
Part A1 is the forward or "main" part of the deck and part B1 is the quarterdeck.
Part A1 has very nice planking detail, with butt ends and a lot of molded on
detail. There are hatches, cable reels, bollards, anchor chafing plates
and anchor chain. One of the hawse pipes is covered with a molded on
cover, which looks pretty good for being done in plastic.
The detail on part B1 is similar - planking with butt ends, hatches and bollards.
The planking is especially nice on both parts. Once painted, a wash will
really bring out
all that detail.
The third section of the deck is the boat
deck - part J1. It is one of the most detailed part of the entire model.
There is a mix of planking and non-slip (corticene/semtex) decks, the corticene
sections having raised fastening strips molded on. There are also
skylights and molded on boat cradles included The splinter shields
have nice bracing molded into the insides for the shields, while the ships name
is actually molded included - it's done in raised letters - on the bulkhead of
the Admiral's dining cabin. That's a really nice touch. I
think I've only seen this on a resin kit previous to this. Finally, there
is ribbing detail on the underside of the boat deck, to simulate the deck
bracing on the real ship. |
|
|
| SUPERSTRUCTURE PARTS |
|
|
Like most of their kits, Flyhawk has a unique way having "sprues" that
consist of just one or two parts. In no particular order, these parts are
(names courtesy of AOTS Hood):
P1 - Admiral's Signal Platform, which also forms the
base of the conning tower and forward superstructure
F1 - Base of the aft funnel
K1 - Conning Tower Platform
L - Fore bridge and after superstructure
O1 - Small structure that fits in right behind part F1
Detail is very good all the way around. Lots of
nicely done portholes, W/T doors, vents, cable reels and molded on vertical
ladders that look pretty good. P1 has the same decking detail as the
non-planked areas of the boat deck. Part K1 has a nice combing on the top
of the splinter shield, while part L1 - the fore bridge - has well defined
recessed windows in the bridge face. What's really impressive
are the molded on screens on the sides of part F1, the base of the aft funnel.
|
|
|
|
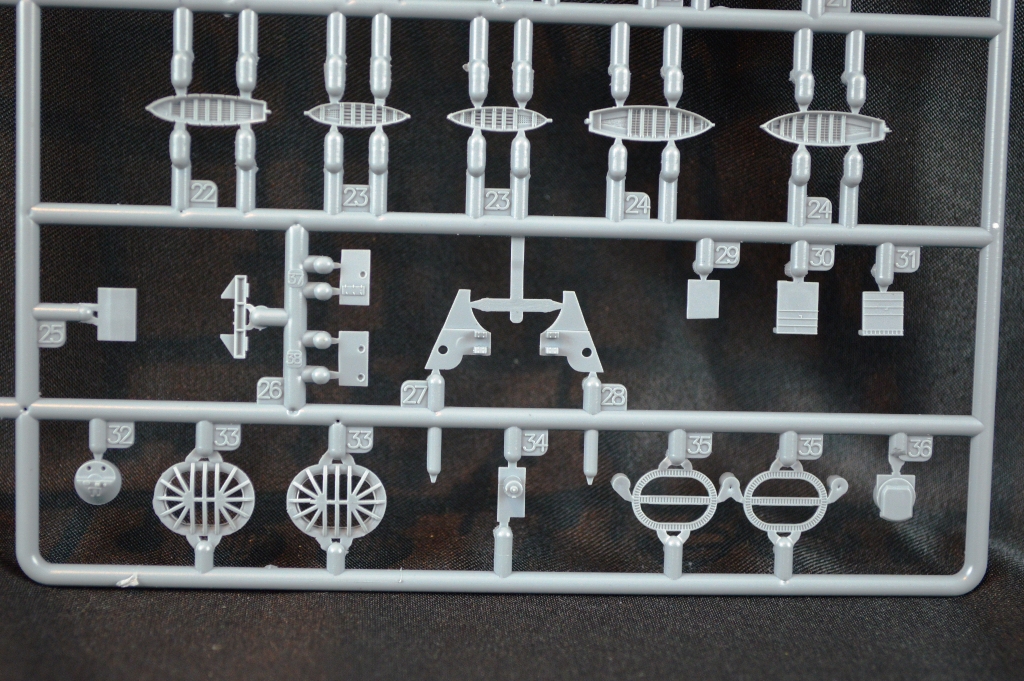
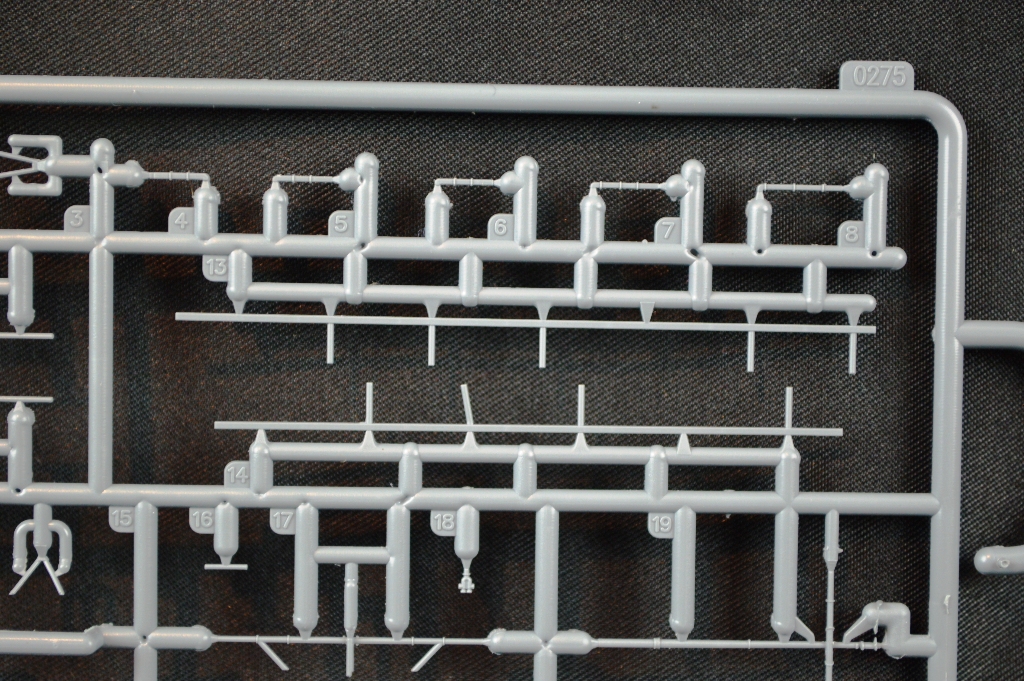
OTHER SPRUES |
|
| The rest of the sprues contain
the balance of the kit parts, and/or generic RN parts, like guns, searchlights, rafts, boats,
etc. |
|
| SPRUE G |
|
|
Here you’ll find
the two prominent funnels, with impressive riveting detail on each.
|
|
|
| SPRUE H |
|
|
This sprue has
two small deckhouses, which
sit on the Admiral's signal platform. Like part F1, they have impressive
screens molded onto each part. |
|
|
| SPRUE I |
|
|
Some ships boats are on this sprue. |
|
|
|
SPRUE M |
|
|
This small sprue contains the forward funnel base and
the conning tower. The funnel base has more of the nicely done
molded on screens, while the conning tower has well defined vision slots. |
|
|
| SPRUE N |
|
|
Two more tiny little deckhouses. One is part of
the forward superstructure, the other sits on the boat deck between the forward
superstructure and forward funnel. |
|
|
| SPRUE Q |
|
|
On this sprue, one of the two largest in the kit,
you'll find a myriad of parts: injection molded starfish, rudder, various
platforms, the lower "skirts" of the funnels, funnel caps, more boats, the
plastic versions of the walkways inside the funnels and a breakwater. |
|
|
| SPRUE R |
|
|
The second of two large sprues, this one has the turrets
and turrets bases, barrels (with blast bags), additional platforms and a
selection of bulkheads that go underneath the boat deck. |
|
|
| SPRUE T (X2) |
|
|
There are pom-poms,
directors, davits and injection molded inclined ladders (sans hand rails) here.
|
|
|
| SPRUE U (X2) |
|
|
Miscellaneous parts, including winches, vents, cable reels
and lockers. The detail on the cable reels is particularly nice. |
|
|
| SPRUE V (X2) |
|
|
Props, searchlight and what
appear to be ready ammo boxes. The ready ammo boxes has nice molded on
detail. |
|
|
| SPRUE W (X2) |
|
|
Funnel piping, davits, and
boat booms. |
|
|
| SPRUE X |
|
|
Anchors, struts for the
main mast, davits and vents. |
|
|
| SPRUE Y |
|
|
Struts and shafts, more vents, a breakwater and the legs
for the mainmast. |
|
|
| SPRUE Z |
|
|
Plastic spars and yards for
the masts. These look very delicate and I suspect you'll need to be
very careful removing these parts from the sprue. |
|
|
| SPRUE
GB01 (x2) |
| This is the first of the common
sprues for RN kits. It has a 4 barreled pom-pom, .50 quad AA gun and some
smaller AA weapons. Petite with nice details. |
|
| SPRUE
GB02 |
| This has searchlights and signal
lamps. Tiny and really nicely molded. |
|
| SPRUE
GB03 |
| Paravanes and winches. |
|
| SPRUE
GB04 |
| Bridge equipment - looks like optical
equipment. All nicely
molded and impossibly small. |
|
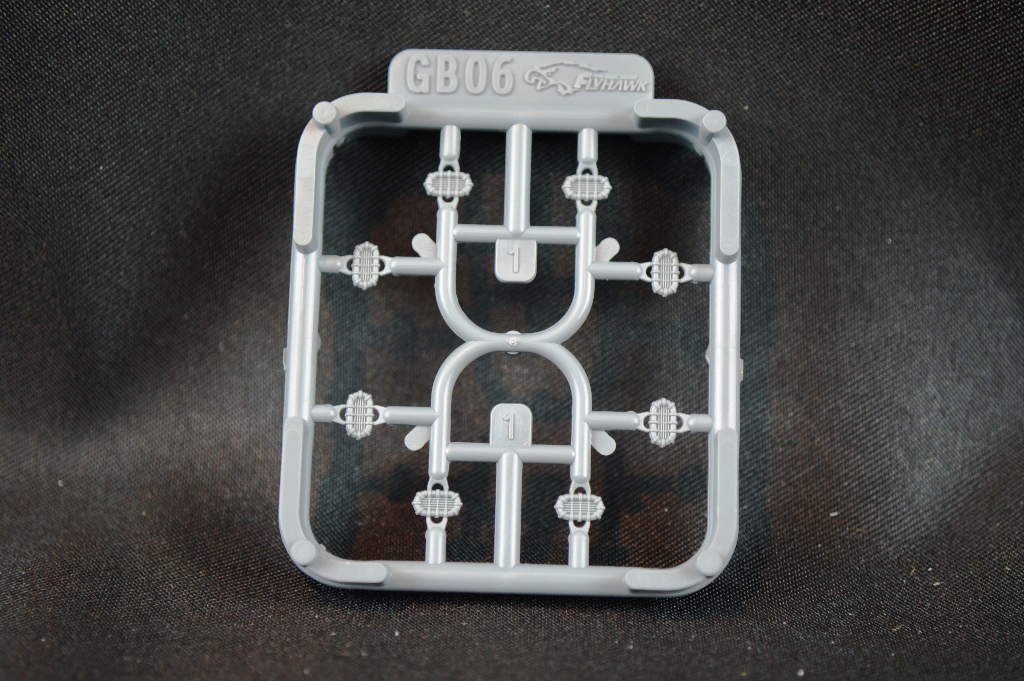
| SPRUE
GB06 (x2) |
| The carley floats, with lots of molded on detail, including
what looks like straps to hold them in place. |
|
| SPRUE
GB24 |
| This sprue has boats and launches
on it. Terrific details on the boats, including planked
decks. |
|
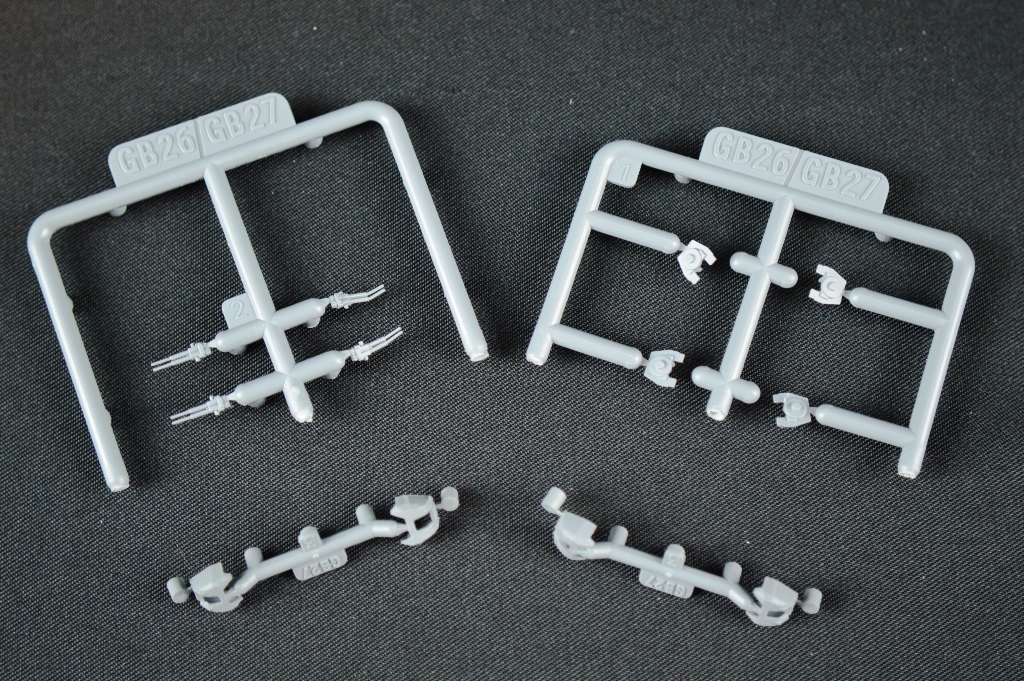
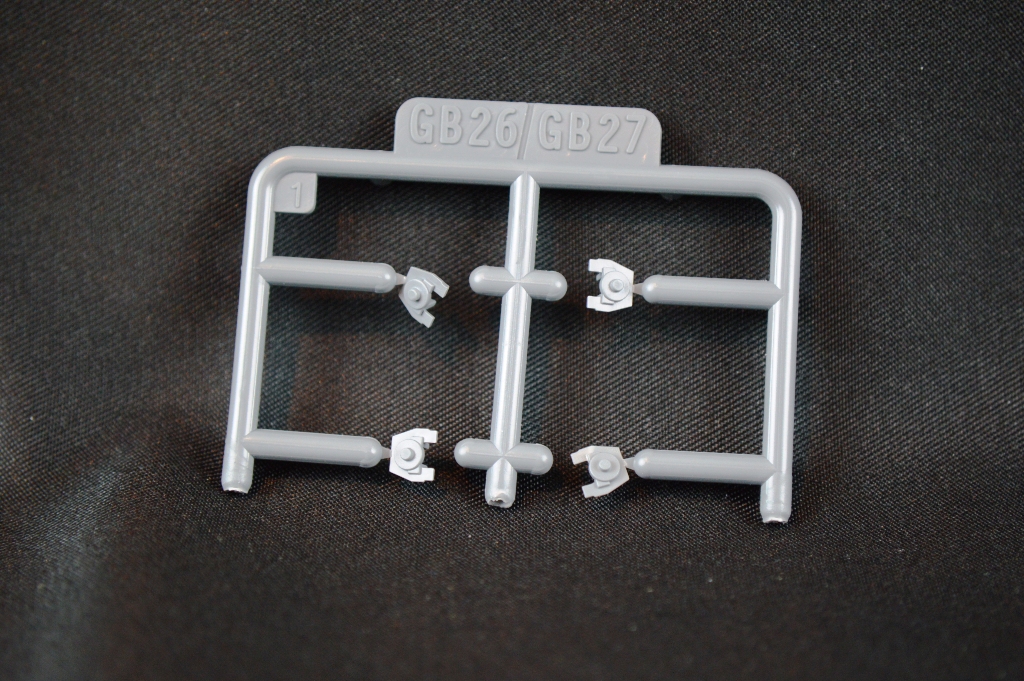
| SPRUE
GB26 |
| This sprue, which contains the
secondary armament, is split into multiple sprues. There is nice riveting details on the gun
shields. |
|
| SPRUE
GB40 |
| The UP launchers on this sprue.
Overall, these are really nice, with defined detail on the faces of the
launches.
|
|
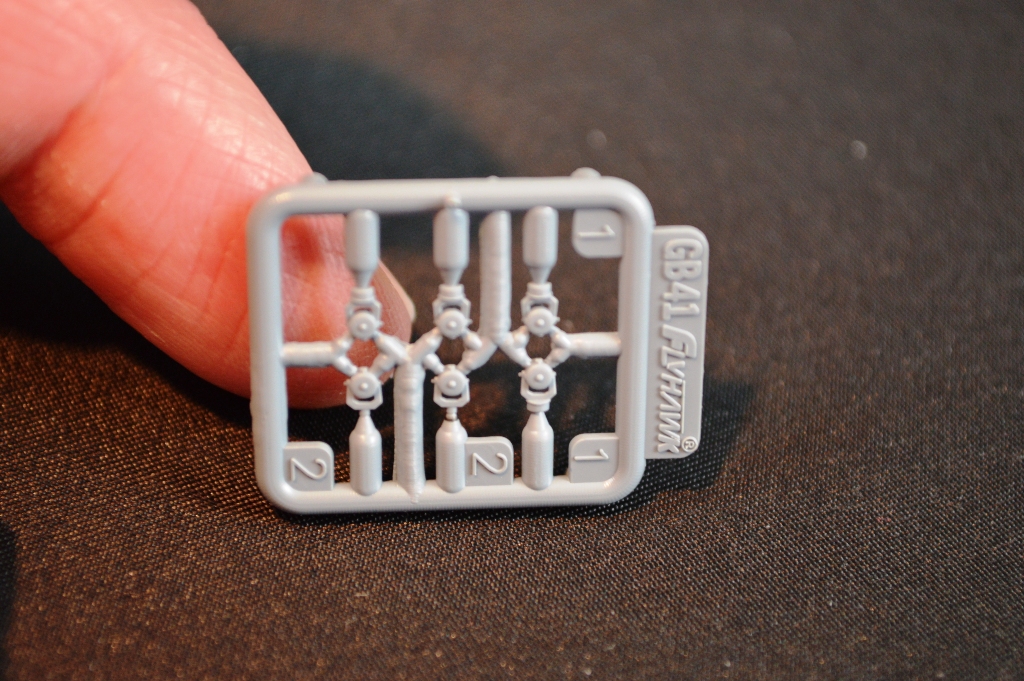
| SPRUE
GB41 |
| There are searchlights on this
small sprue.
|
|
|
DISPLAY BASE |
| There is a plastic display base
included with the kit. The pins at the top of the pedestals fit
into holes molded into the bottom of the hull. |
|
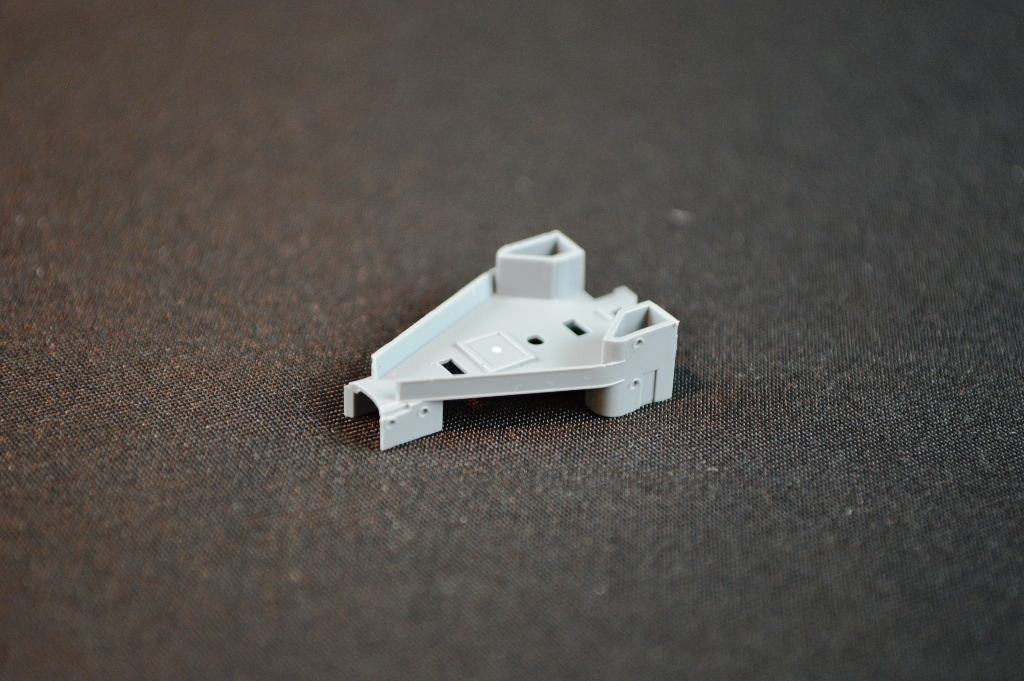
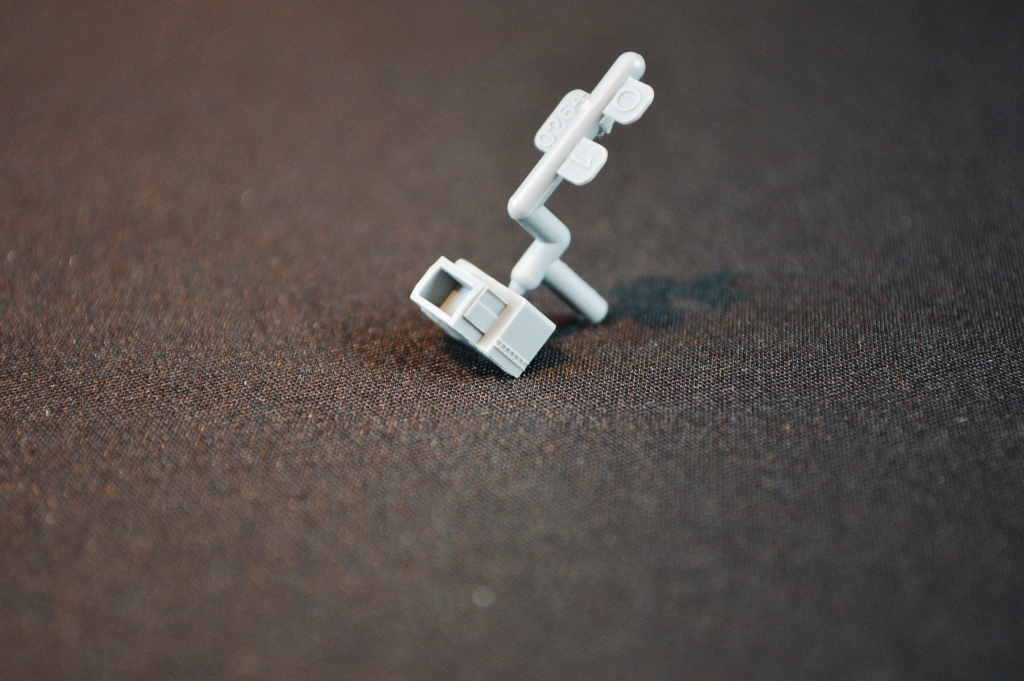
| 3D
PRINTED PARTS |
| This is the second Flyhawk kit that
I've reviewed that contains 3D printed parts, the first being their 1941
release of
HMS Aurora. In Hood, the 3D printed
parts contain vents, lockets, splinter shields, and the "joint" for the
foremast, where the legs connect to the main strut of the mast.
These 3D printed parts are specific to the Deluxe Edition, and the parts
look really nicely printed. Directions on how to install them are
part of the photo-etch instructions.
|
|
| PHOTOETCH |
|
|
There are a total of five photo-etch frets included in the
box. One is the small fret that comes with the base kit.
The other four frets are part of the deluxe offering - two larger frets and two
very small frets. The two smaller frets almost look like they are
afterthoughts, as I'm not sure why there weren't included in the larger frets.
Included on the larger PE parts are inclined ladders, rails, the bottom of the
"starfish" that supports the forward spotting top, funnel caps, interior funnel
details and walkways, rigging for the boat booms and some replacement detail for
the base kit parts. There are also parts to represent the vertical rigging
lines on the funnels. On the smaller frets are some platforms with
integral rails, and what looks like bracing/supports. |
|
|
|
|
|
|
| PHOTO-ETCH INSTRUCTIONS |
|
|
These instructions, specific to the photo-etch, 3D printed
and brass parts, are on three sheets of double sided glossy paper, with the last
side of paper left blank. The layout of the photo-etch instructions
appears to be new to me. Flyhawk is using 3D renderings as part of
the instructions, which clearly show where the photo-etch parts are placed.
I really like the look of these instructions. It should take any mystery
out of where to add photo-etch parts to the model. |
|
|
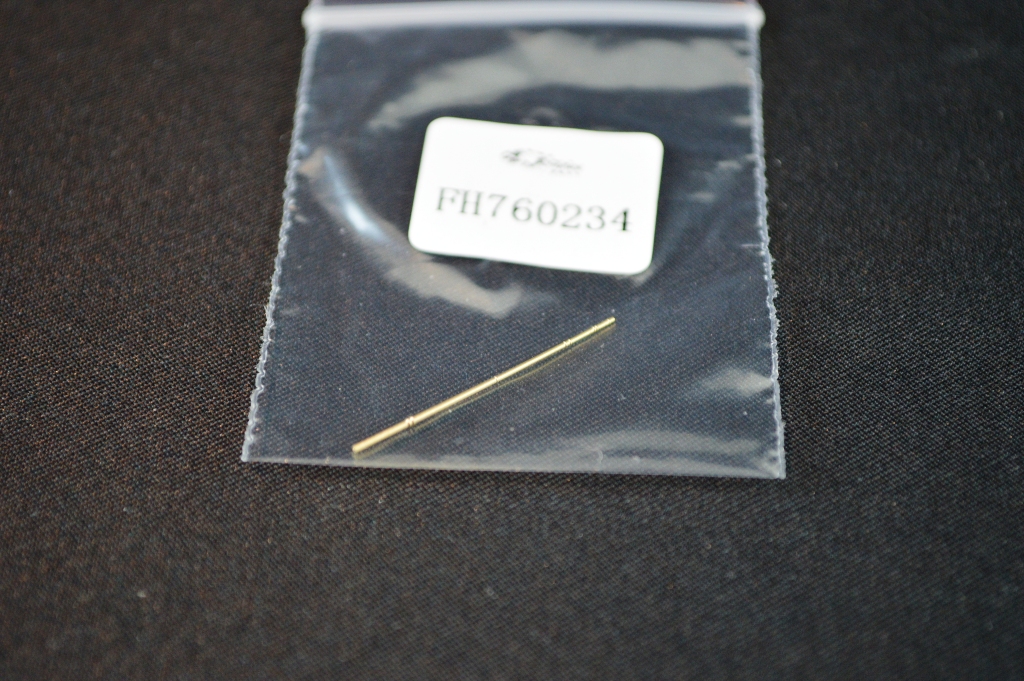
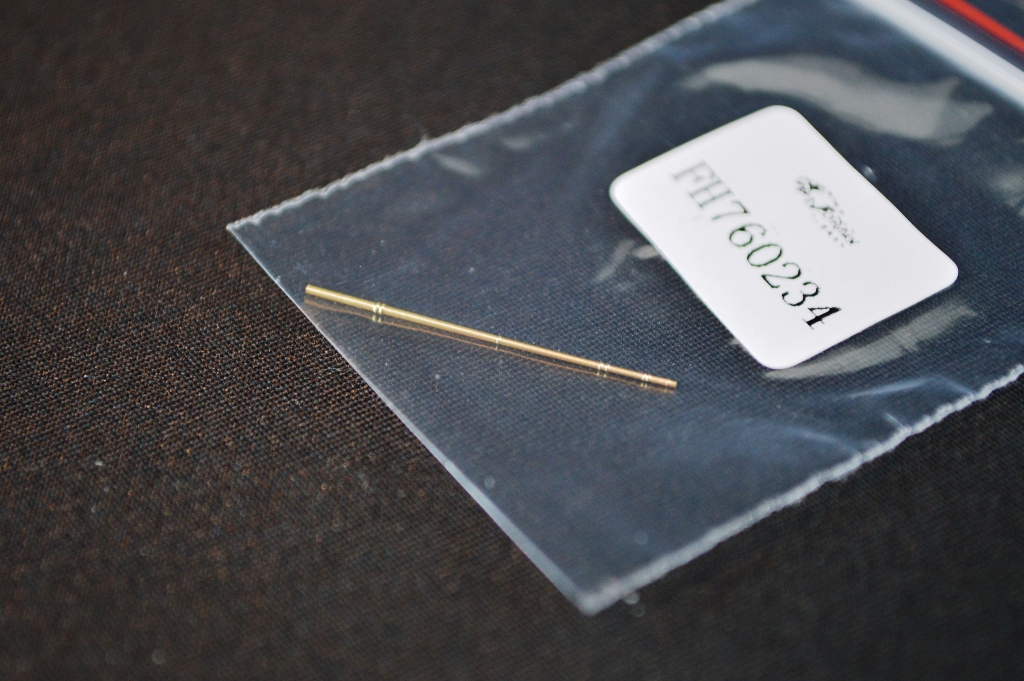
| BRASS PARTS |
|
|
In the same small plastic box that holds the 3D printed
parts are seven small bags containing the 3D printed parts. Along
with main and secondary gun barrels, there are a ton of replacement vents, in
different sizes, various sized of brass rod, and a brass replacement for top of
the main mast. This last part looks really good and has some nice
detail machined into it. |
|
|
| DECALS |
|
|
There is a small set of decals in the kit. Here you’ll
find several different versions of the White Ensign.
|
|
|
| INSTRUCTIONS |
|
|
The instructions for Hood are in a new - to me - format.
Instead of the large, double-sided, folded up sheets of paper, it is in booklet
form. I like the change. Time will tell if this going to be the new
format for all Flyhawk kits moving forward. Overall, the instructions are
logical and should be easy to follow. Interesting to note that the
instructions do contain the latest thinking regarding the color of Hood's
lower hull coating. The last page of the instructions include a letter
from the HMS Hood Association, speaking to their contributions in the
development of this kit. Below are a selection of imaged of the
instructions.
|
|
|
| CONCLUSIONS |
|
| This is Flyhawk’s deluxe
version of it's 1/700 HMS
Hood 1941, kit number FH1160S.
It's another winner from Flyhawk and a really great model of the Royal Navy's
most tragic warship. It's worlds better than the old Tamiya kit and also
better quality than the more recent Trumpeter offering. Additinally,
Flyhawk had the help of the HMS Hood association in developing this kit,
which has led that association to say that
this model of Hood is "the
most accurate yet produced".
Prices vary around the 'net, but I see it going for around $94USD from some of
our sponsors. Highly recommended!
Thanks to Flyhawk for the sample kit used for this "in-box" review. |
 |