| BUILDING I
LOVE KIT'S USS CURTIS WILBUR |
|
| I received this kit from Martin Quinn to do a
build review (an in-box review can be found
here).
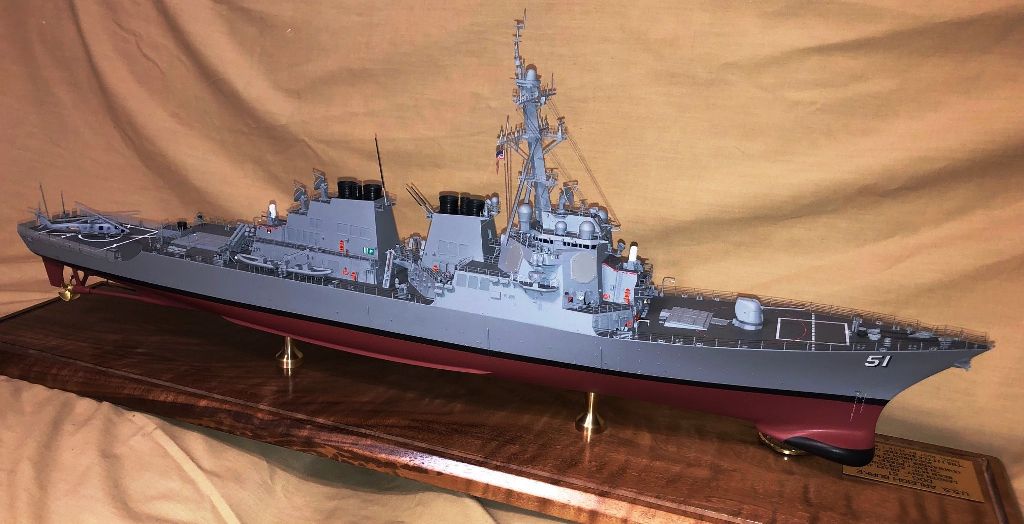
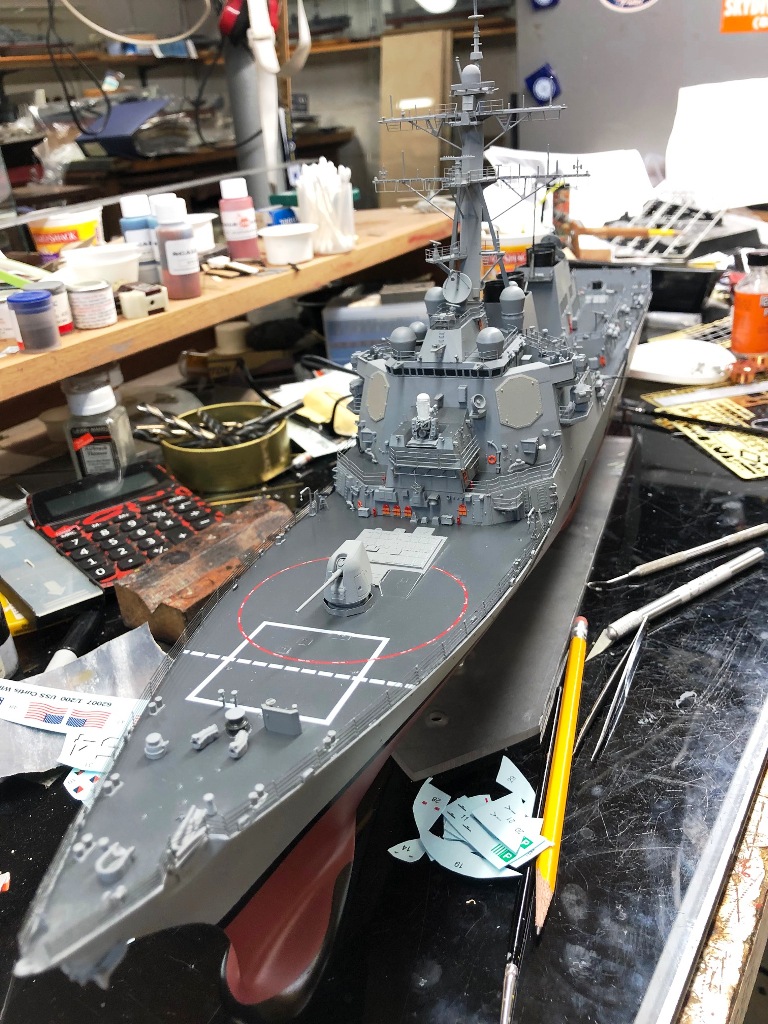
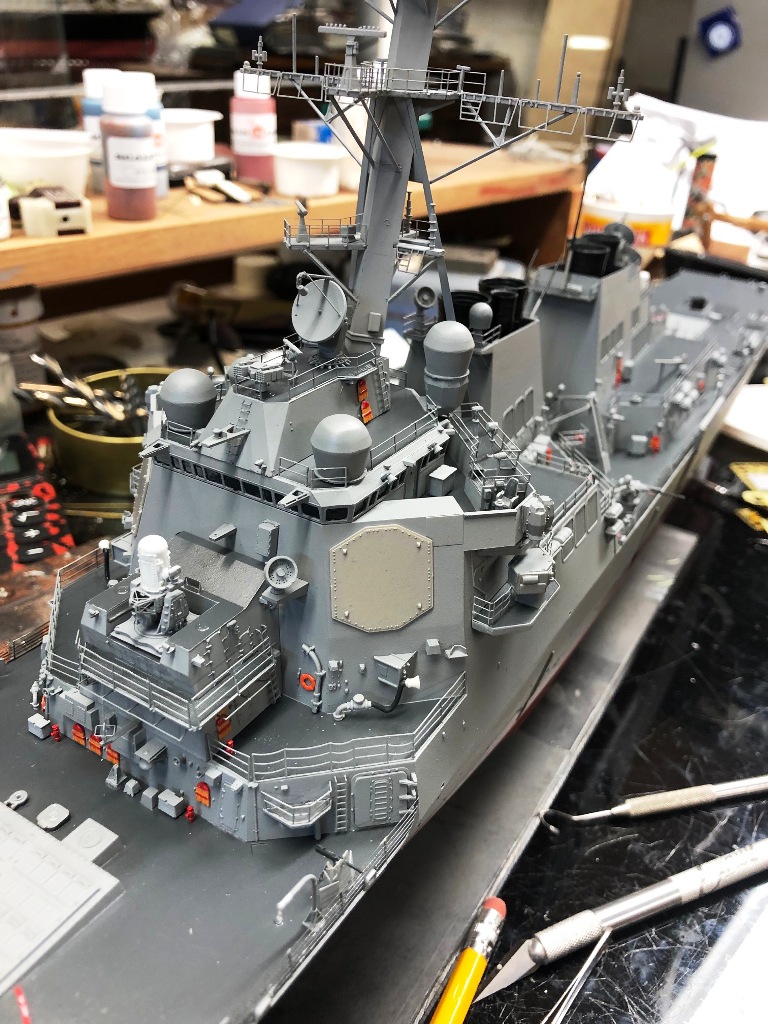
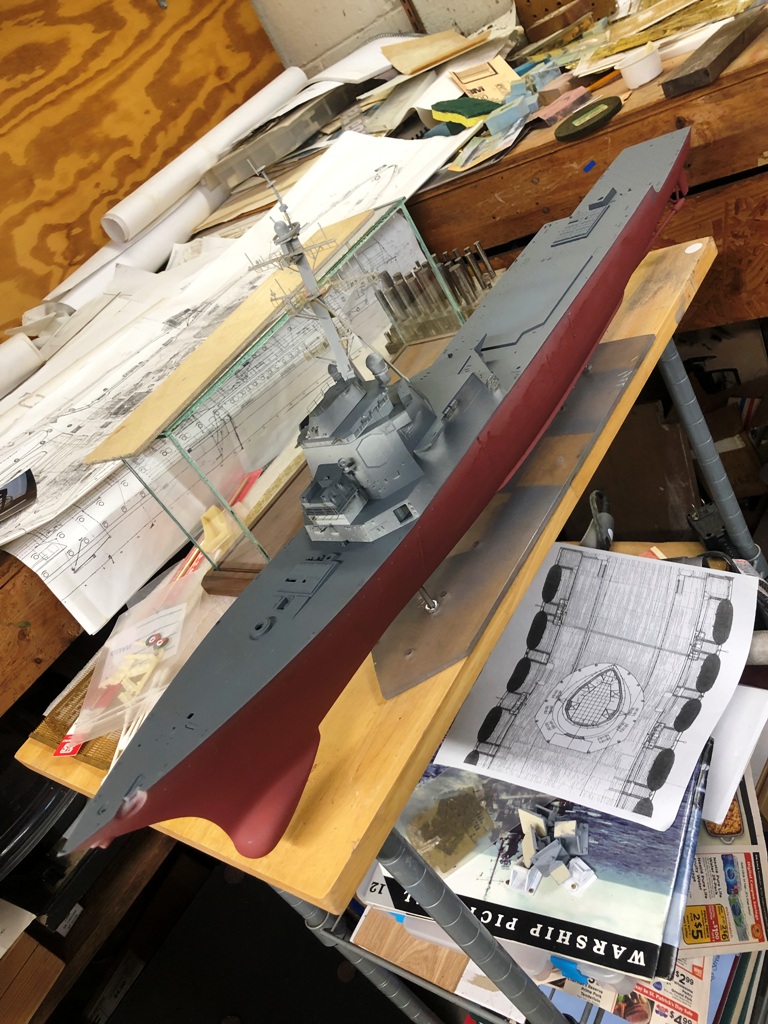
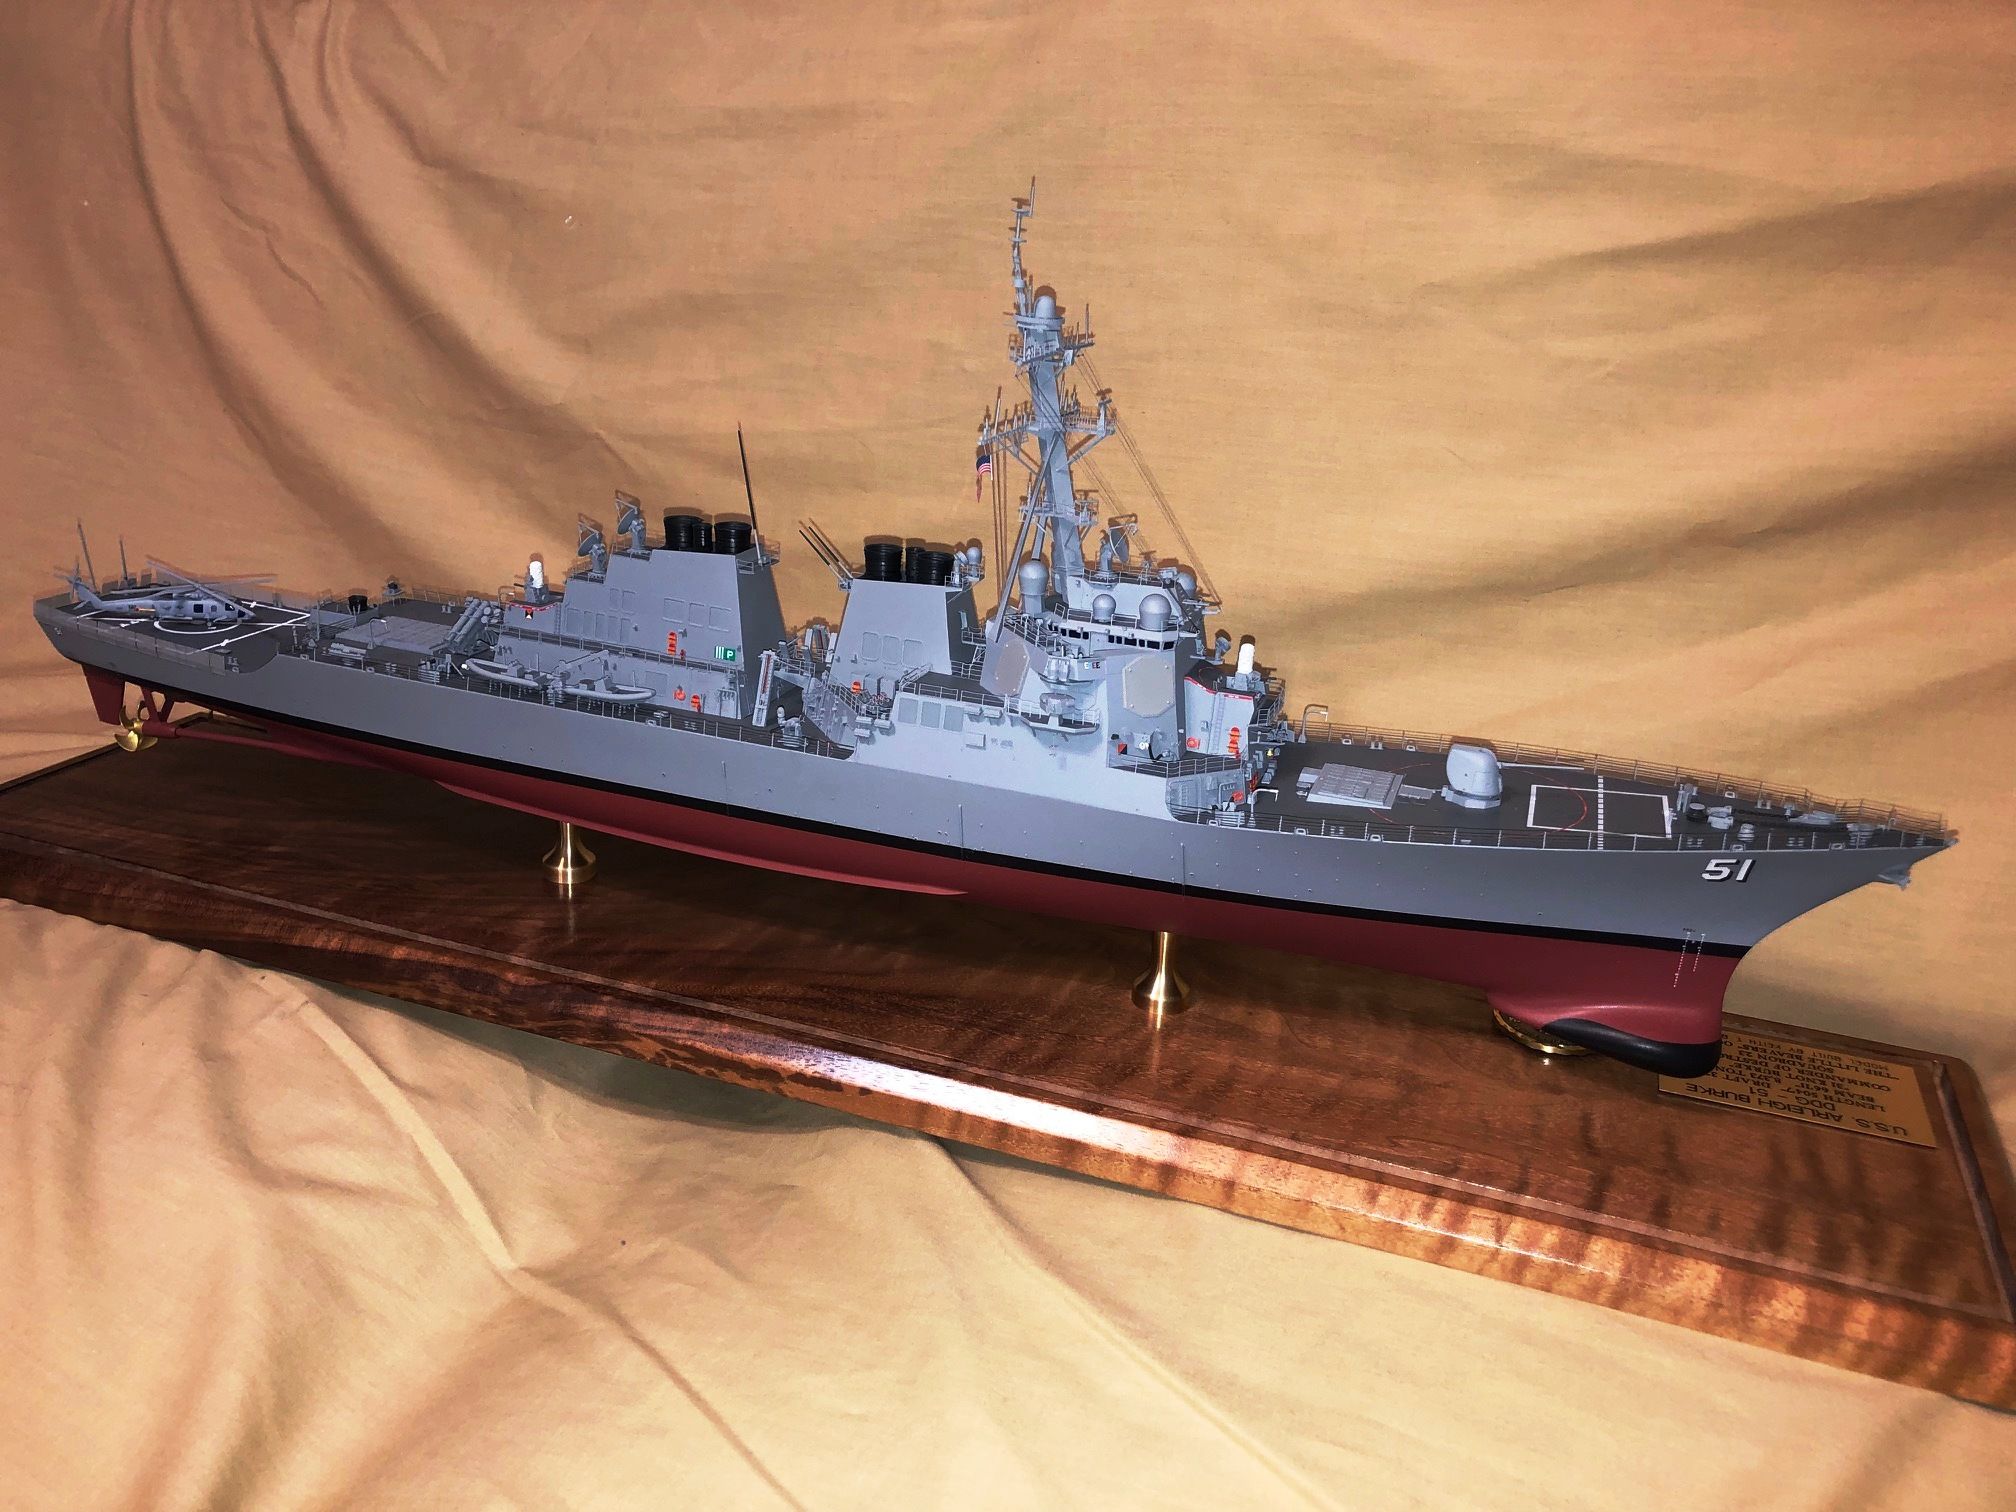
Upon opening it I found the kit to be a rather nice size and what Id say
perfect for this class of vessel. Not too big or too small. The hull measures
to 30.27 to replicate the ships 5047. So after looking the contents
over one would think its a simple build because its a modern day warship
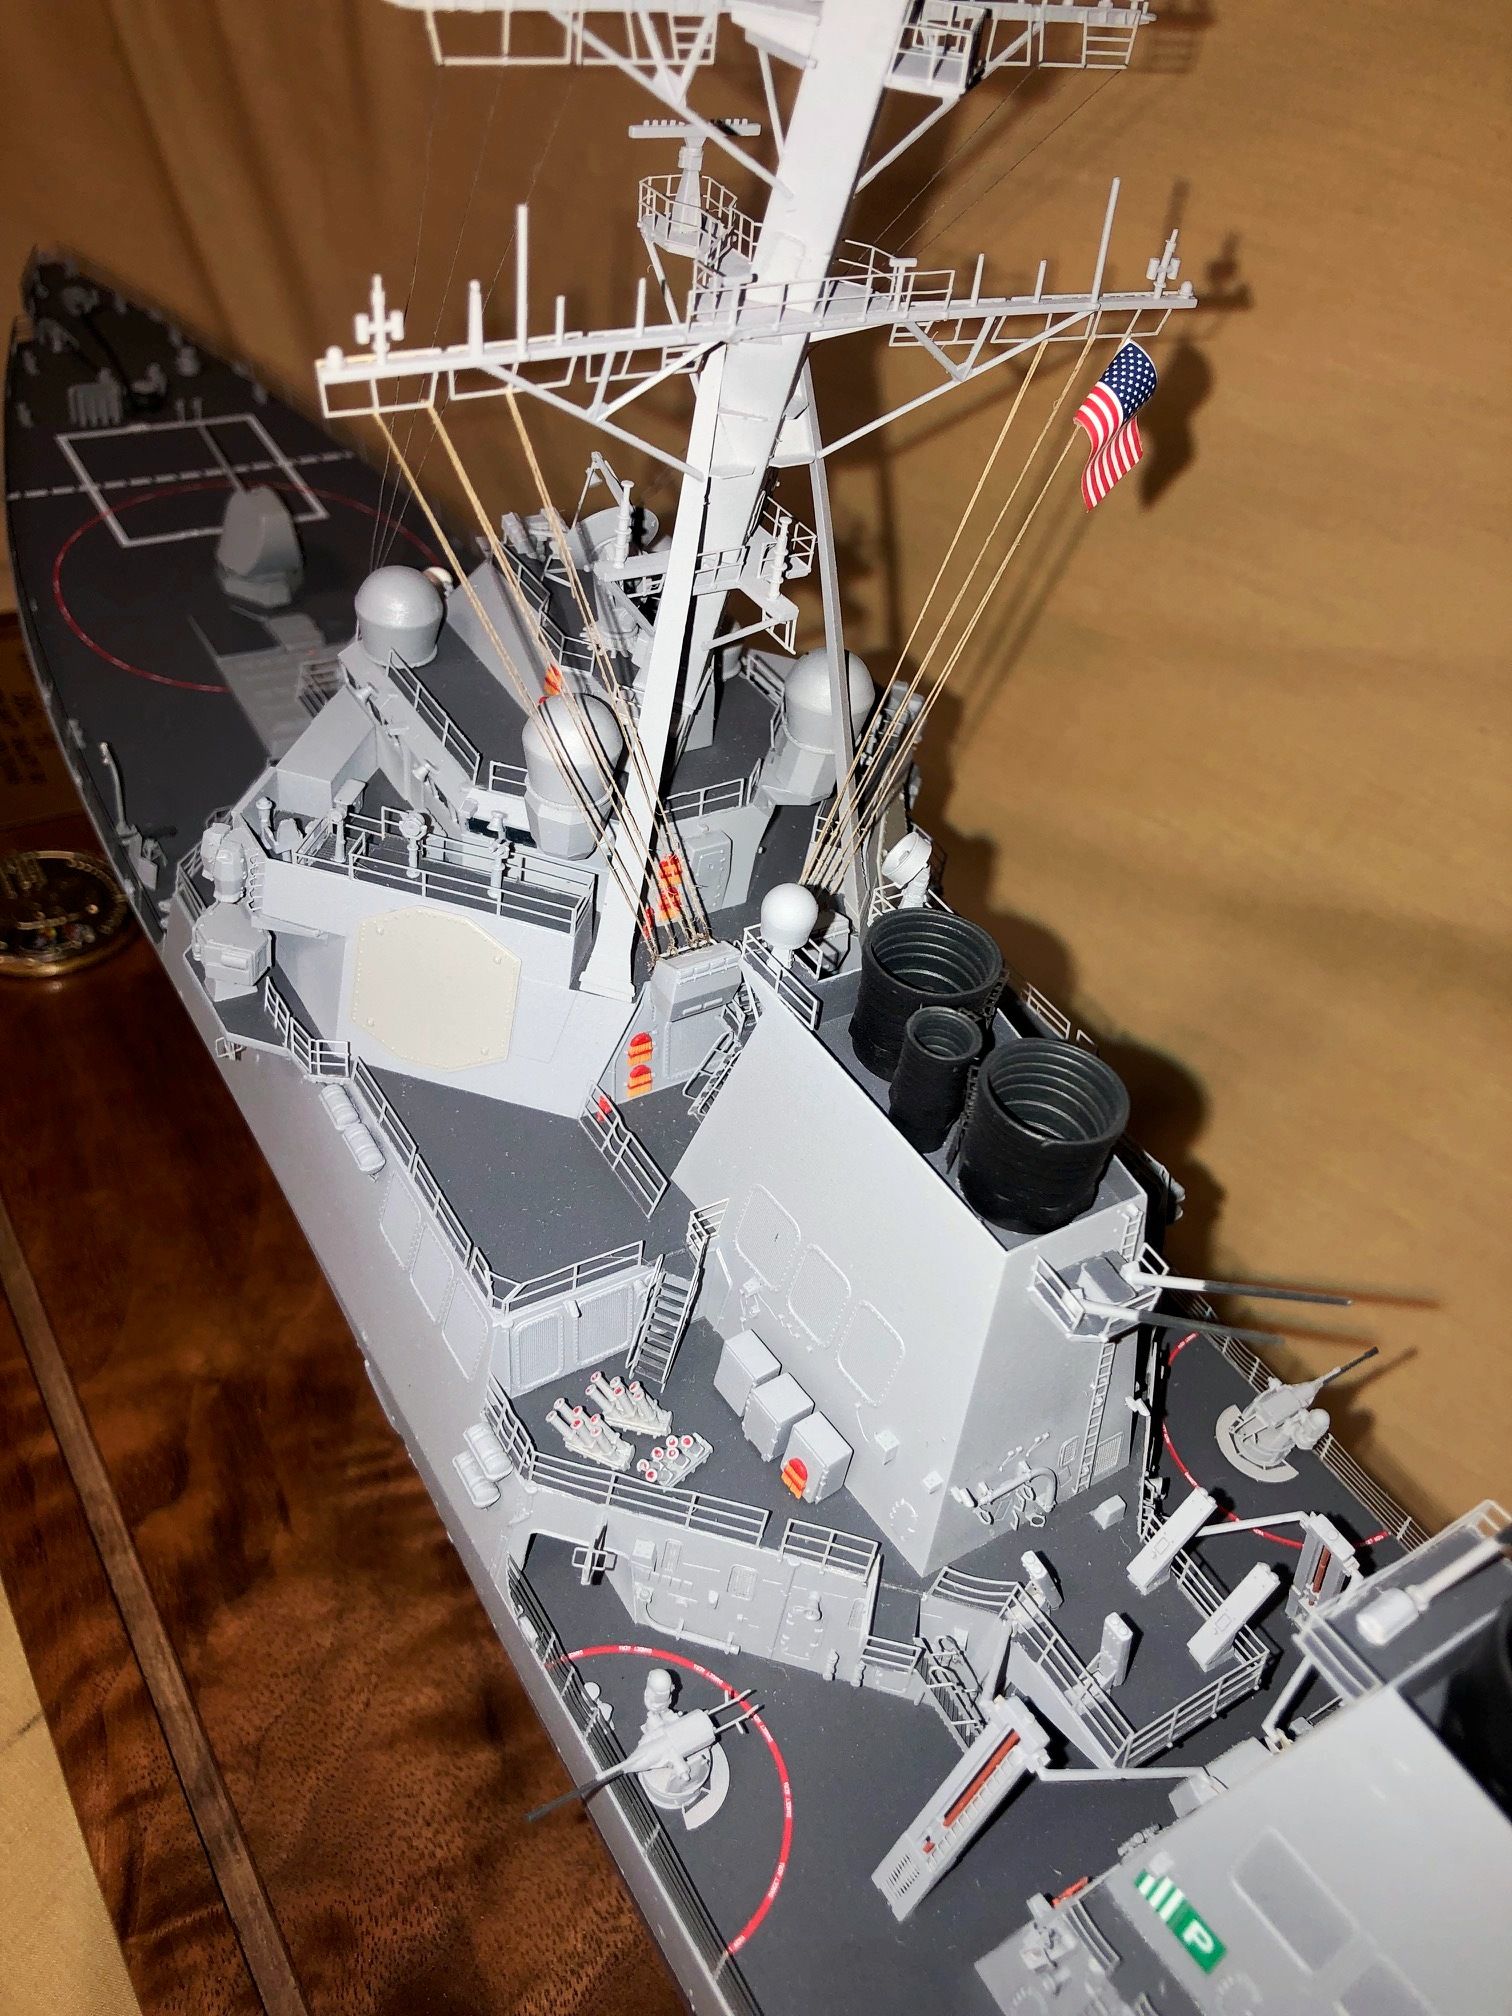
and lacks detail that the WWll warships have. Totally wrong. There are
loads of details to be added to the bulkheads. Having all these extras
to add to the bulkheads makes for a longer build but a much better looking
model when complete. I thought this would be a fairly fast build but I
proven incorrect. It took me about three months to complete.
Lets
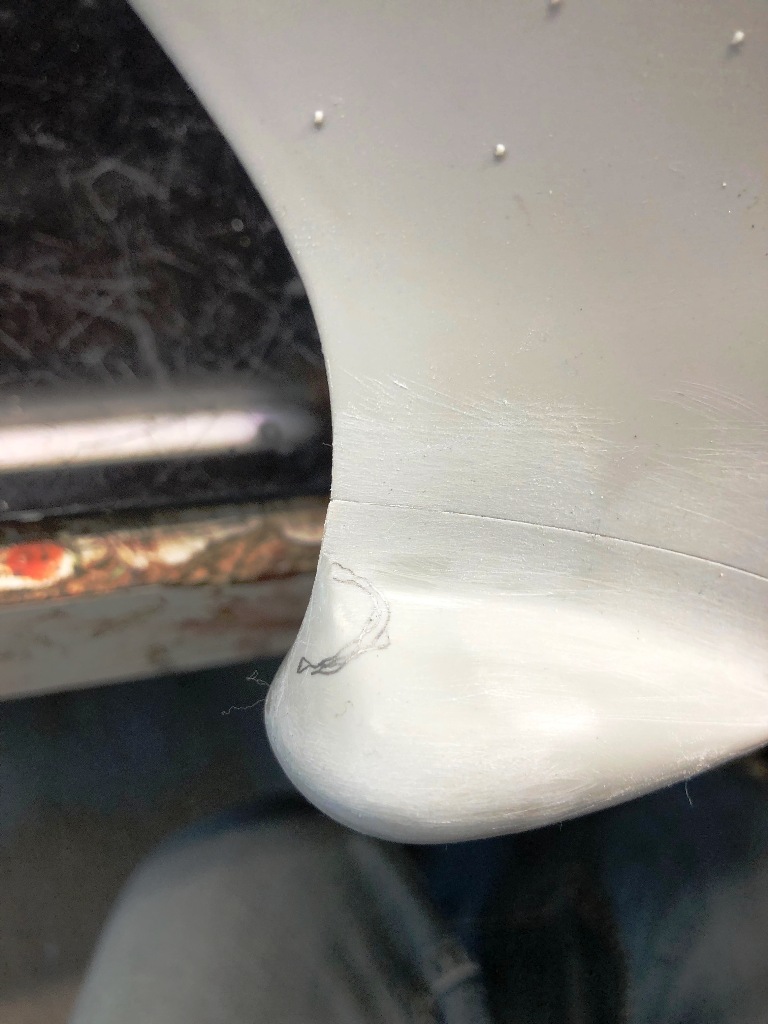
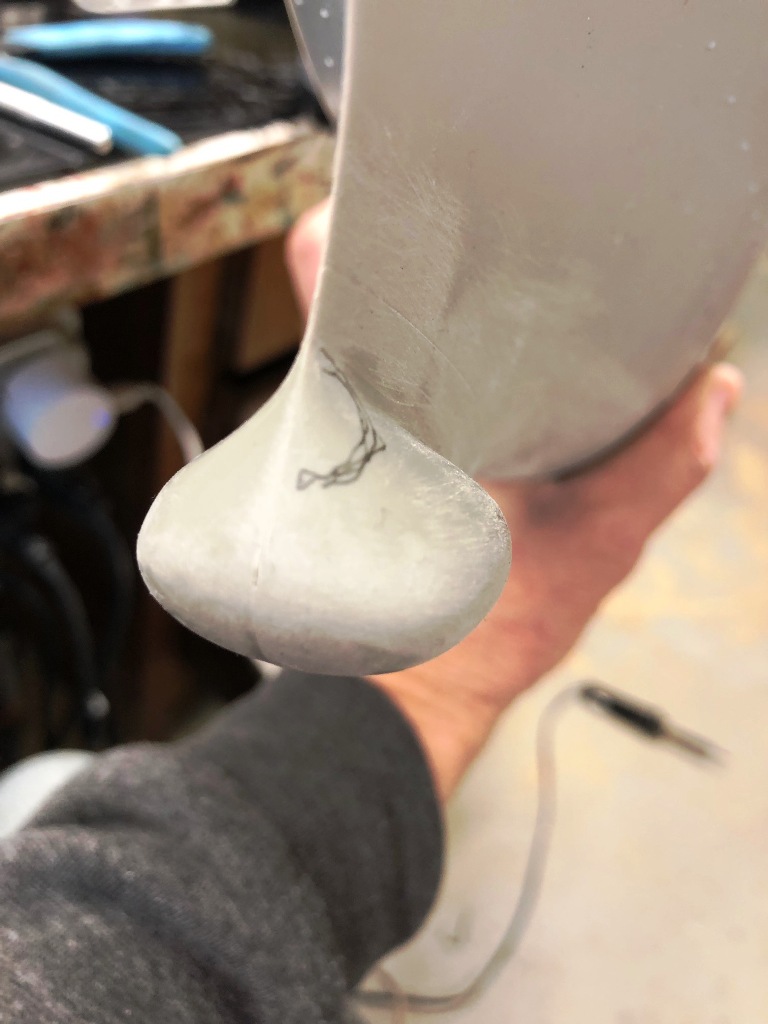
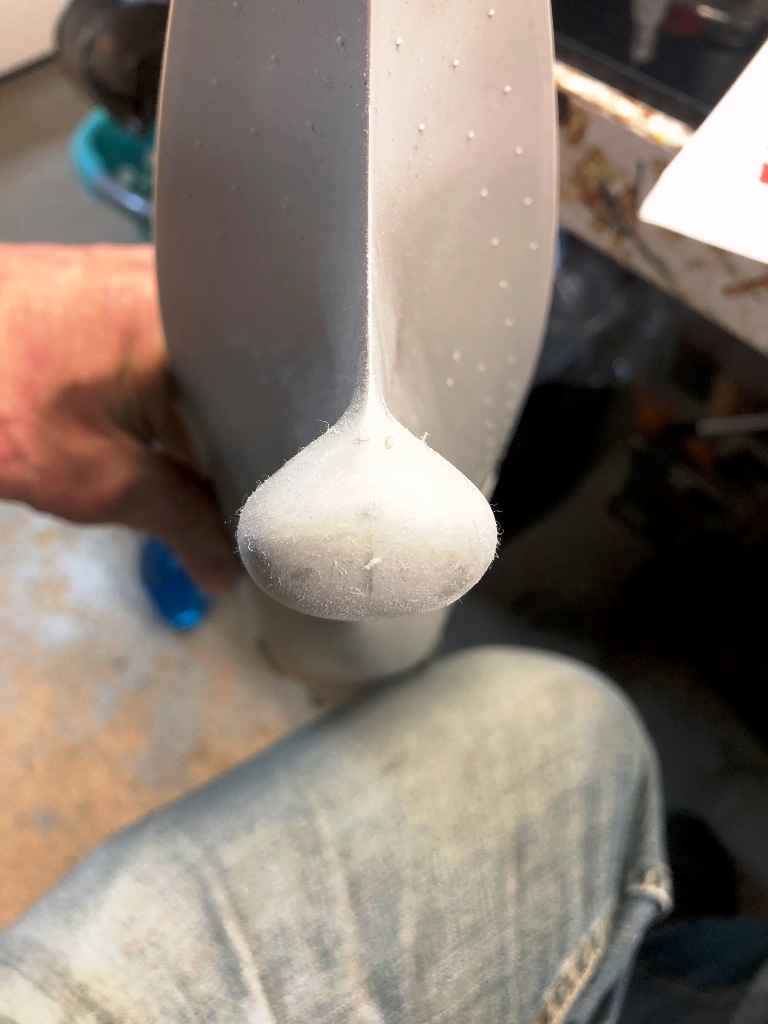
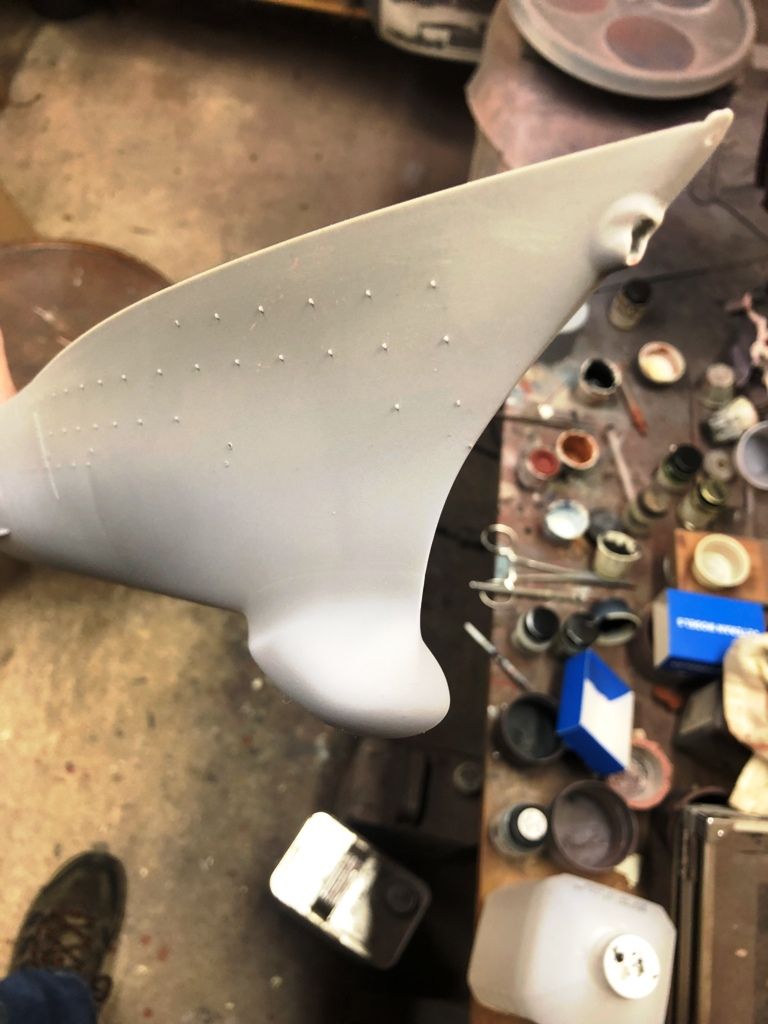
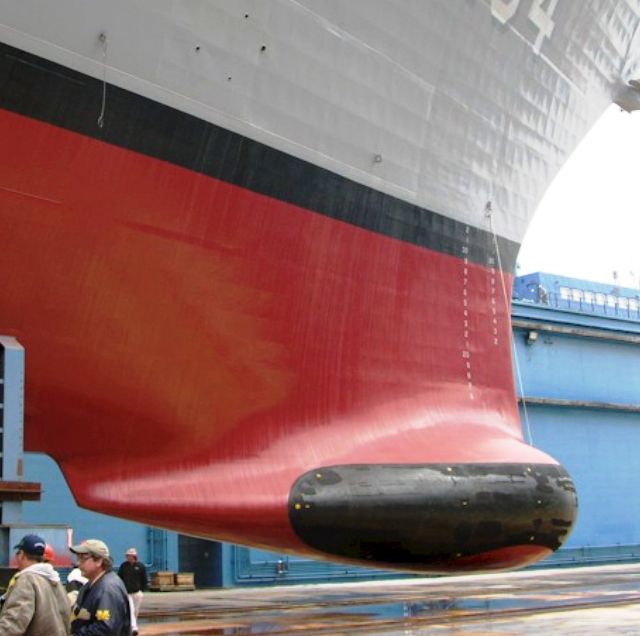
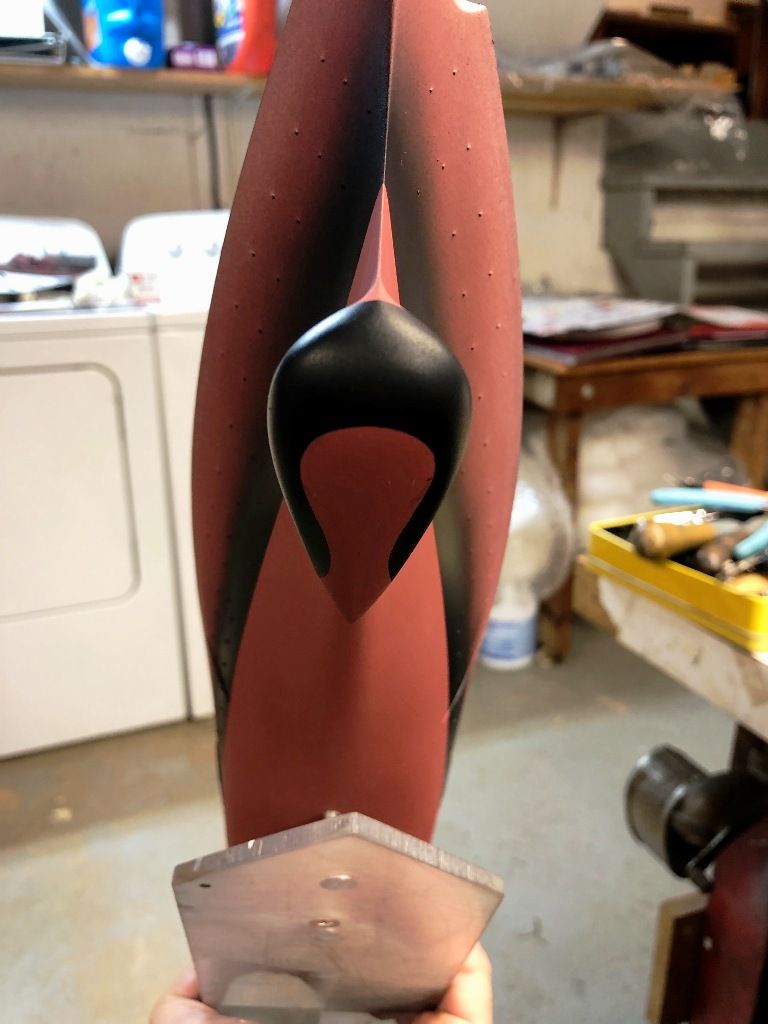
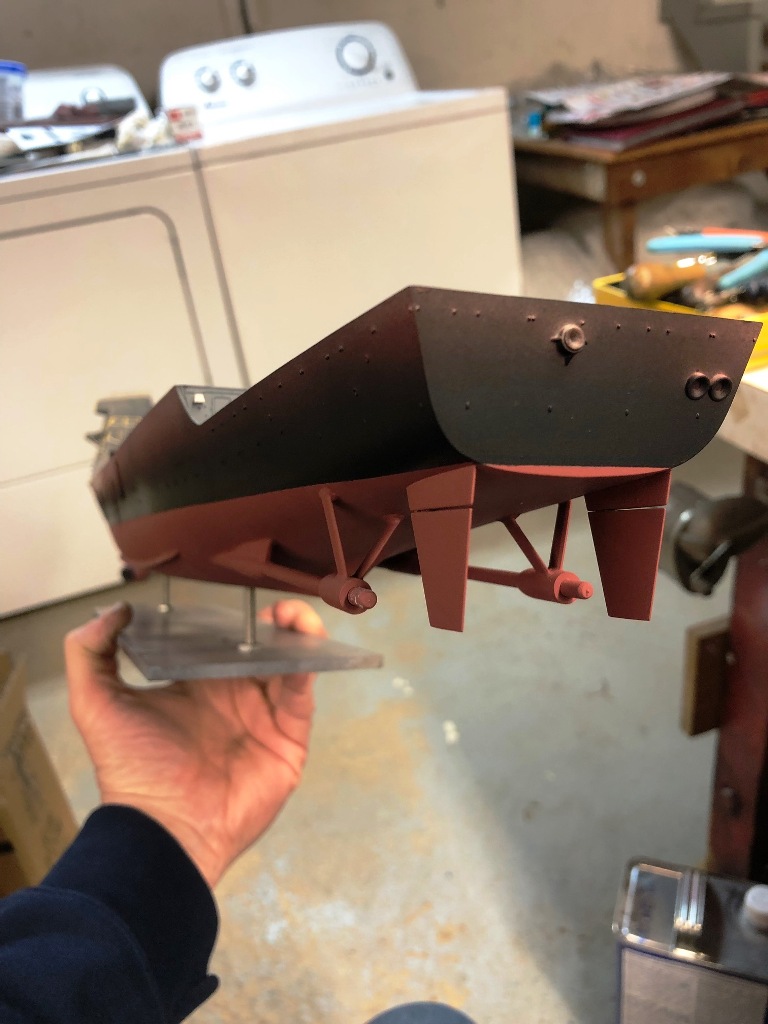
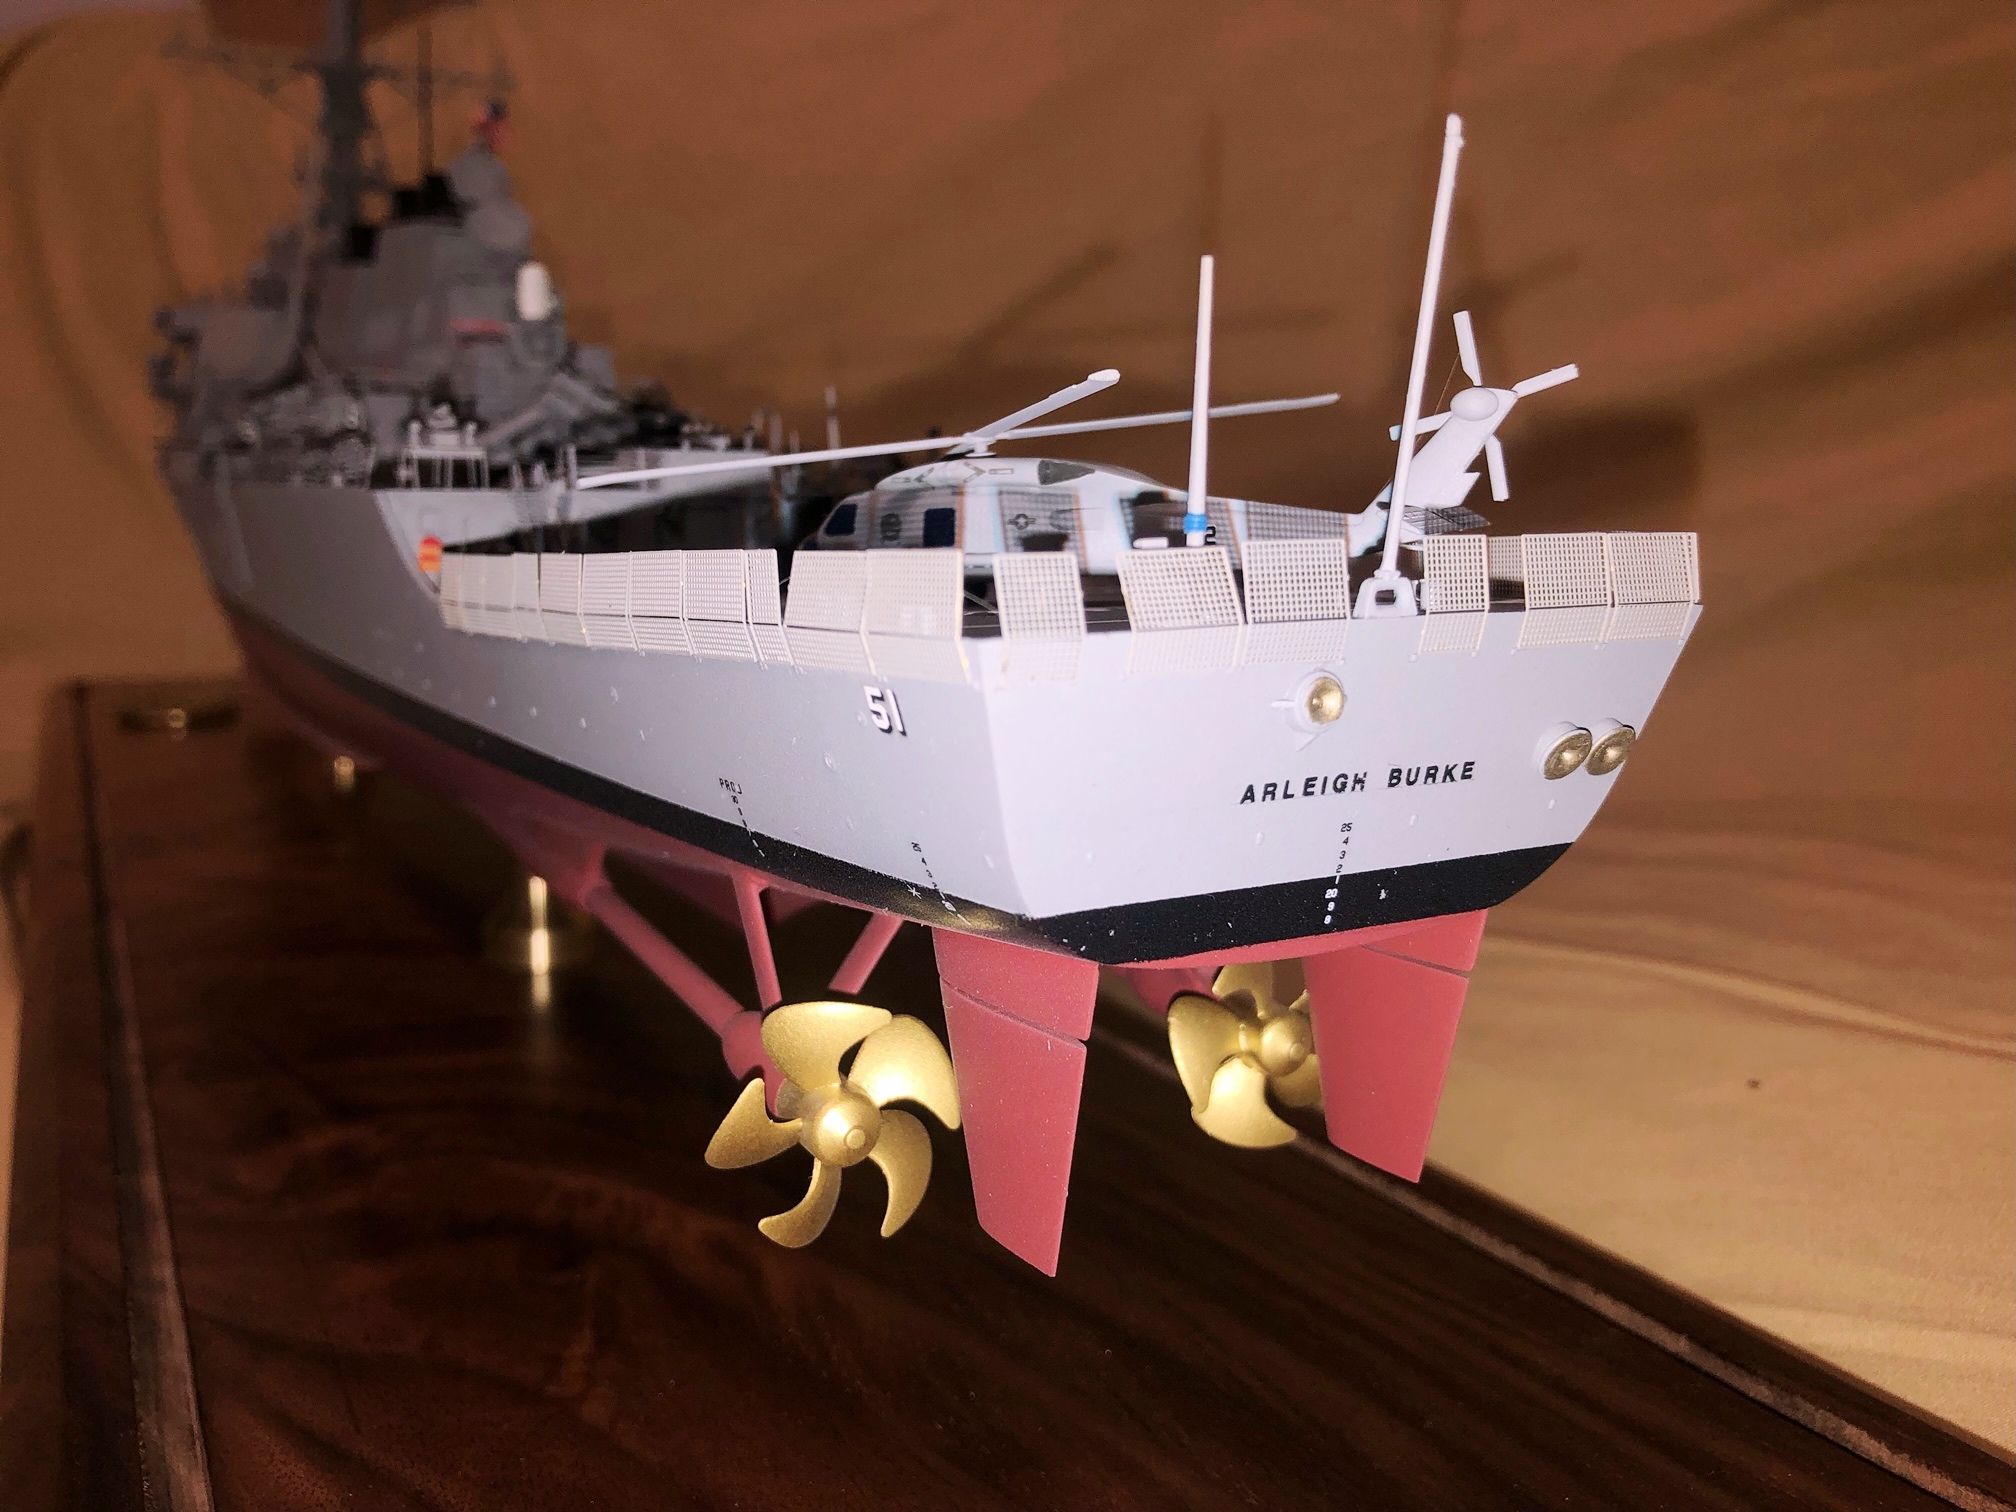
start with the hull. The AN/SQS-53C sonar dome comes as a two piece
unit port and stb sides. It fits very well to the hull. I did
notice the top of the dome is sort of heavy so I sanded it down slightly.
Filled the seams and sanded complete. The bilge keels
fit really nice as well and only required slight Bondo fill at their seams. |
|
|
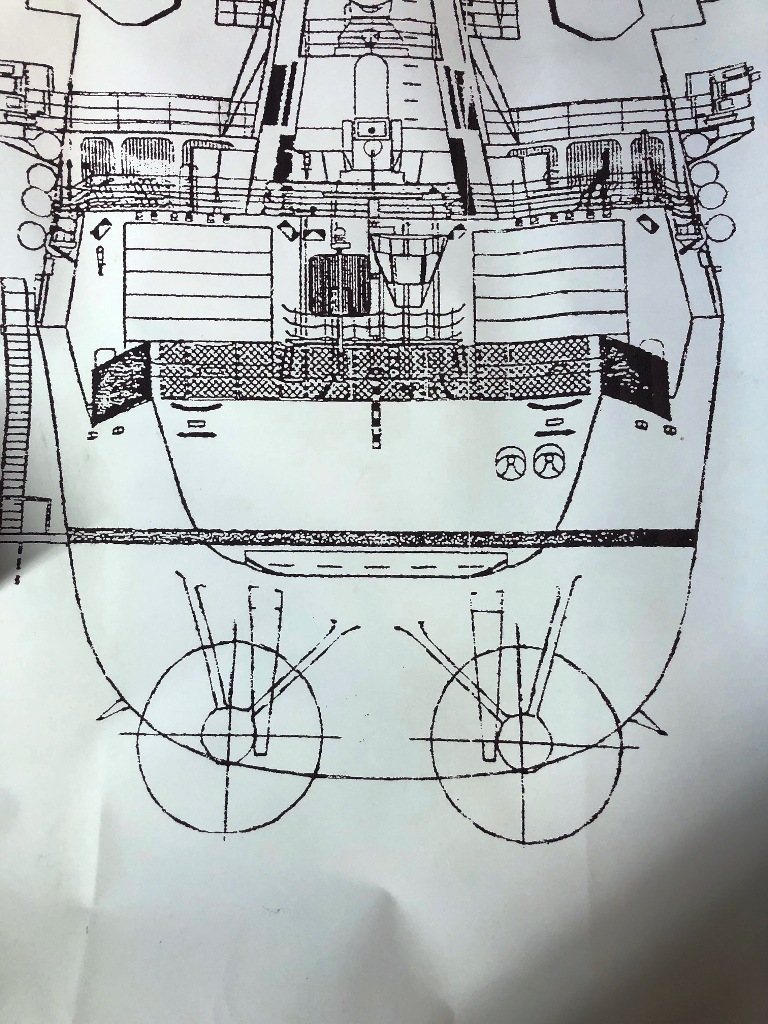
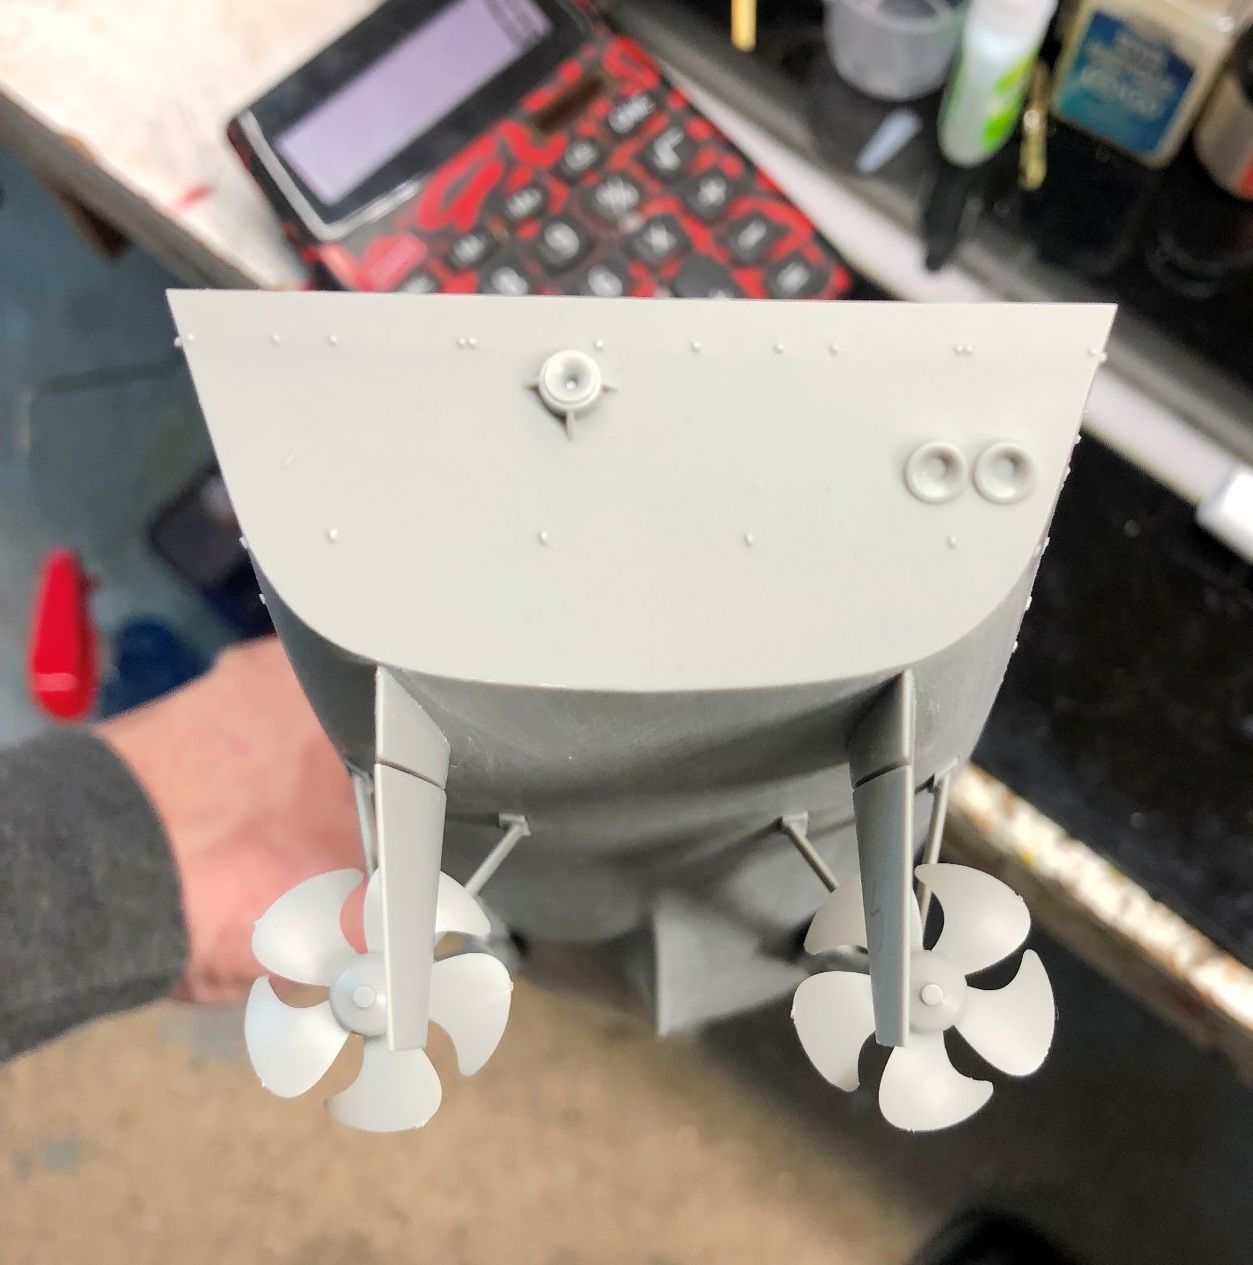
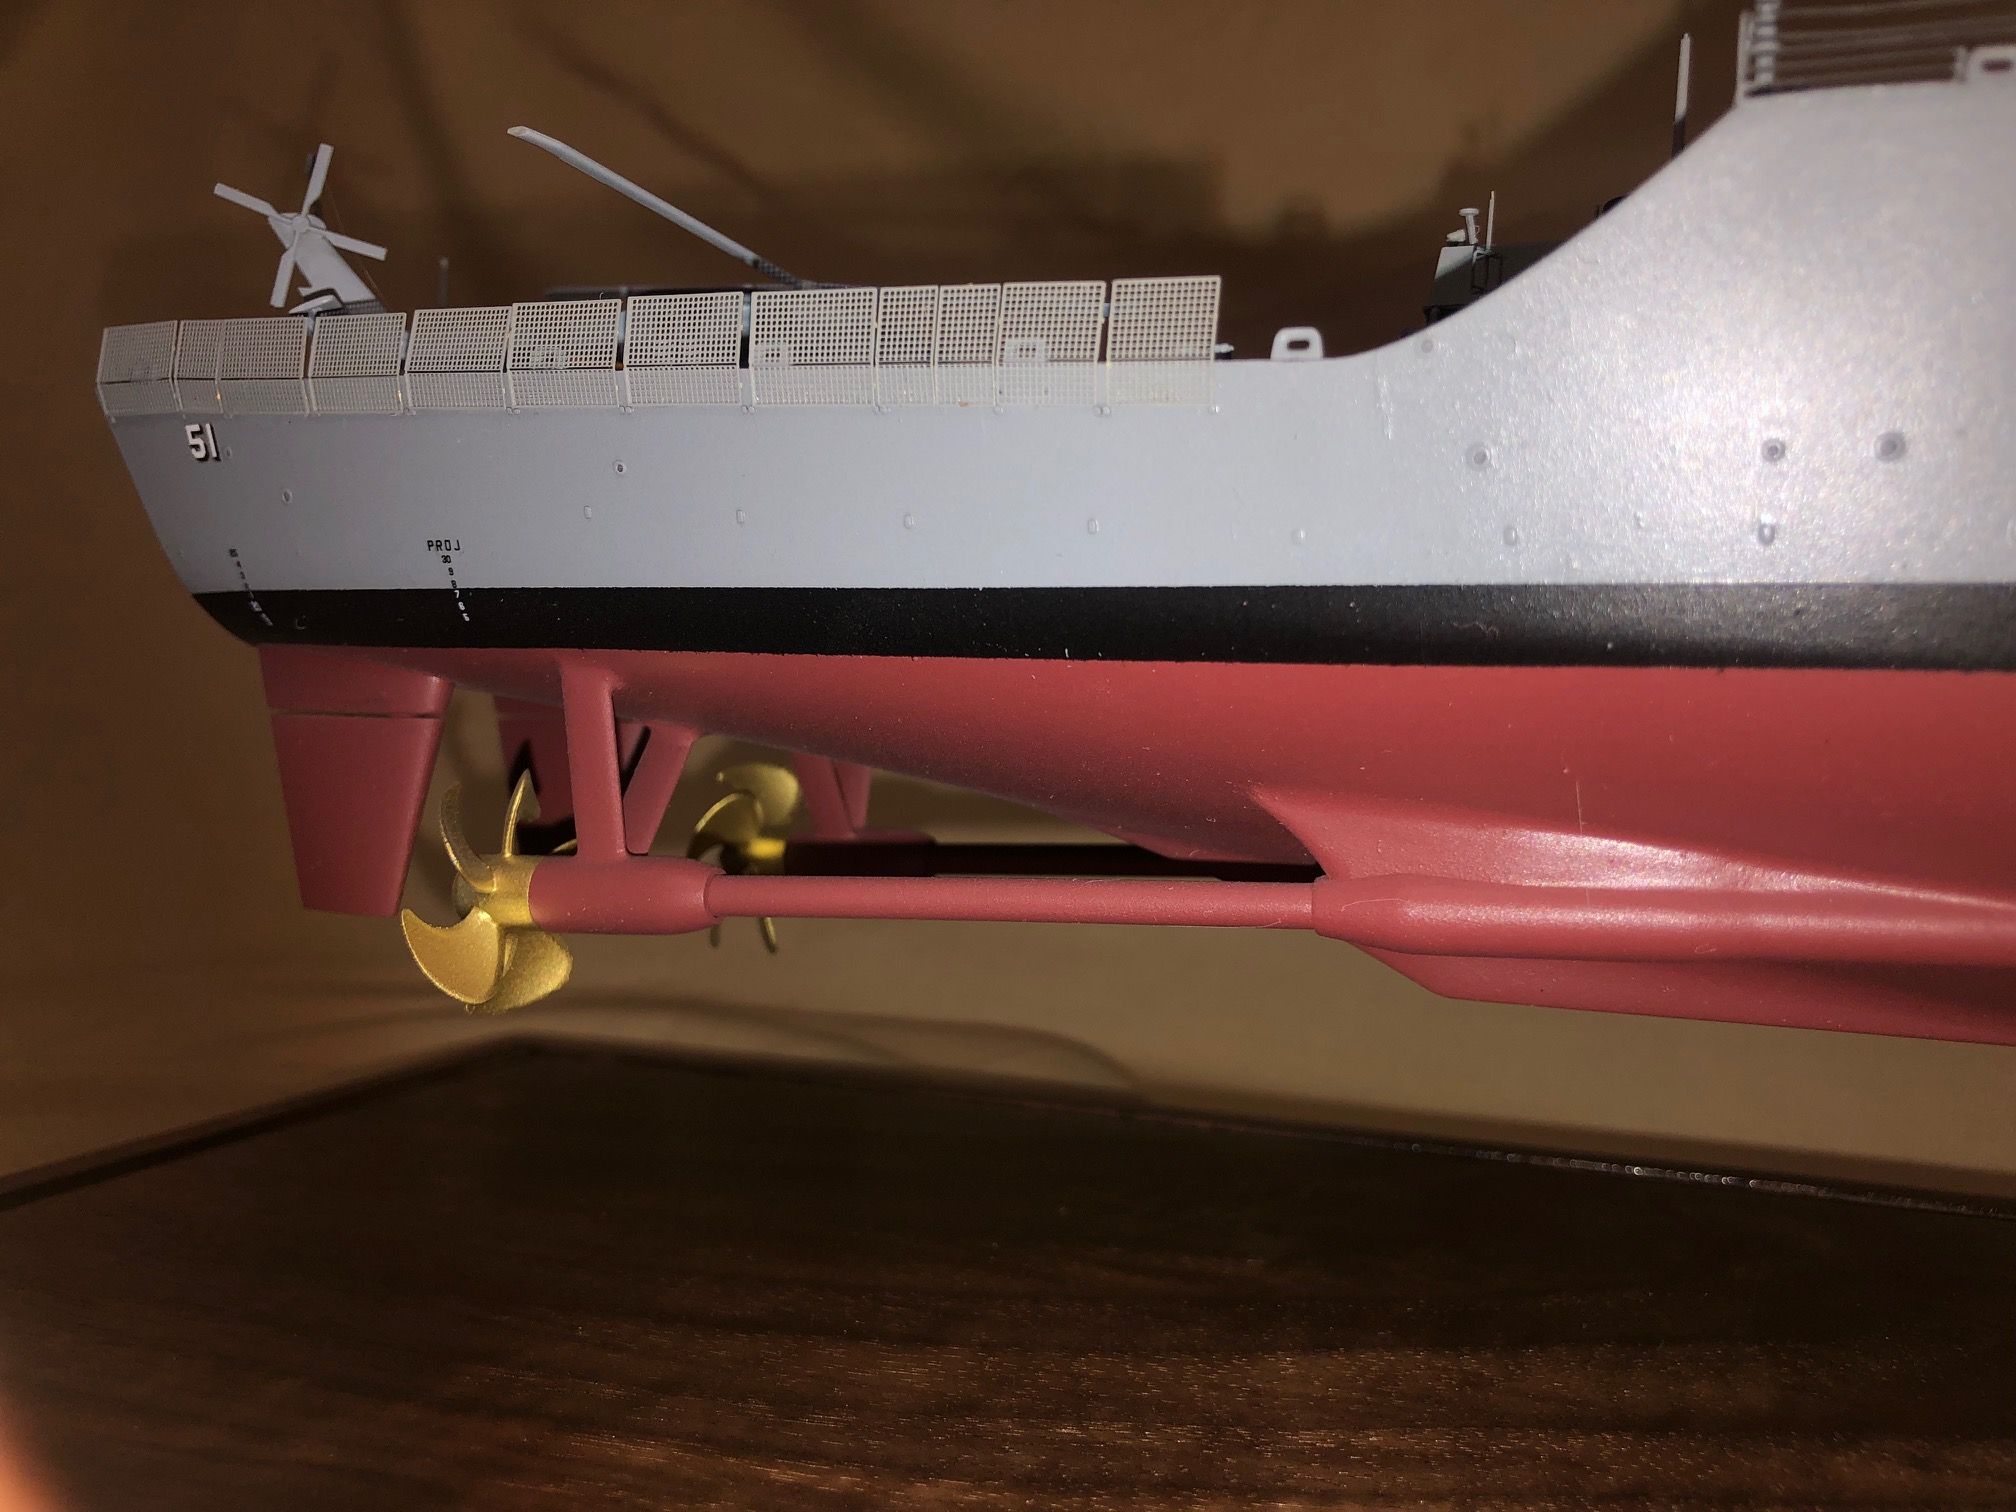
| Ok, the shafts and rudders appear to look proper
In shape and size and fit nice but both are too far apart from center line.
It is noticeable when viewing directly from aft looking fwd. Since this
is a build review I decided to leave them as they are and not correct the
distance between them but, if I built another one of these kits I will
fix them. It will require some surgery of the hull and parts themselves.
I believe most builders can accomplish this task if you put your mind to
it. |
|
|
| Propellers: The props are correct size matching
the 17 dia real propellers but the blades are modeled on in a reverse
pitch. I was about to make a new set of my brass props but decided not
to because again this is a build review and I want people to see what is
going on here. Now with saying that, I waited about a month and could no
longer stand for the incorrect propeller pitch so I cut the blades off
and glued them back on in the correct manor. The Burke class props are
CPP [ controlled pitch propellers]. The model props dont represent this
and neither did I when resetting the blades. The blades and hub shape and
very close to realistic however.
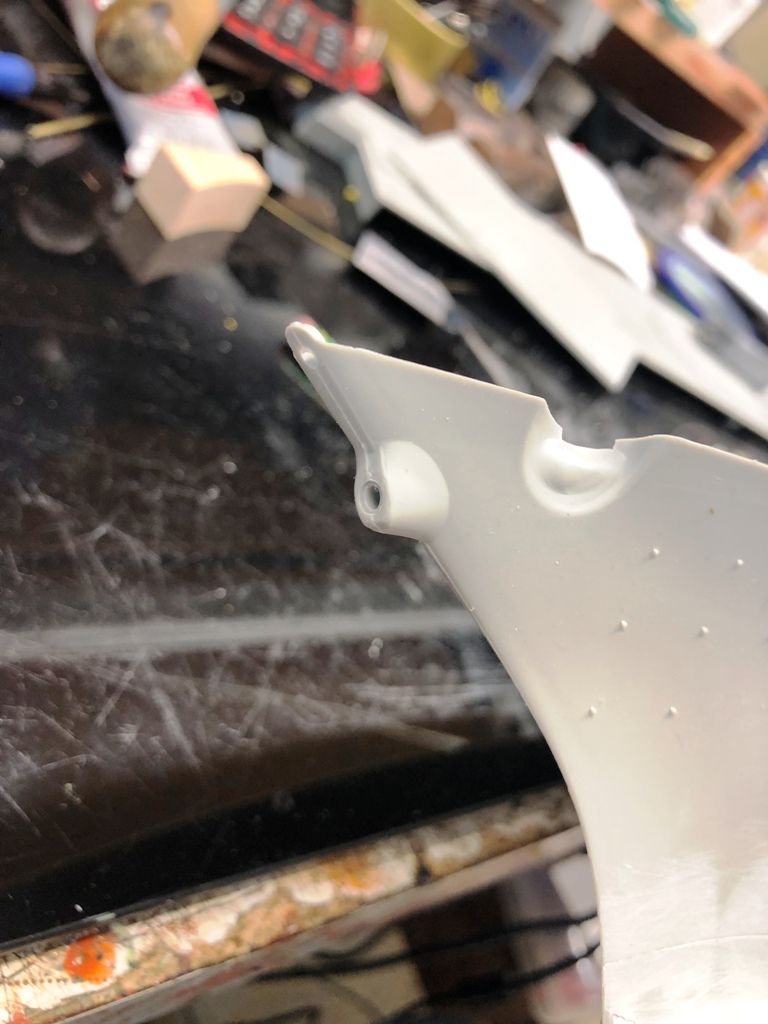
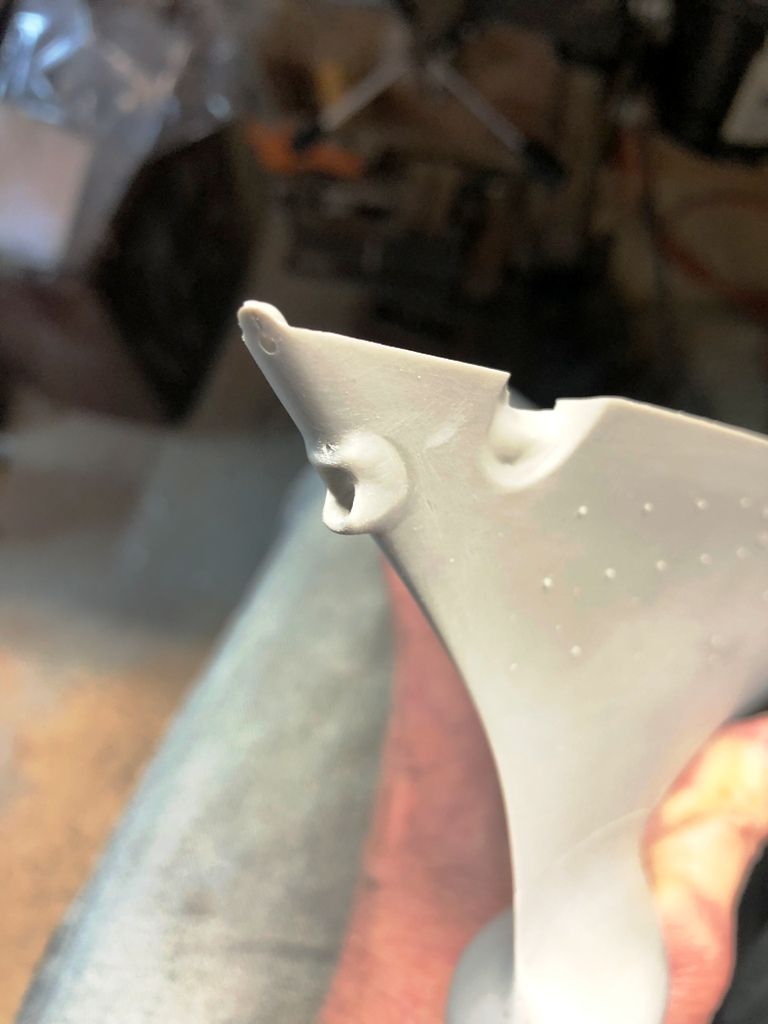
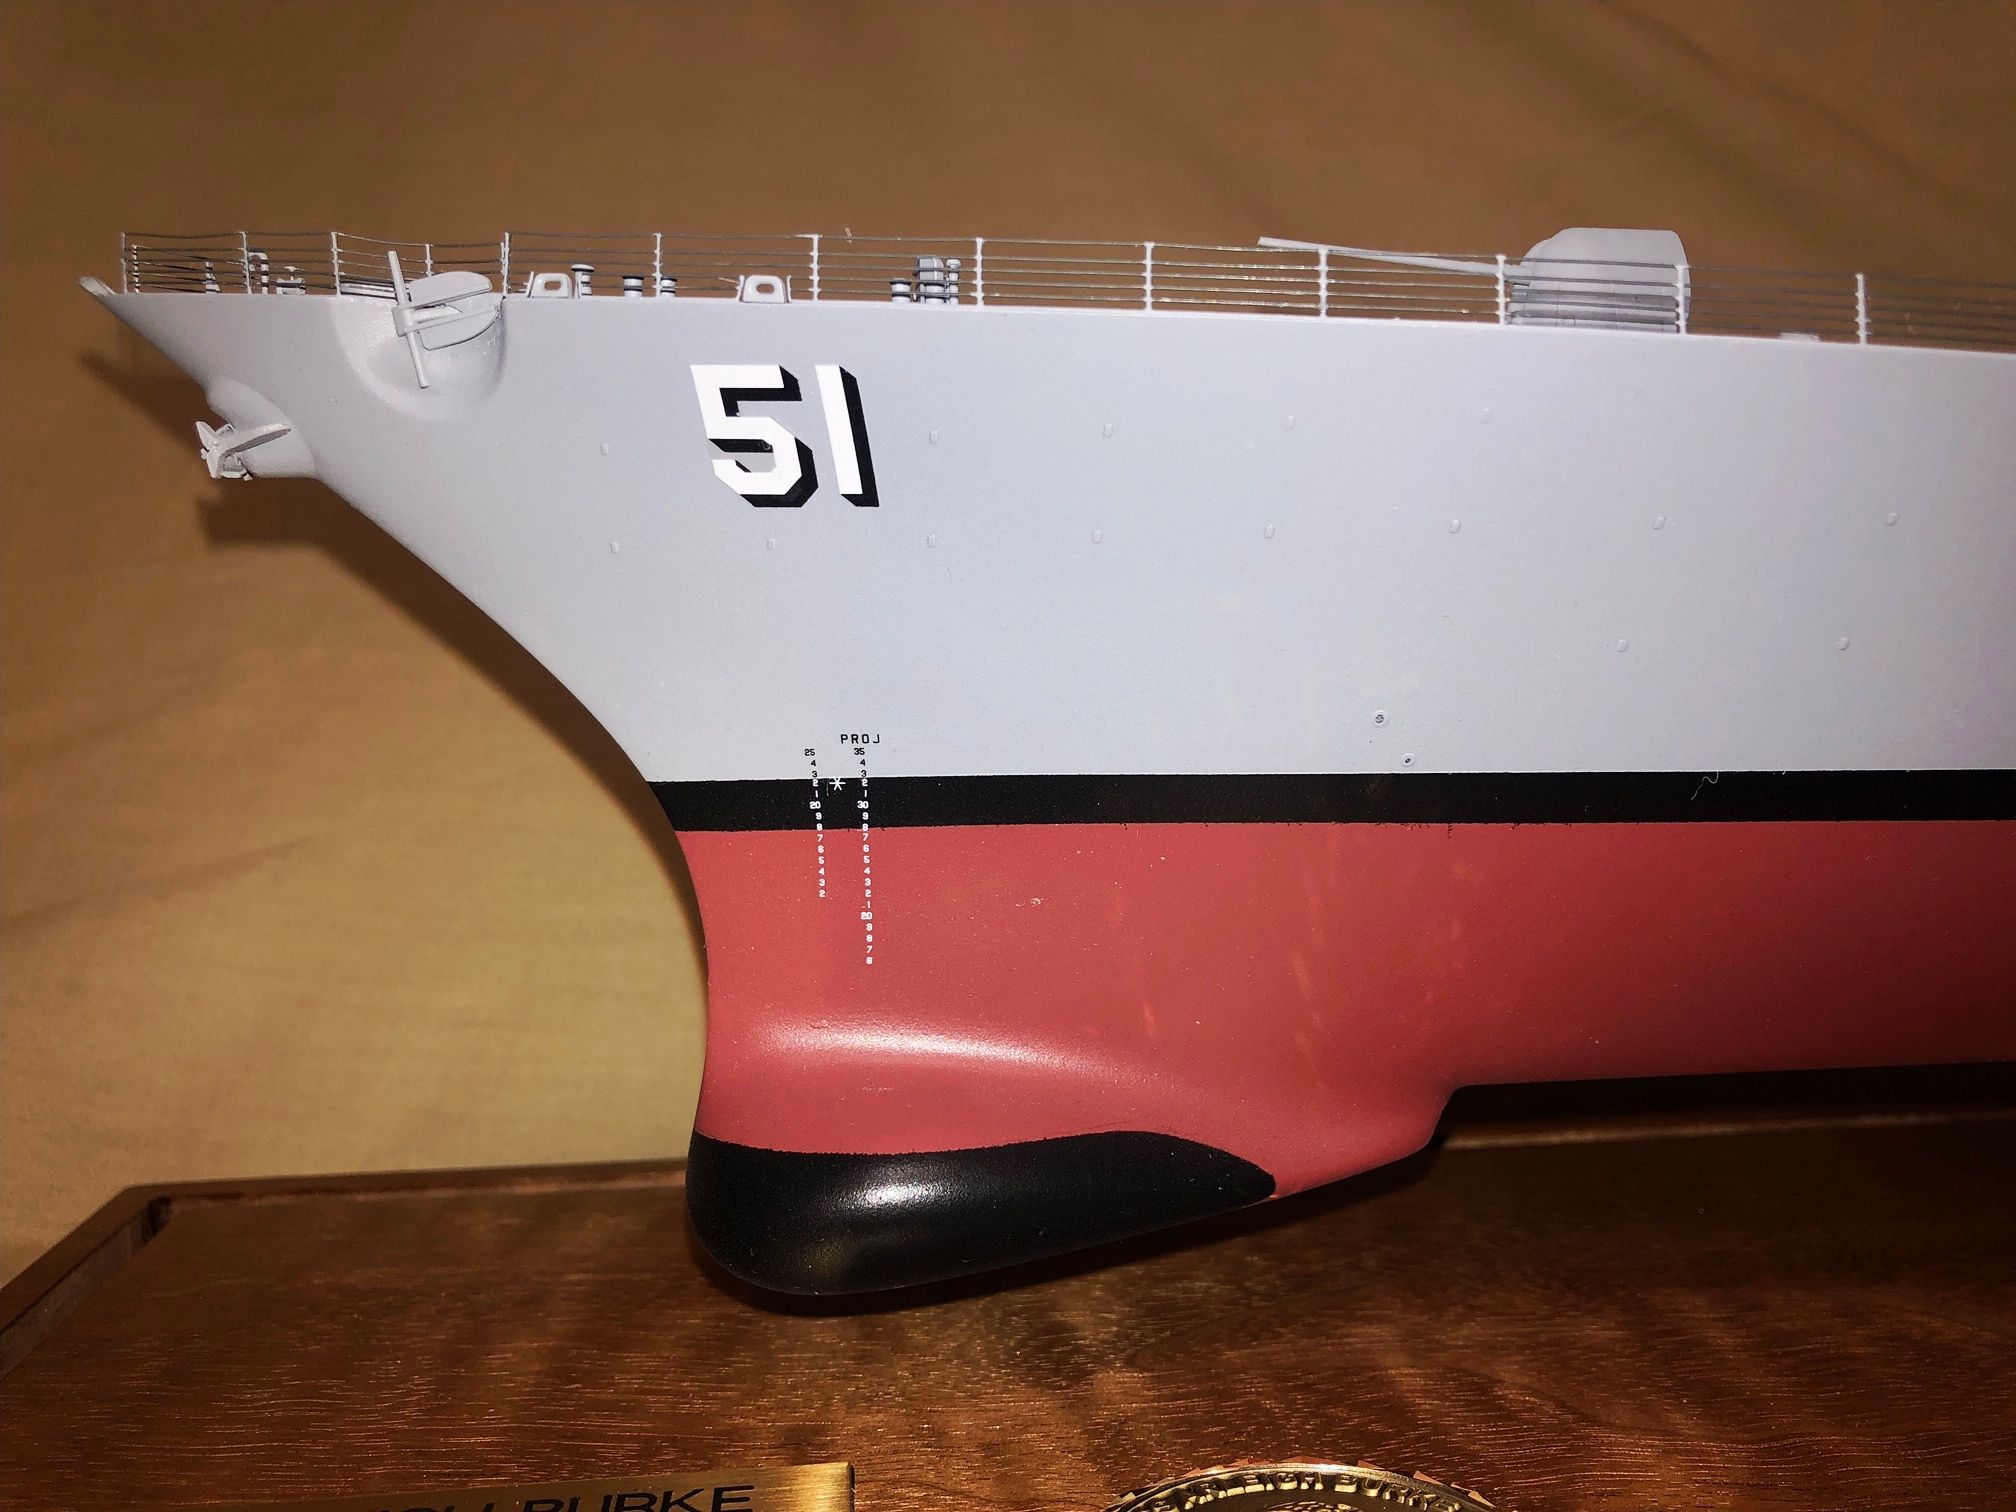
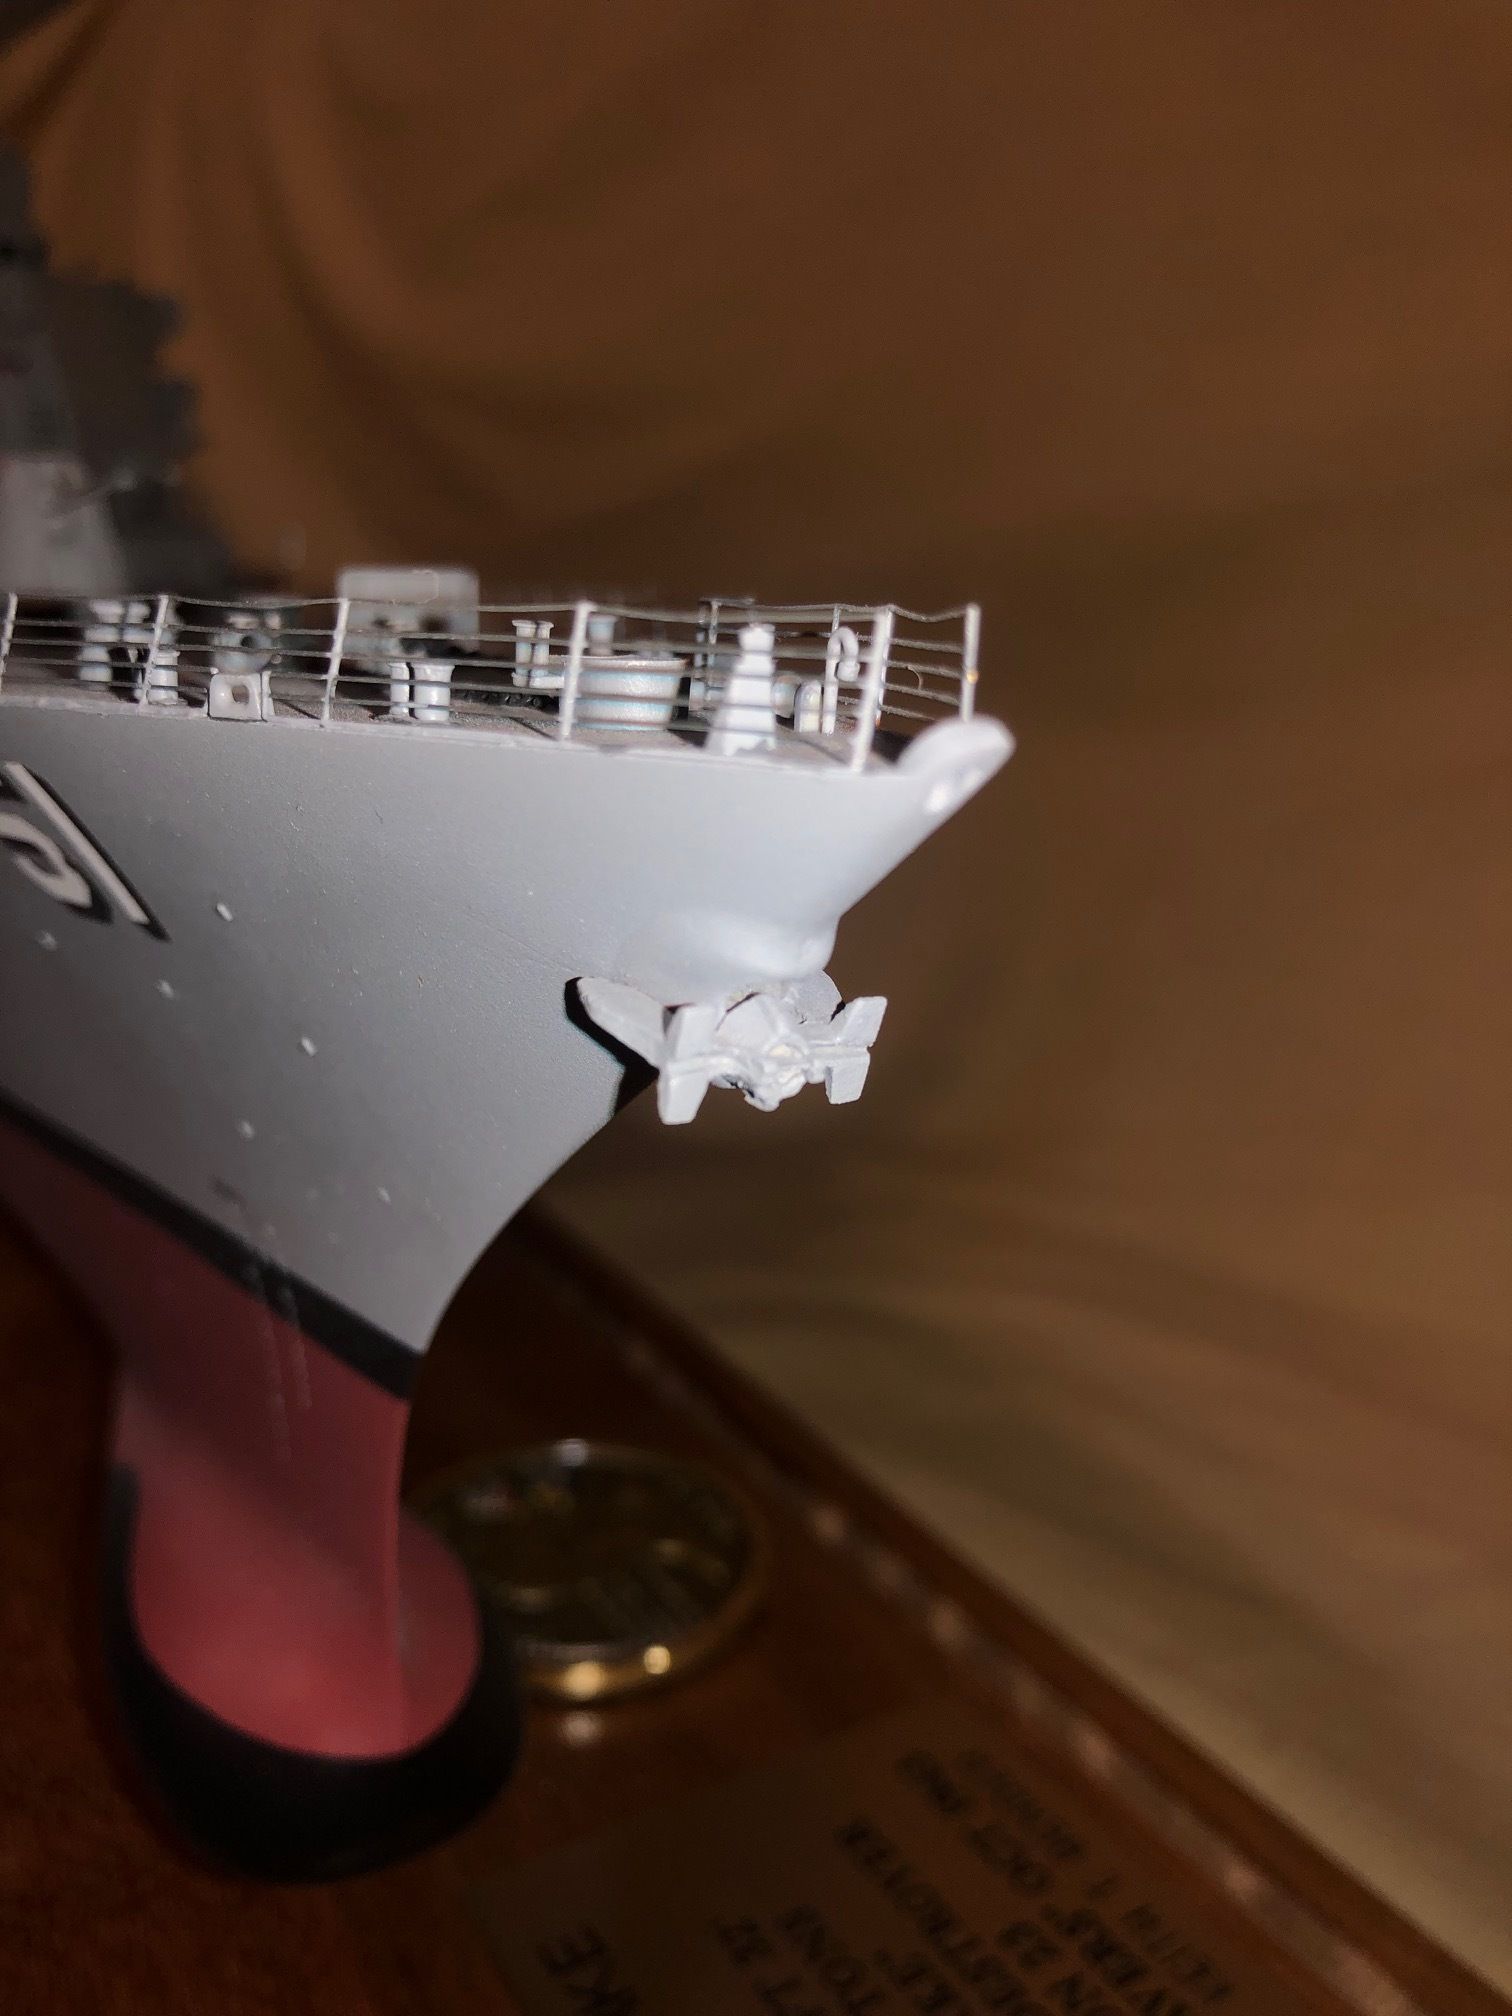
The bow anchor hawse pipe and anchor holding foot
is a mess. Way over size. It needs to be sanded and filed to a correct
shape. I went on Navsource and looked at as many Burke class ships that
had their bow anchor deployed as to get a good look at the hawse pipe.
With a rat tail file I managed to fix this issue. I wanted to keep the
model as close to out of box as I could. |
|
|
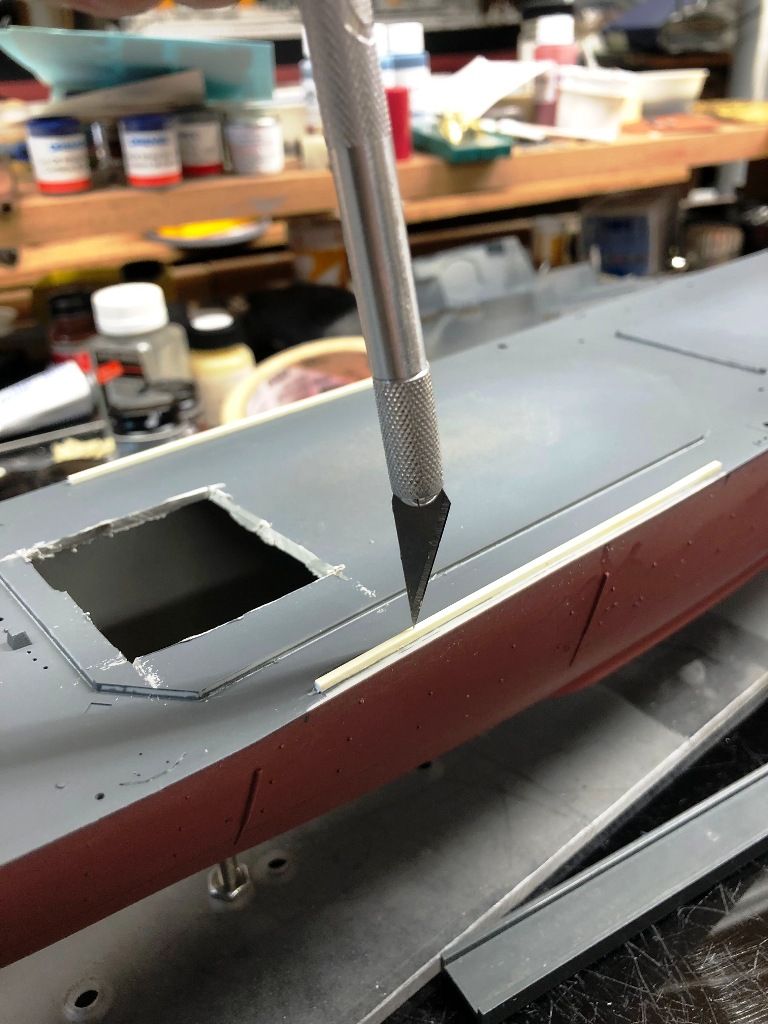
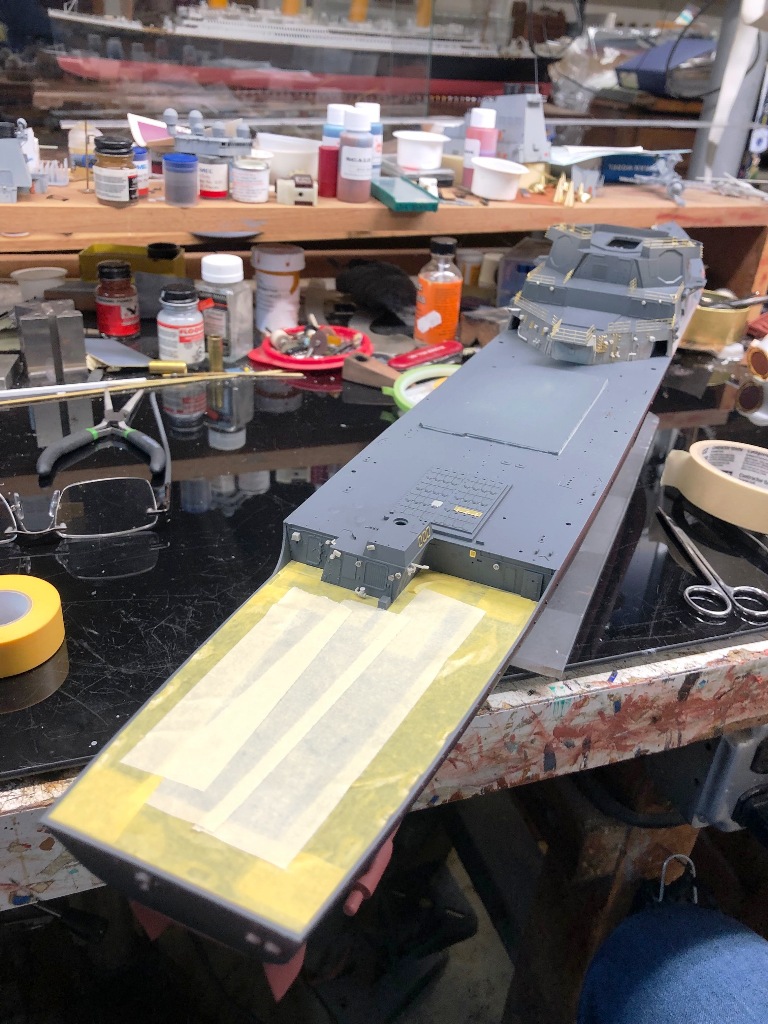
| The deck under the fwd superstructure had a sag
so in order for the superstructure to sit on it without a gap between the
two I cut open a hole in the deck. Then I used a plastic beam cut to a
length long ent to push the deck upwards to mate with the superstructure. |
|
|
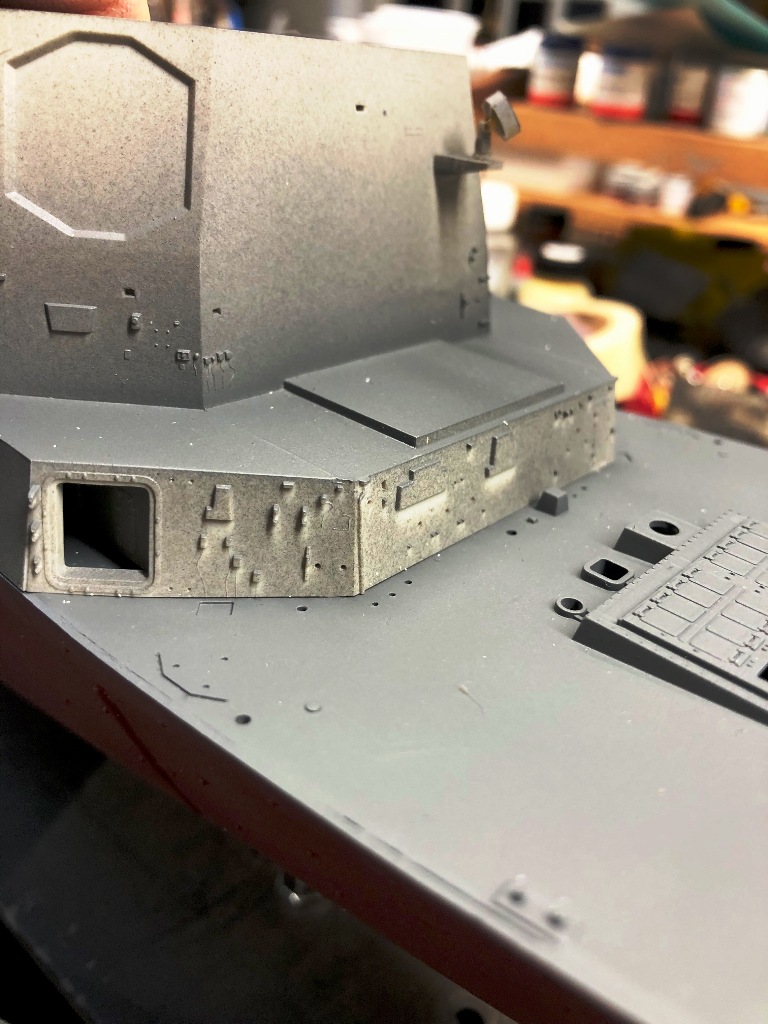
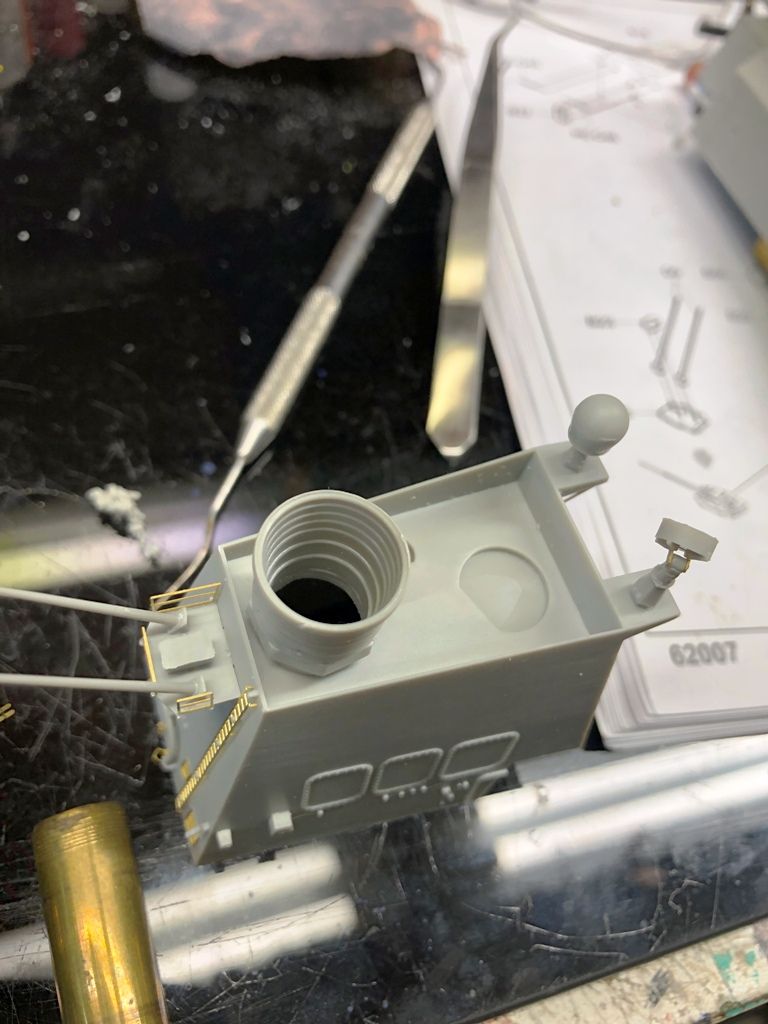
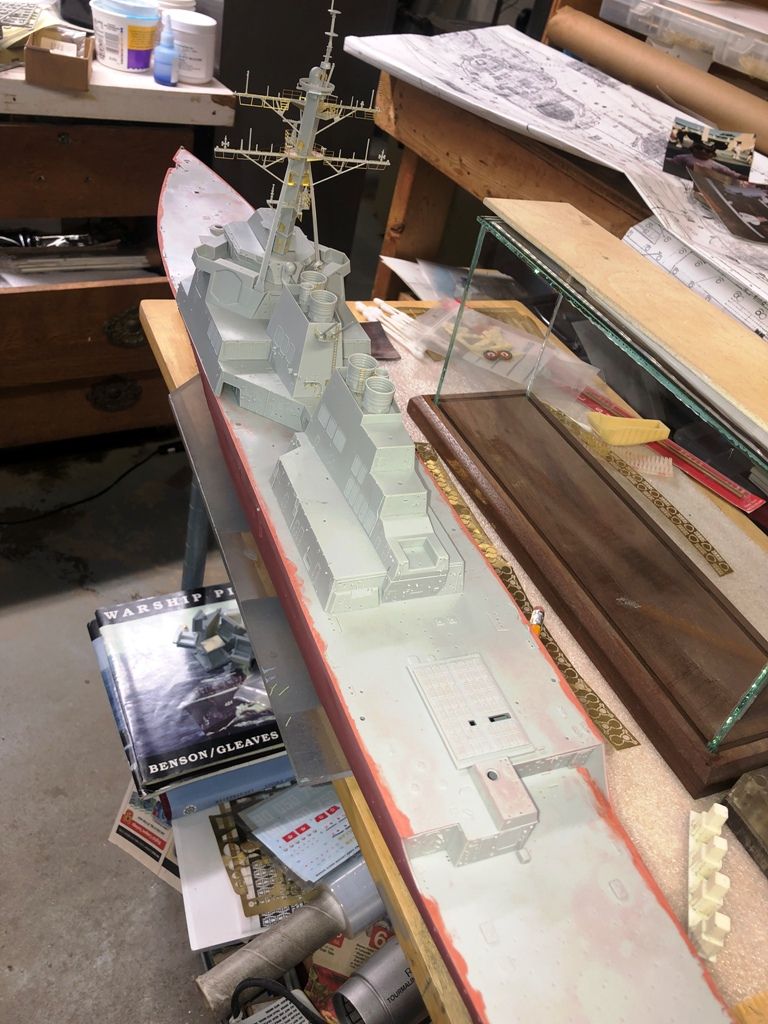
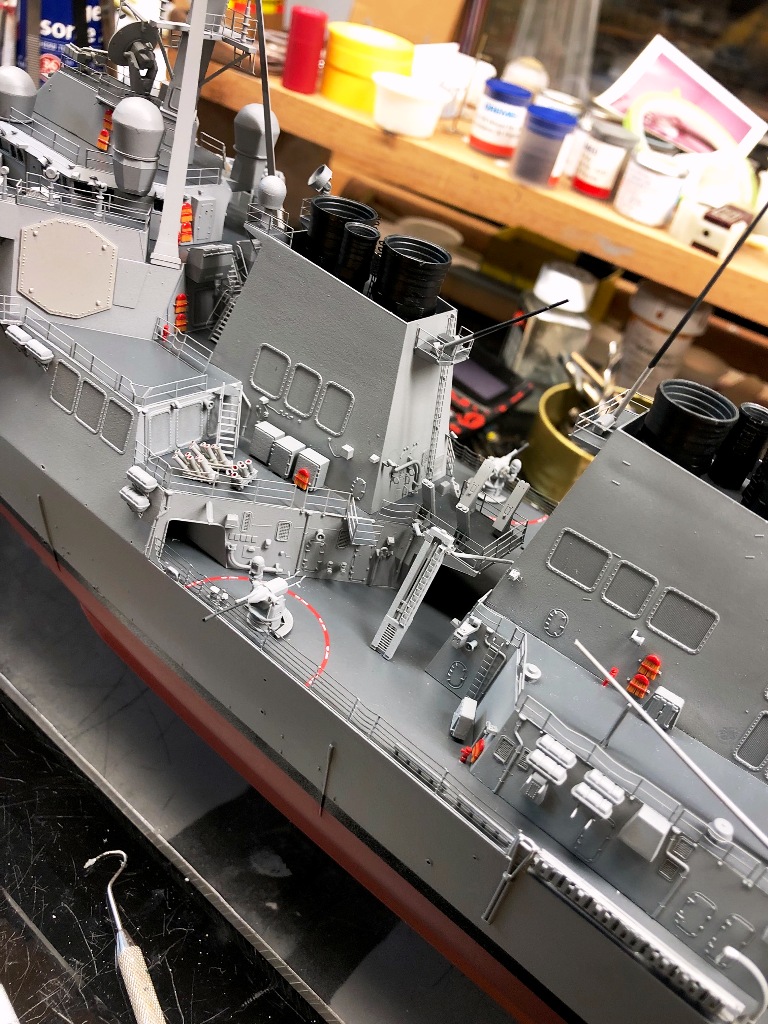
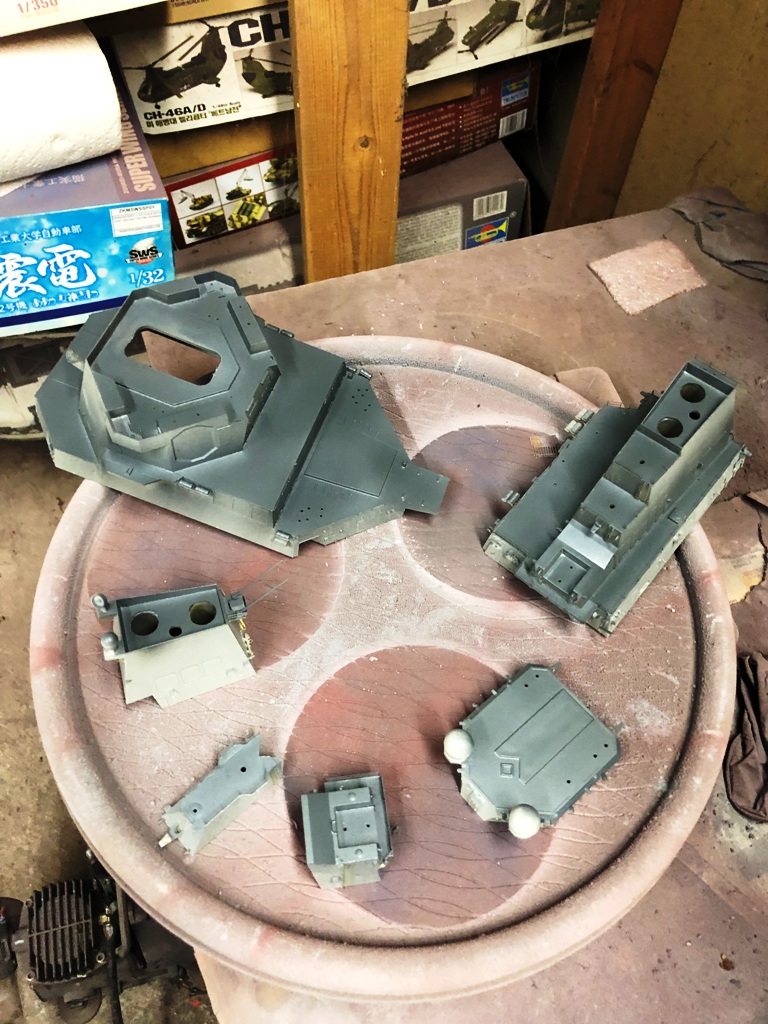
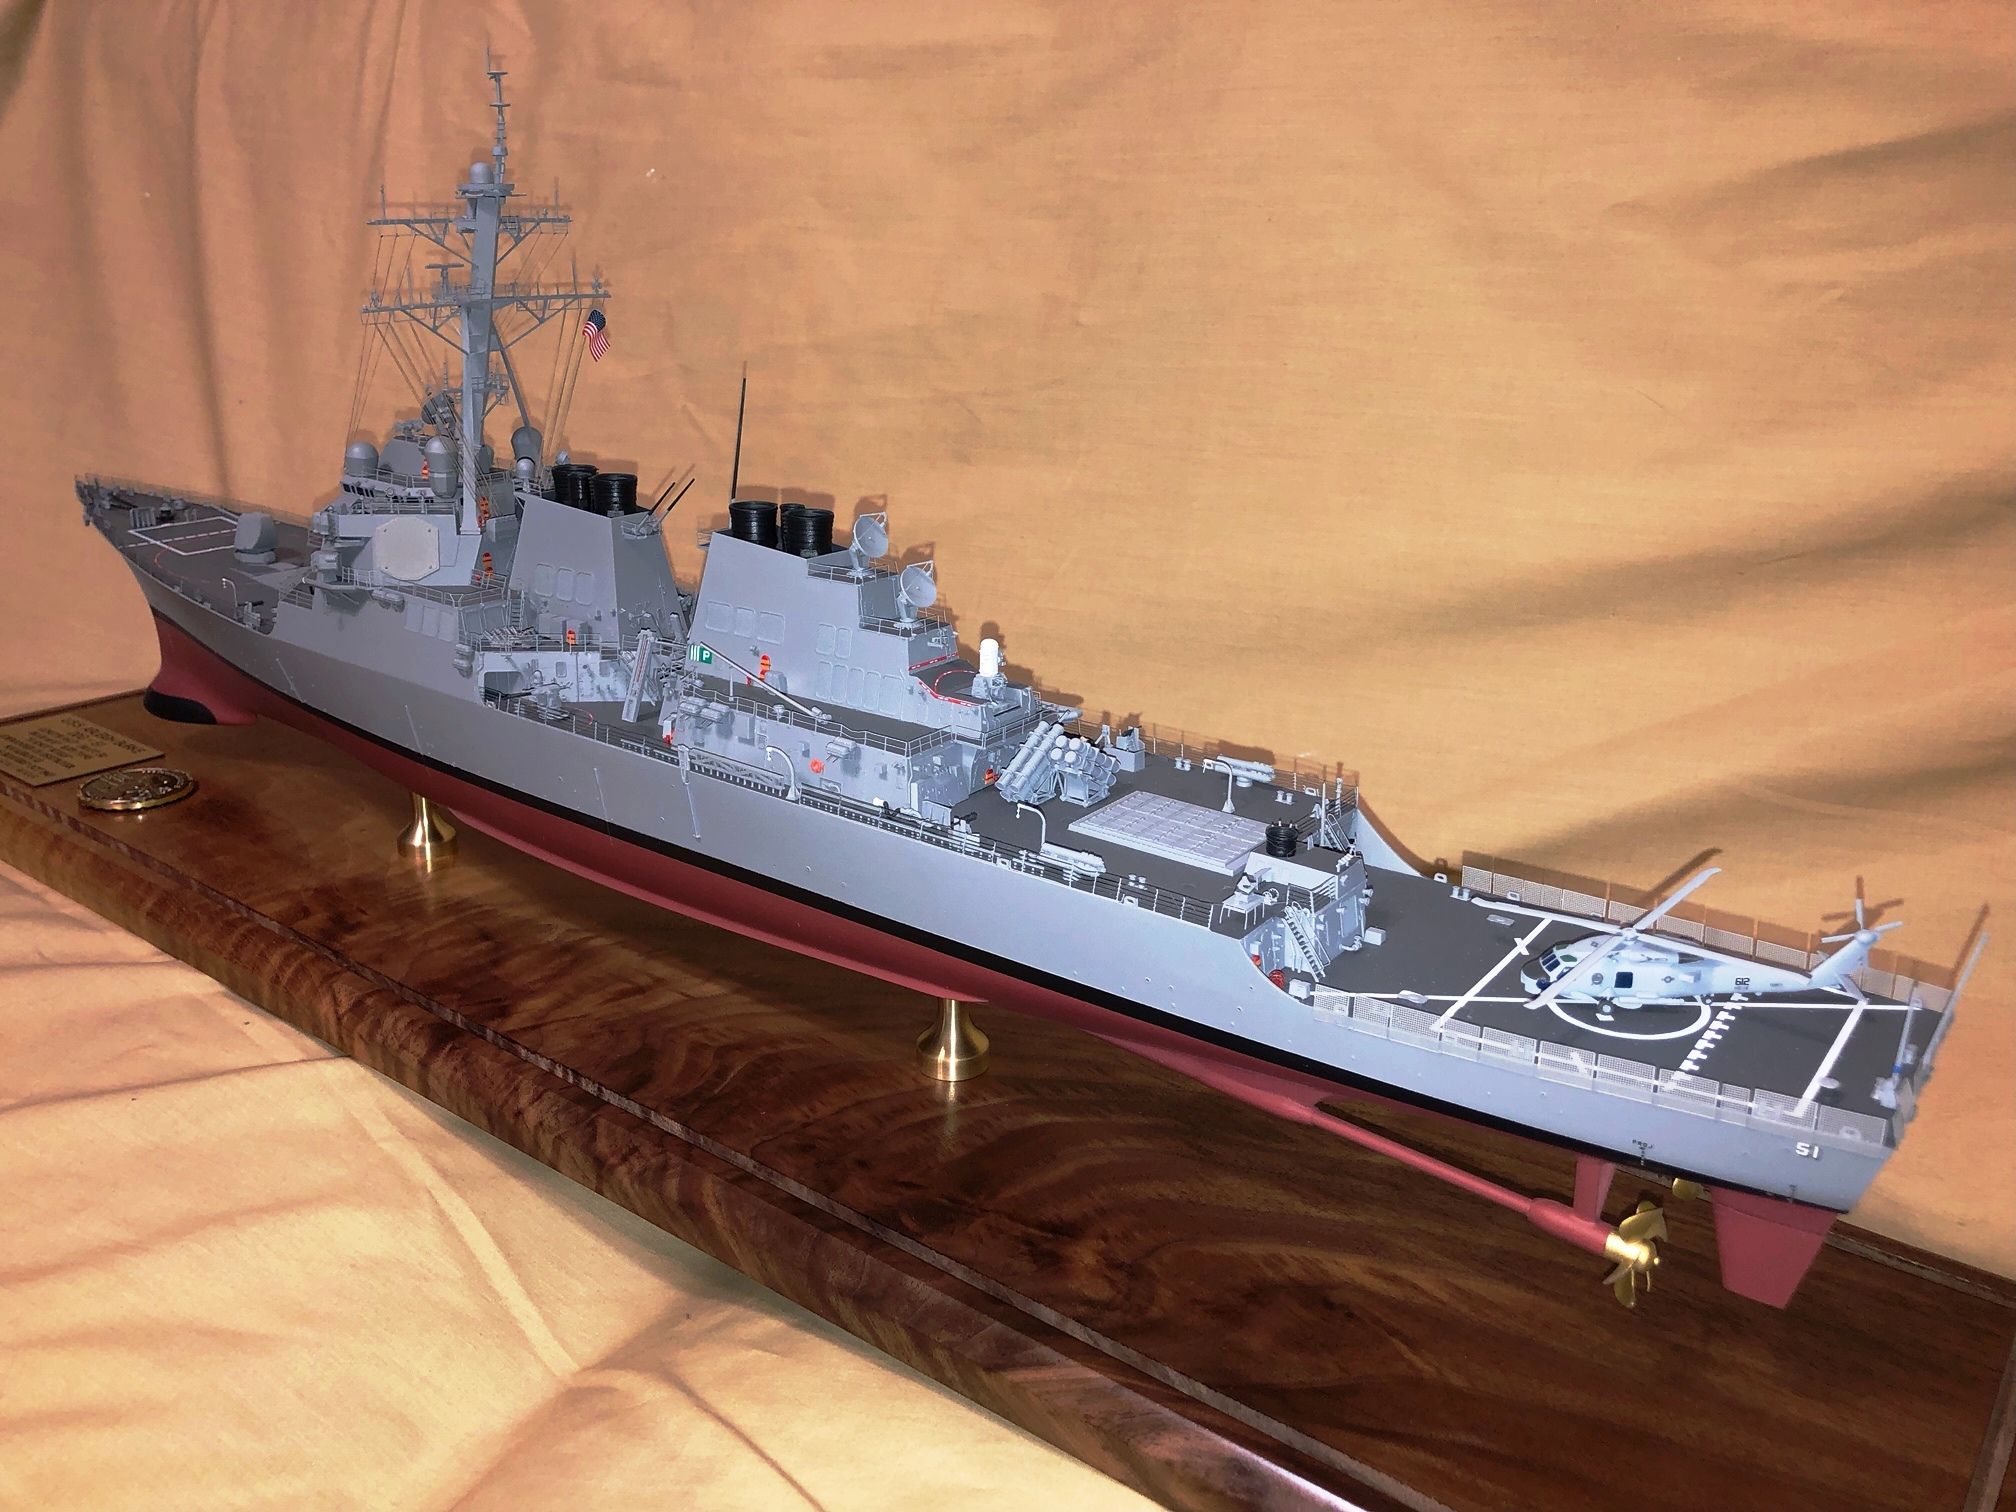
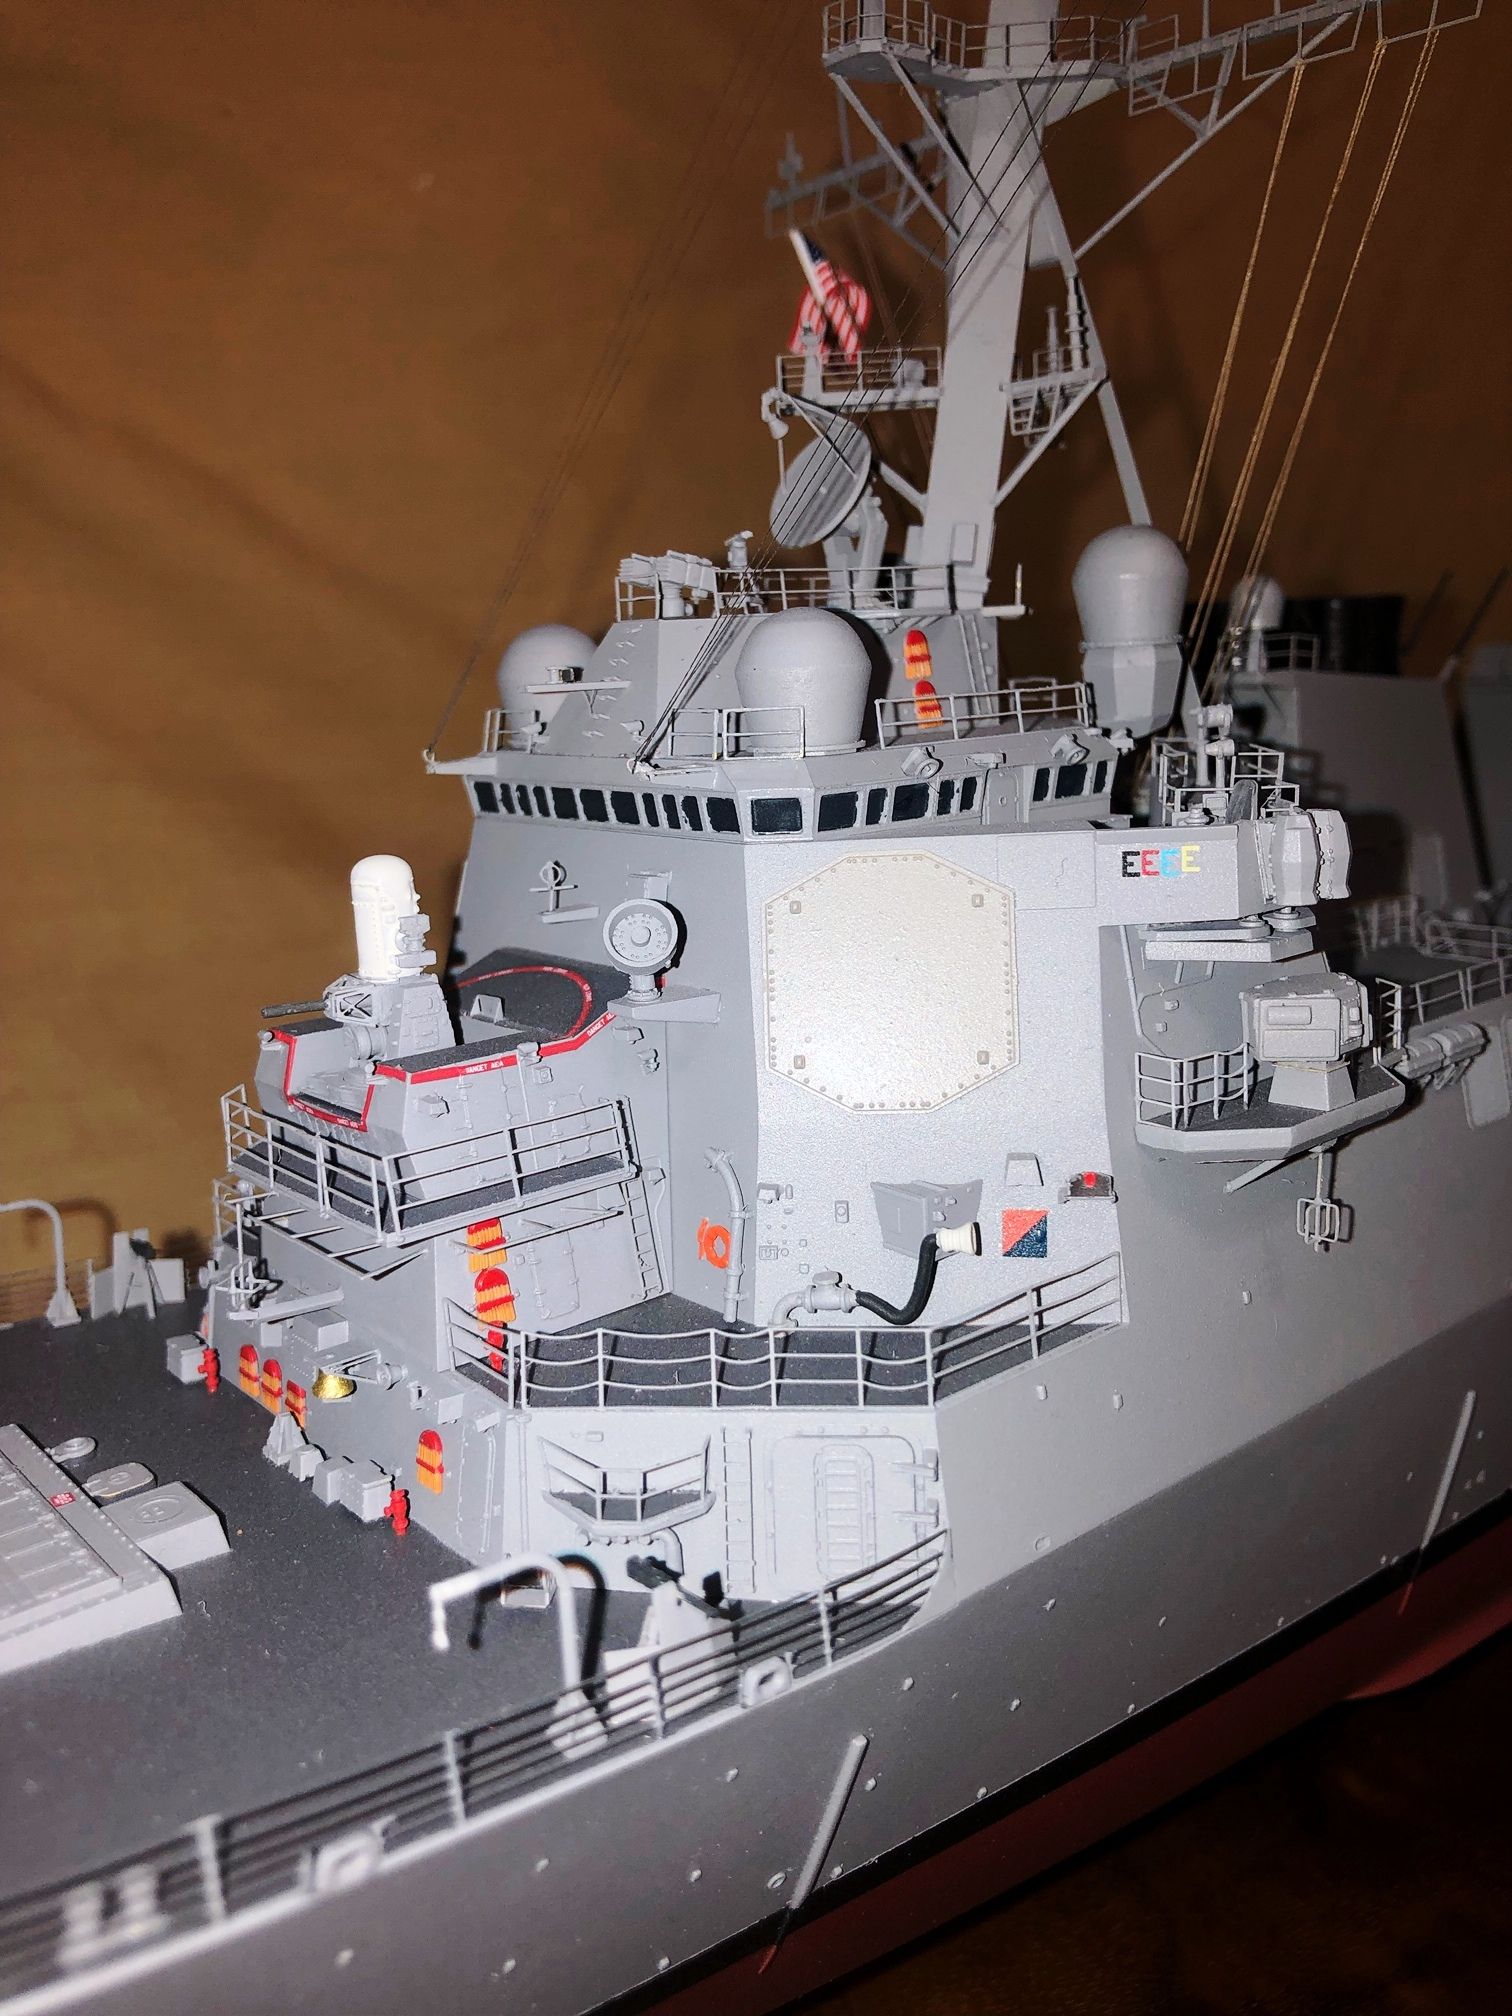
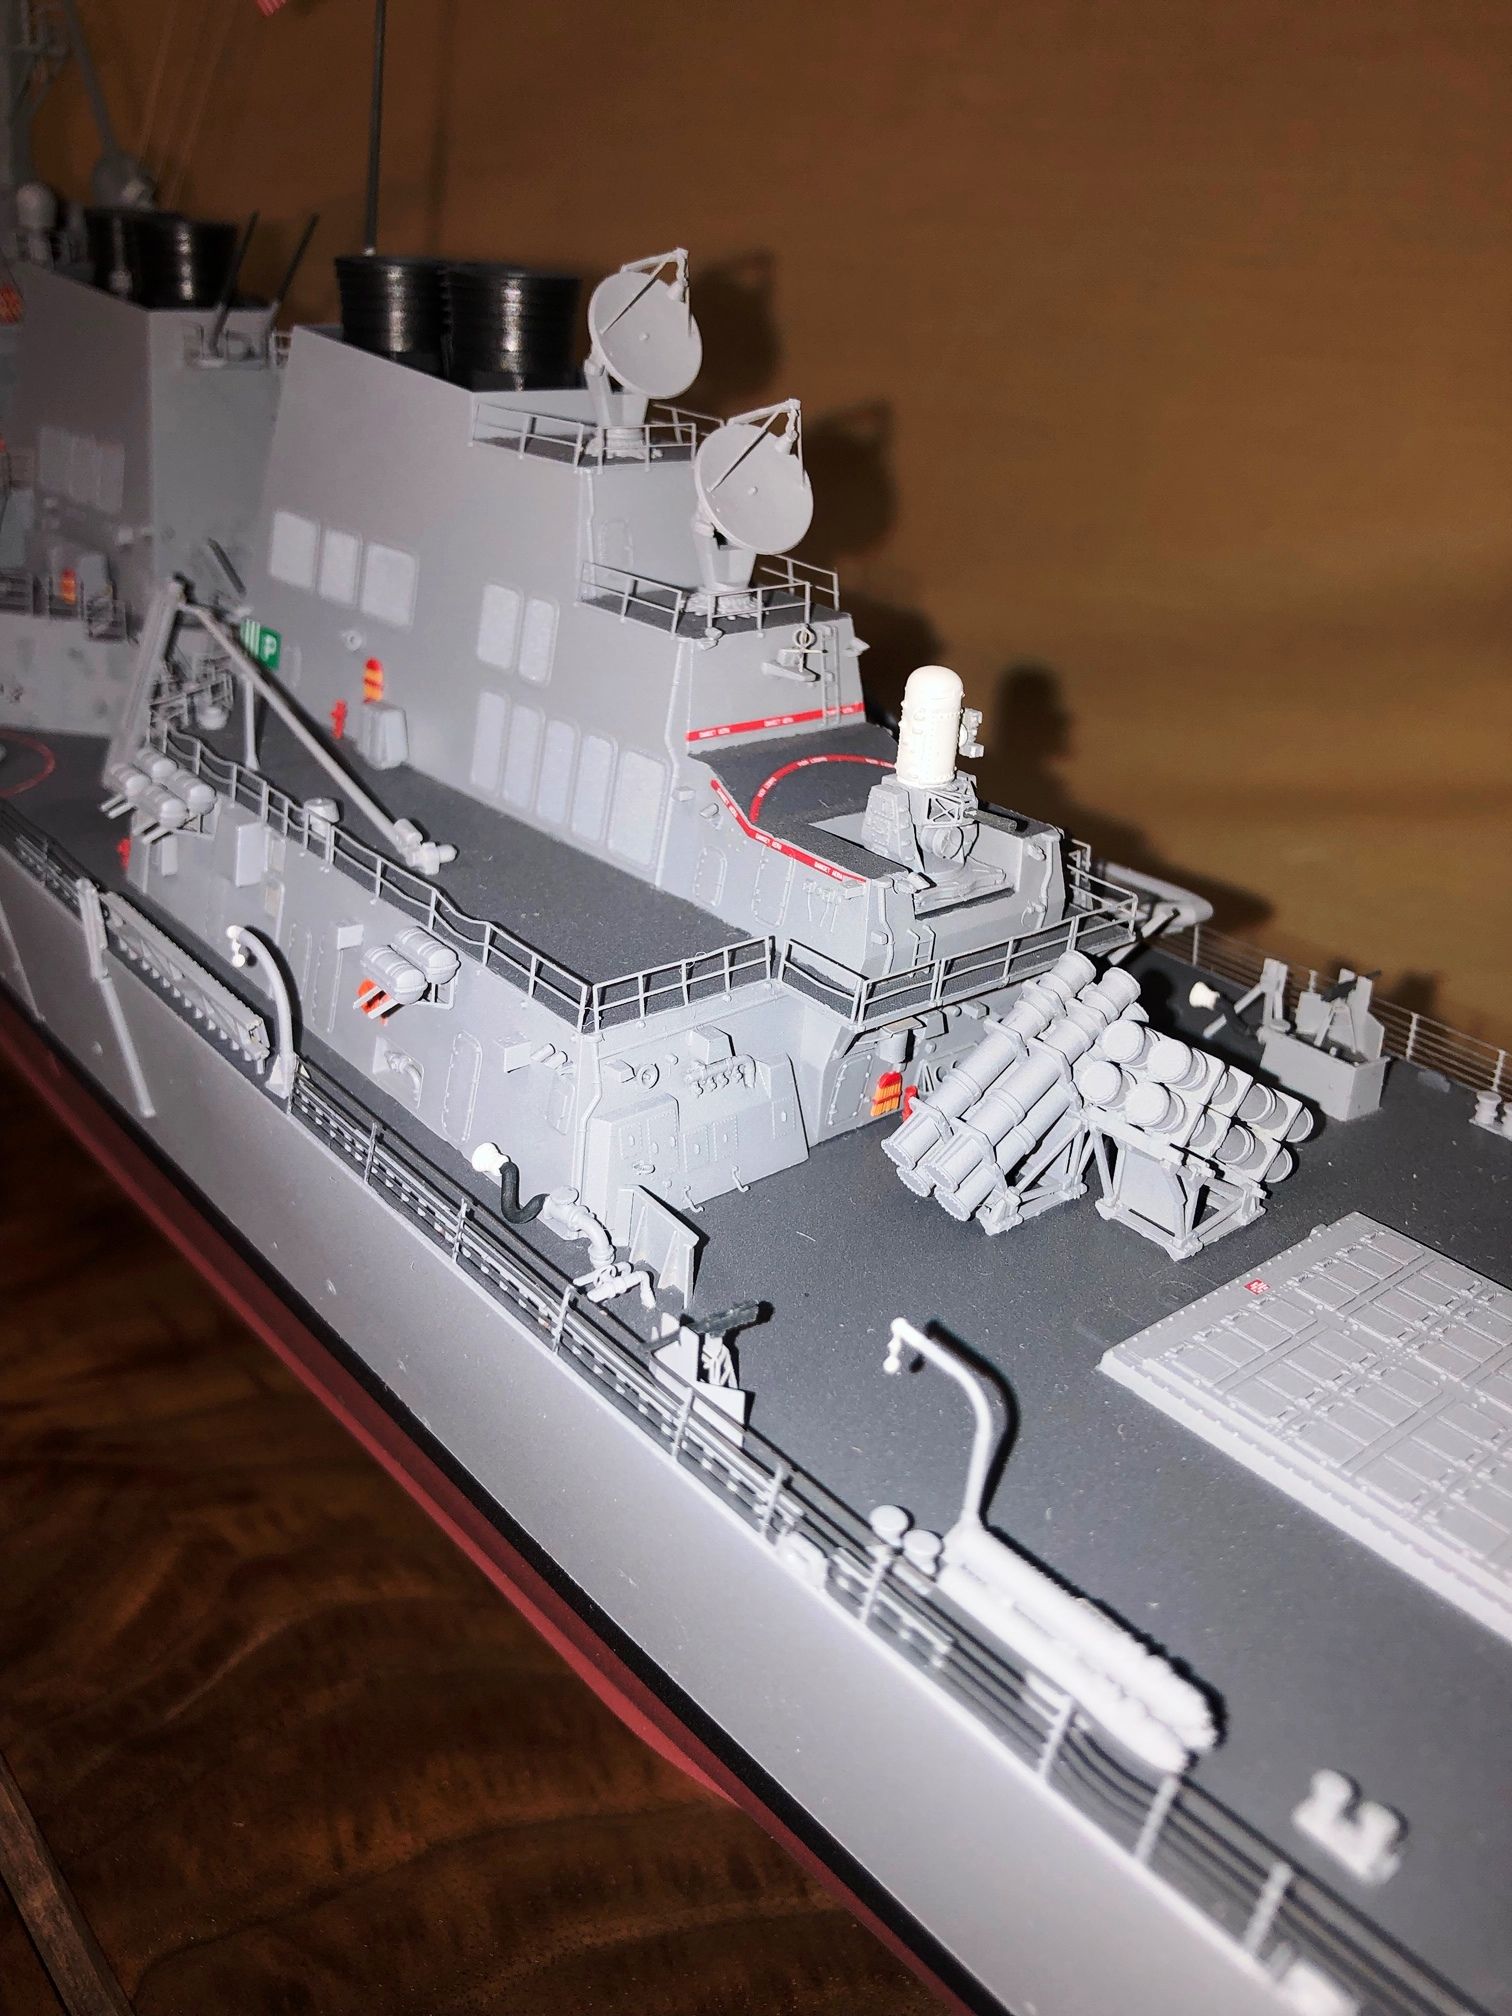
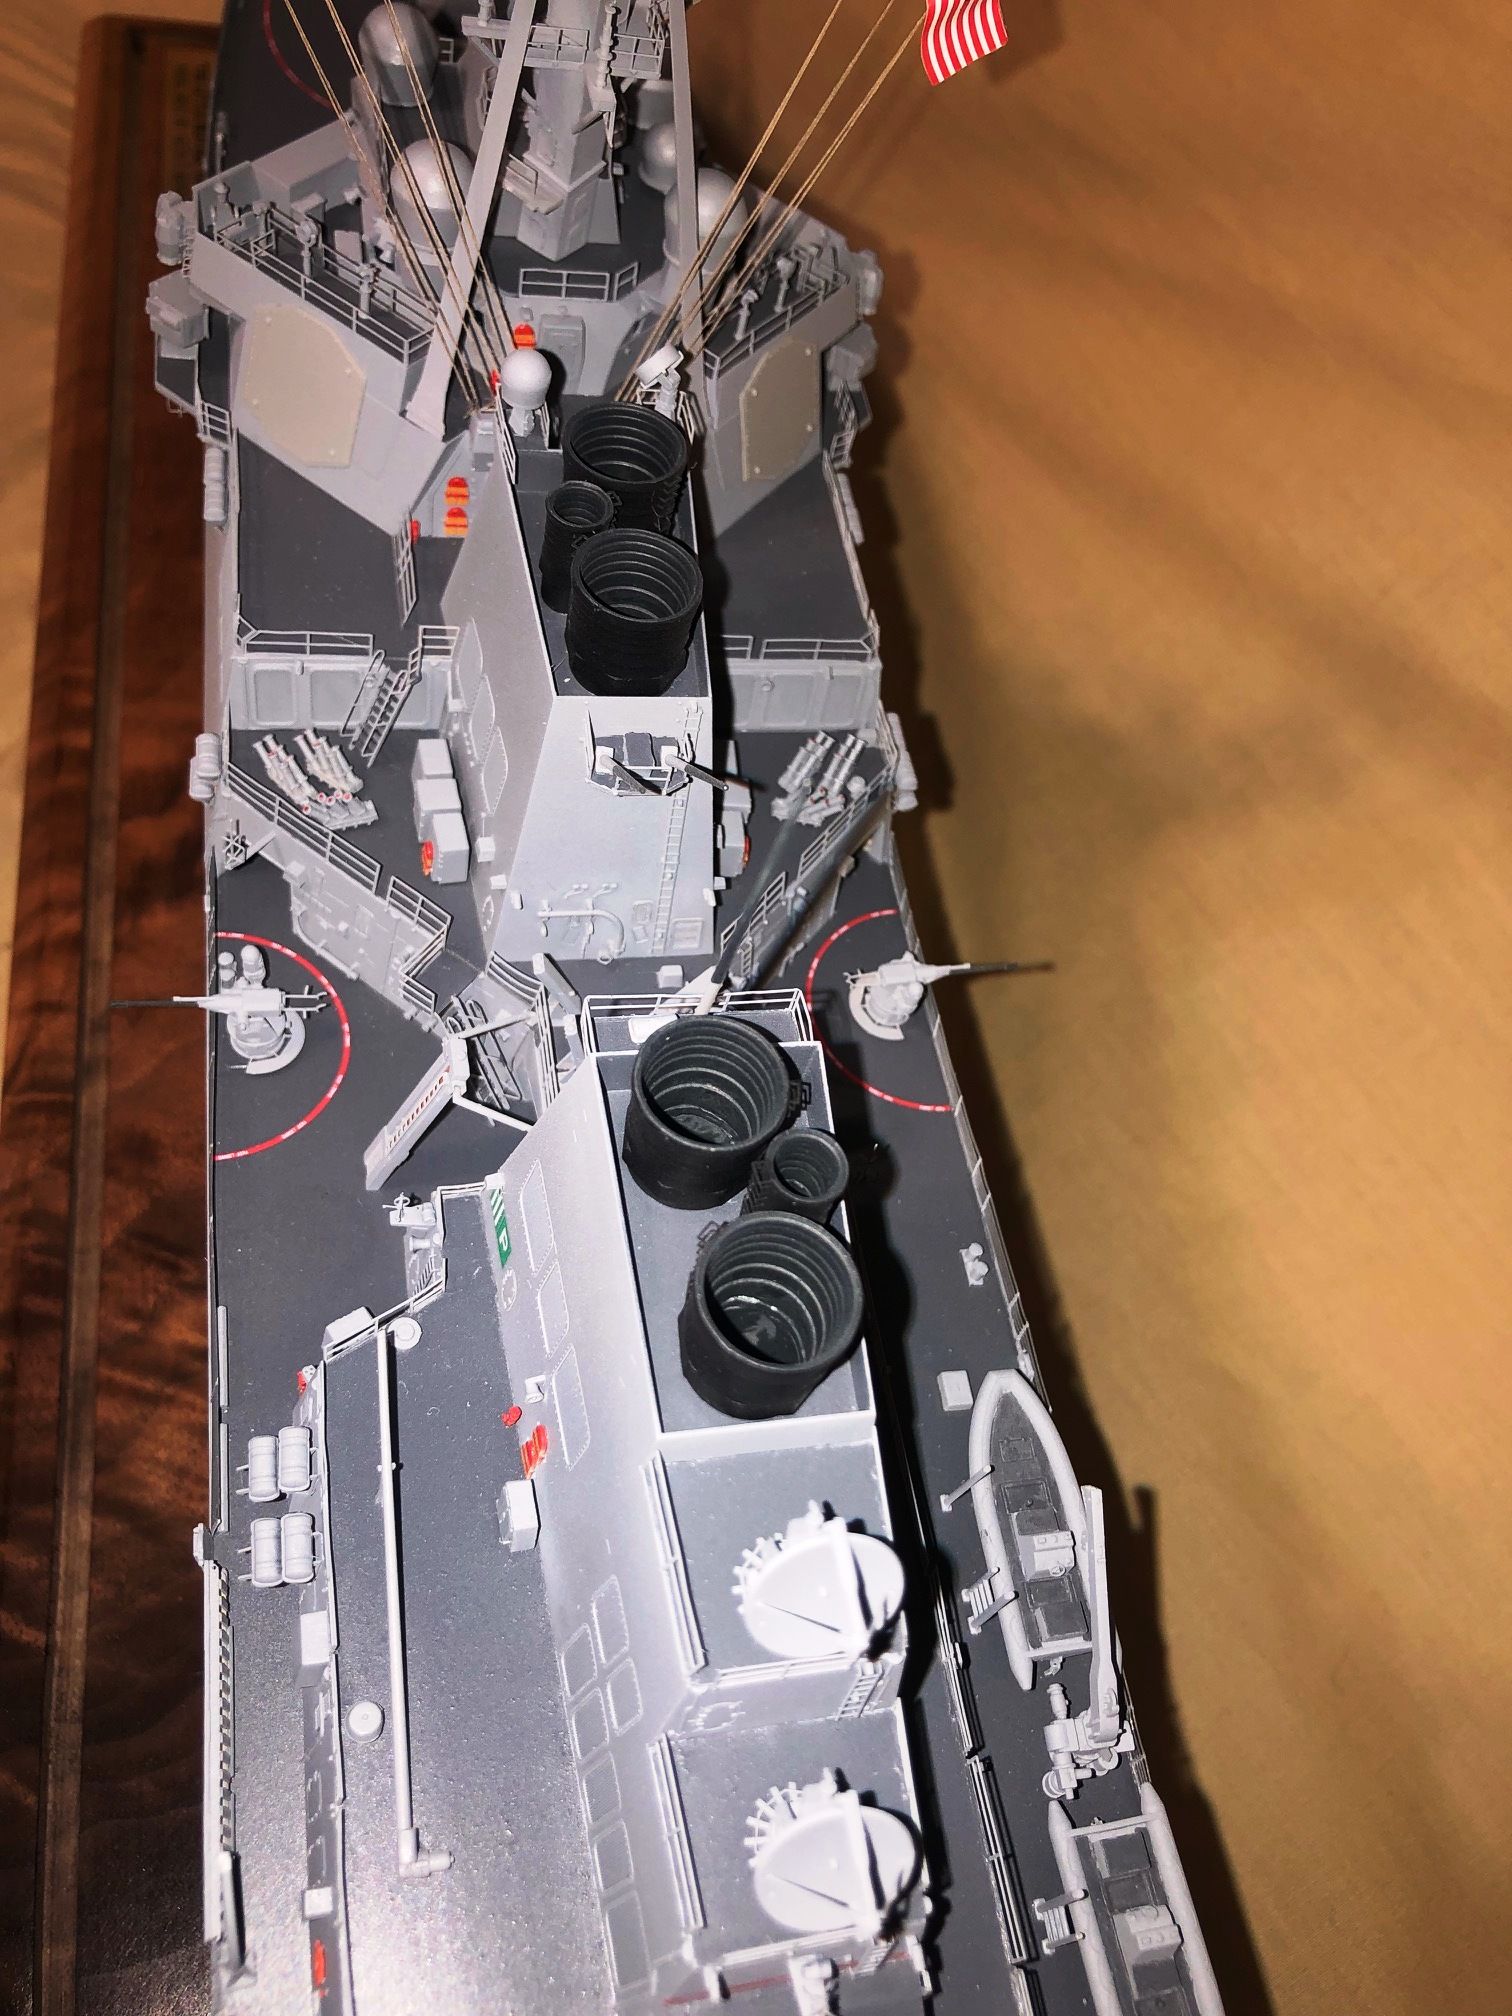
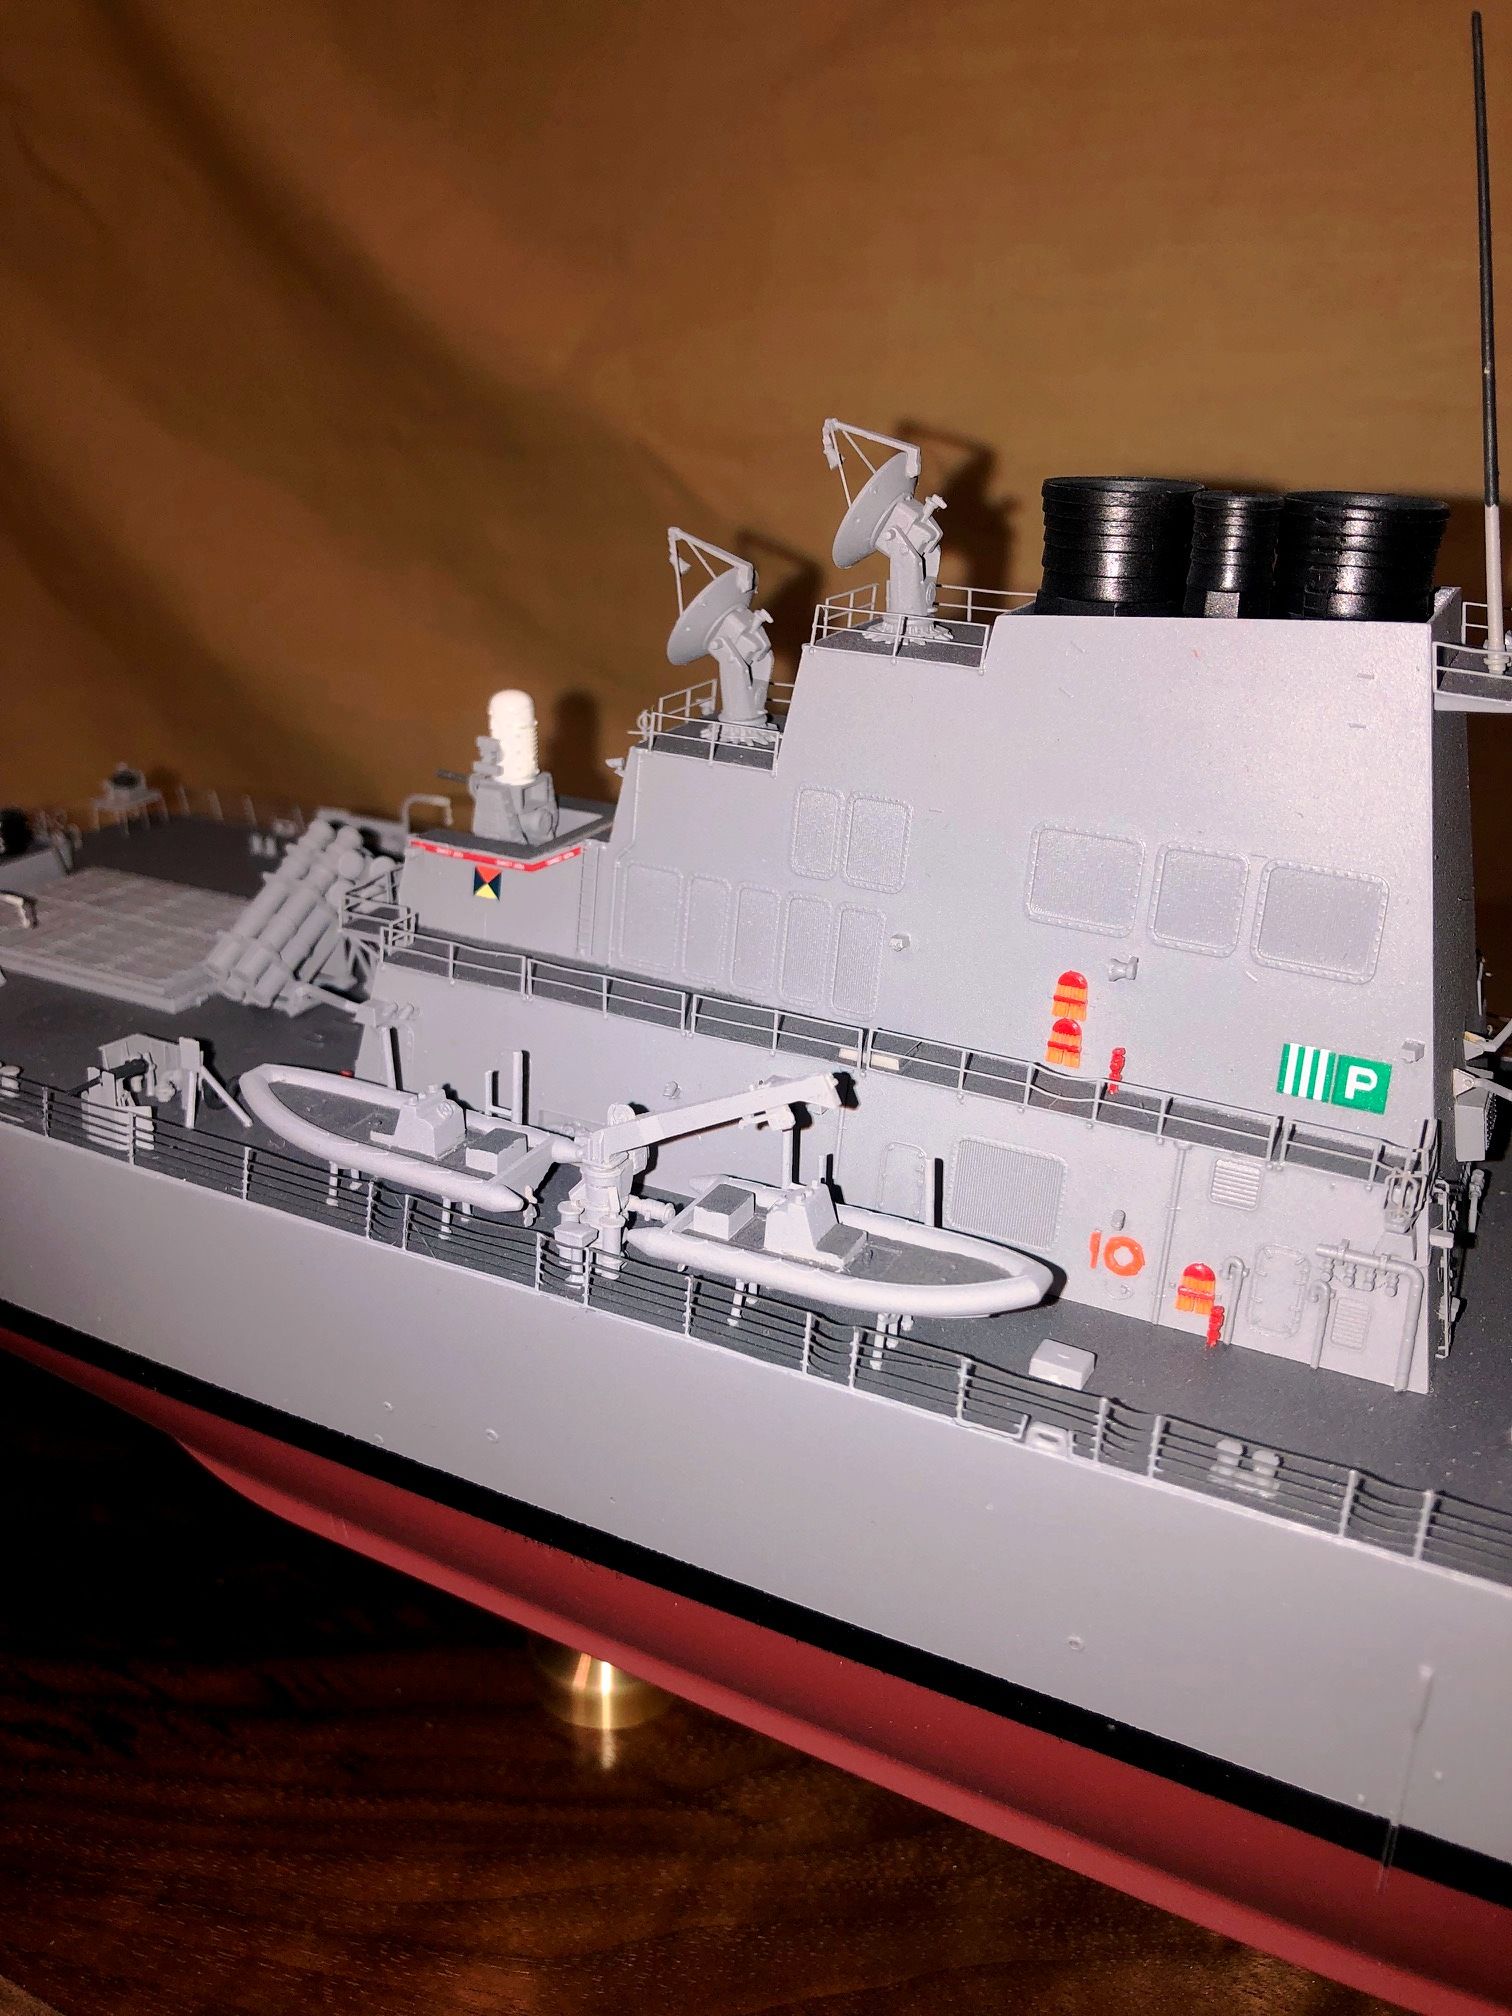
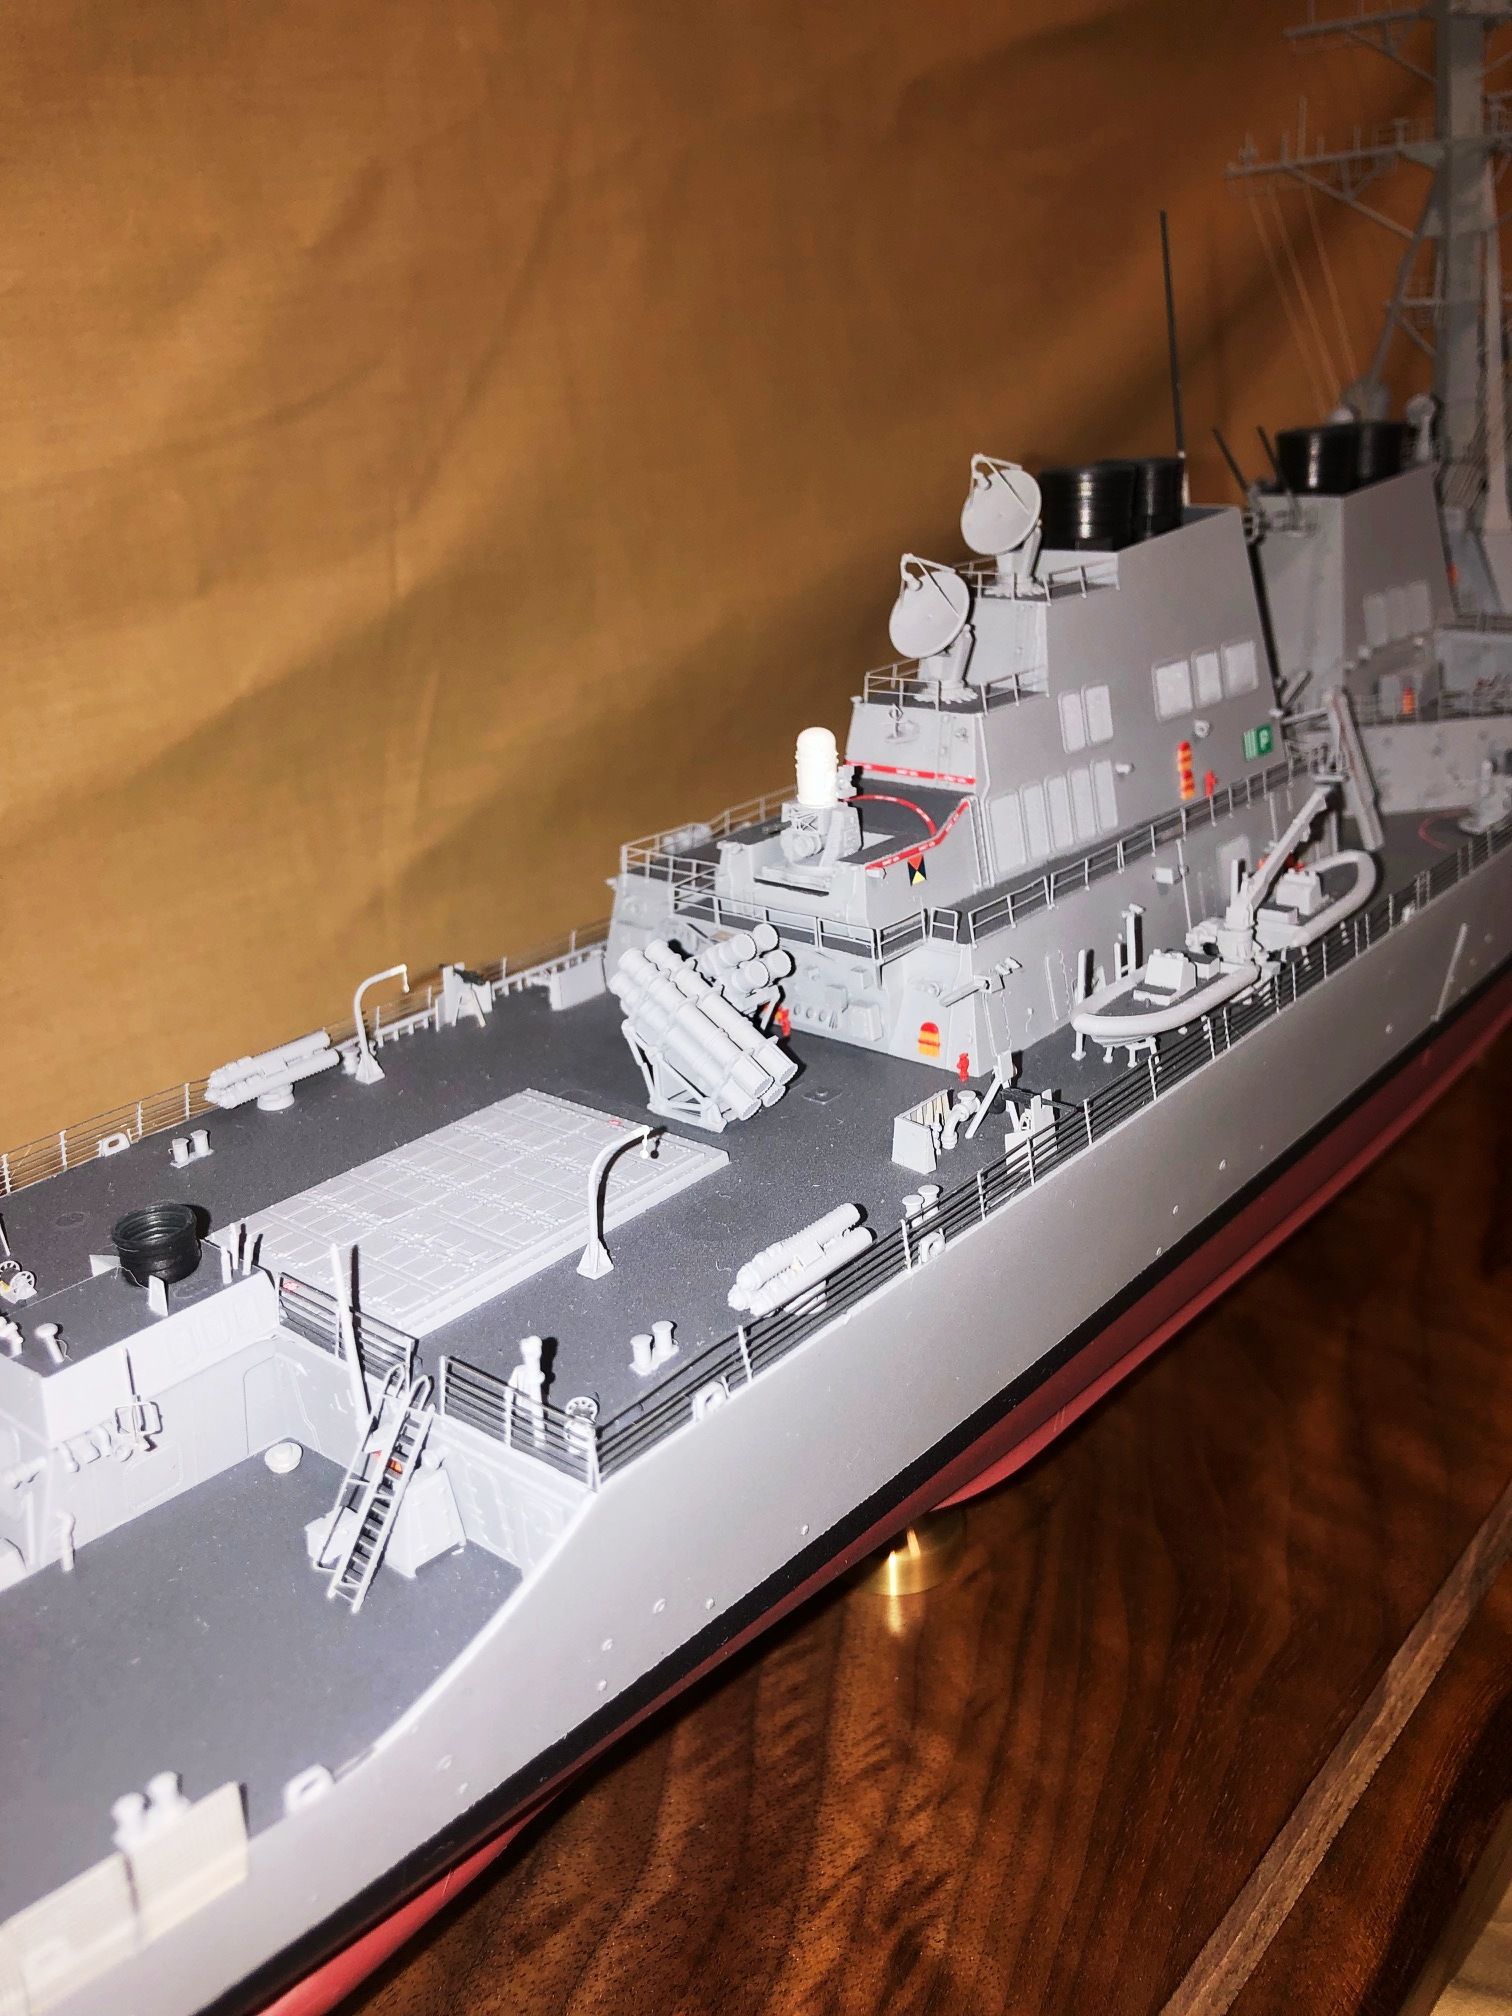
| After the hull I began with subassembly work.
Small parts as deck fittings, RHI boats, stacks, H-60 helo, all weapons
and superstructures. In all most of the parts can be removed from the sprues
with easy. However I found the most frustrating parts are the individual
mooring bitts. Two per unit and 42 separate parts need to be desprued.
They should have found a better way to do the tool and die work on the
mold for these tiny parts. There is too much sprue holding them on and
it is difficult to cut them away without distorting the round cap on top.
Takes some time and can frustrating.
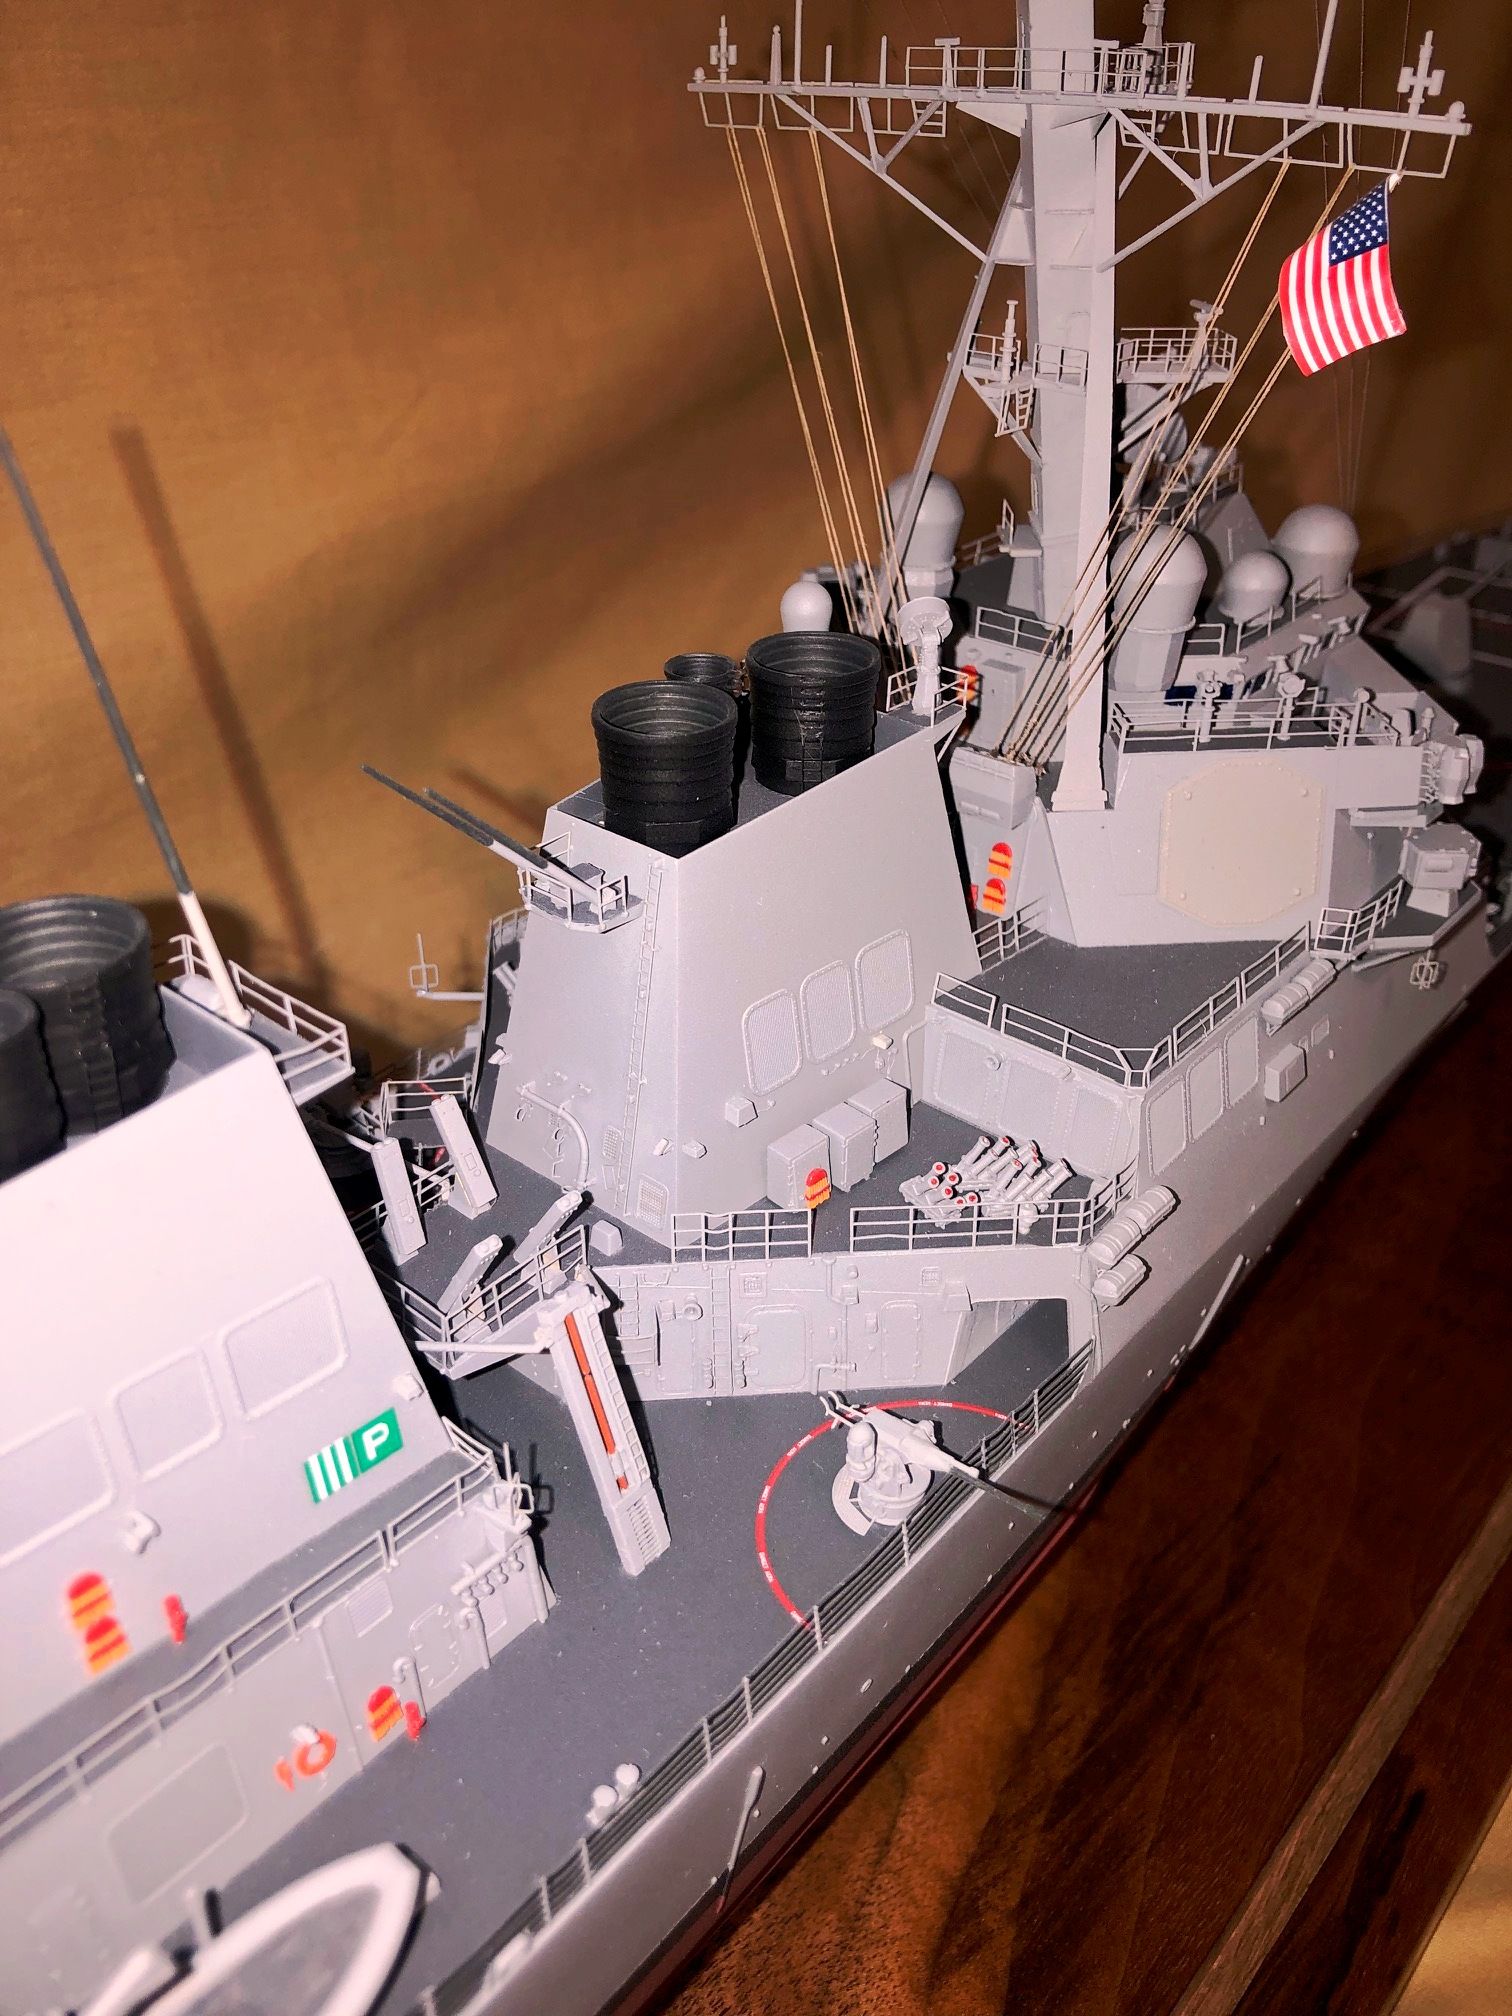
One mod I did do and yes I broke the rules of out
of box build was with the six stacks. The four main ones are large enough
to see right down inside and they come to an end or I should say they have
a bottom. These I drilled open at the bottom and I also opened the top
of the superstructure where they mount to. Then I put some brass tubing
inside there so as to make them look like uptakes coming up from the engine
rooms and not just blocked off at the stack base. Besides, how can the
exhaust get out |
|
|
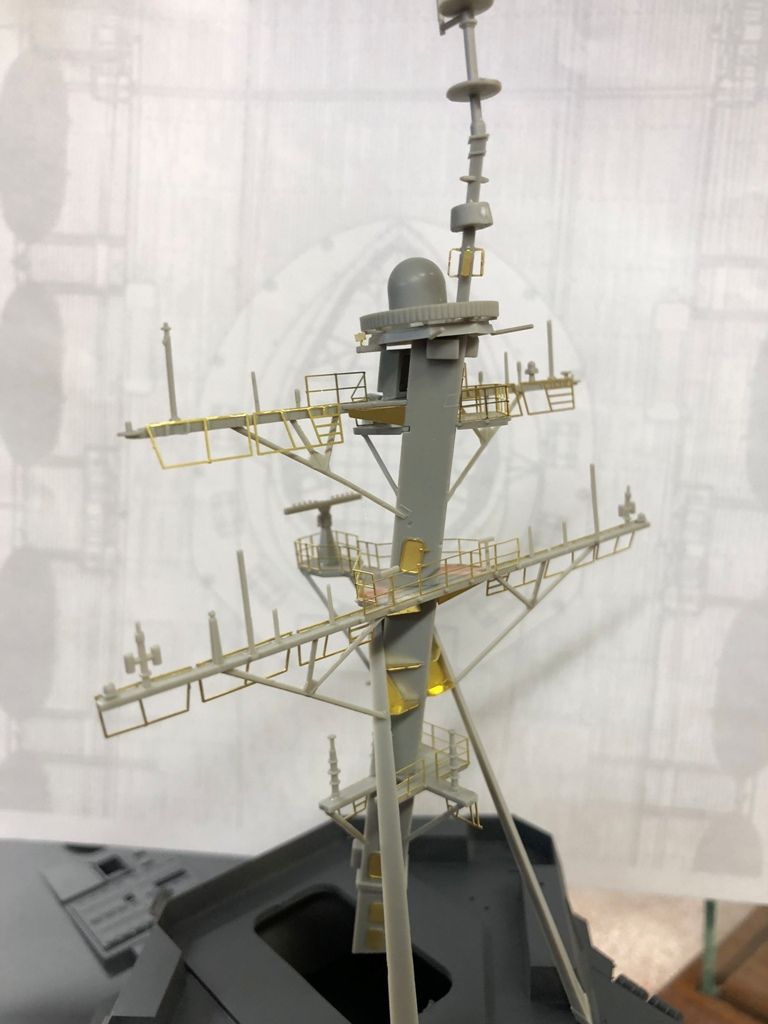
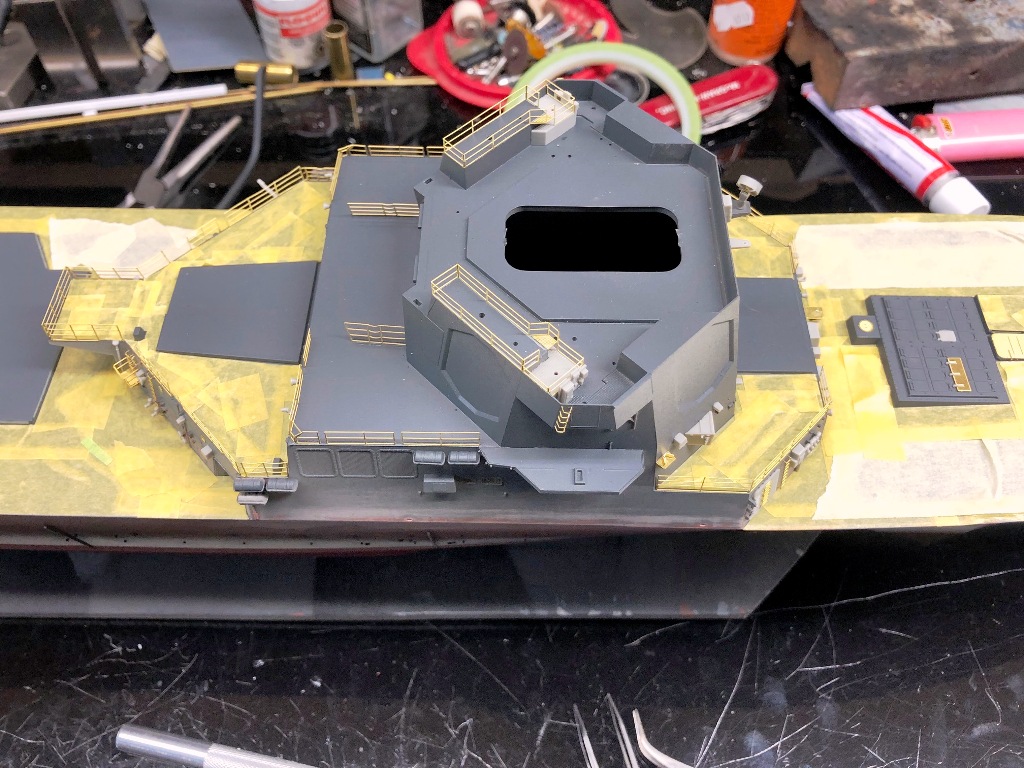
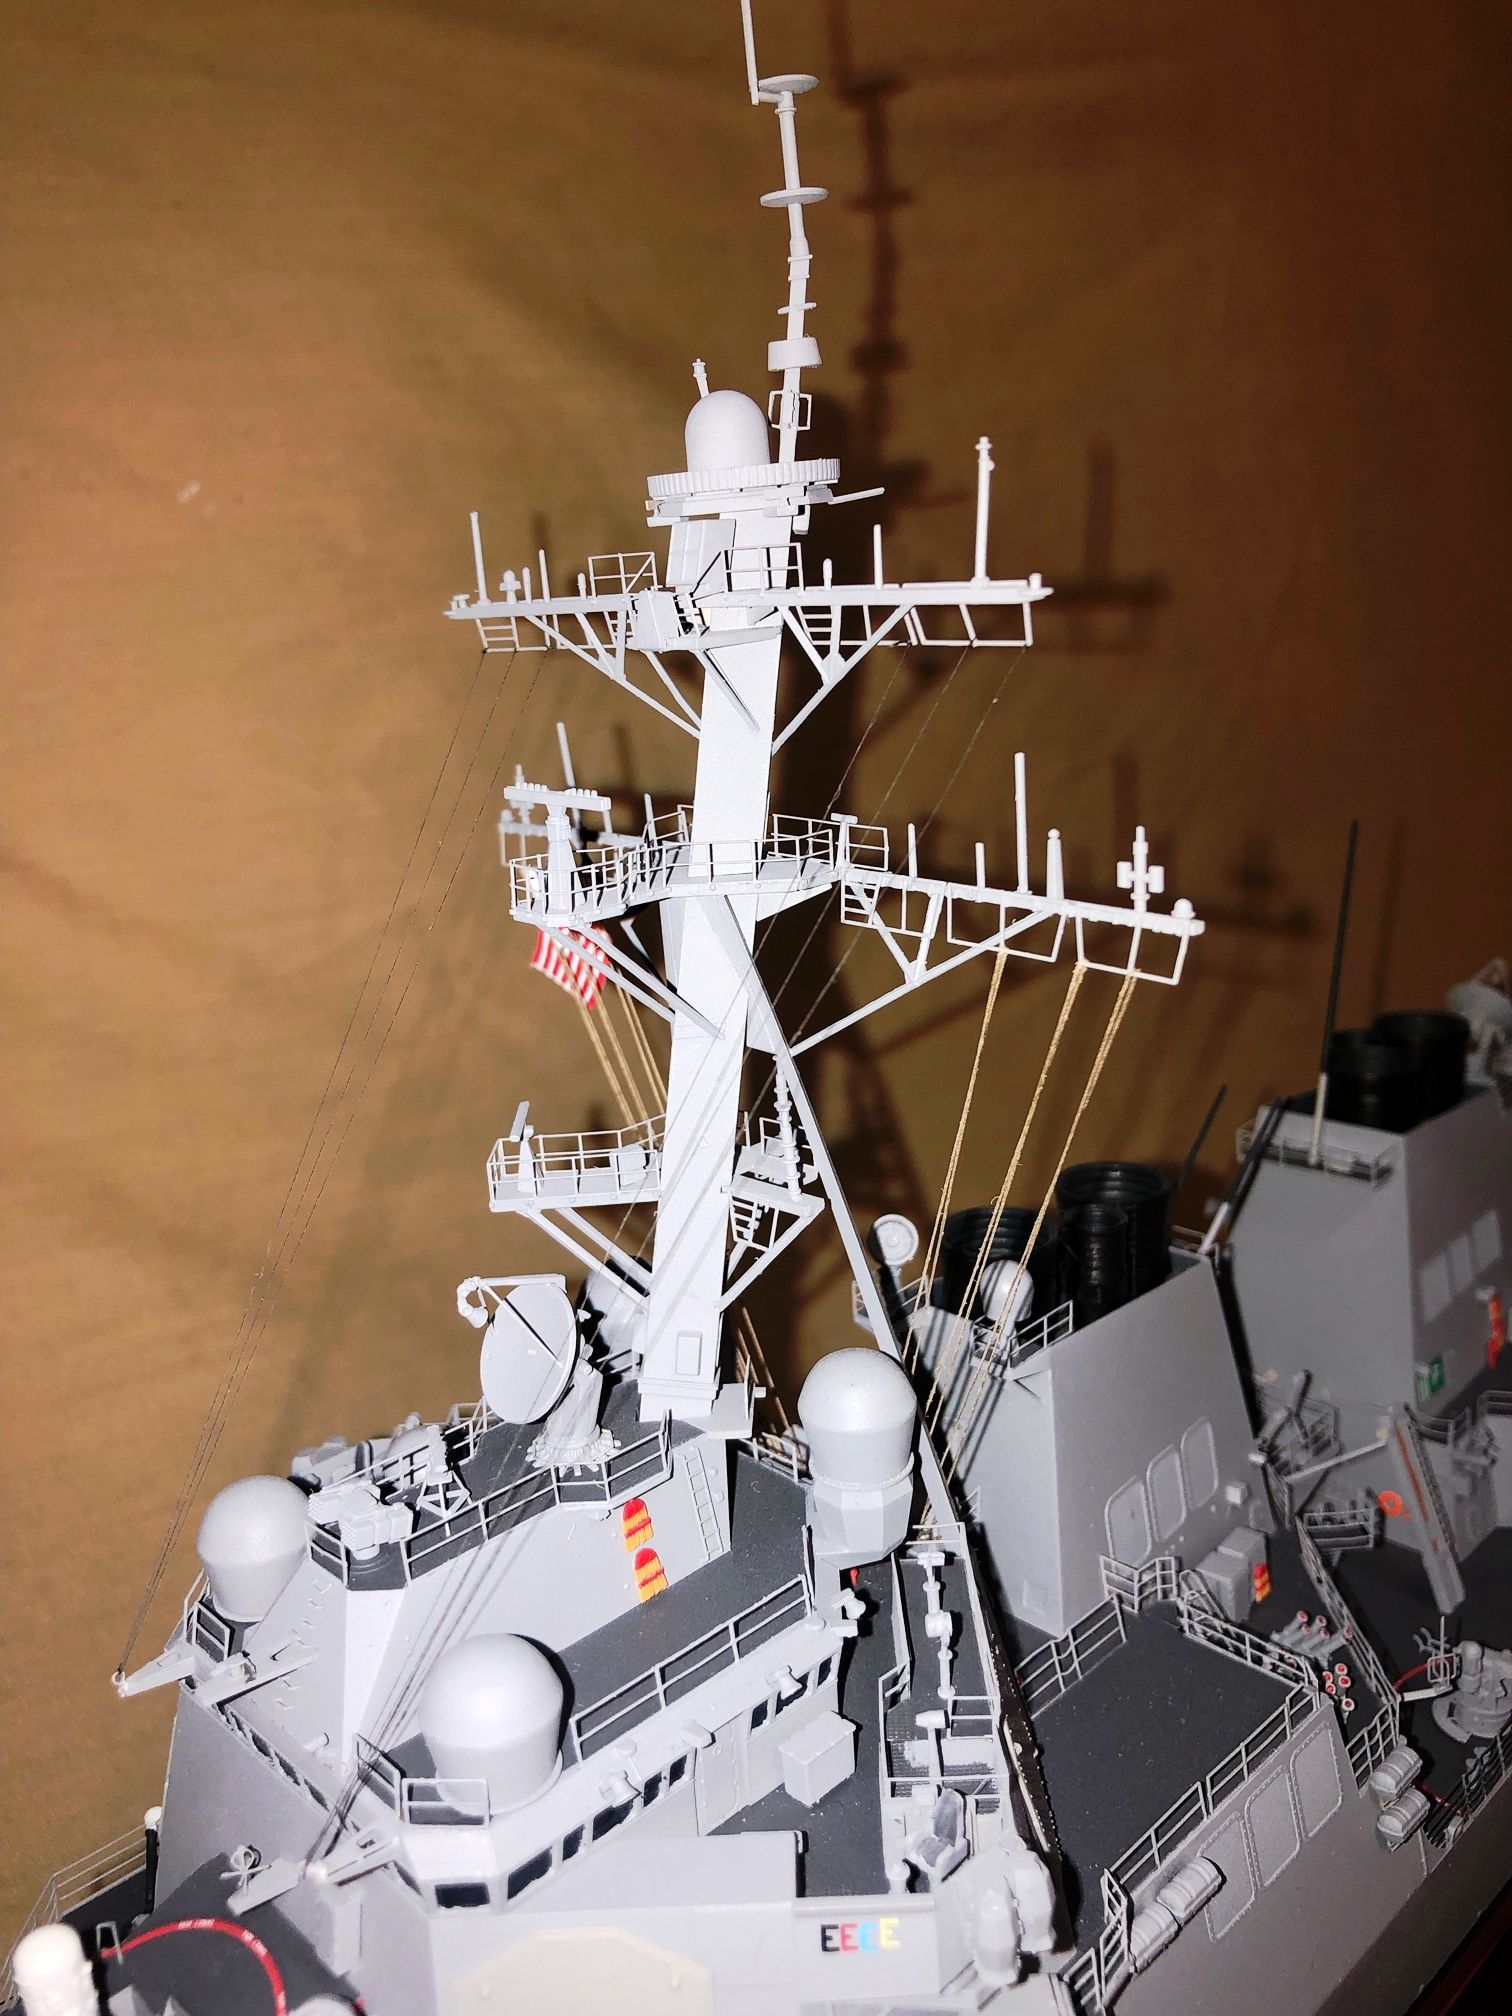
| I found the mast to be just a tad complex
but it went together with ease. No issues there at all. It took two episodes
of Yellowstone to build it. So figure two hours. |
|
|
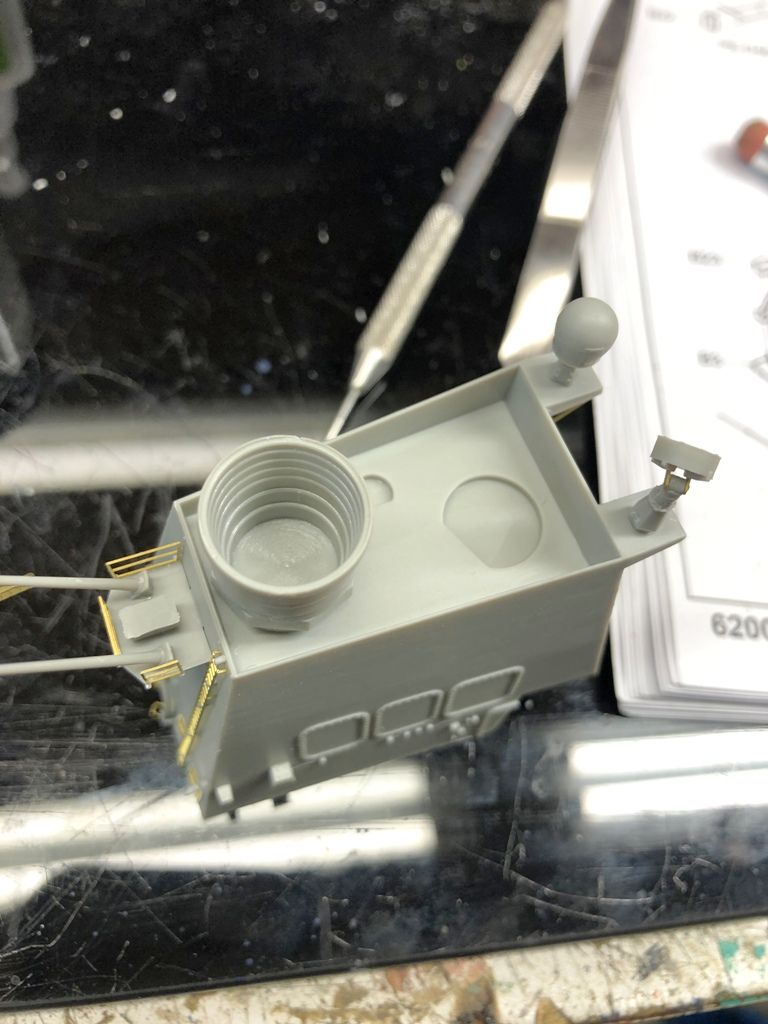
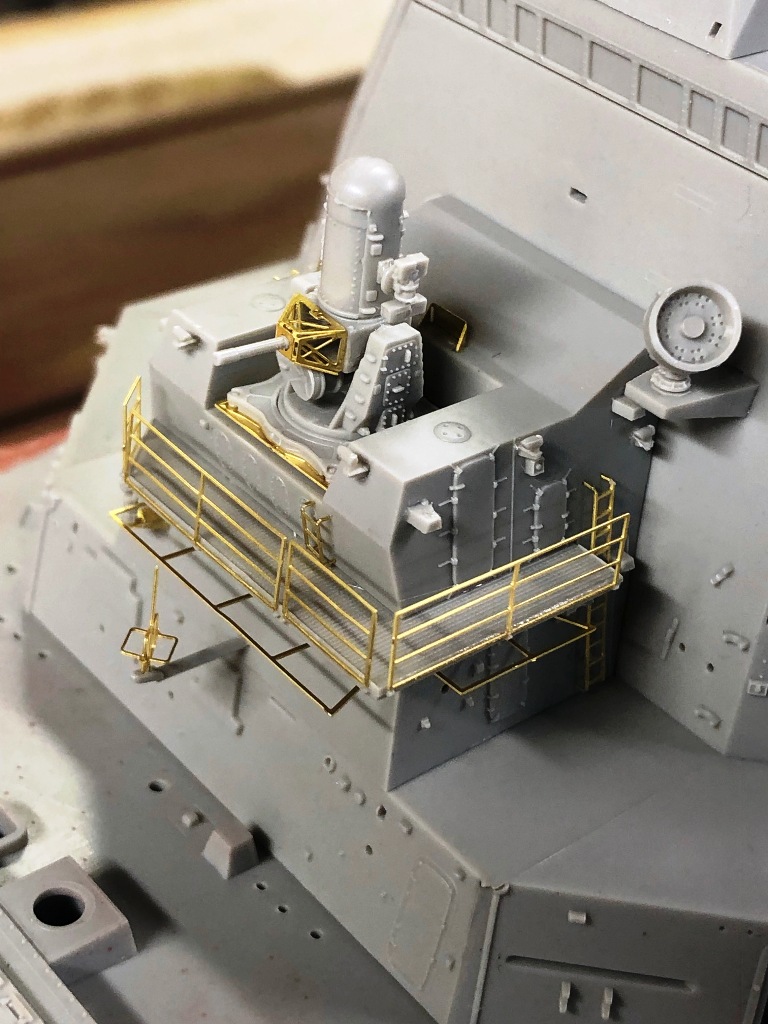
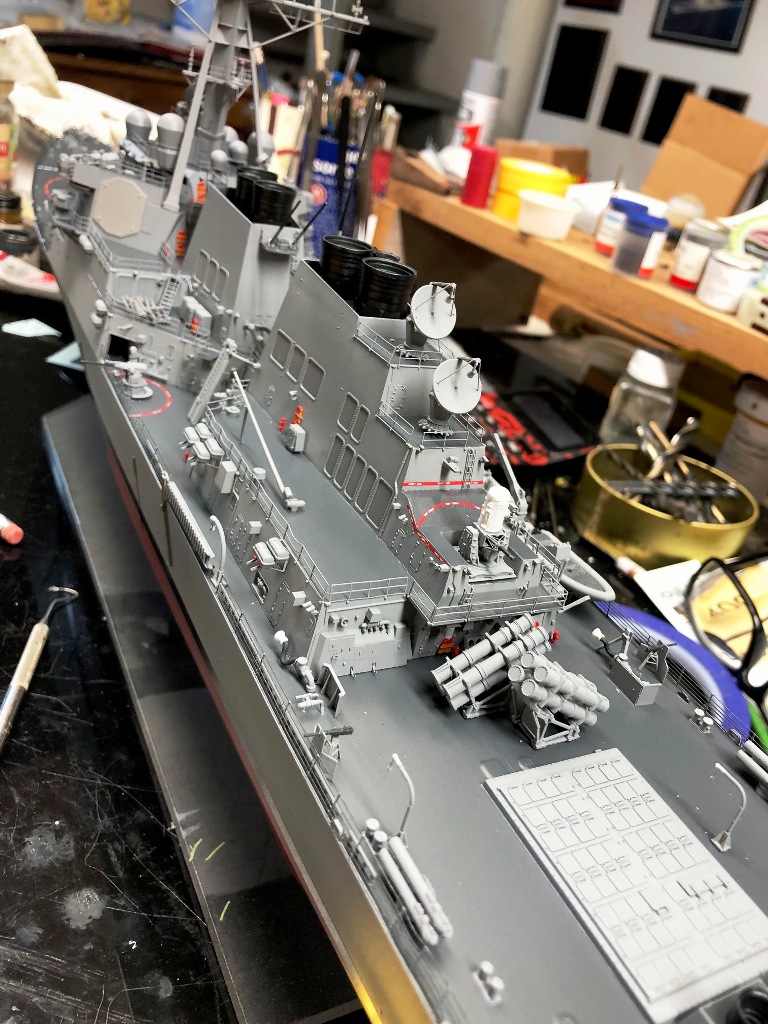
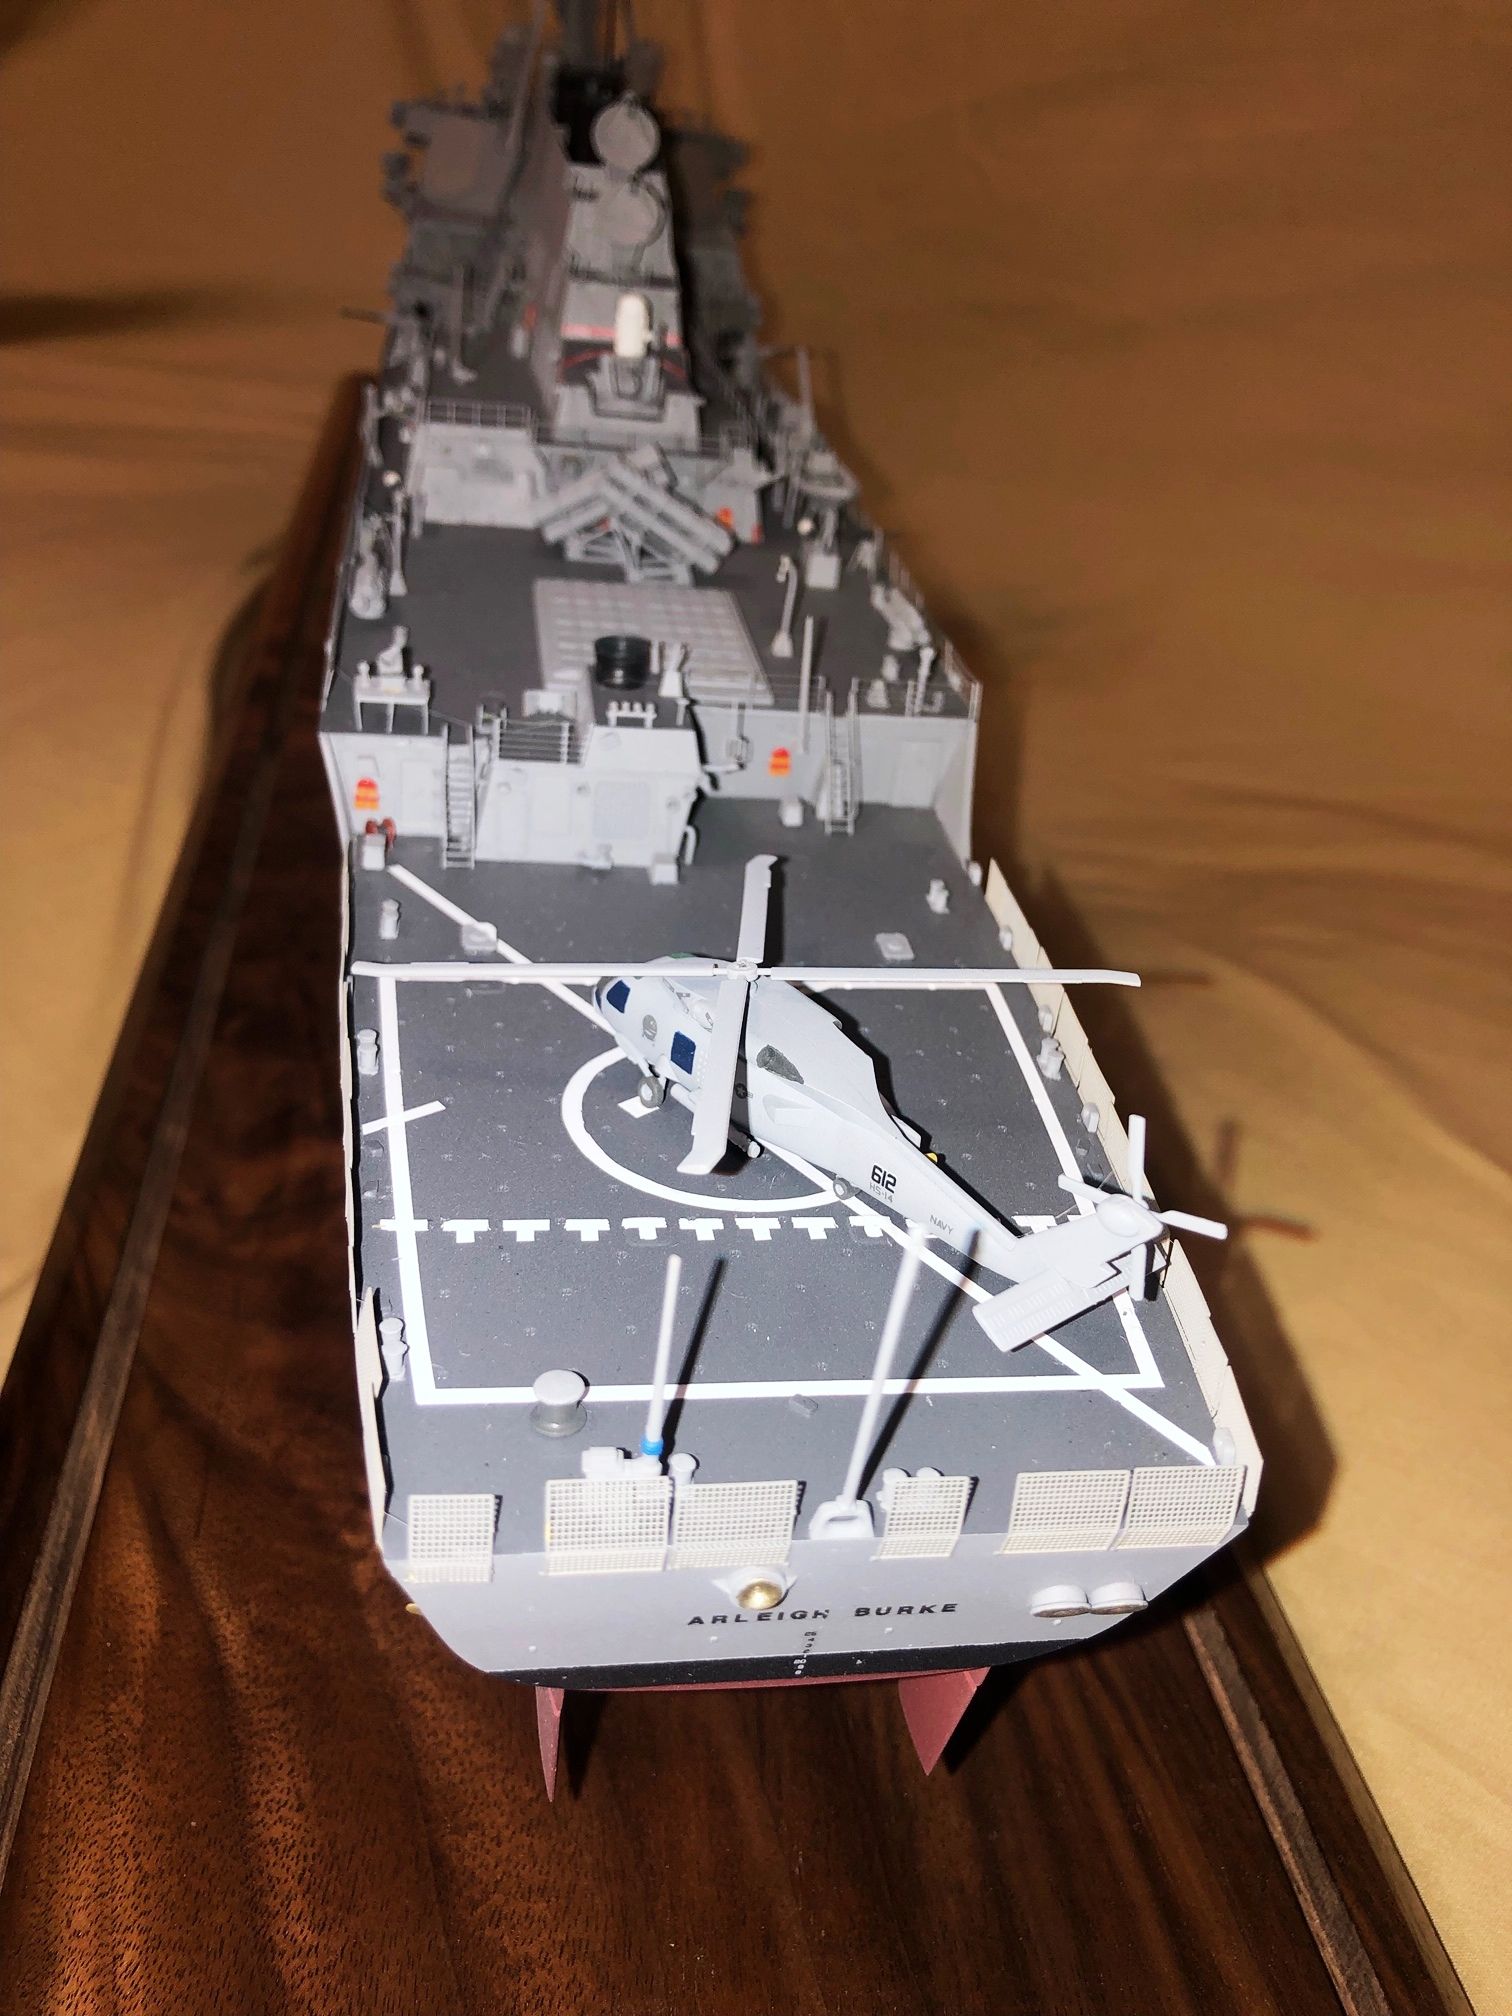
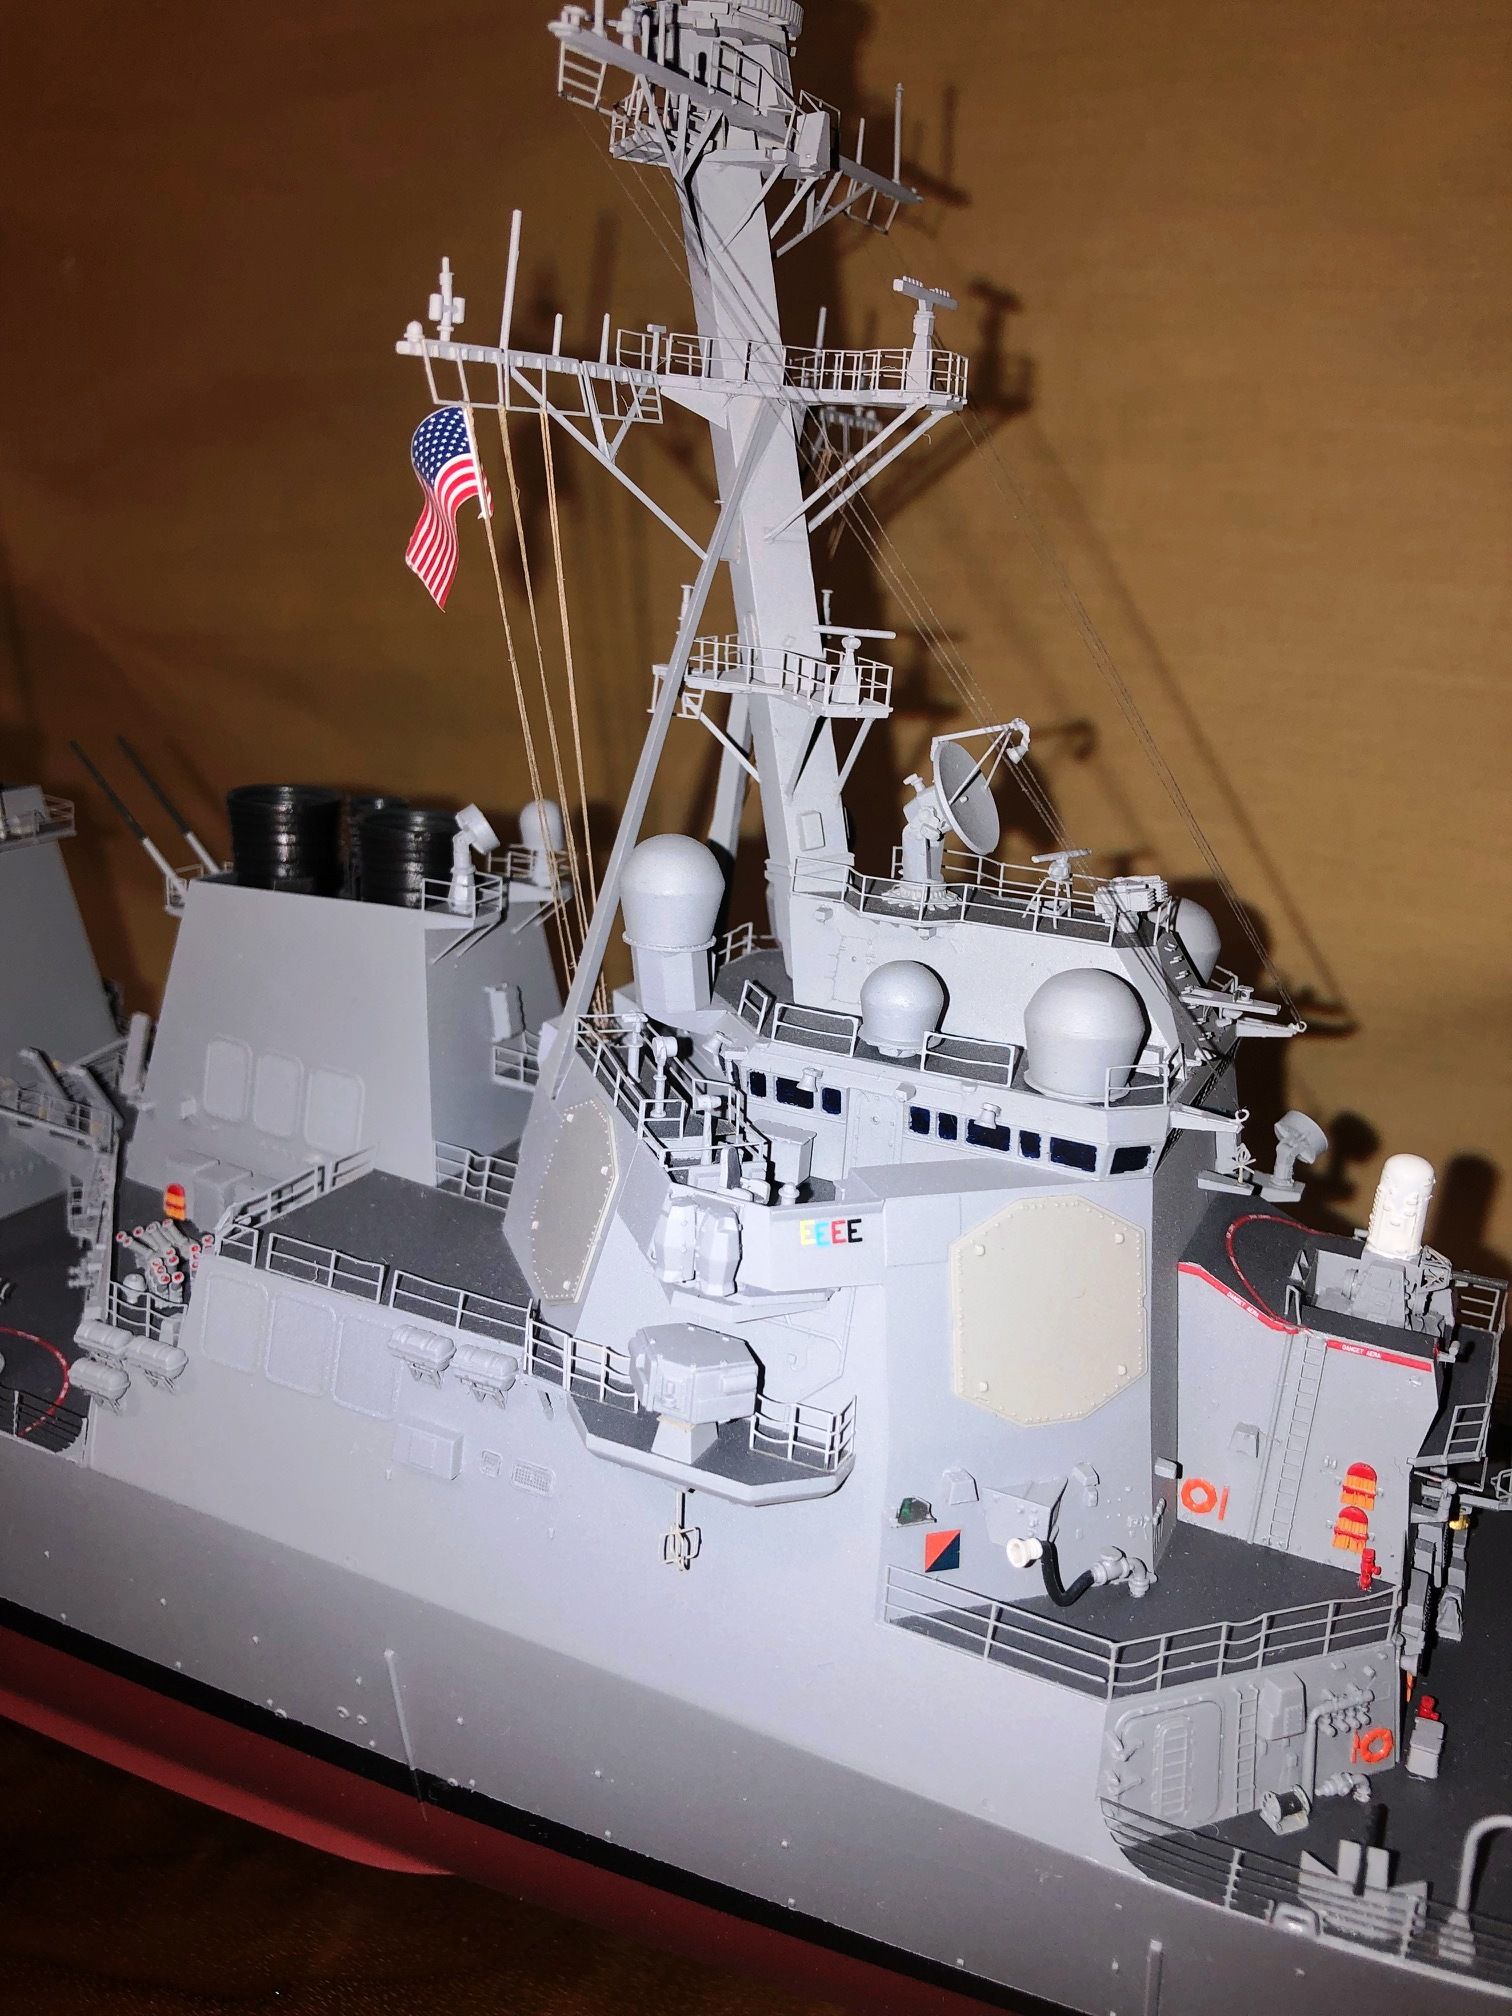
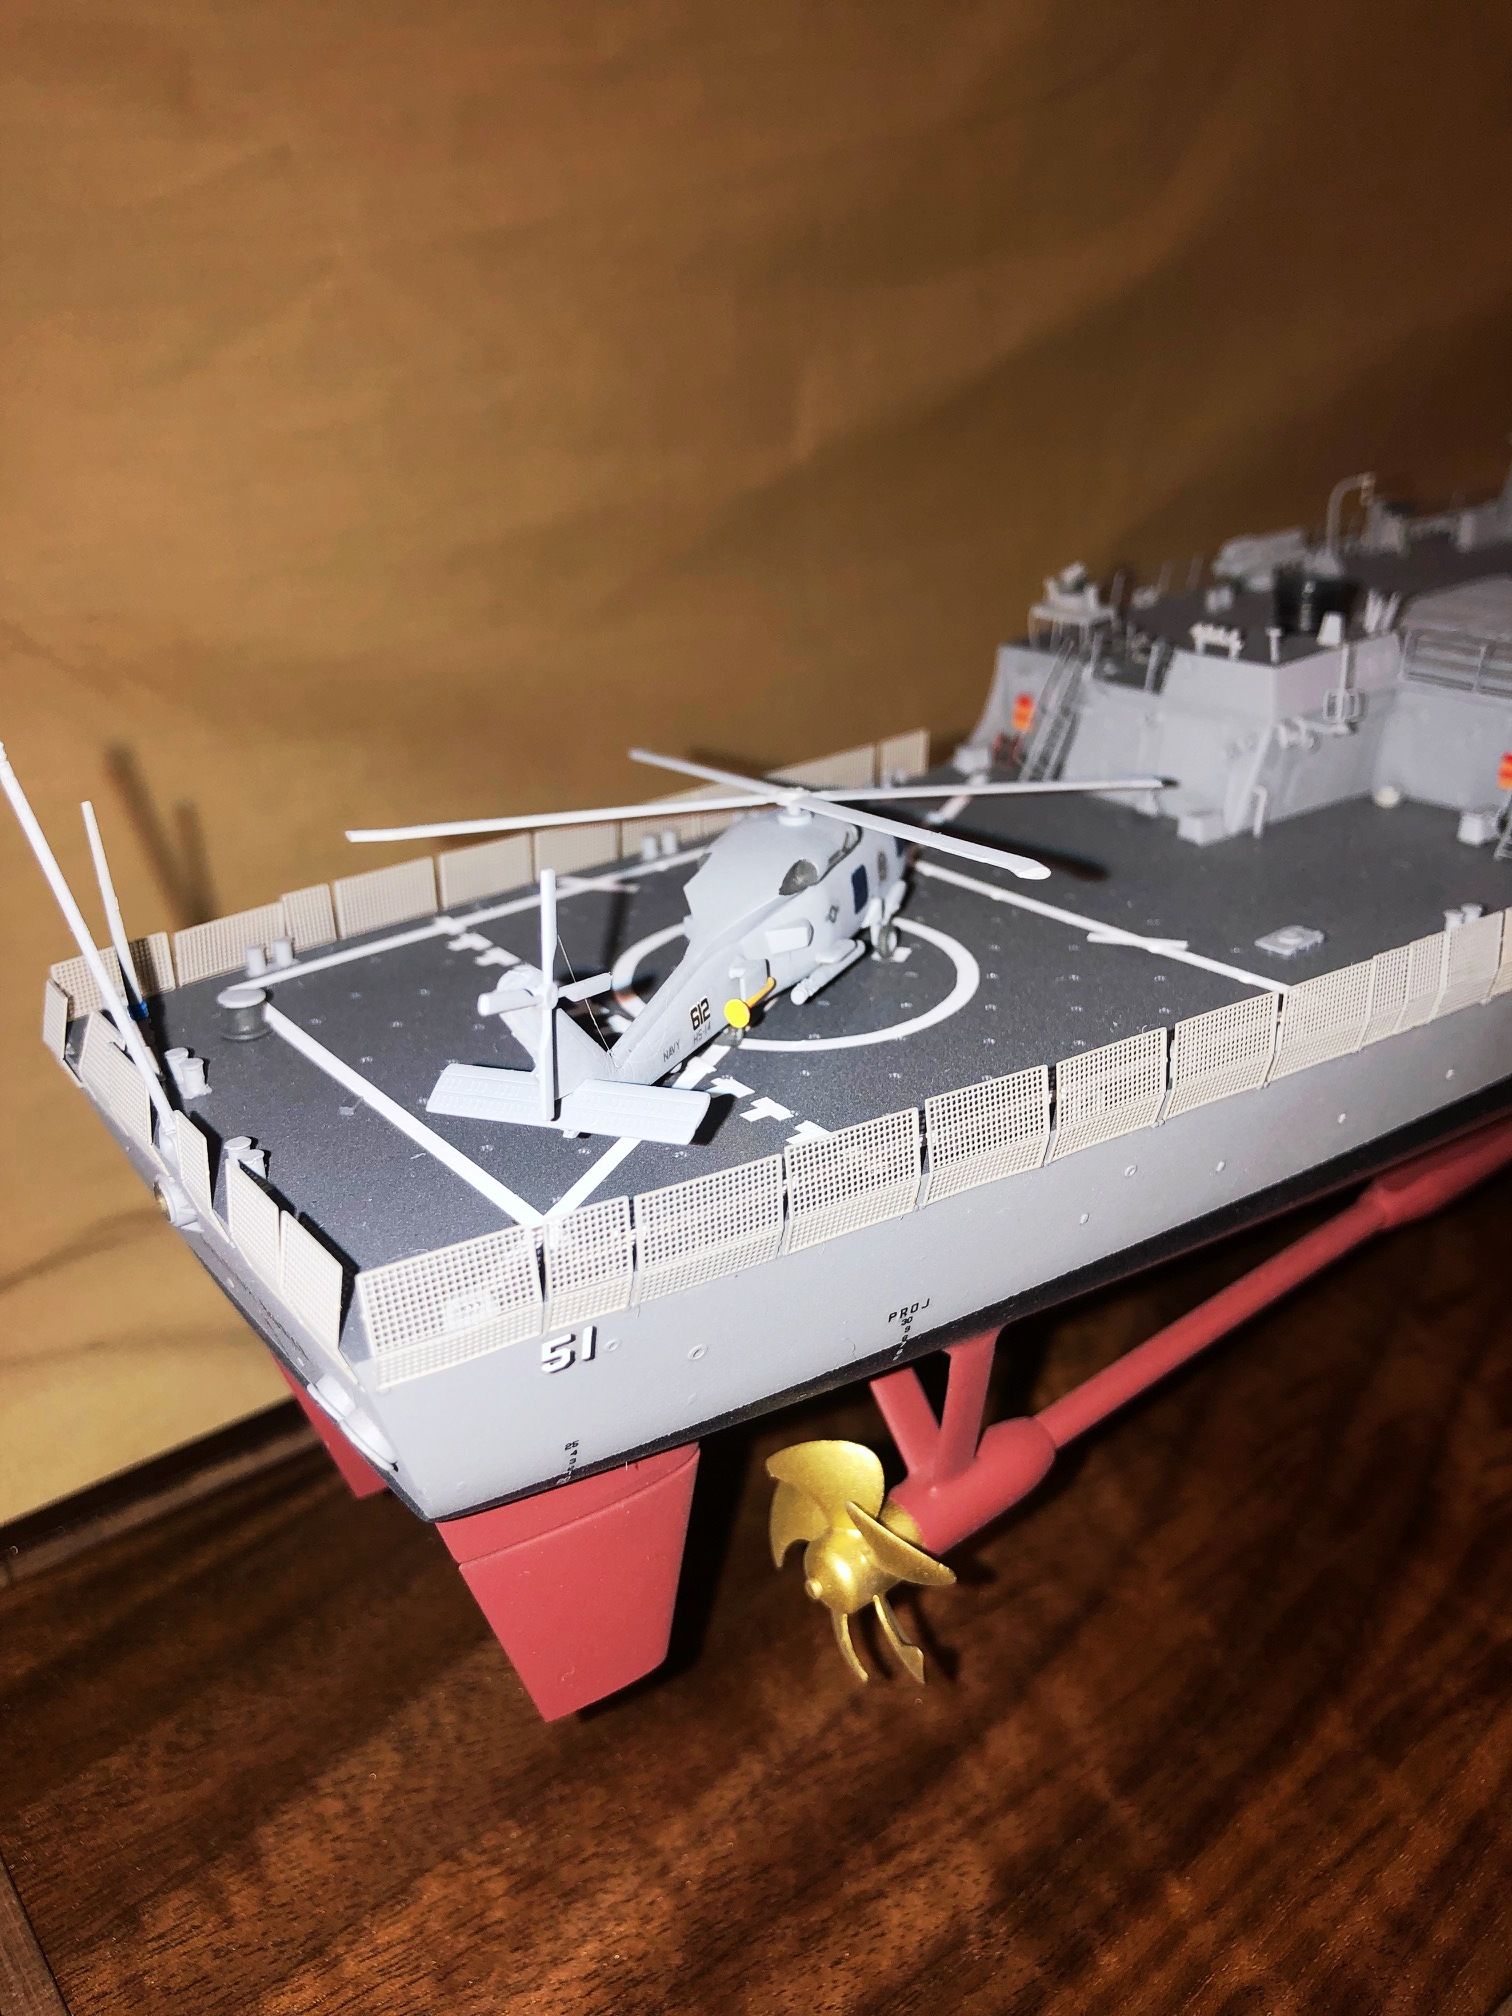
| I find the helo lacks a lot of detail and is a
straight forward build. The photo-etch sets have pretty good detail, crisp
and clean. A note to all who build this and arent familiar with a Burke
class. All their railings have an inward lean to them. From main deck to
mast every railing. This is another radar deflection and a special note
is all main deck horizontal rails are stainless wire covered with black
rubber. The vertical stanchions are square with a 90 degree corner facing
outboard for more radar deflection. It seems like a lot of trouble to build
this way but Im sure the navy has tested this and found it works best
vs using round pipe as vertical stantions.
Now the kit photo-etch rails are not designed to
be mounted in this fashion but I chose to do so. It only required to make
a few cuts here or there to get the angle correct in some areas but for
the most part these can be glued on in an angle without modification. You
will find there is a few short comings of railing for the upper decks where
the ends dont join as they should. |
|
|
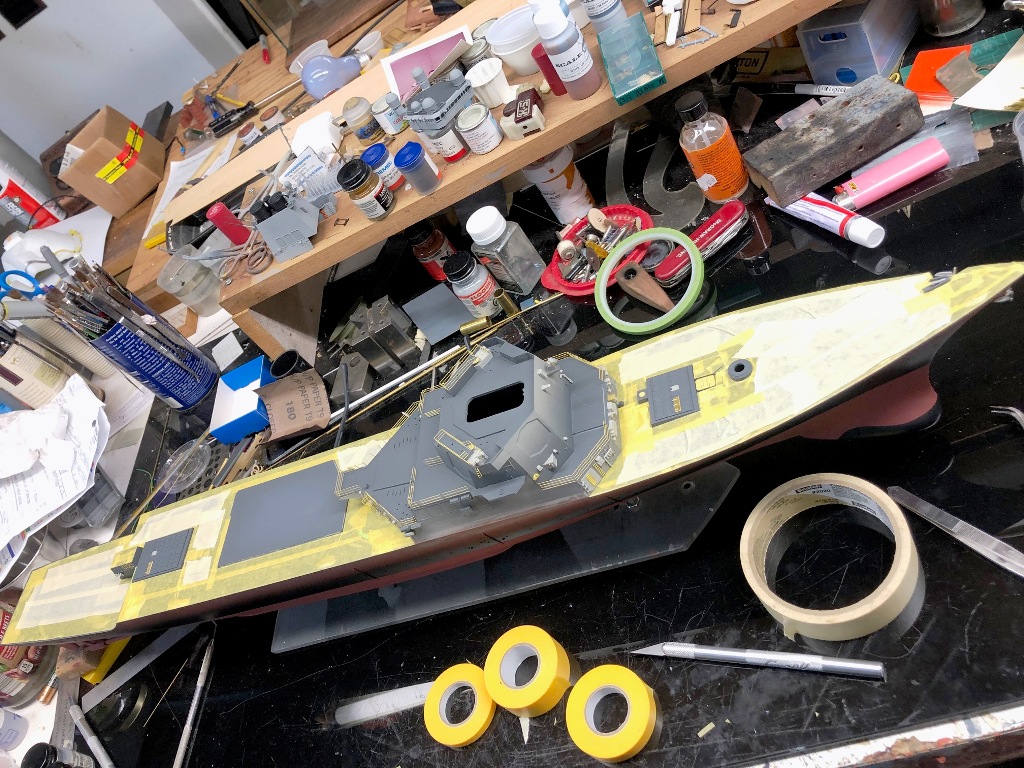
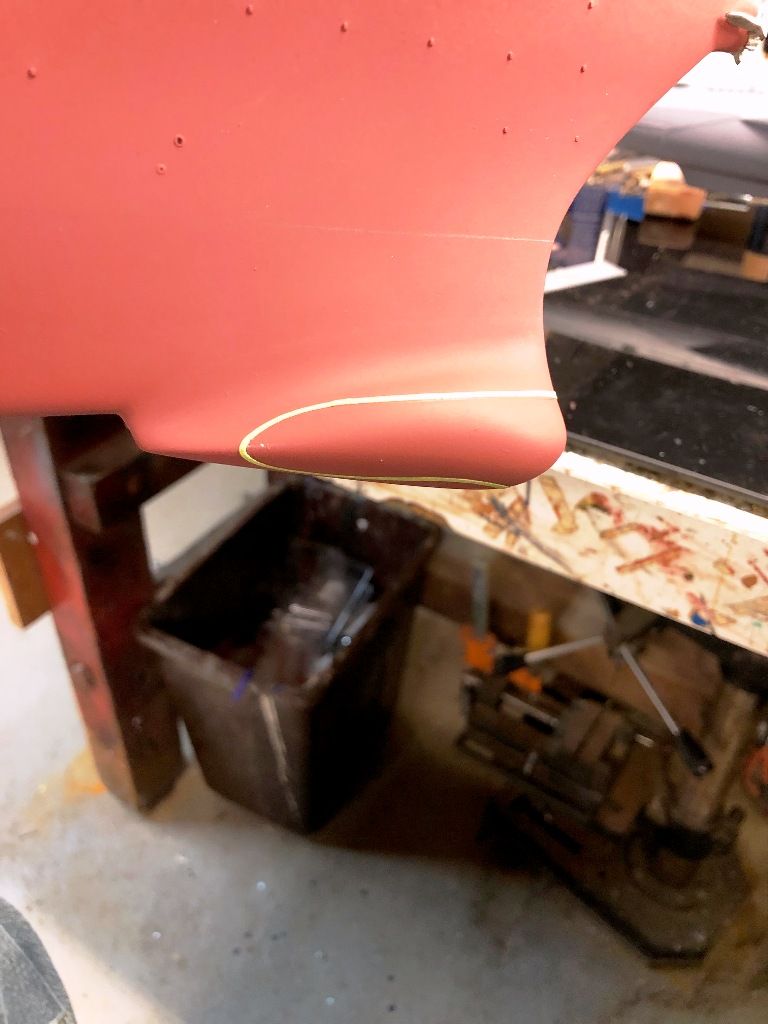
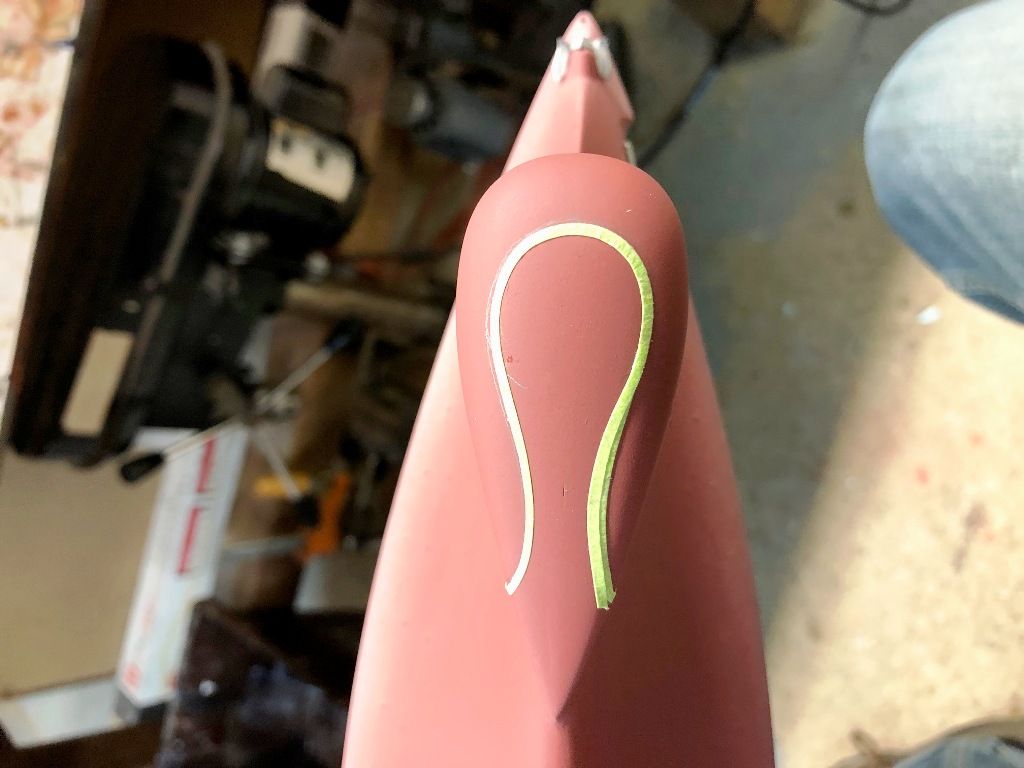
| I should mention the paint work on the sonar
dome. The dome has a window built into it and it is rubber. It does not
wrap around the entire bottom of the dome but is pretty much a horizontal
window going around from one side to the other and at the bottom has an
odd shape. This too can be found by looking at the Burke class on Navsource.
I enclose some pics of the masking job I did to replicate this rubber dome
and to make matters more realistic I sprayed it with a rubber used to coat
tool handles. I thinned it with toluene. Id advise to spray that outside.
Its some bad stuff for he human body. I believe I semi short covered all
on this build. |
|
|
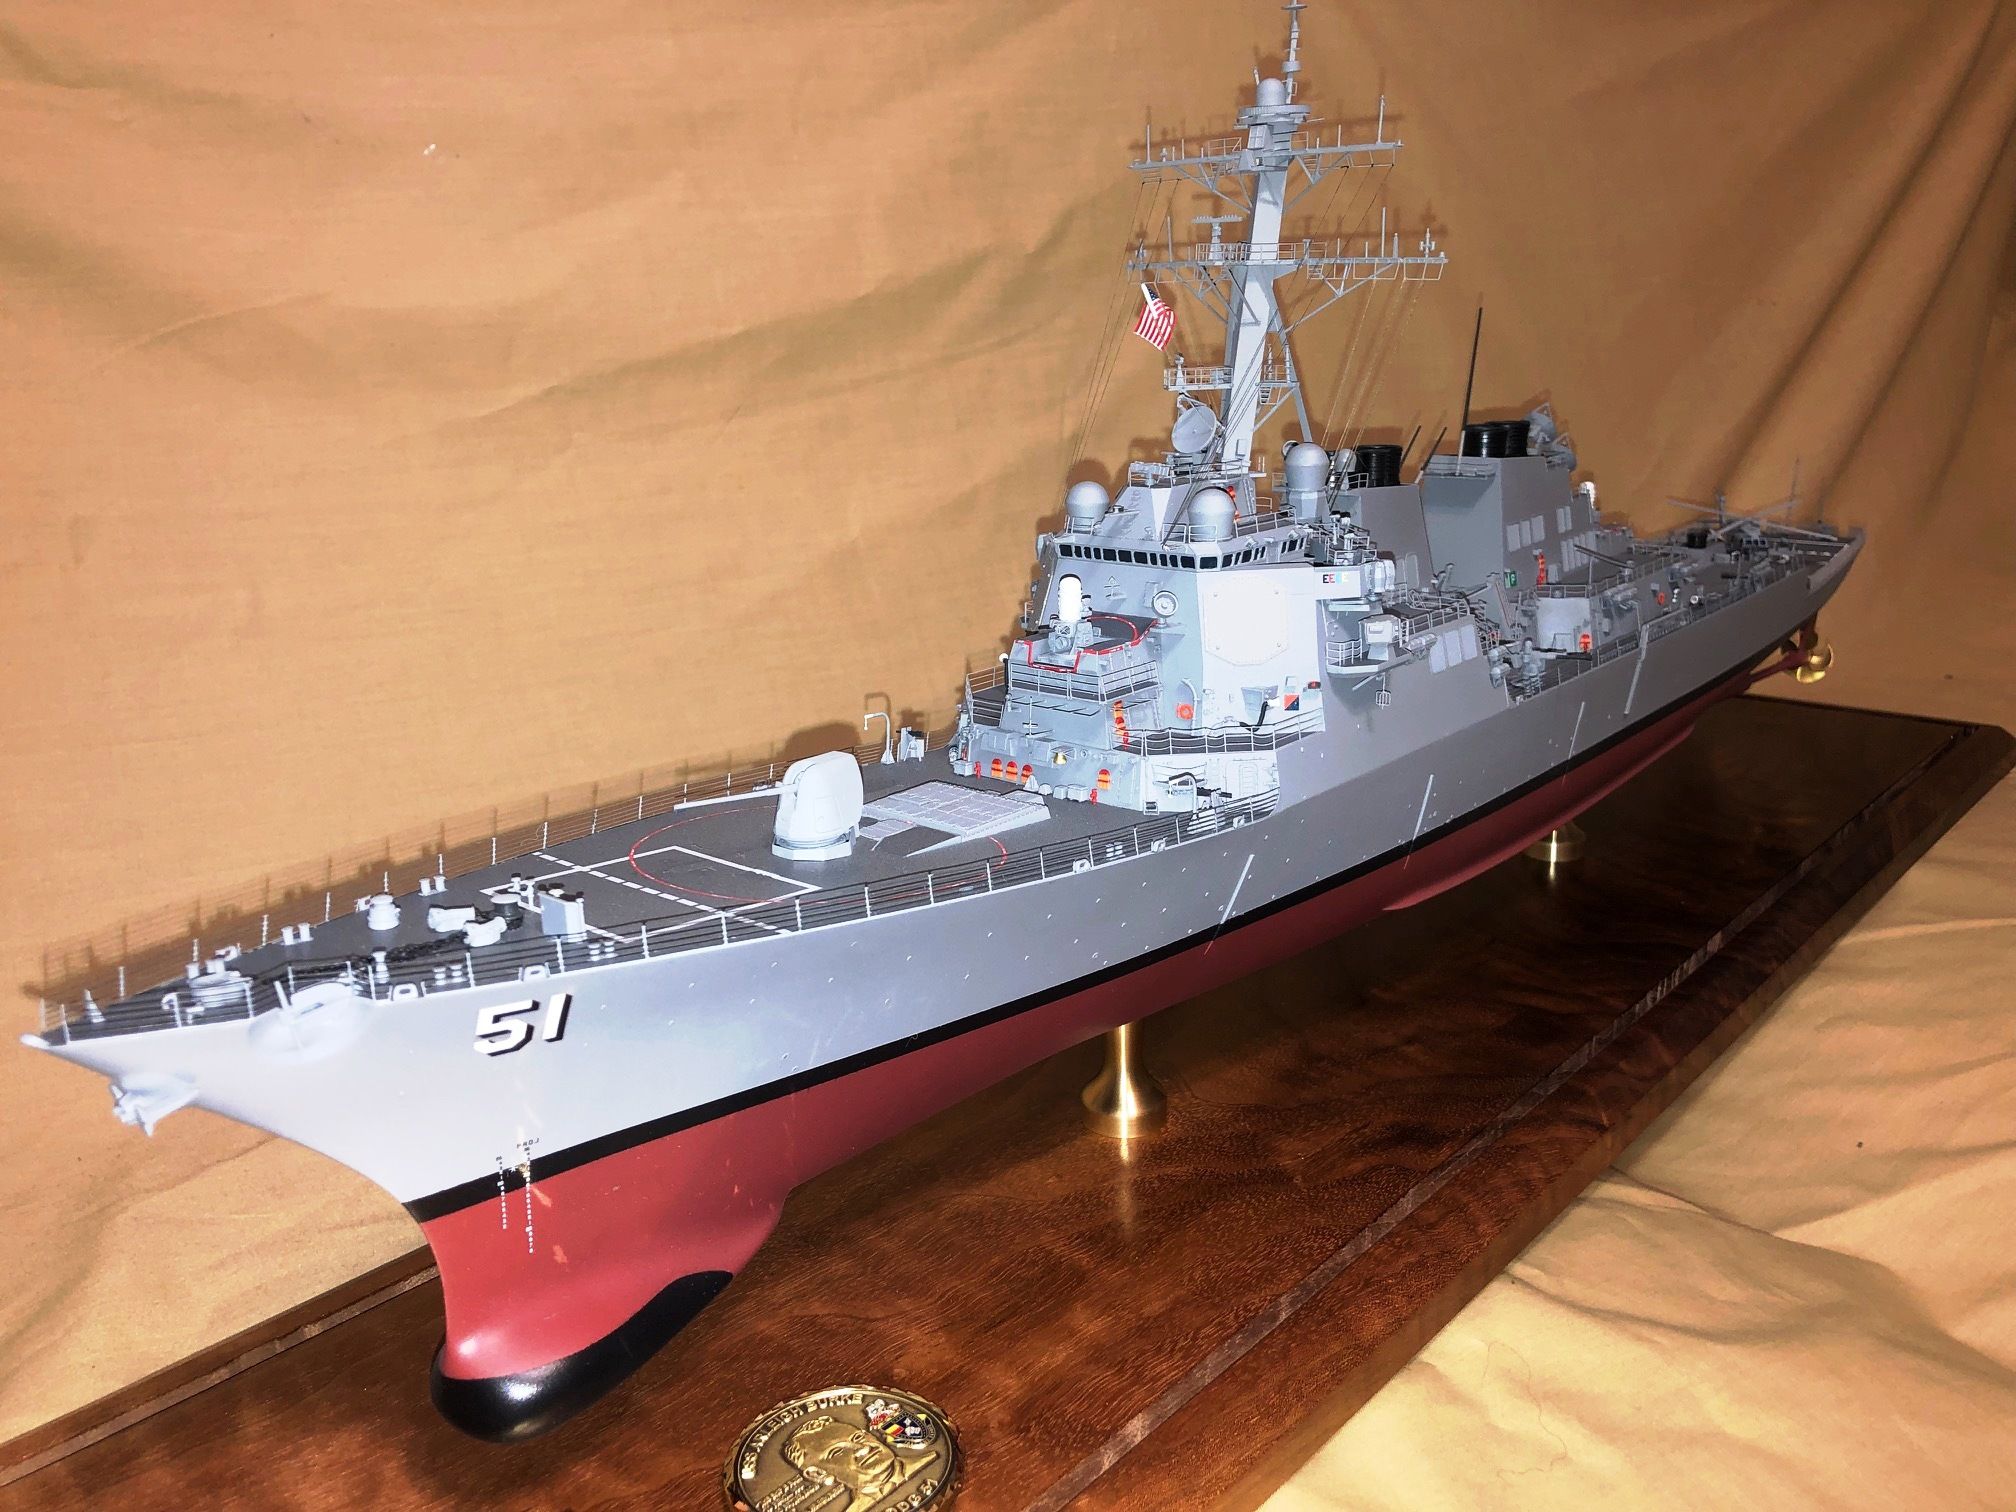
| I painted her with Colourcoats hull red, modern
USN gray and Modern USN deck gray. Boot top is gloss black but after several
coats of flat finish it loses its shine but still has a hint of shine in
which all USN ship have. |
|
|
| Decals: Theyre not too bad but the flightdeck
decal gave me fits and I totally destroyed it. I see now how I should have
cut it into several sections and butt them together once they were on deck.
My mistake but on the other hand it is a difficult piece to work with.
You will also take note that the two bow draft mark decals are slightly
different from port to stb side. Below the black the numbers are white
and the numbers that go in the gray are black. Also there is the ones that
say proj. This is for the dome and props. I found the numbers on
the starboard side are all white and the proj is black. I believe the
manufacturer didnt pay attention when printing these. I left mine as they
are. Please dont keel haul me for this discrepancy.
The flight deck safety nets are basic and could
use some love. Again I just put them on as instructed. The model is plenty
large so a lot of detail can be added to these nets and their frames |
|
|
| I did take the liberty of numbering mine
as USS Arleigh Burke DDG 51. I used GMM hull decals for the numbers and
Woodland Scenics ST575 dry transfers for the name aft. This kit has more
parts then one would imagine for a modern navy vessel but it went together
well. Follow the directions for they were written very good and easy to
follow.
I want to thank Martin Quinn for asking me to do
this build review, and
Squadron
Models for providing the kit to review and build. You can find
the model on the Squardron website, where it retails for $215.99. |
|
|