USS Enterprise CVN-65 In 1/350 Scale

by Kelly Quirk

| Click images | to enlarge | |||||||||||
| After separating the fuselage from the sprue, I clean up the seams with a Flex-file. I then carefully cut off the wings at the fold line. These will be glued back on in the folded position later. Using a set of needle files, I carefully started to file away the cockpit area where I will have the open canopies. |  |
 |
||||||||||
| In order to have open canopies, you are going to have to sacrifice one each of the aircraft you plan to do. Take the sacrificial plane, say something nice about it, then hack off the wings and everything else behind the cockpit area. You must have a clean area in order to have the thermoforming work correctly. Chuck the airplane in a vise, leaving the cockpit area sticking out. I use Squadron thermoform to make my canopies. |  |
|||||||||||
| Cut a strip of the thermoform material, then hold it over a candle until it starts to sag, then quickly pull it straight down over the canopy area of the plane. It will cool rapidly, just hold it in place for a couple of seconds. Make several copies. It will take some practice, but once you get the hang of it you will be churning them out with no problem. The canopy may appear a tad cloudy at this point, but don't worry, we'll take care of that in a bit. |  |
|||||||||||
| I have found through much trial and error that the best way to actually cut out the canopy itself is to paint the canopy a dark color on your sacrificed jet. Lay your formed part back over the master, then very carefully take a new exacto blade and trace the outline of the canopy. |  |
|||||||||||
| Don't try to actually cut out the canopy, at this point you just want to score the plastic in the correct outline. Then pull the form off the master, and with a pair of cuticle scissors carefully cut out the canopy. I've said the word "carefully" a lot so far, but trust me everything you do in this small of a scale must be done "carefully"! | ||||||||||||
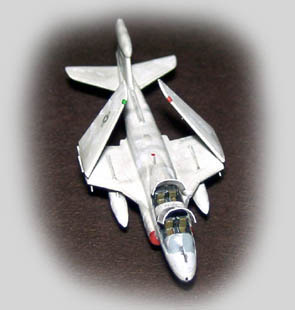
| Set your canopies aside, they will be the last thing we attach to the finished model. You can do as little or as much as you want to detail the rest of the aircraft. Landing gear doors, weapon pylons, tail hooks, or even small antennas such as I did can be made from left over photoetch material. I made four tiny ejection seats out of sheet styrene. Just make the seat backs, the front cushions can simply be painted on, and they look pretty good. Paint the open area of the cockpit flat black, it gives the illusion of depth. I also added center consoles from tiny pieces of styrene. I also add a small length of stretched sprue in the wingfold, it adds the illusion of something there. |  |
|||||||||||
| Don't forget to paint the navigation lights, a small detail that adds a lot of realism. I also made a master and cast my own resin drop tanks for all my aircraft. I have been asked countless times to cast them and sell them to others, but honestly they take a lot of clean up and it is very tedious work, not something I want to do again anytime soon! Here is a picture of my worked over Prowler compared to the "out of the box" part. |  |
|||||||||||
| After the plane has been painted and had the decals applied, you can add the canopies. Use a small dab of white glue and carefully position them in the correct place. After they dry, take a small brush and coat the inside and out with Future. This will make the canopy crystal clear, taking away that cloudiness I talked about above. Then, with a very fine brush, VERY carefully paint the outline of the canopy frame on the canopy. Take your time here, screwing it up at this point will cause you to say words your kids shouldn't hear! Yes, I'm speaking from experience... The last thing I do is weather the aircraft, I use pastels and also add a few paint splotches as touched up areas. | ||||||||||||
I'll let the rest of the pics speak for themselves. As you can see I've done Tomcats and Hornets with the same methods. I hope you'll agree that with a little work, your aircraft can really make or break your aircraft carrier models. Good luck, and above all else enjoy your projects! |
||||||||||||
|
||||||||||||
Links: