USS Cowpens (CG-63), 1998
Deluxe Edition
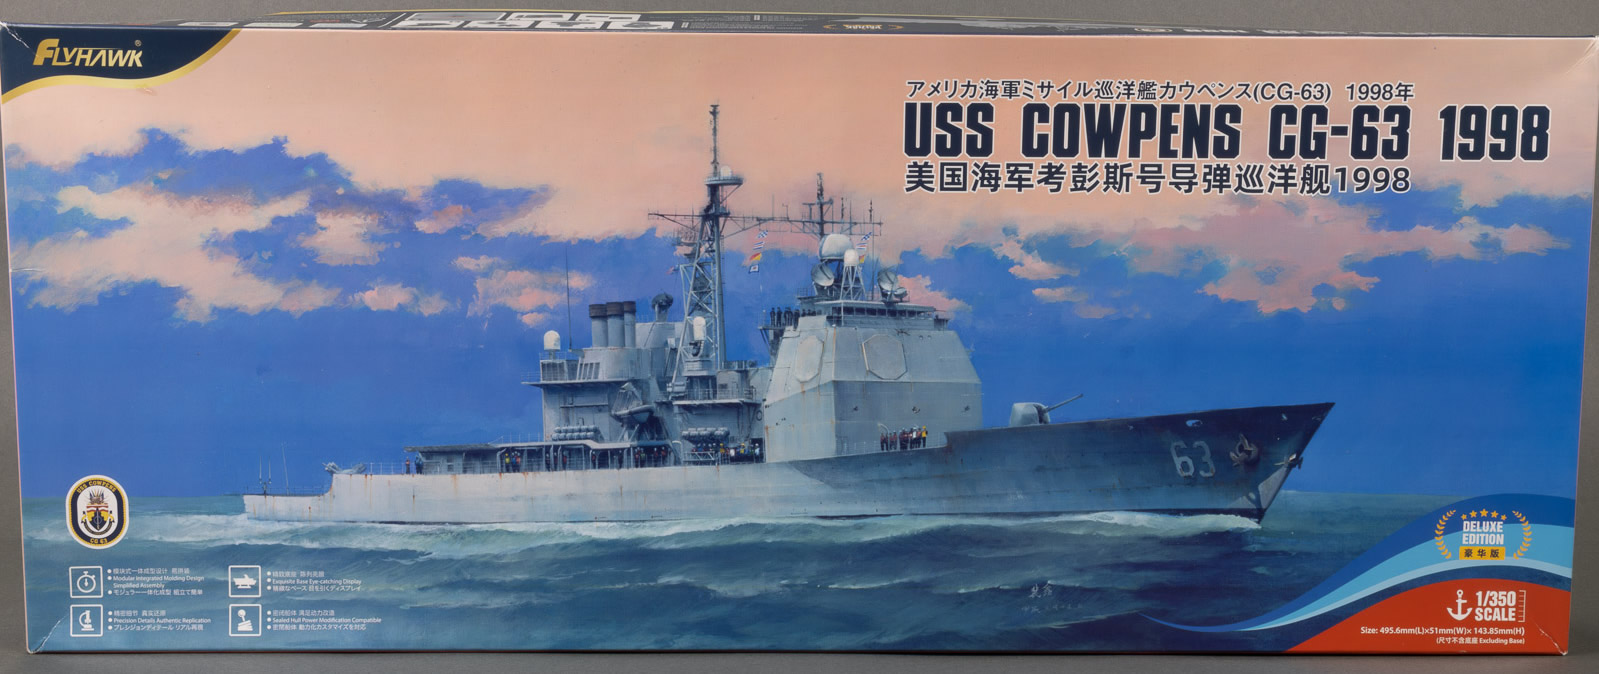
Flyhawk Model No. FH5001S,
1/350th Scale Injection Molded and Multi-Media
Reviewed by Devin Poore, October 2024
|
| Launched in March 1989, USS Cowpens commissioned
in March of 1991. A Ticonderoga class cruiser, she was considered
a multi-role warship, with weapons to operate in the anti-air, anti-sub,
anti-surface, and land-attack roles. Mounting the AEGIS combat system,
she and the rest of her class were originally designed to provide anti-air
cover for Soviet saturation missile strikes against carrier task forces,
but since the introduction of the class, the addition of the Tomahawk and
Harpoon missiles have allowed these ships to take on land-strike and anti-ship
missions as well.
USS Cowpens, named after the American Revolutionary War Battle
of Cowpens, was the second US Navy warship to bear the name (the other
being an Independence class light-carrier during WWII). Leaning
into her name, Cowpens was know as "The Mighty Moo", used the radio
call sign MCOW, and boasted steer horns mounted above her bridge windows,
and painted horns also flanked her name on the ship's stern. During her
over 33 years of service, Cowpens provided escort and cover for
various battle groups, and was one of the first ships to launch Tomahawk
missiles in the opening phase of the Iraq War in 2003. From 1999 to 2013,
she called Yokosuka, Japan, her home port. During that time especially,
but throughout her entire career, she deployed to the Pacific and Asia
theaters, even making a port visit to Vladivostok, Russia. Decommissioned
27 August, 2024, she was towed from San Diego to the Naval Inactive Ship
Maintenance Facility in Pearl Harbor, Hawaii.
For those interested in a more comprehensive history of the ship, uscarriers.net
is a good place to start.
**Note: for a little background, I personally served as a Fire Controlman,
AEGIS, on USS Normandy, CG-60, from 1991-1994, so I have a little
real-world experience with these boats. When I do build this kit, it'll
be as Normandy, unless Flyhawk releases a kit of her before I get
started.** |
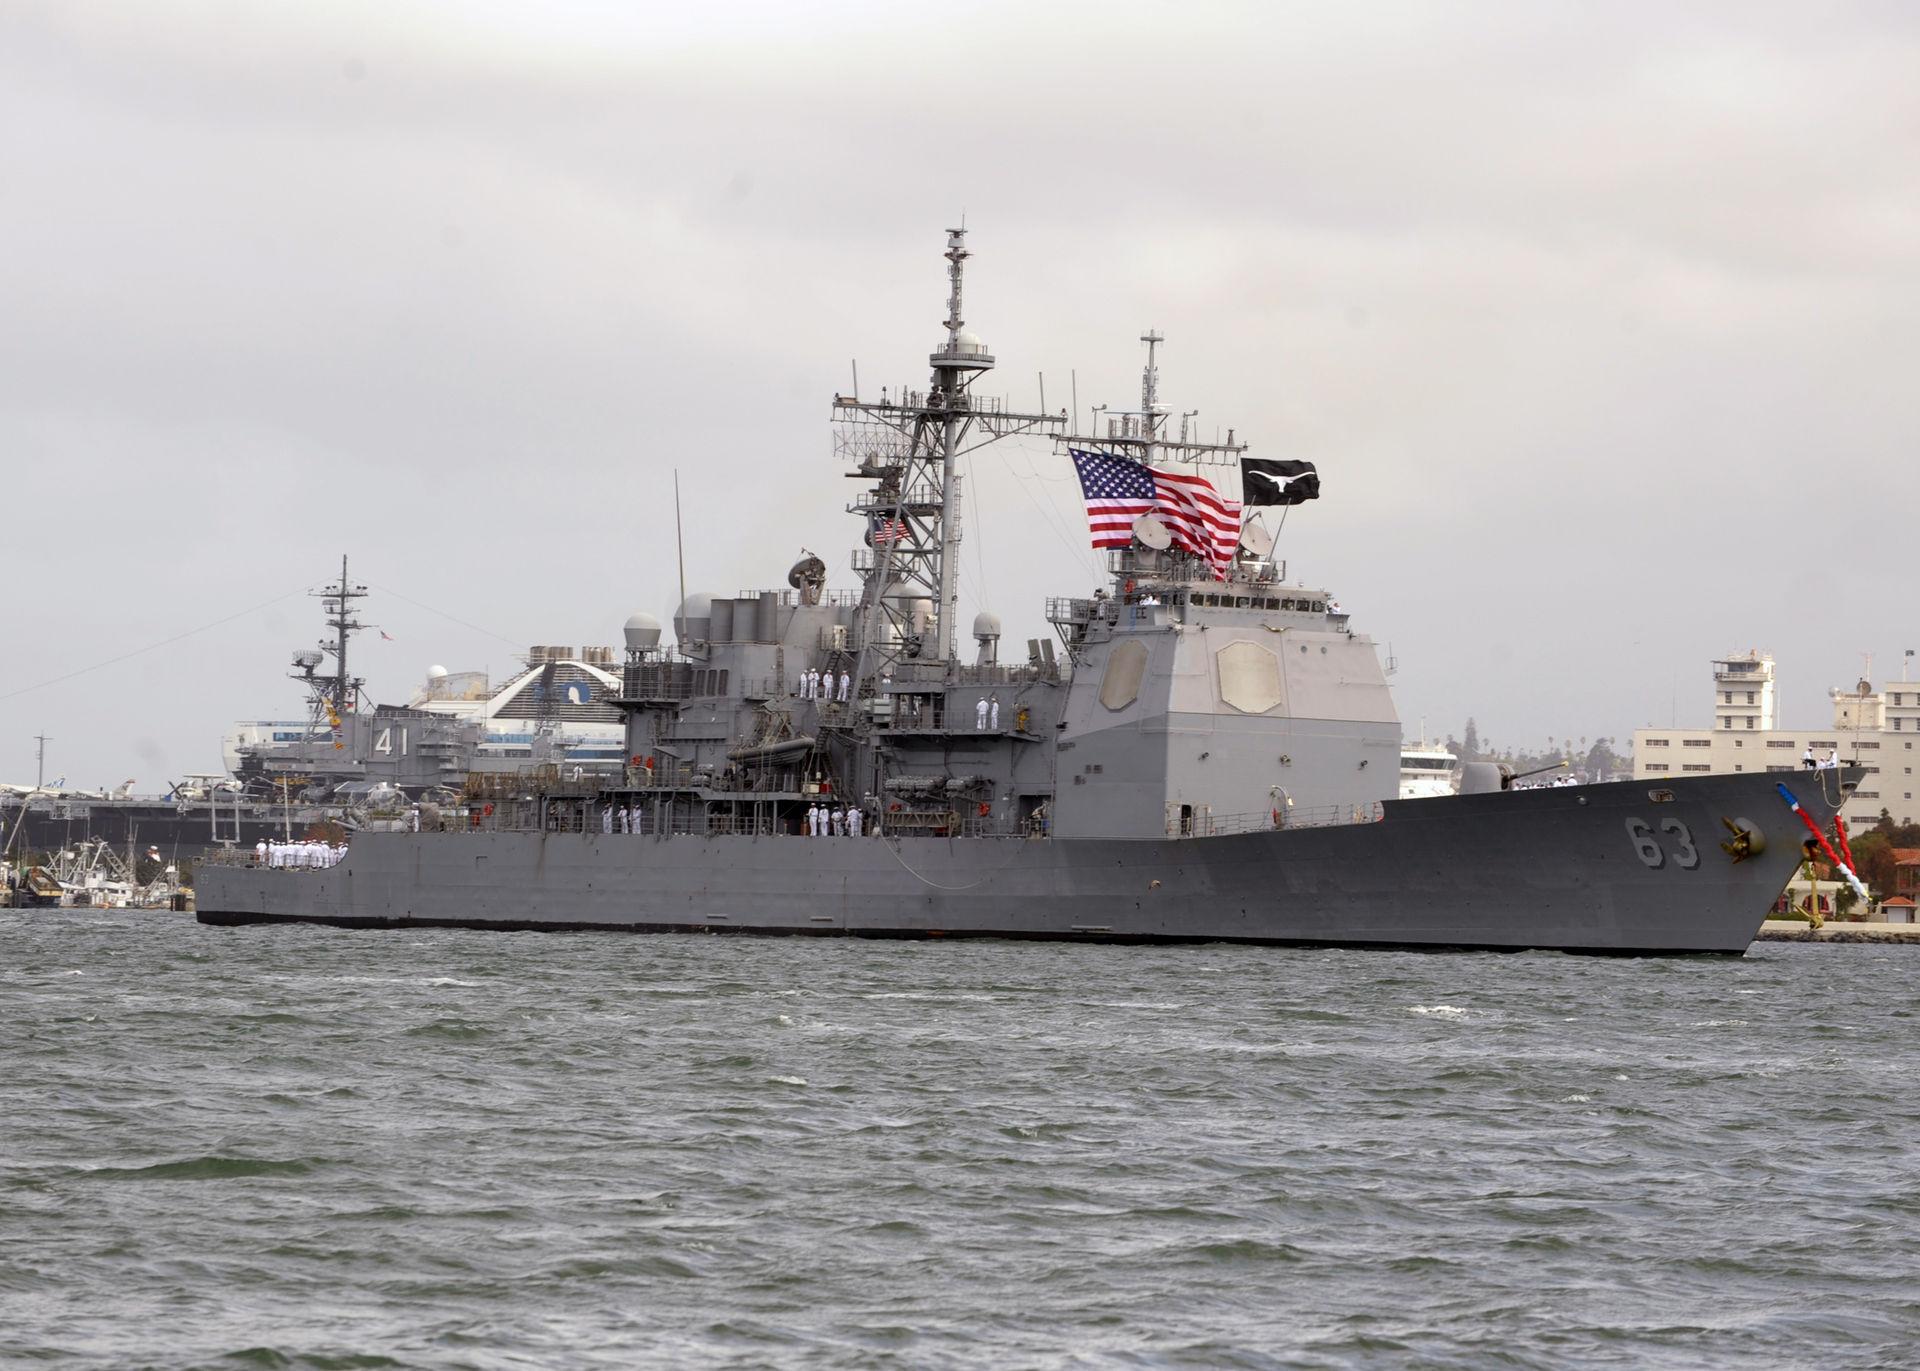
USS Cowpens in 2013. Photo via Wikipedia
|
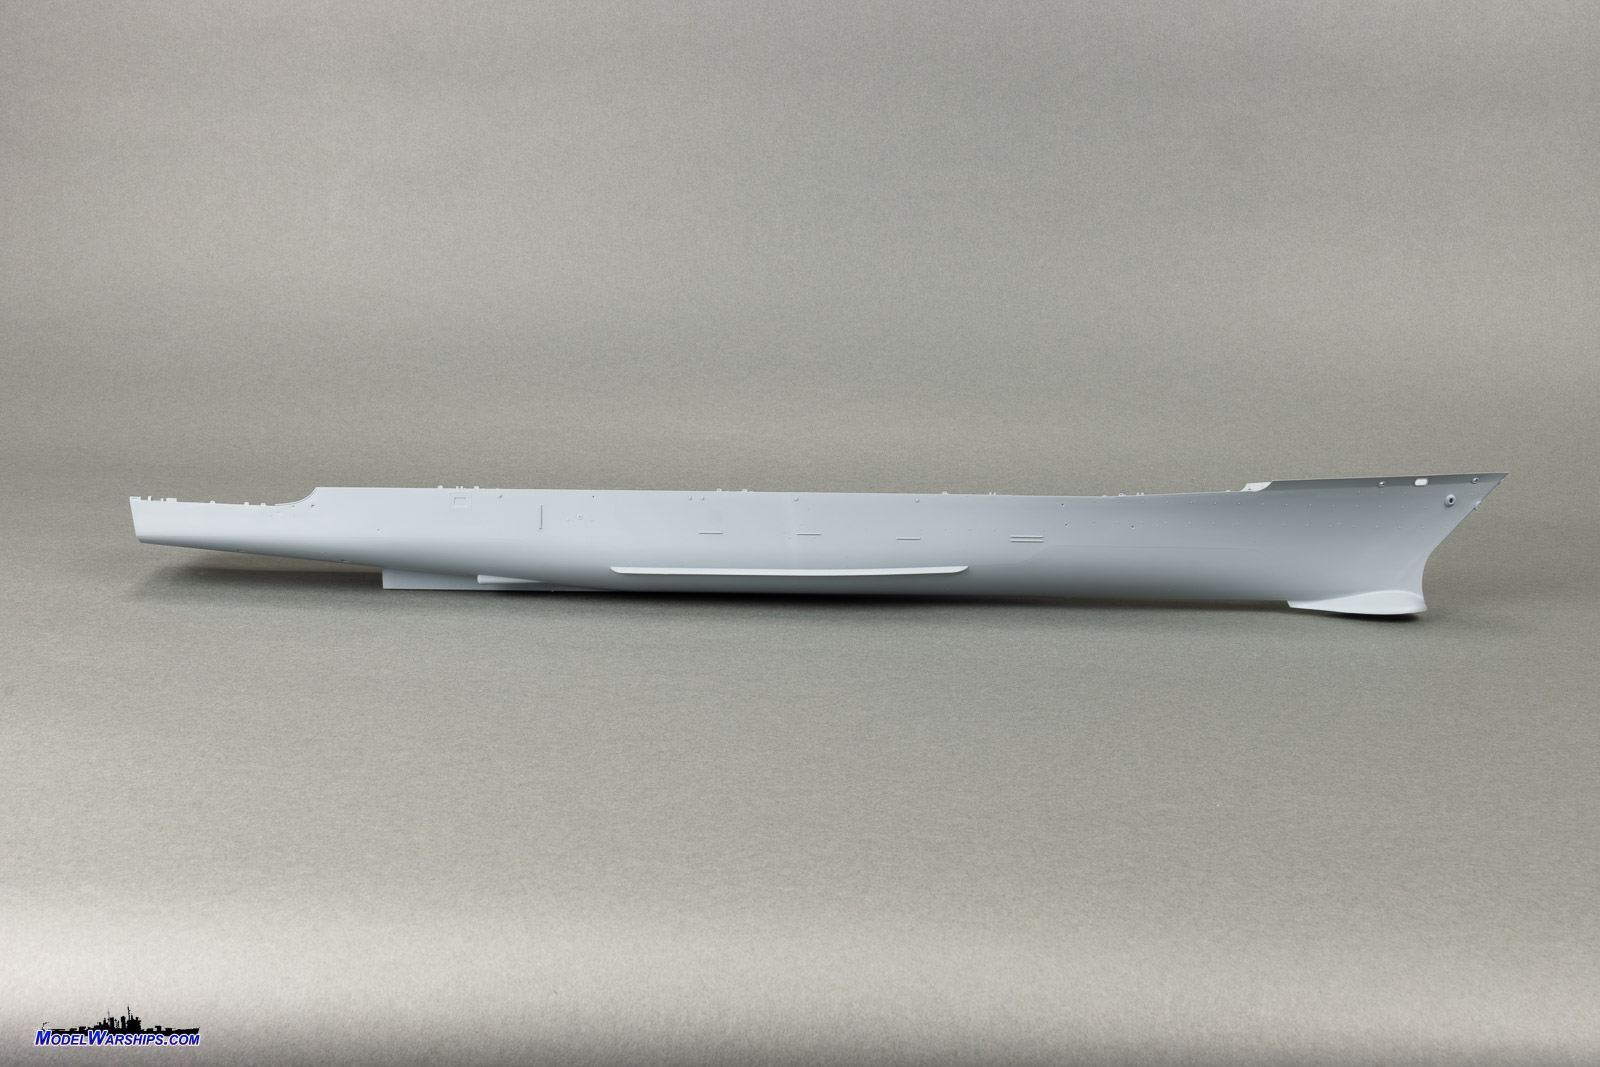
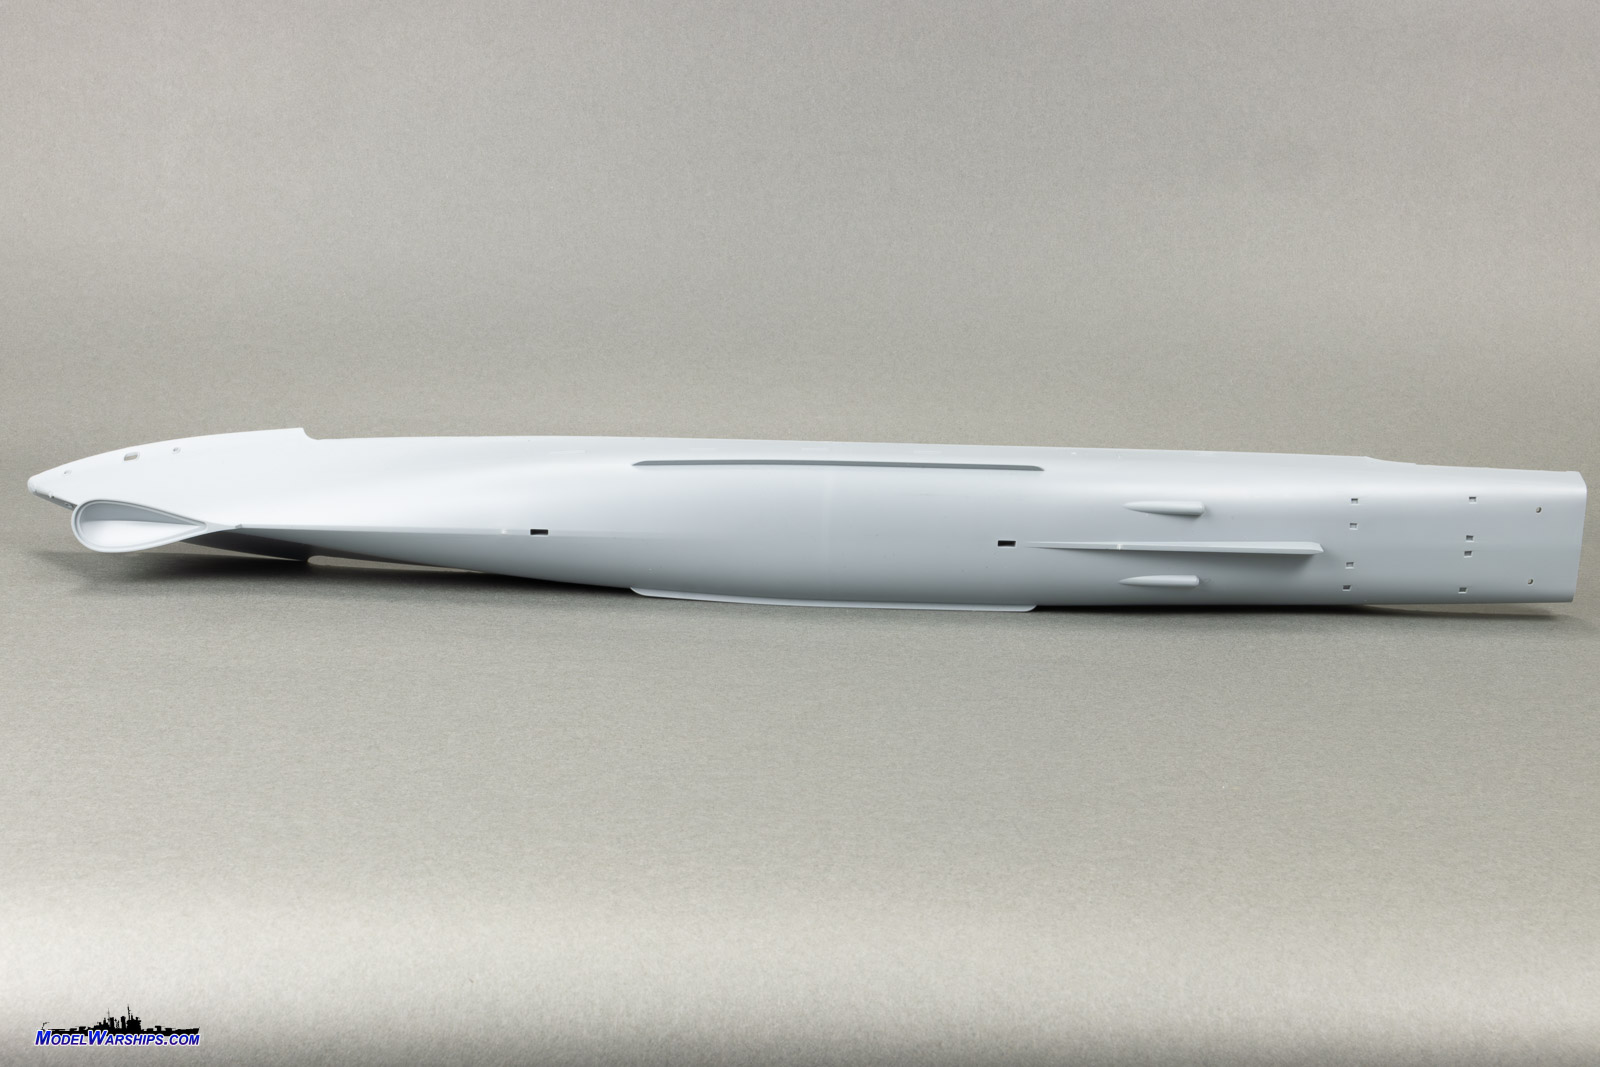
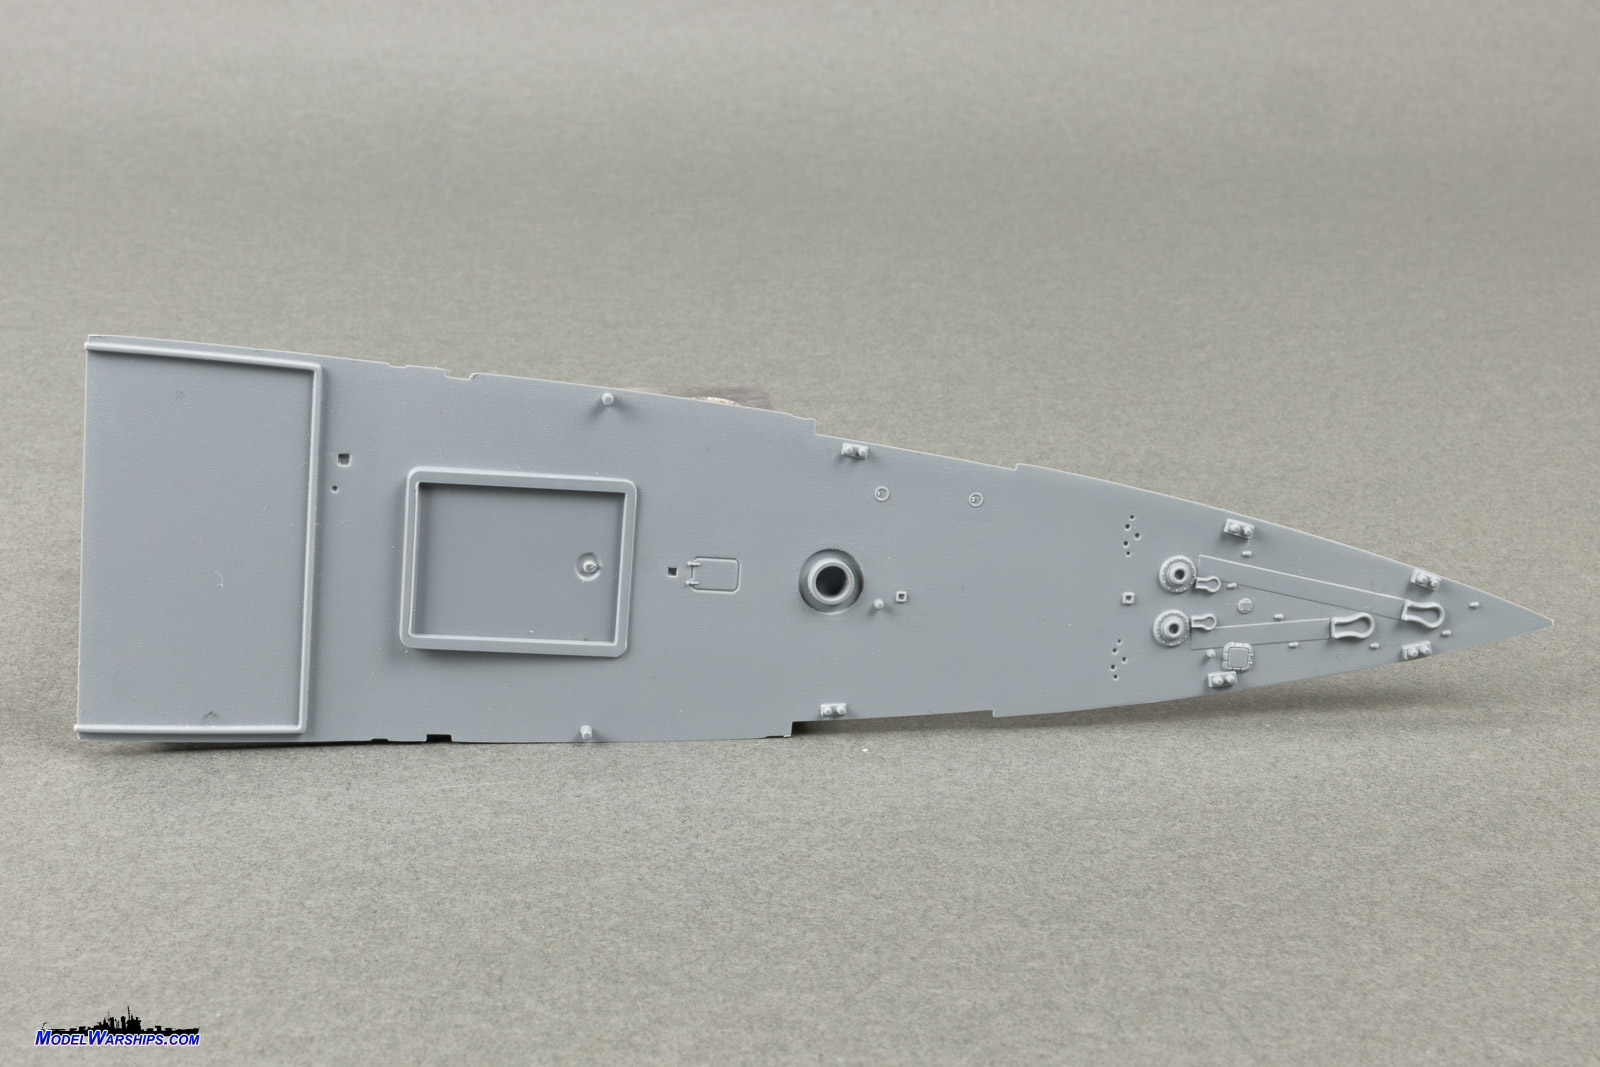
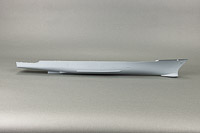
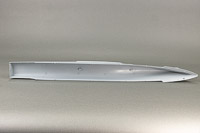
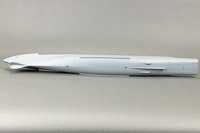
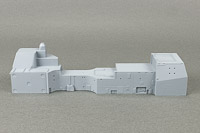
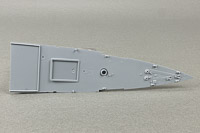
| HULL |
| The hull is one-piece and solid, with no warping or bowing
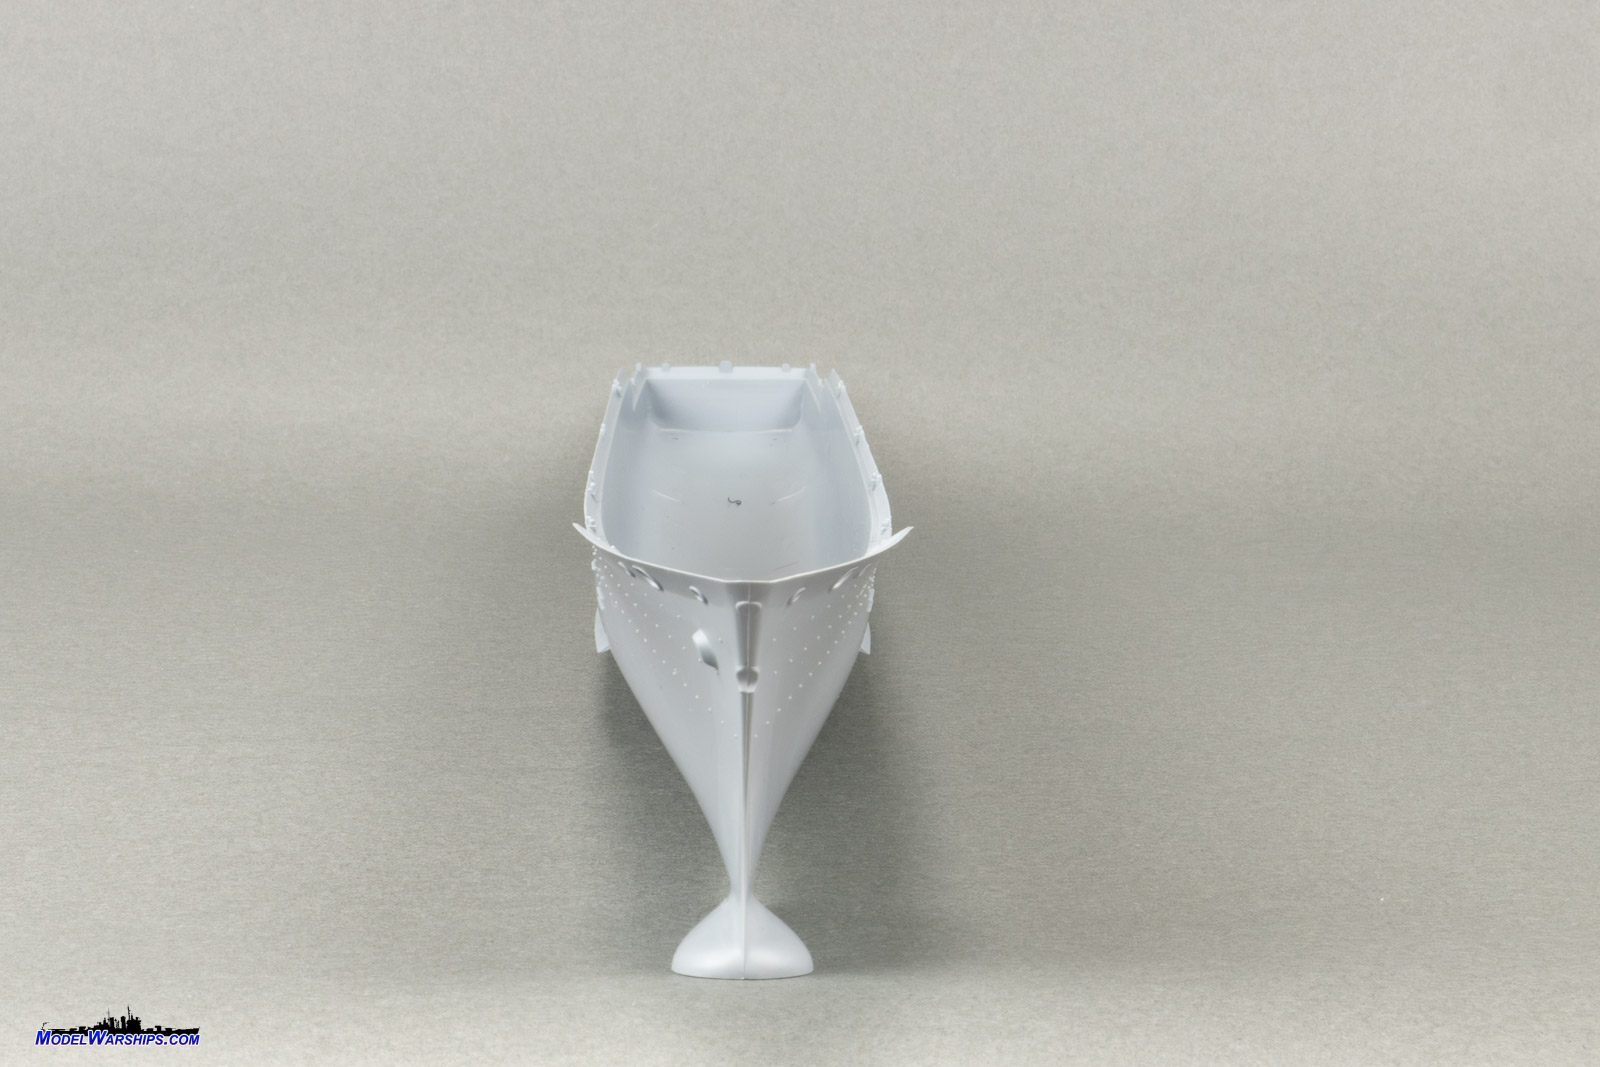
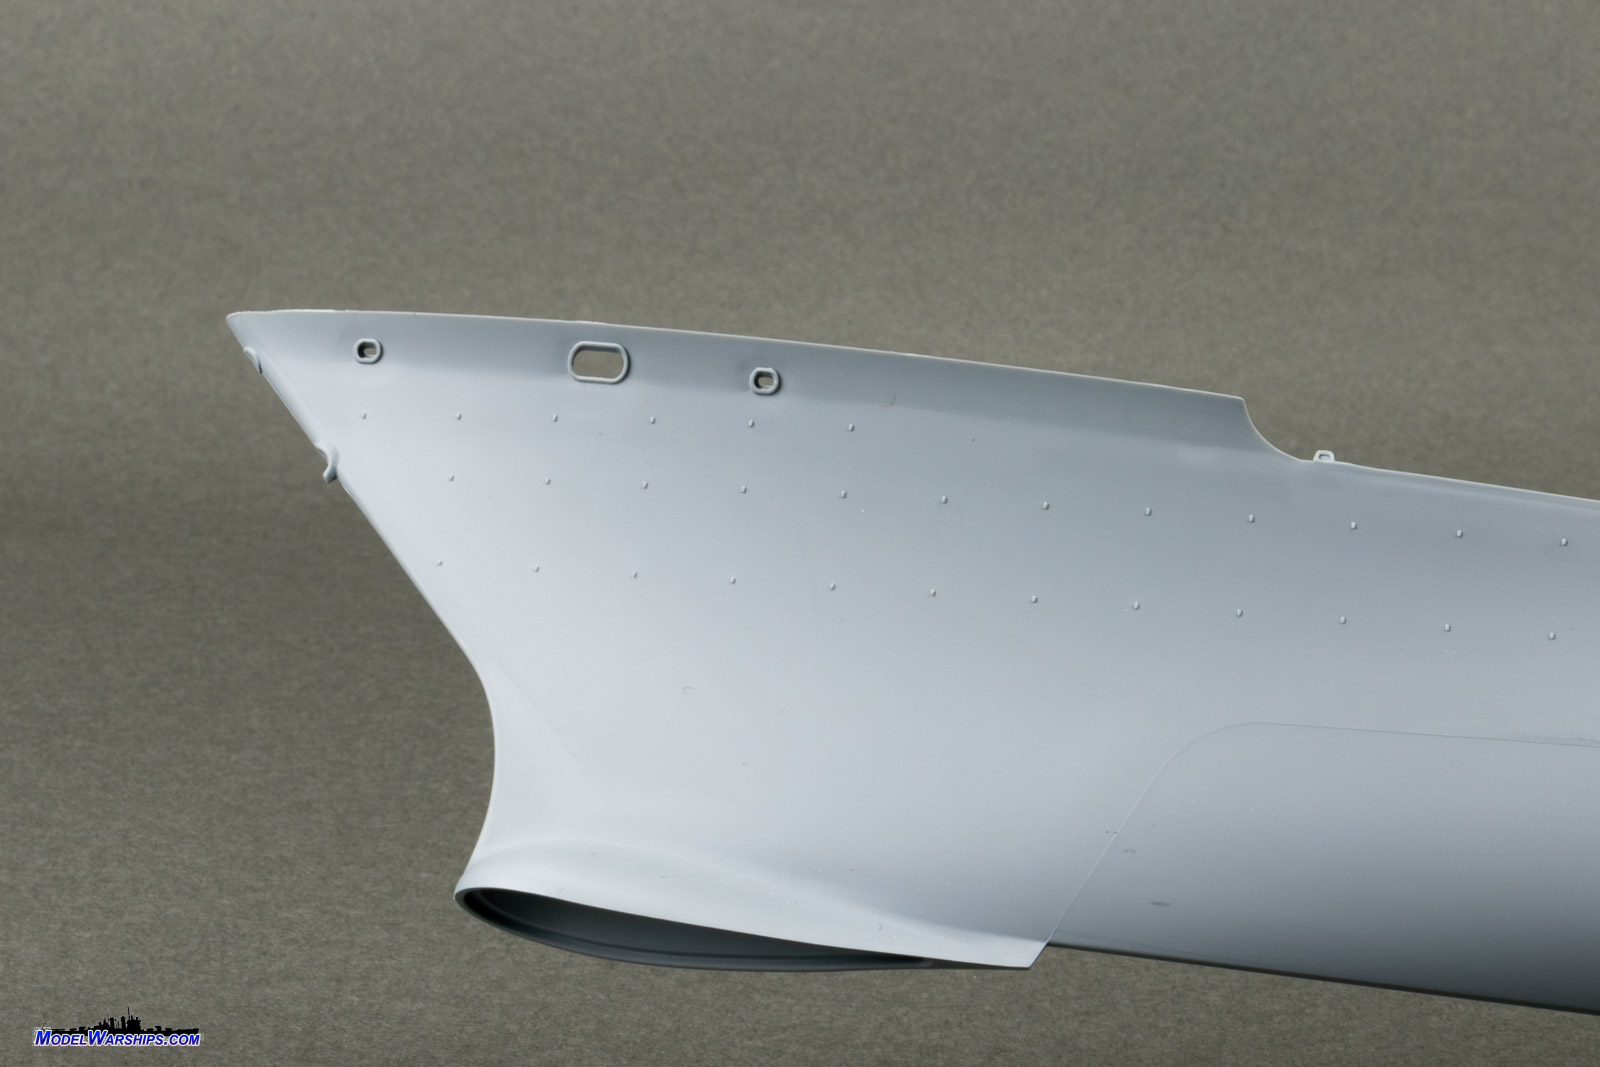
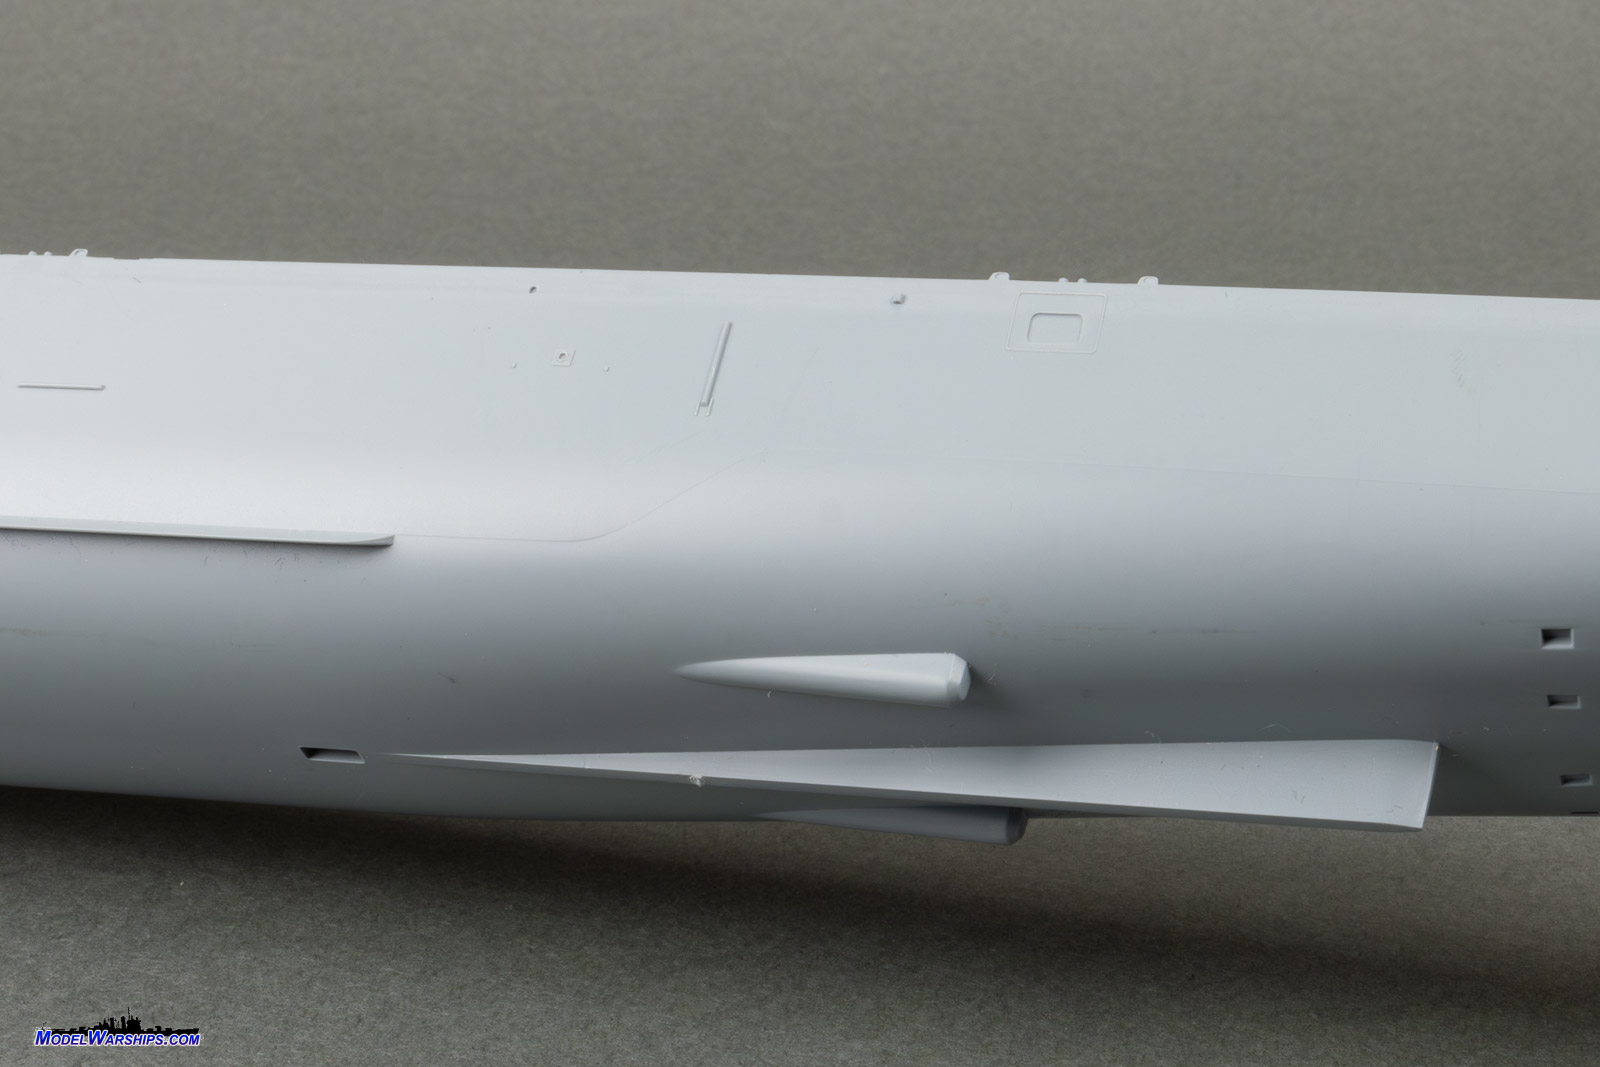
detected. There is no plating indicated on the hull, but details such as
exhaust for generators, doors for the torpedo tubes, tie-off padeyes on
the bow represented by simple bumps, and the stern NIXIE and towed sonar
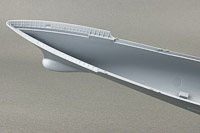
openings and doors are sharply depicted. Bilge keels are thin and straight.
Someone mentioned that these keels should maybe be lower, more on the turn
of the hull. I can see that when comparing to dry dock photos of some of
the ships, but without a side-by-side compression, it wasn't noticeable
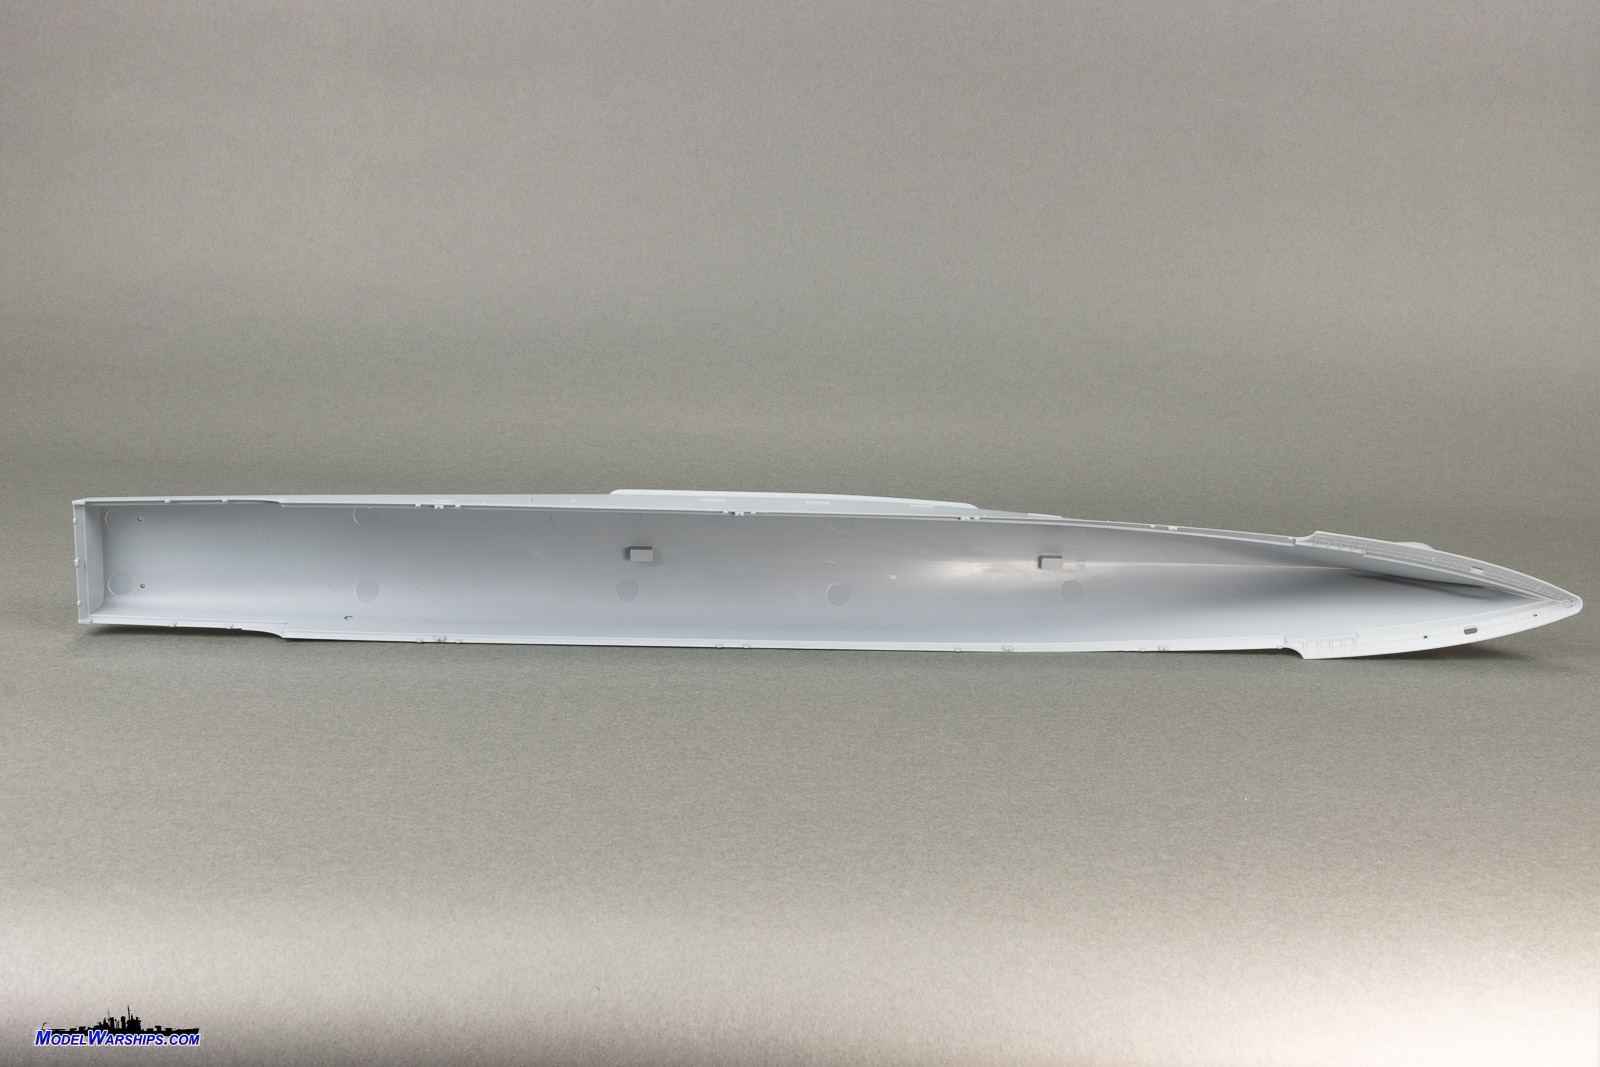
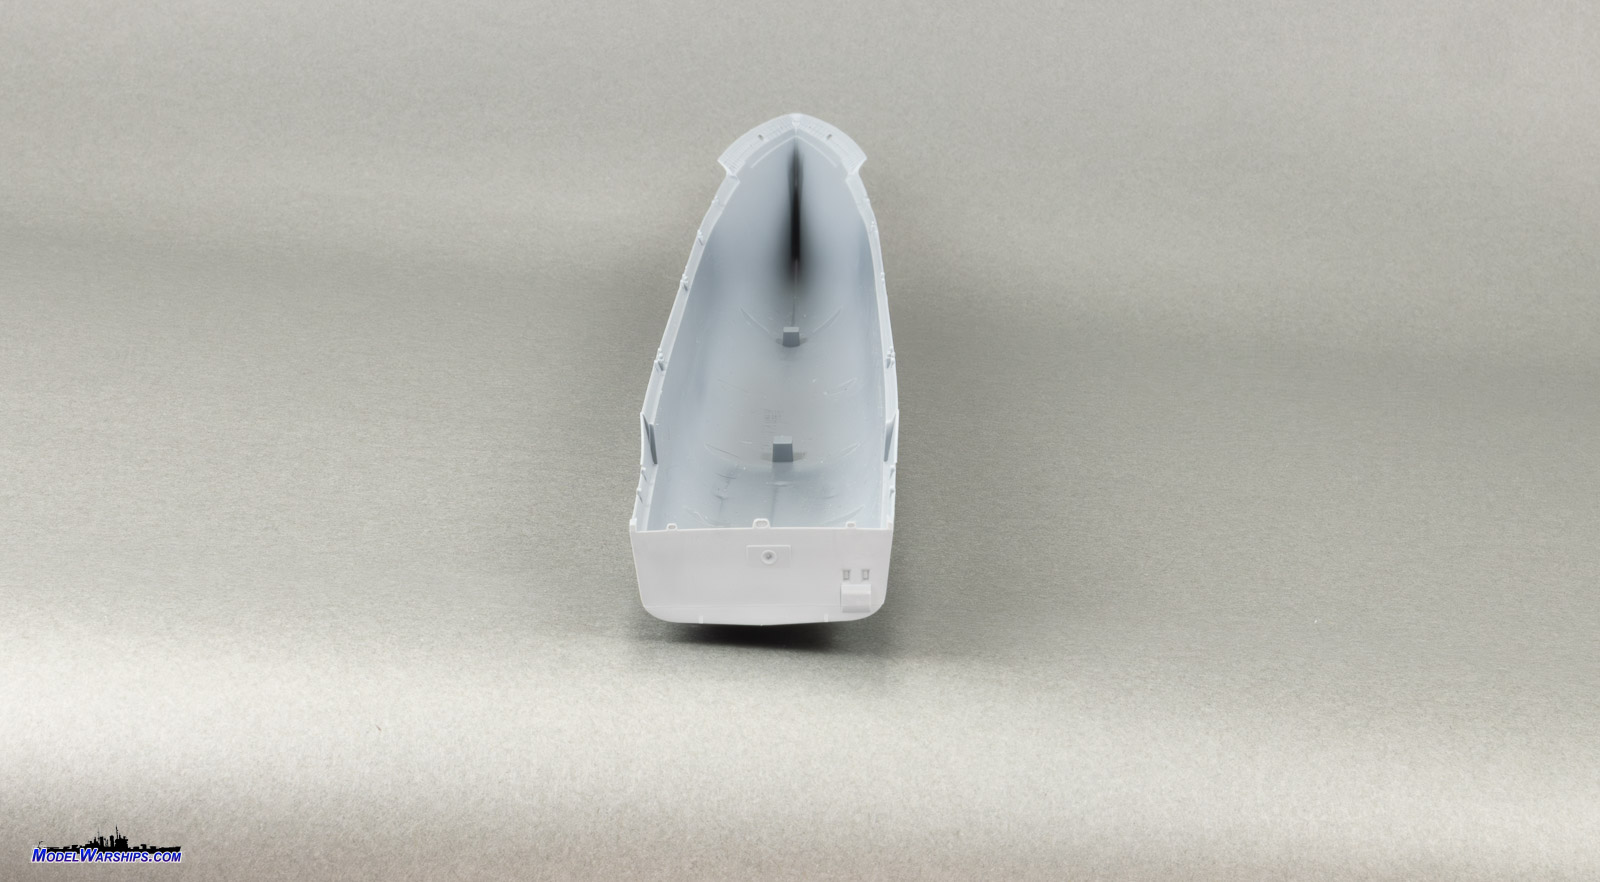
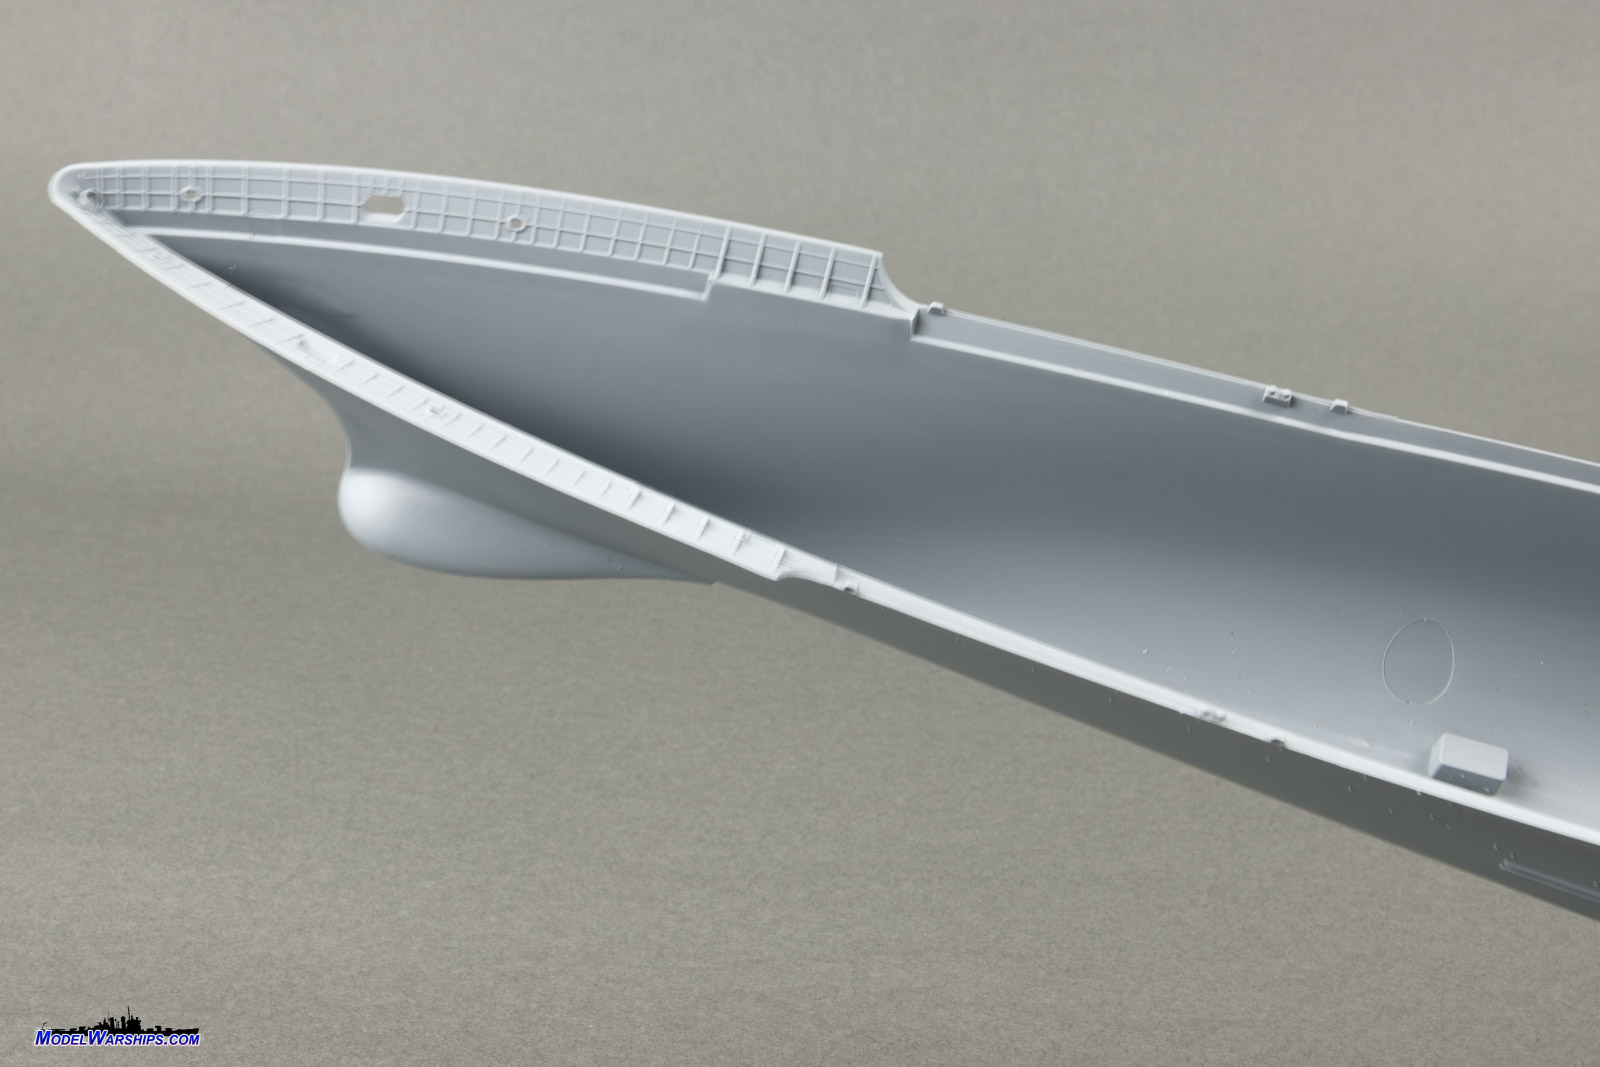
to me at all. Mooring bits and chocks line upper lip of the hull. All look
the part and are finely molded. The chocks, however, are solid, with recessed
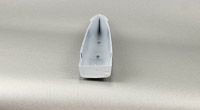
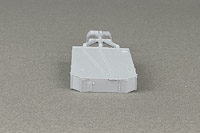
areas that will need to be drilled out to open them up. The forward bulwark
has nicely detailed rib reinforcements. There are two rectangular openings
in the keel of the hull, for the provided mounting finials.
There's little clean-up to be done to the hull: two small stubs where
the sprue was removed need a little sanding, and there's a faint line that
goes around the entire hull, I believe it a seam from slide-molding, that
will need to be sanded. This seam, though, is one of those things that
shows more in photos than to the naked eye. It's so fine that it can barely
be felt, and it'll sand away with a swipe of a sanding stick.
The other non-issue with the hull is that in my photos the tops of the
bow bulwark appear slightly wavy and uneven. This is mostly an issue with
the digital photography, and a very slight amount of flash along that top
edge. Again, hardly visible with the naked eye, and will disappear with
a swipe of a sanding block.
Multiple print and online sources list the Ticonderoga class
as having a length of 567'. In 1/350th scale, that's 19.44". The kit's
hull measures almost exactly that. Spot-on. |
|
 |
 |
 |
 |
 |
 |
| |
 |
|
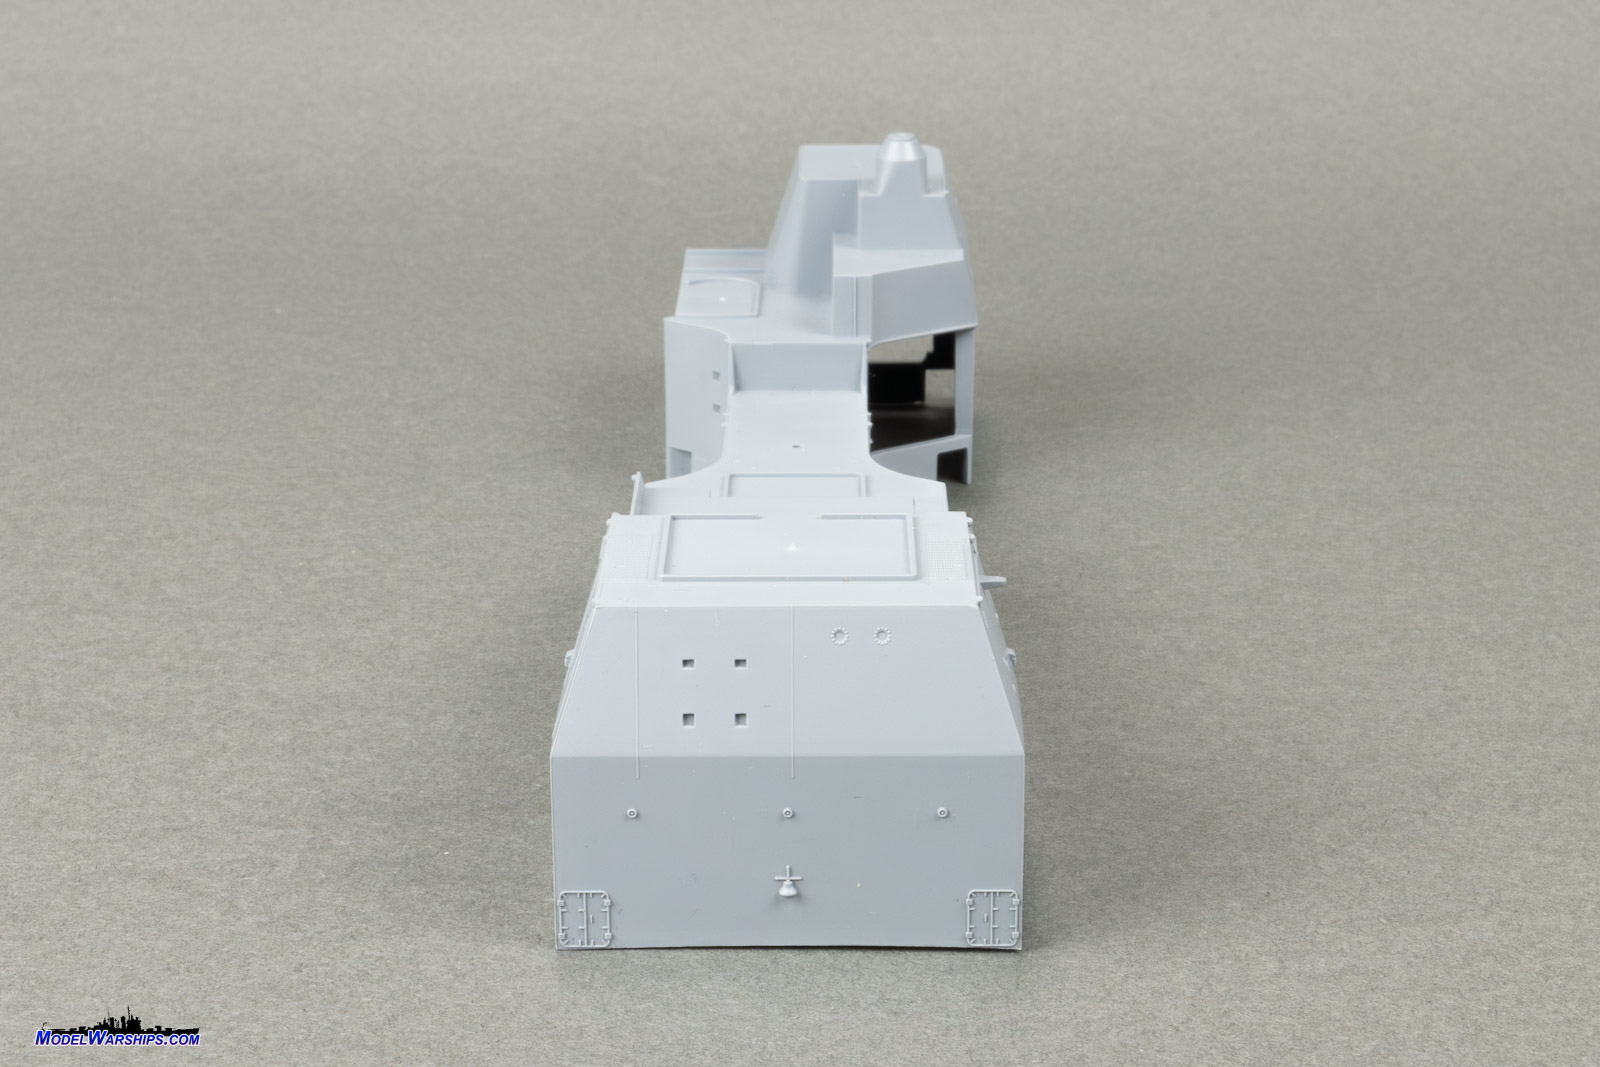
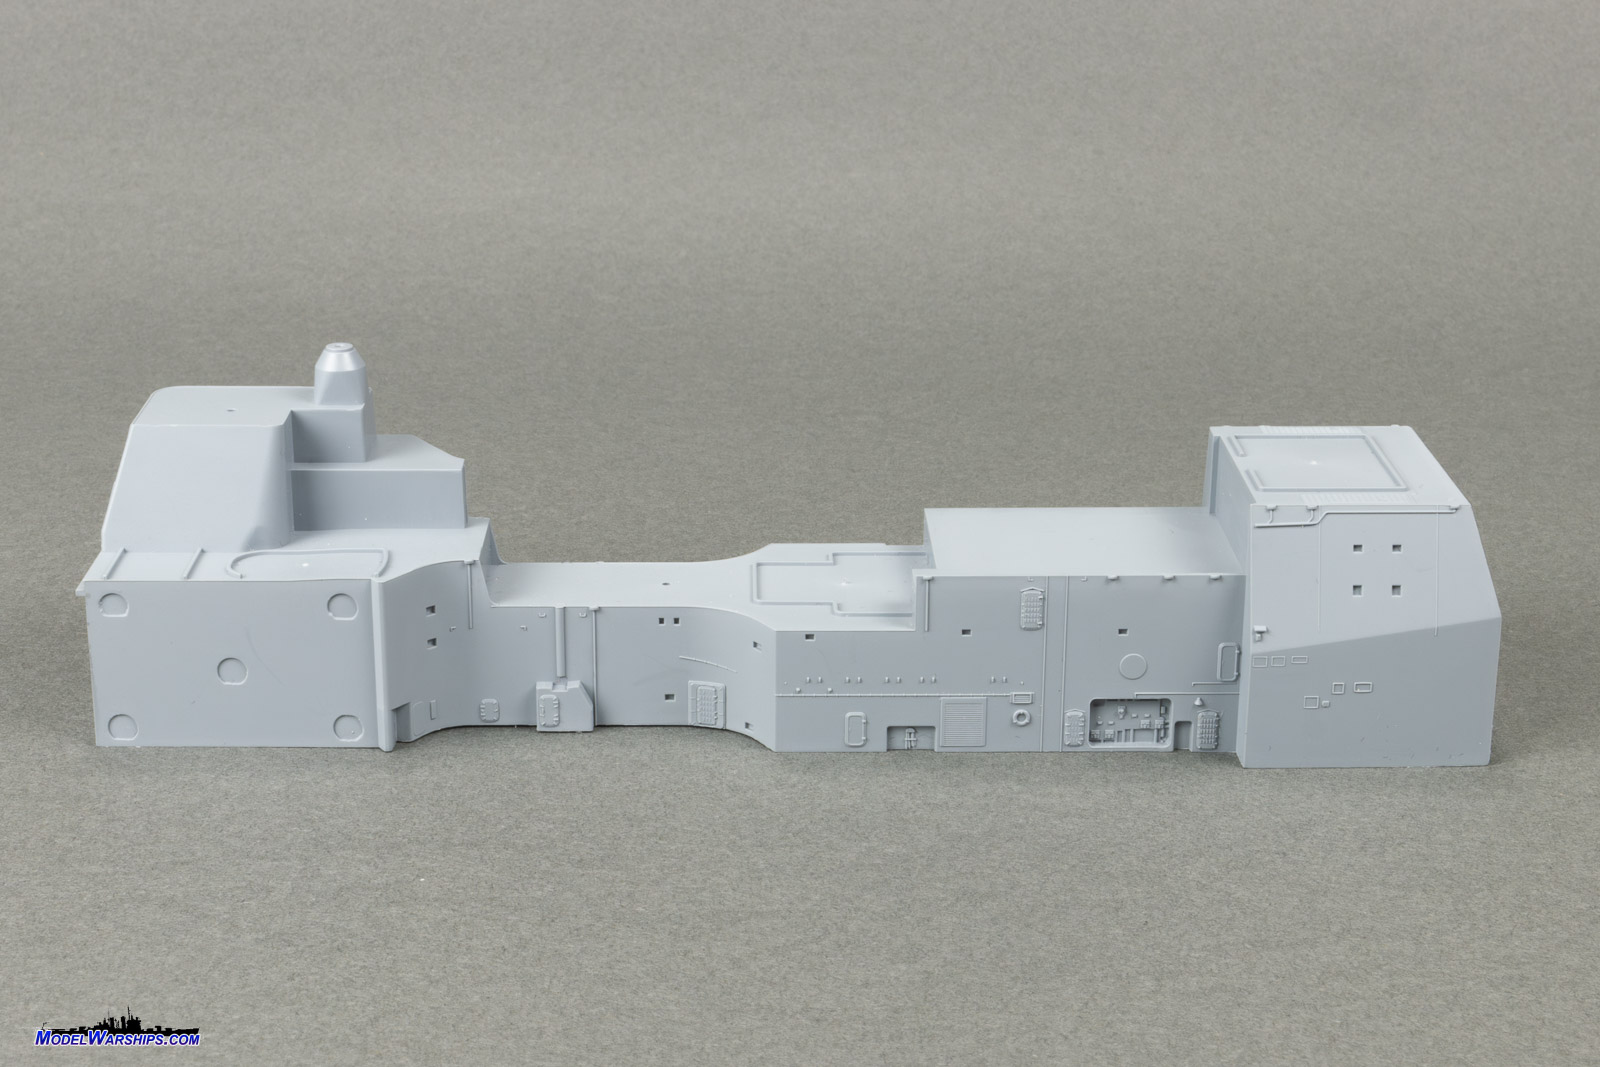
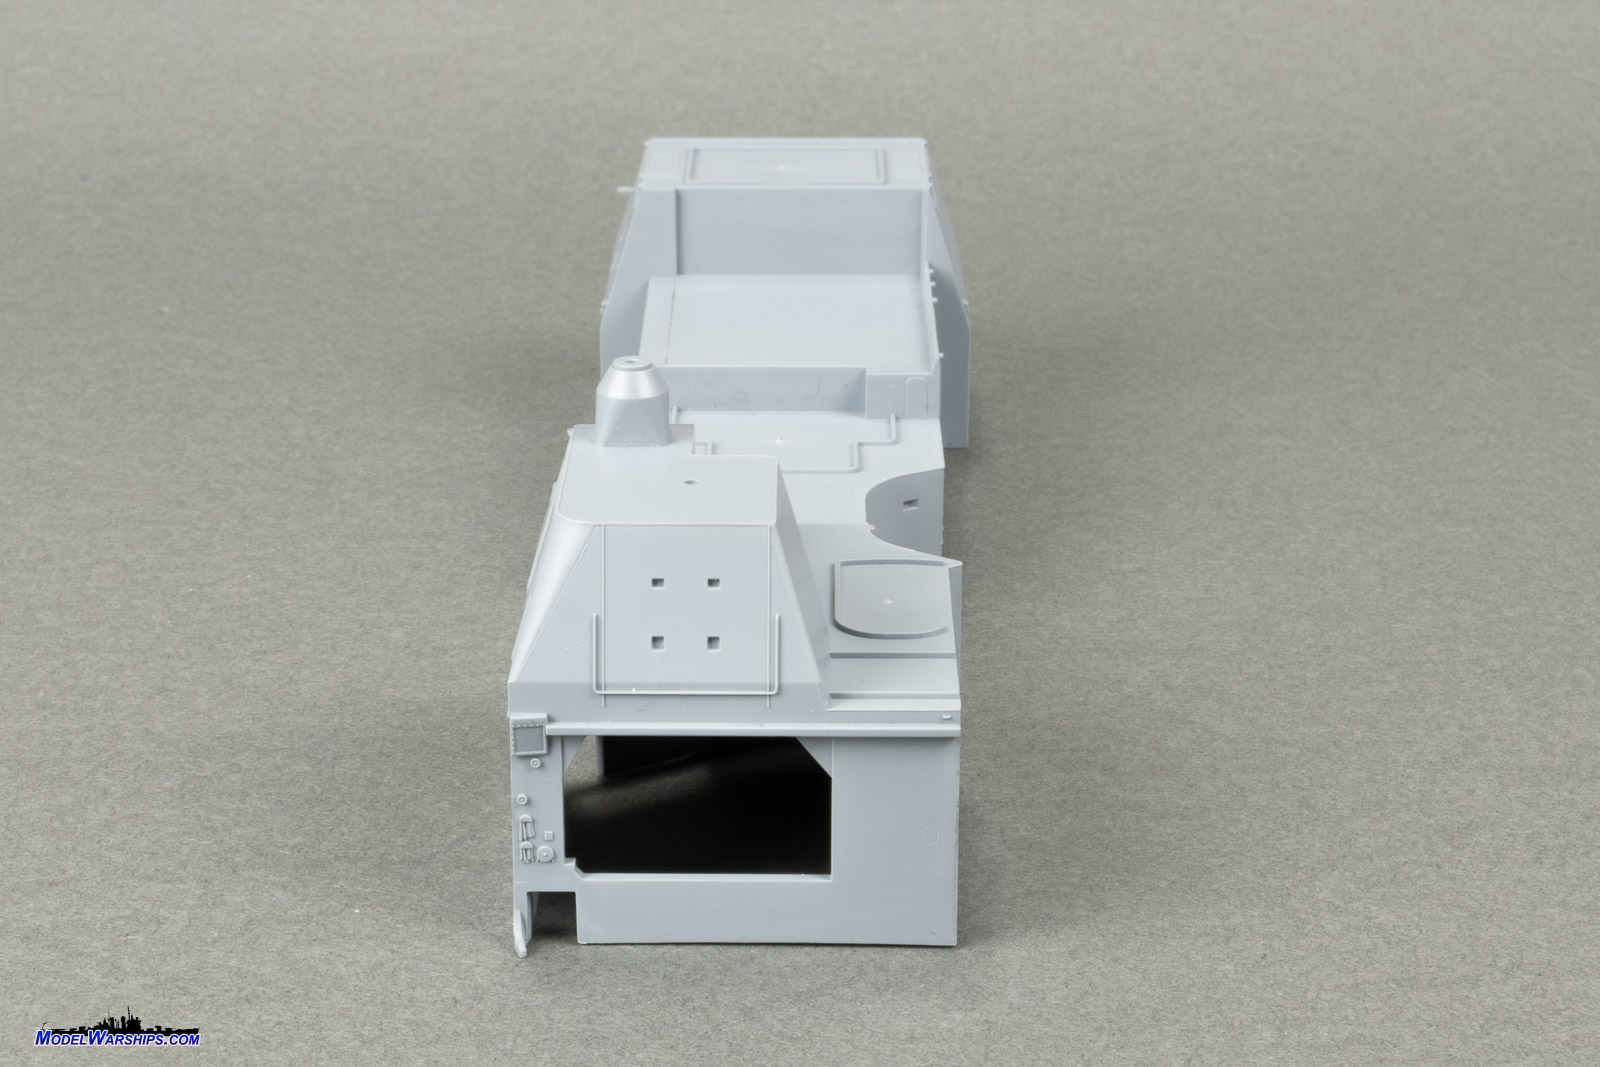
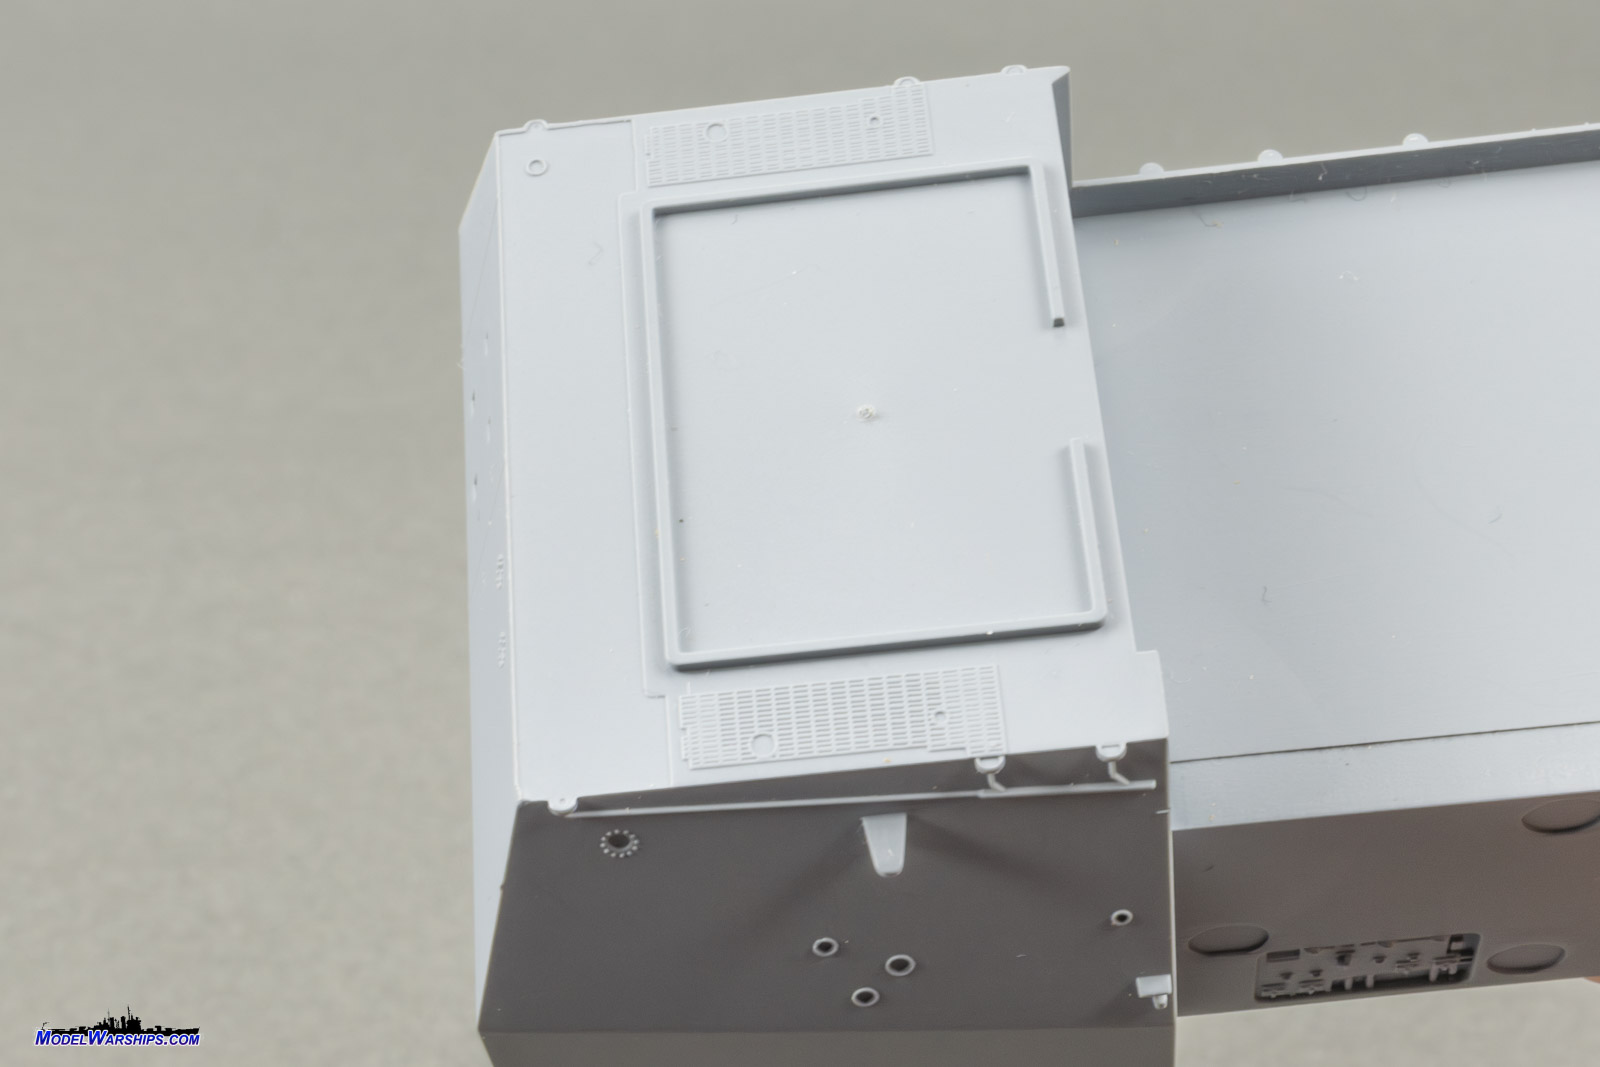
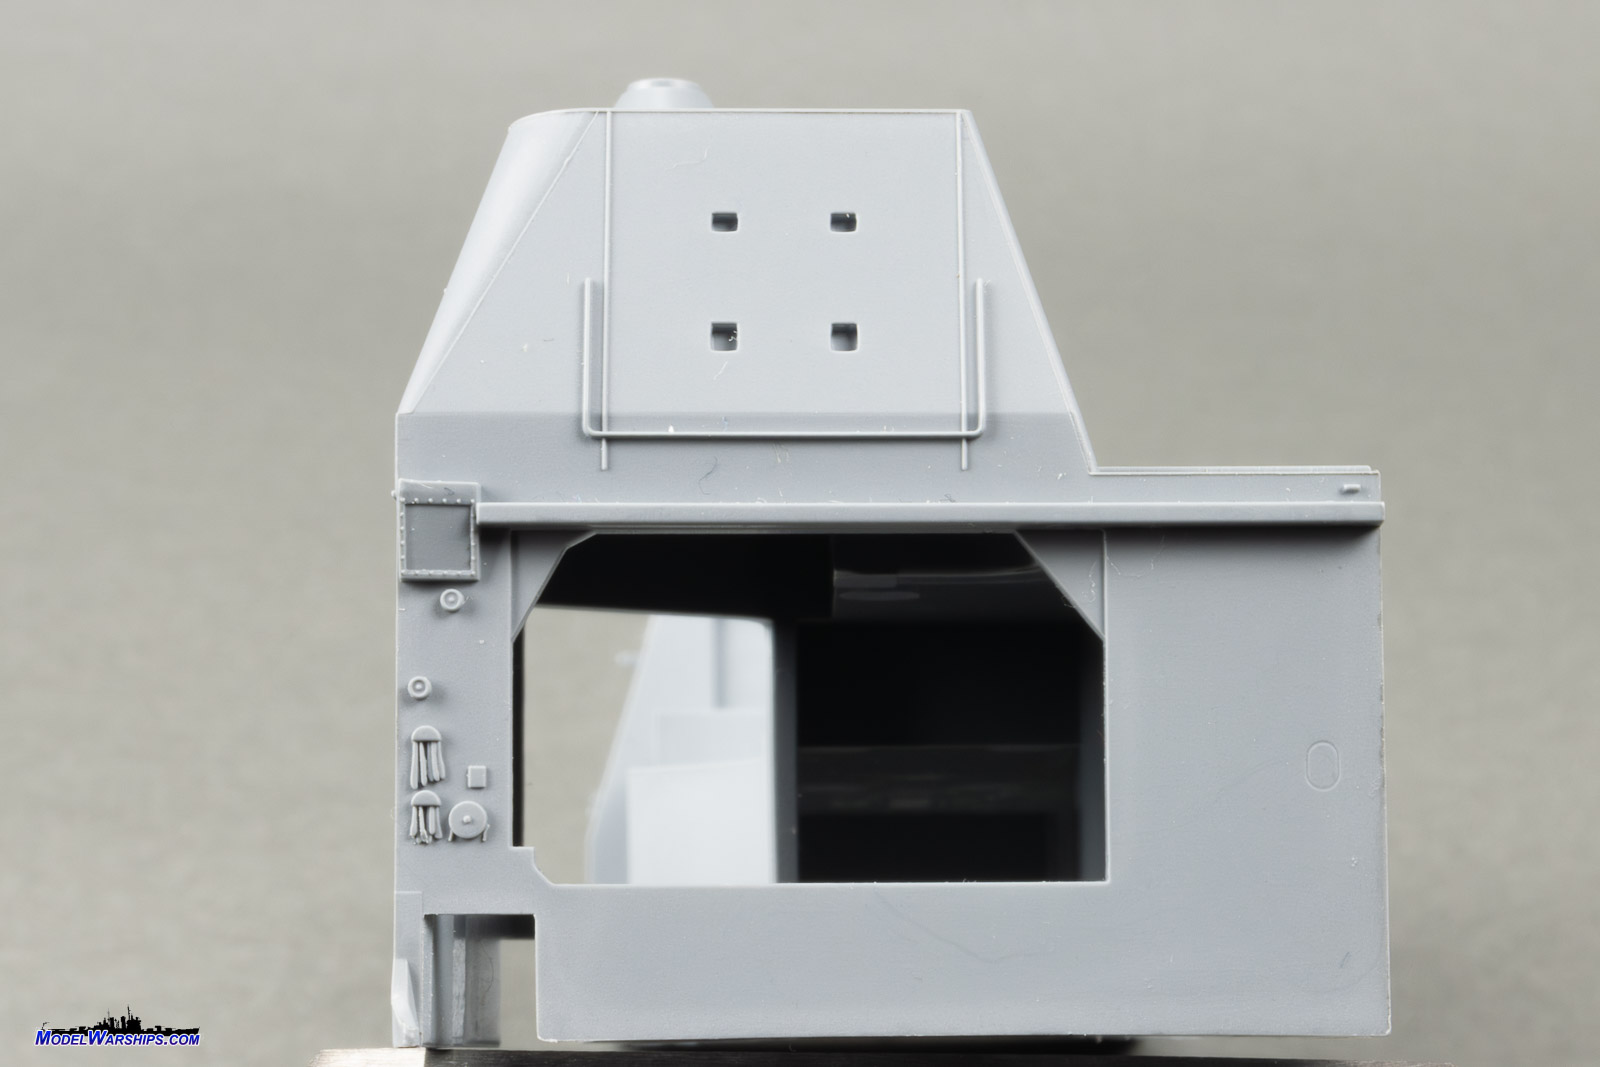
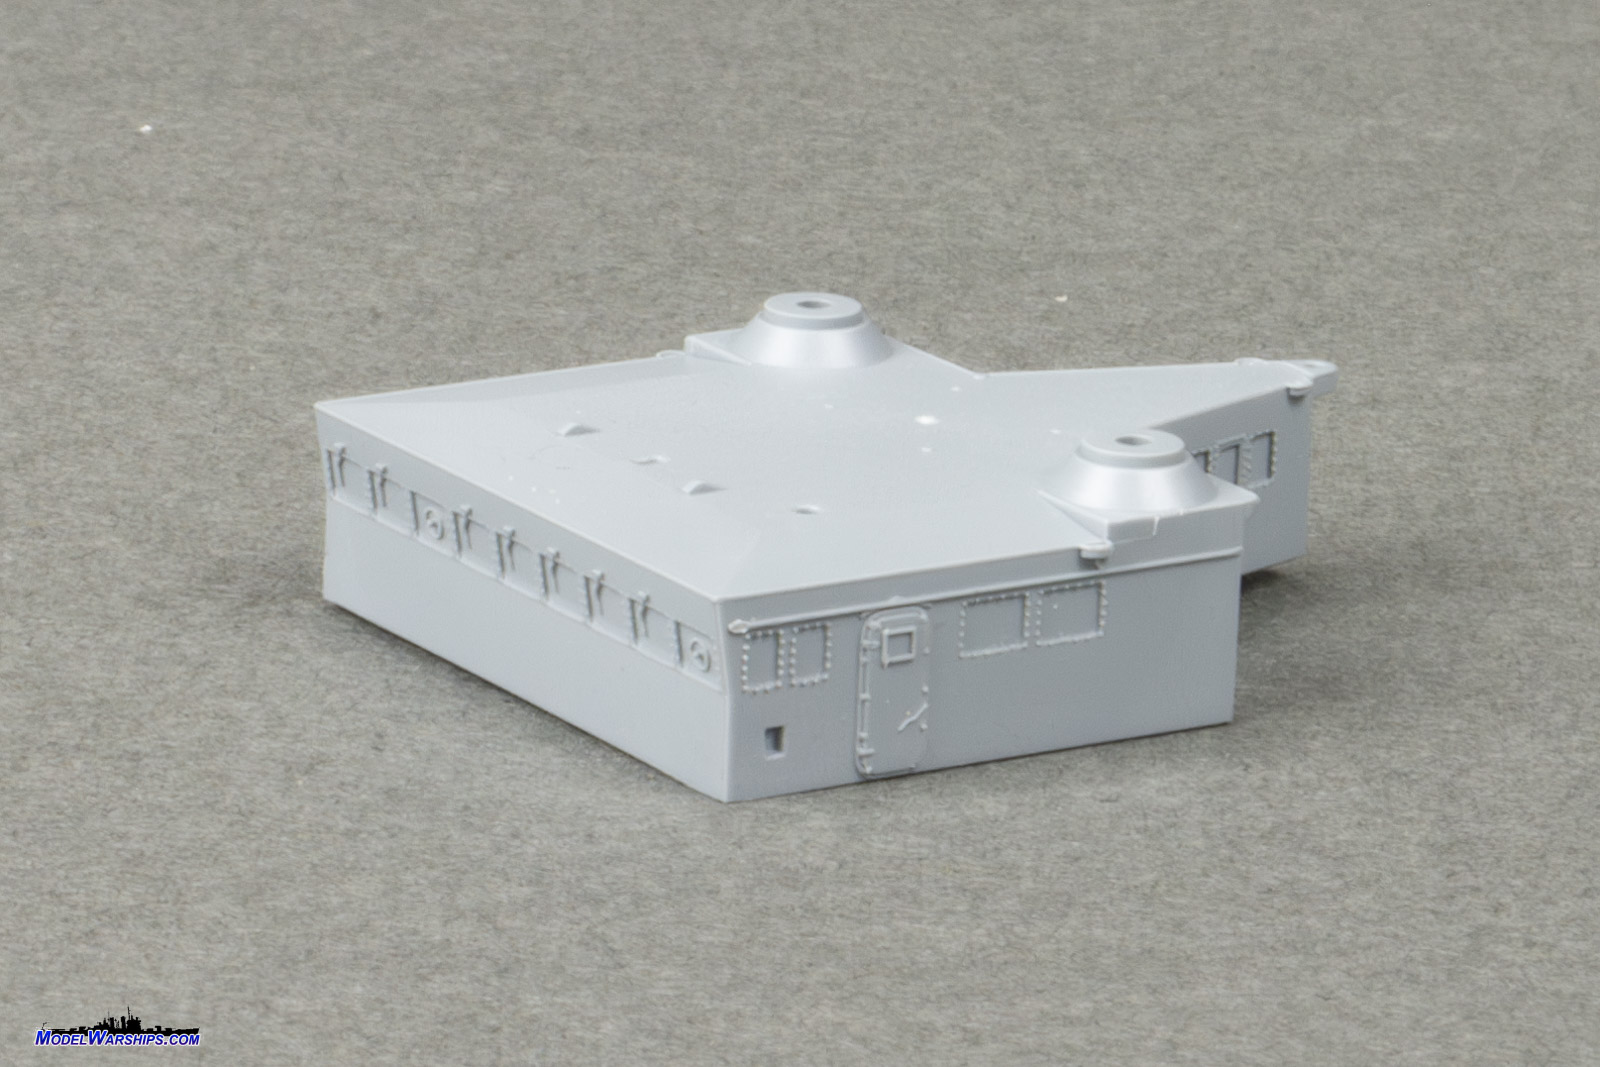
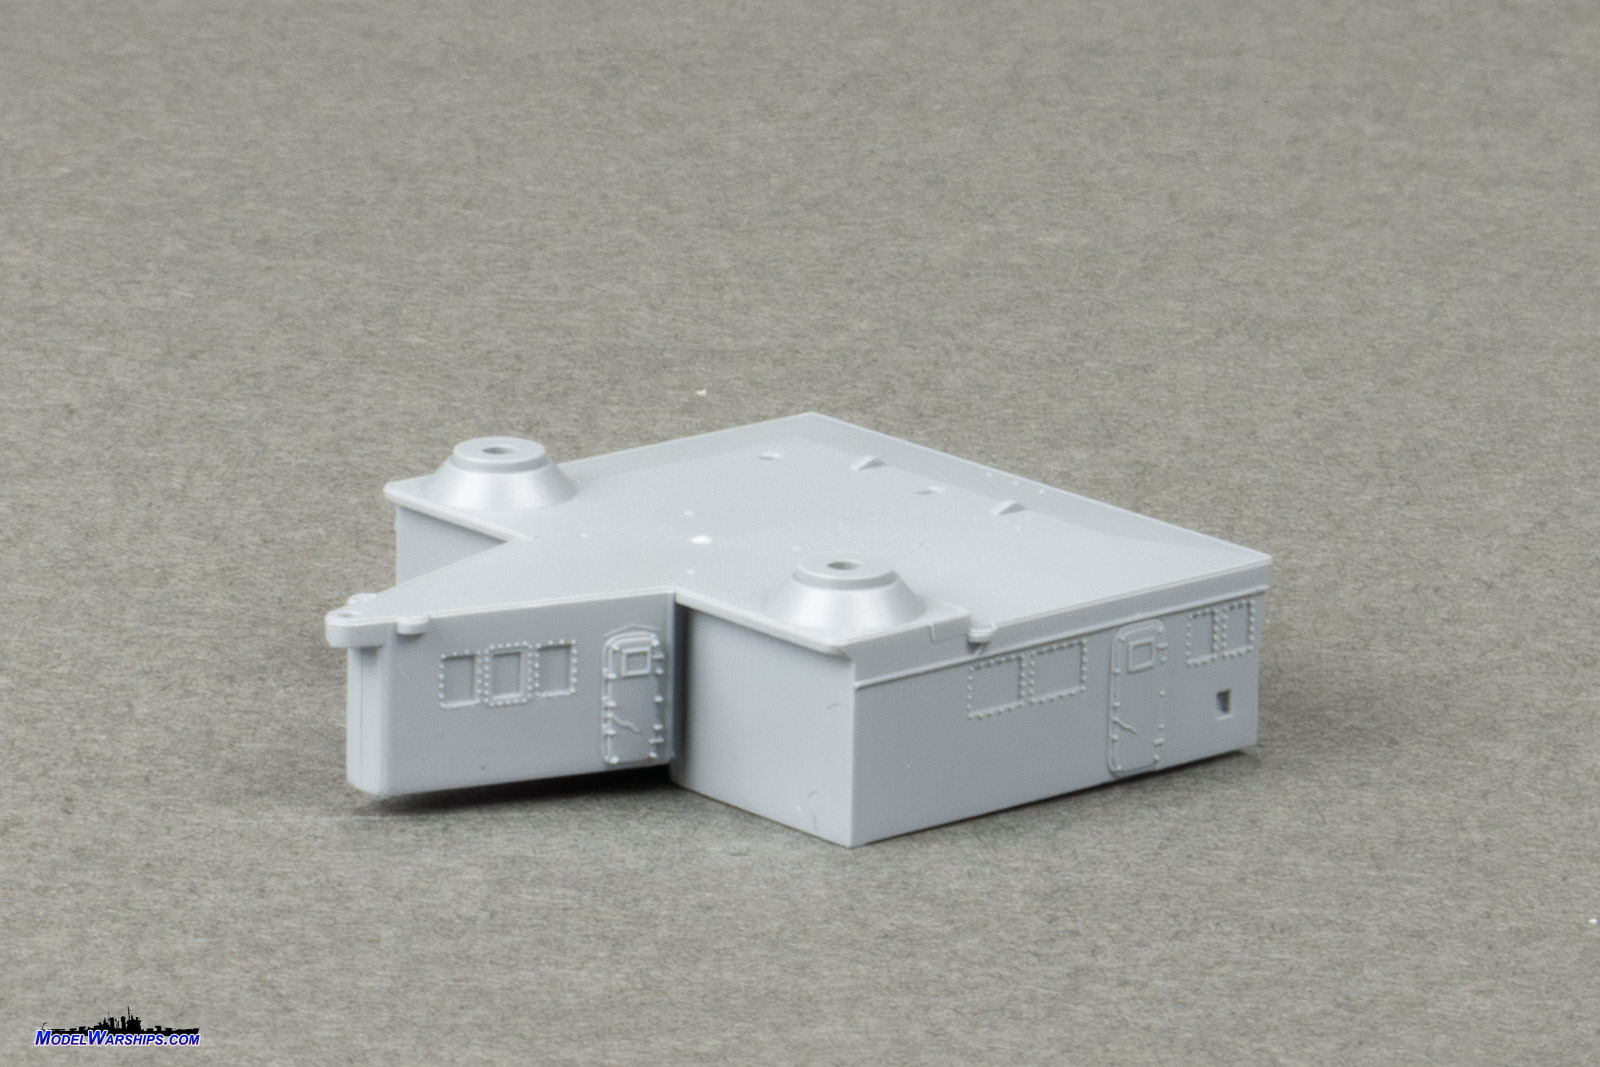
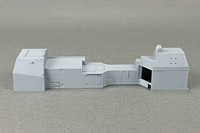
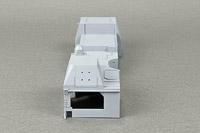
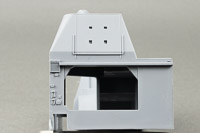
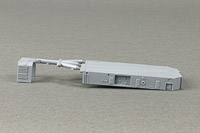
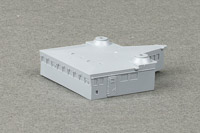
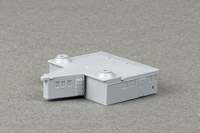
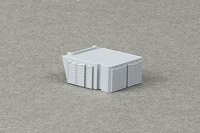
| SUPERSTRUCTURE and DECKS |
| The main superstructure is molded in one-piece... mostly.
The entire structure is one-piece, with two port external bulkheads provided
as separate pieces that attach over recessed detail. This has a two-fold
benefit of allowing the part to be molded with ejector marks that'll be
covered by the added bulkhead, and giving the refueling station on the
port side more depth. This and the superstructure parts all show fine grating
detail, well done fire station details with realistic hoses, and life rings.
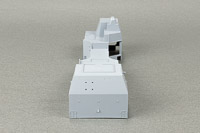
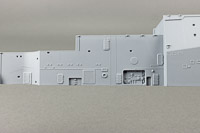
The one oddity is that while the watertight doors are extremely well detailed
with hinge and handle detail, there's a pronounced grid surface texture
to some of the doors. My take is that this is representing the very faint
waffle texture on US Navy watertight doors. It shouldn't be visible in
this scale -- much like deck grating on 1/700 scale models -- but I doubt
it'll be too distracting when viewed in person. Other excellent details
include wipers on the bridge windows, and wooden matting on the bridge
wings. One thing I would like to have seen is the bridge windows being
open; sure, that would have done away with the wiper detail, but to have
an open bridge would be a cool option.
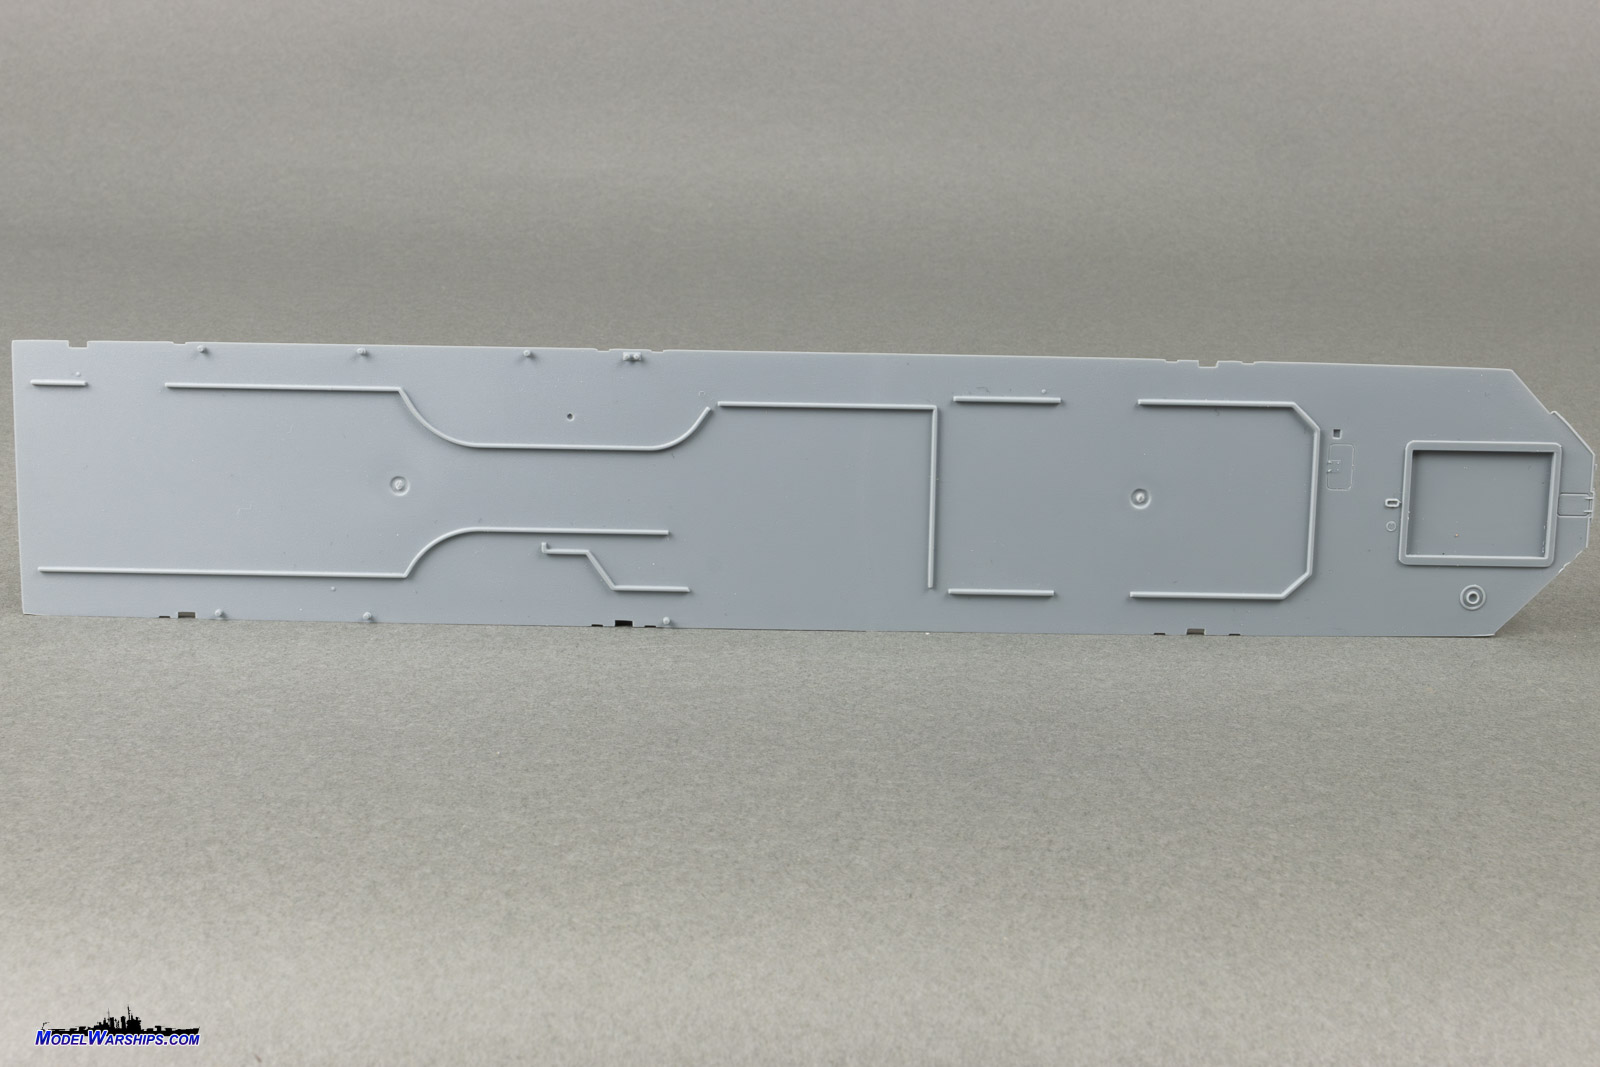
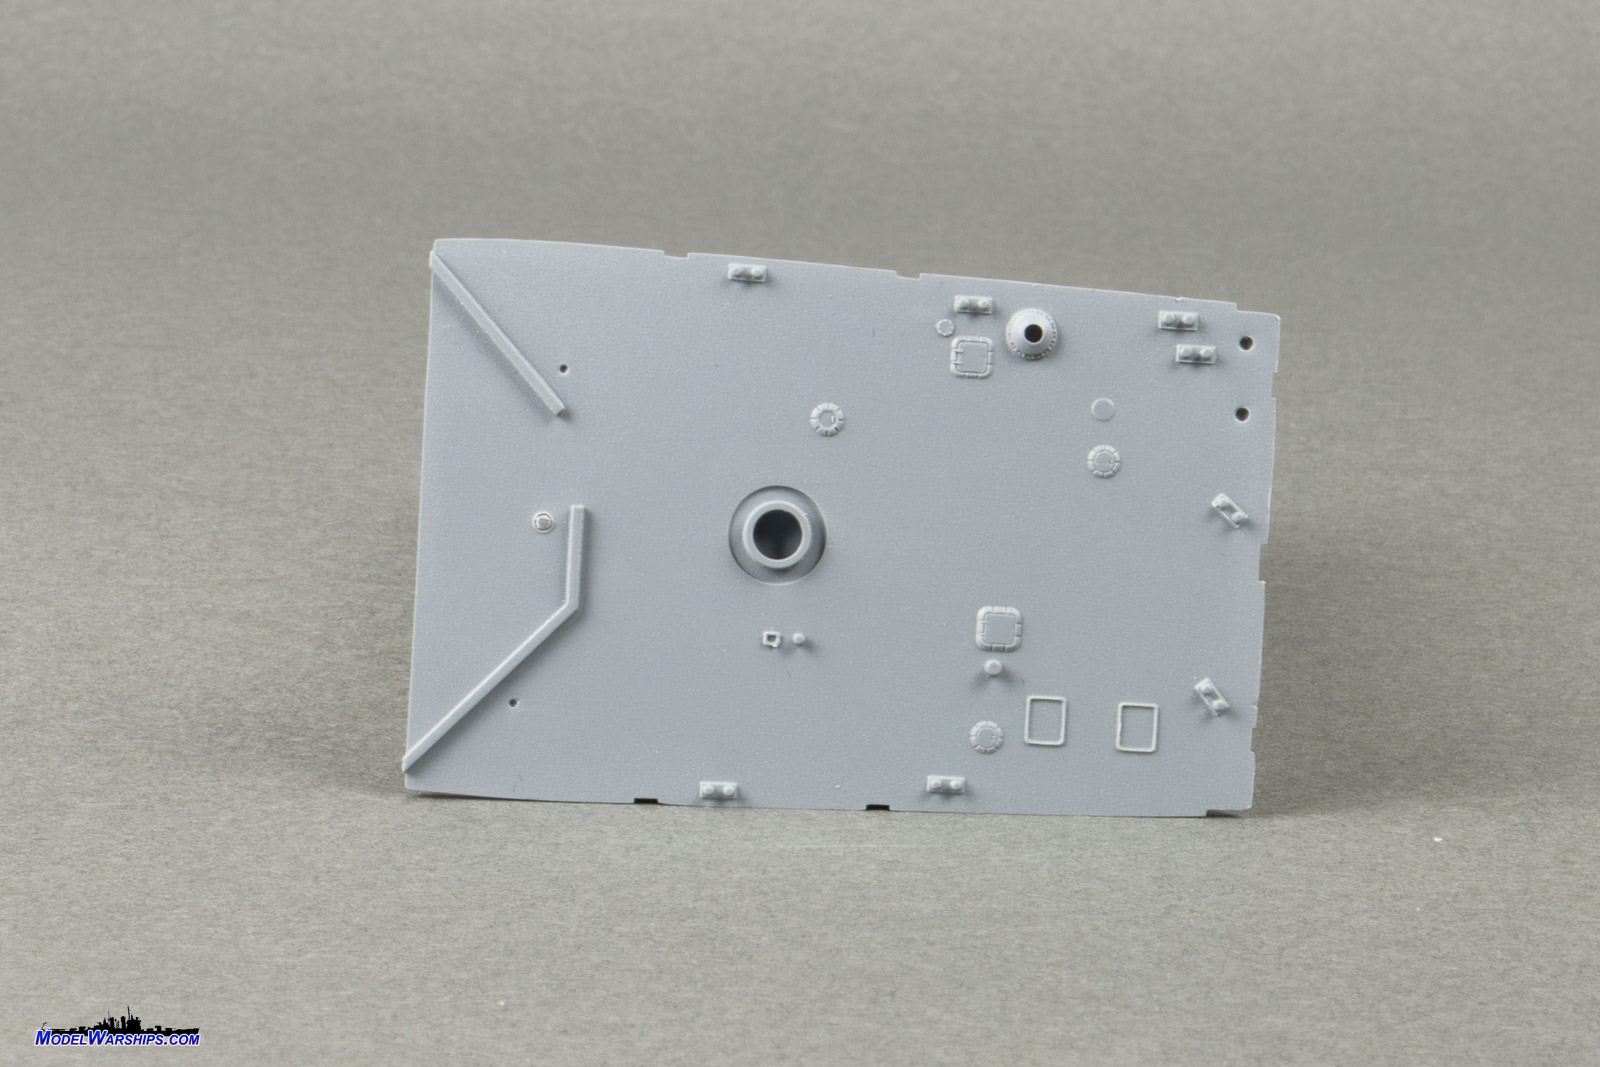
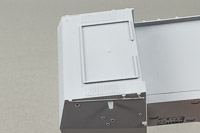
The decks maintain the same level of detail to the hawse pipes, more
mooring bitts, and hatches. The helo deck RAST tracks look the part. A
test-fit of the decks into the hull show a near seamless fit, as does stacking
the superstructure on top of those decks. The dreaded mis-match between
the superstructure and hull on the old Dragon kit, that caused many a modeler
to question their life choices, is not present here. Fit is outstanding. |
 |
 |
 |
 |
 |
 |
 |
 |
 |
 |
 |
 |
 |
 |
 |
 |
 |
 |
 |
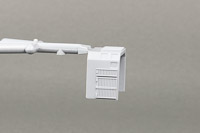
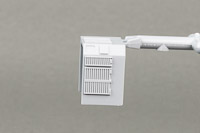
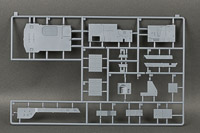
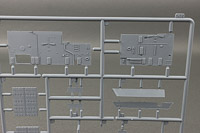
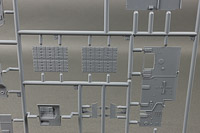
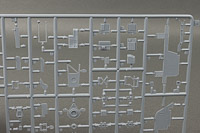
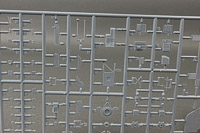
| SPRUE I |
| Those two external port bulkheads and the MK41 VLS launchers
make up a good portion of Sprue I. The VLS hatch doors have nice hinge
detail. The watertight door waffle pattern is really apparent on these
pieces as there are so many doors so close together. Trust me, they don't
look as cluttered in-person. If they do turn out to be an issue, I think
a drop of thinned primer flowed onto the door surface would reduce the
sharpness of the detail enough.
Other pieces are smaller external bulkheads and decks. |
|
 |
 |
 |
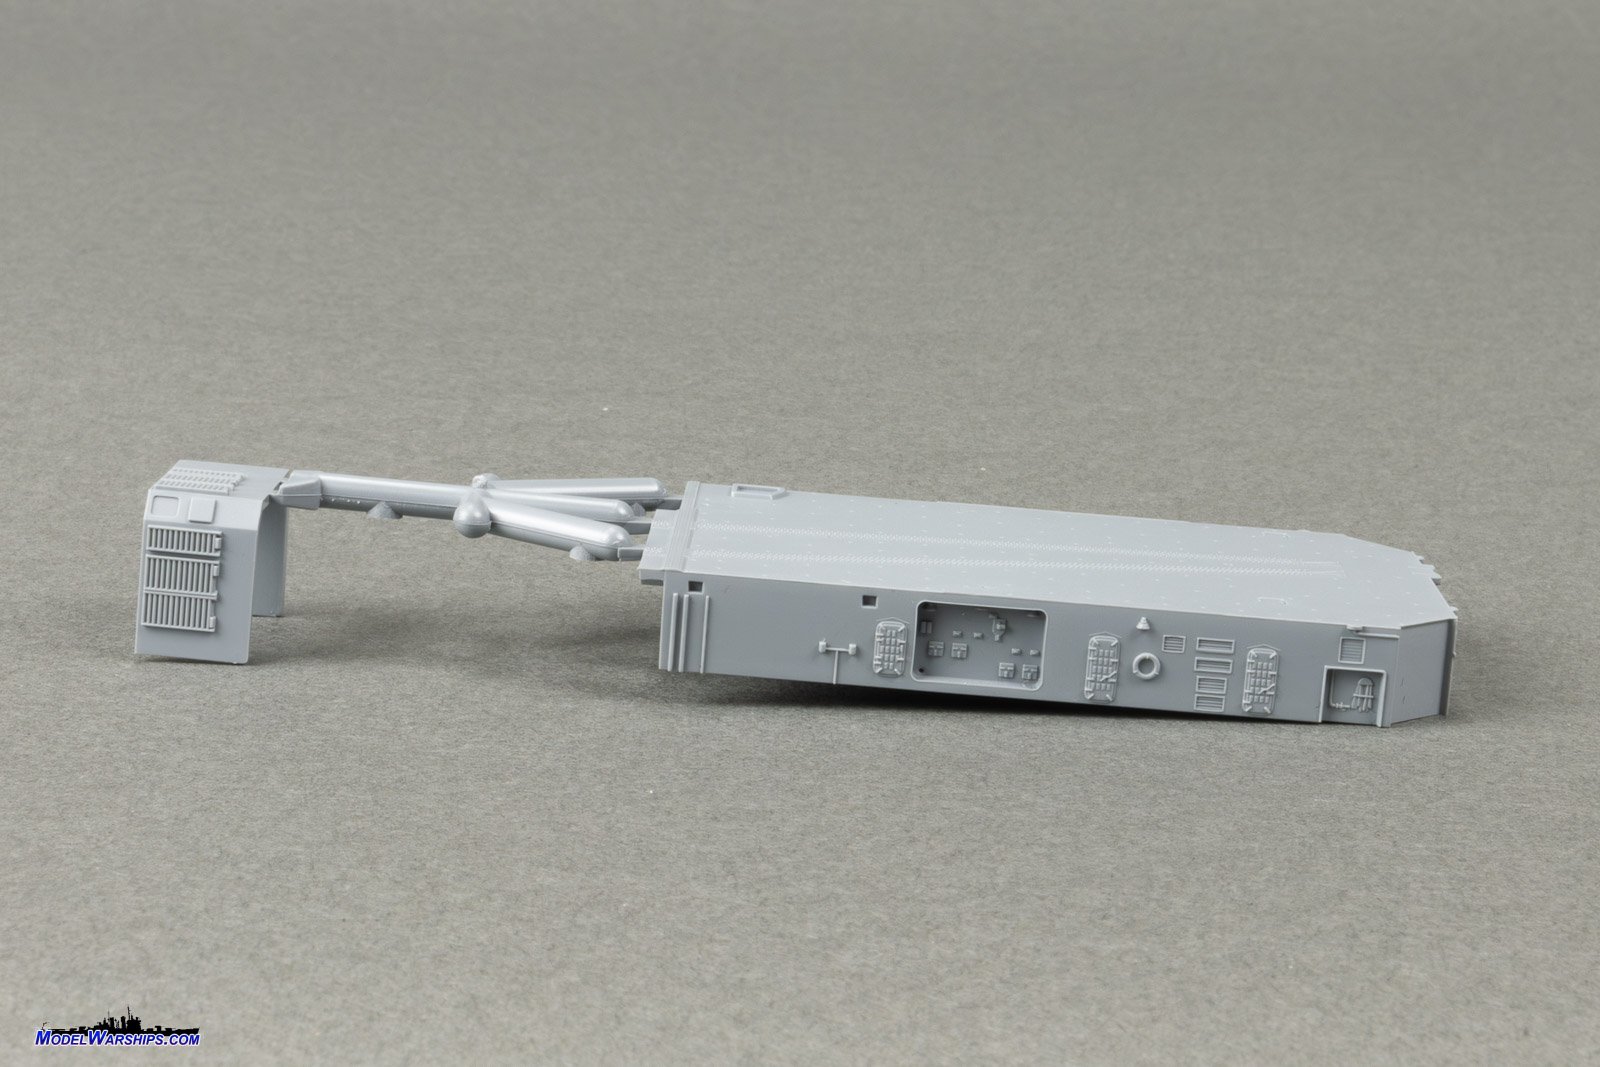
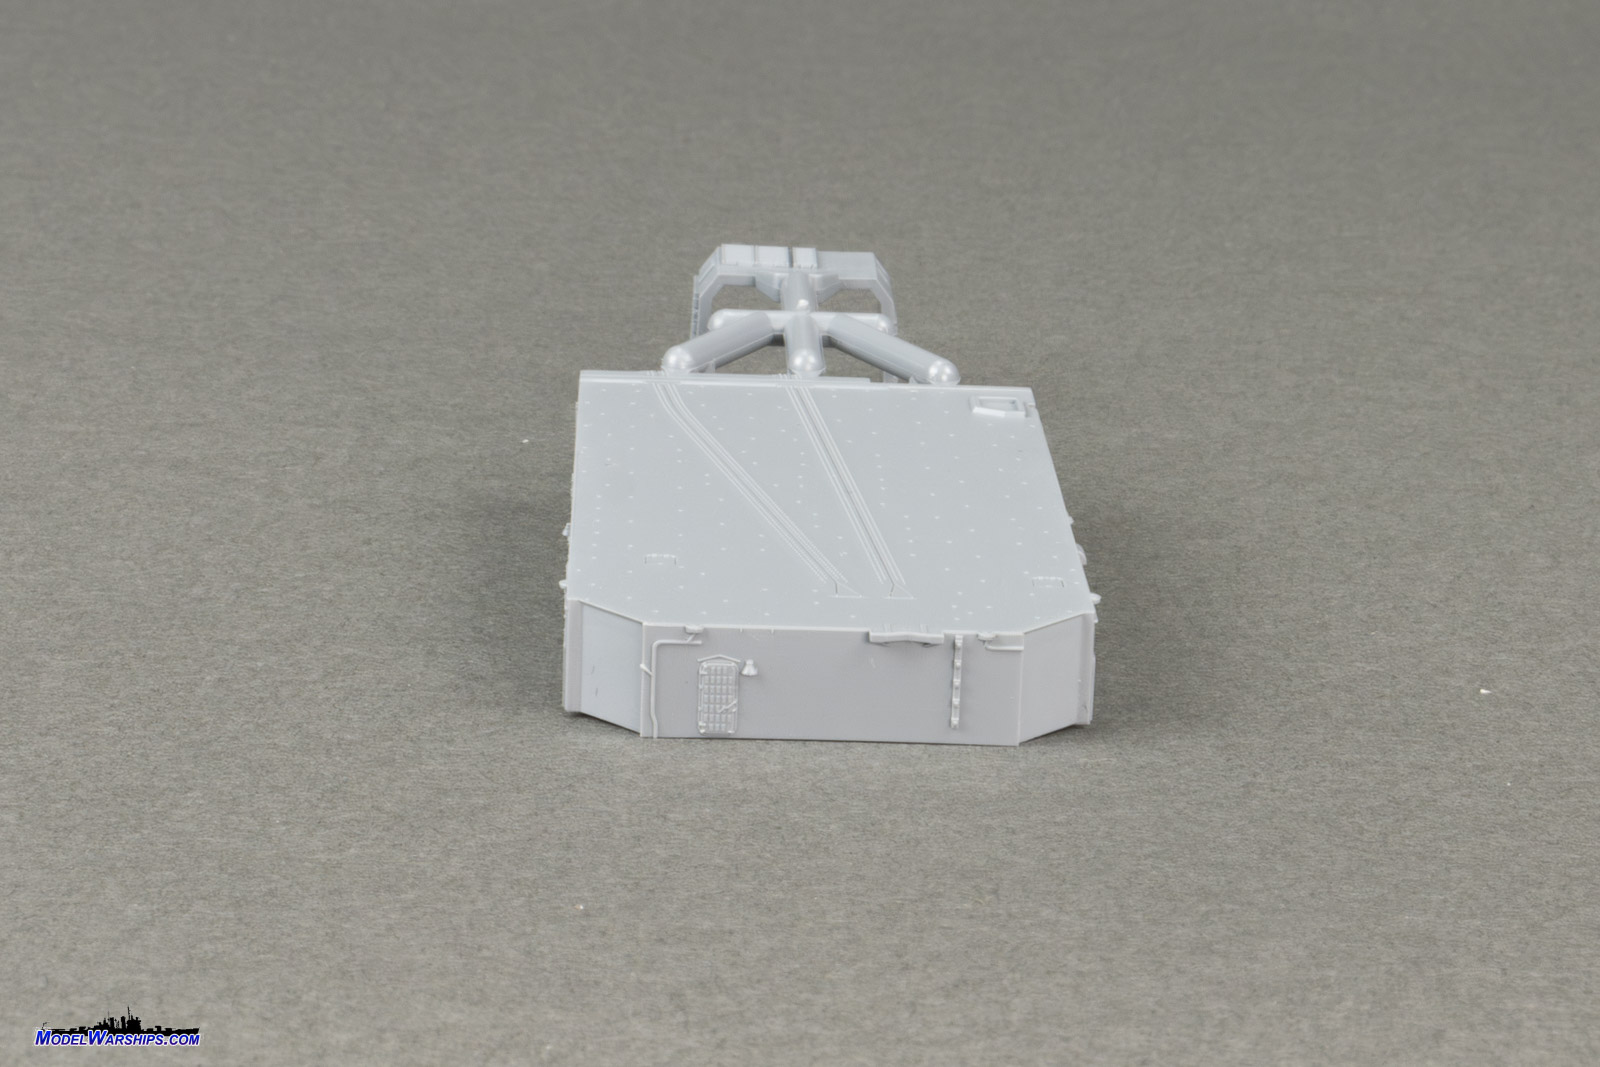
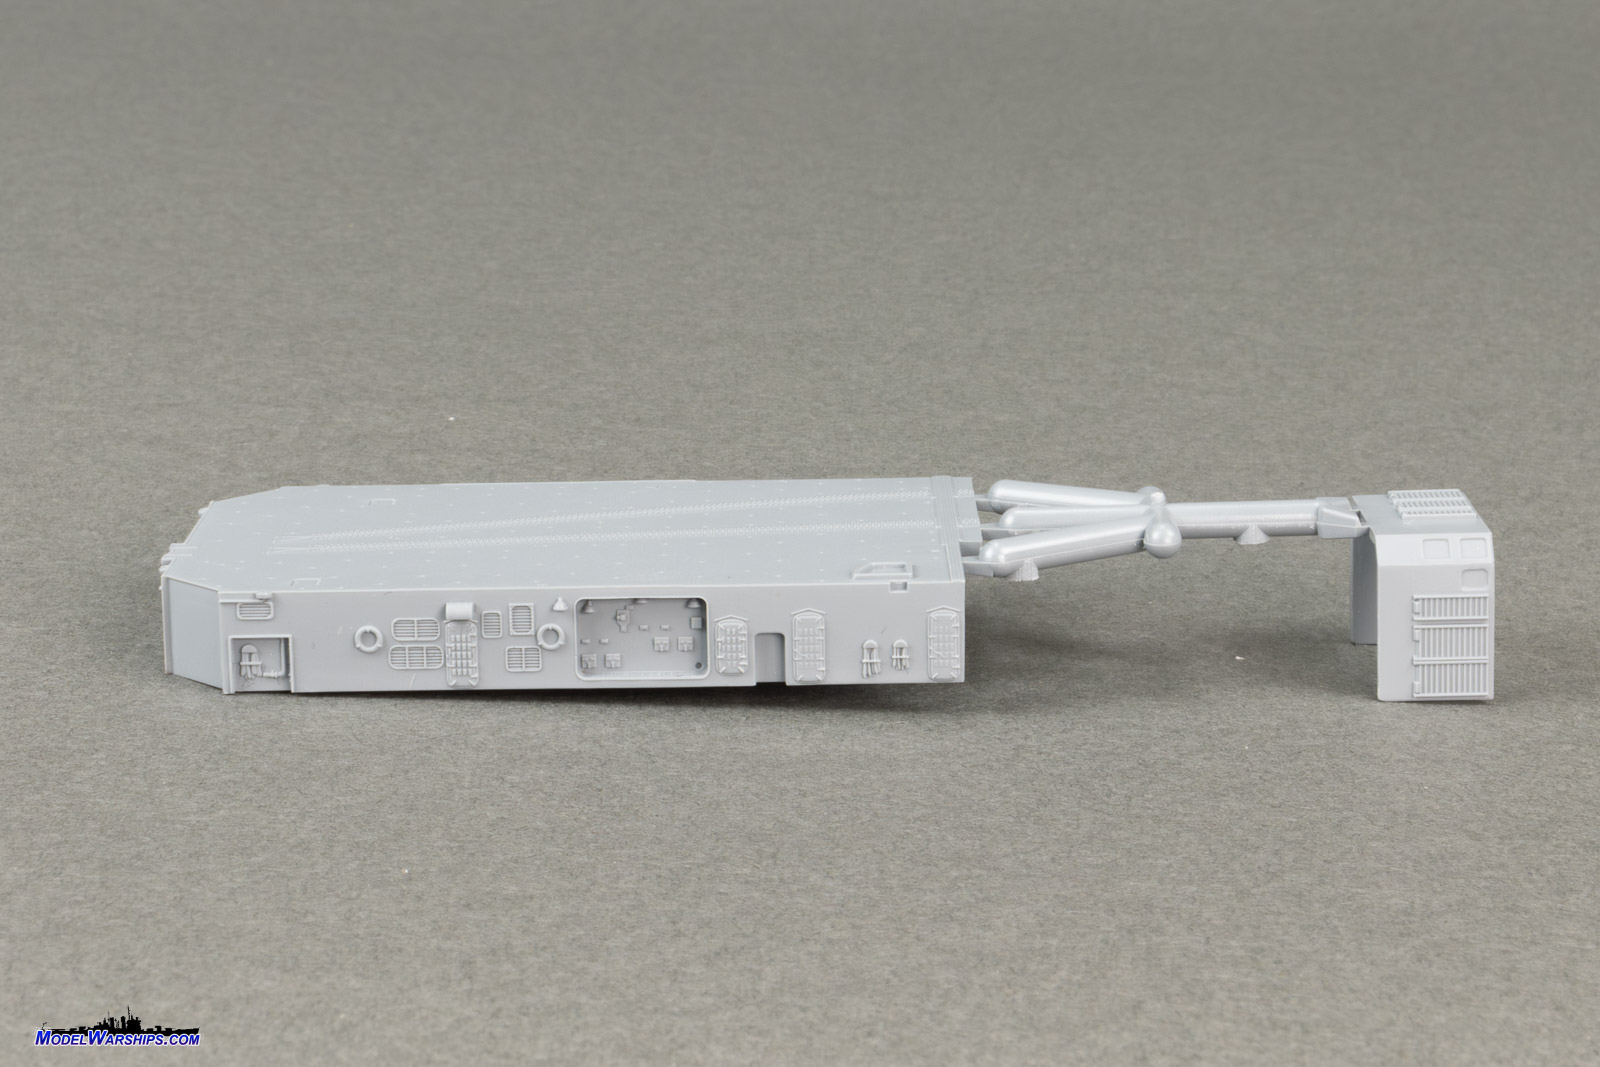
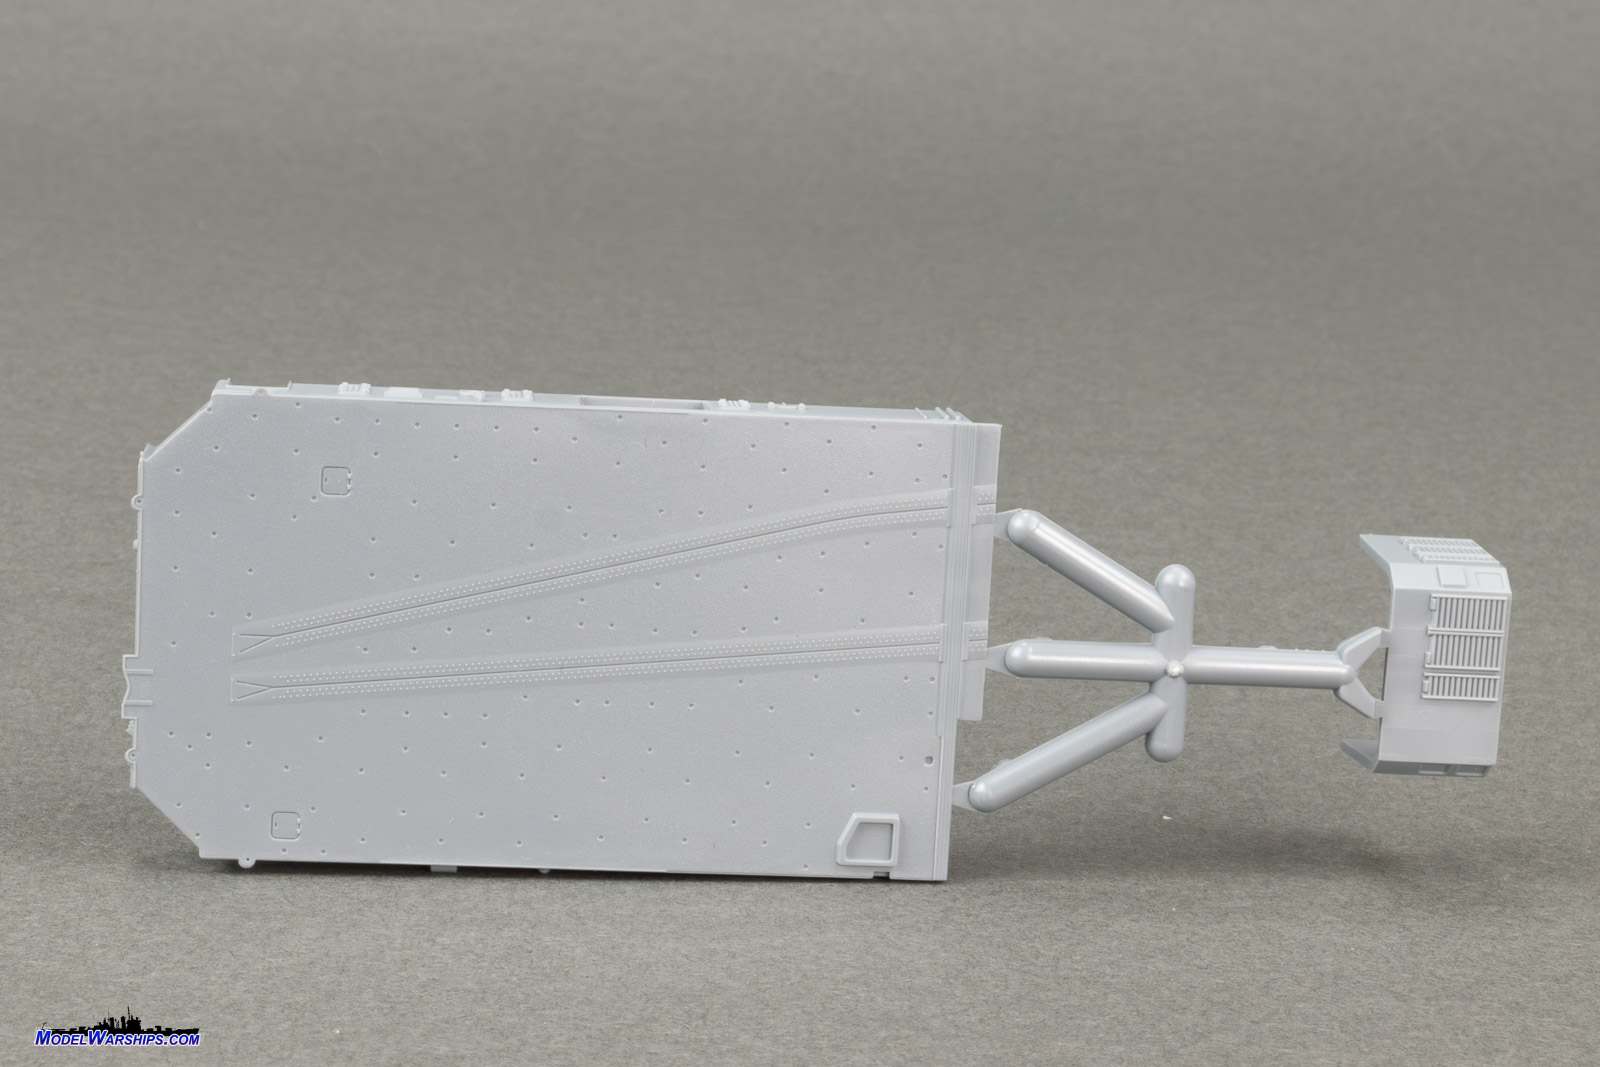
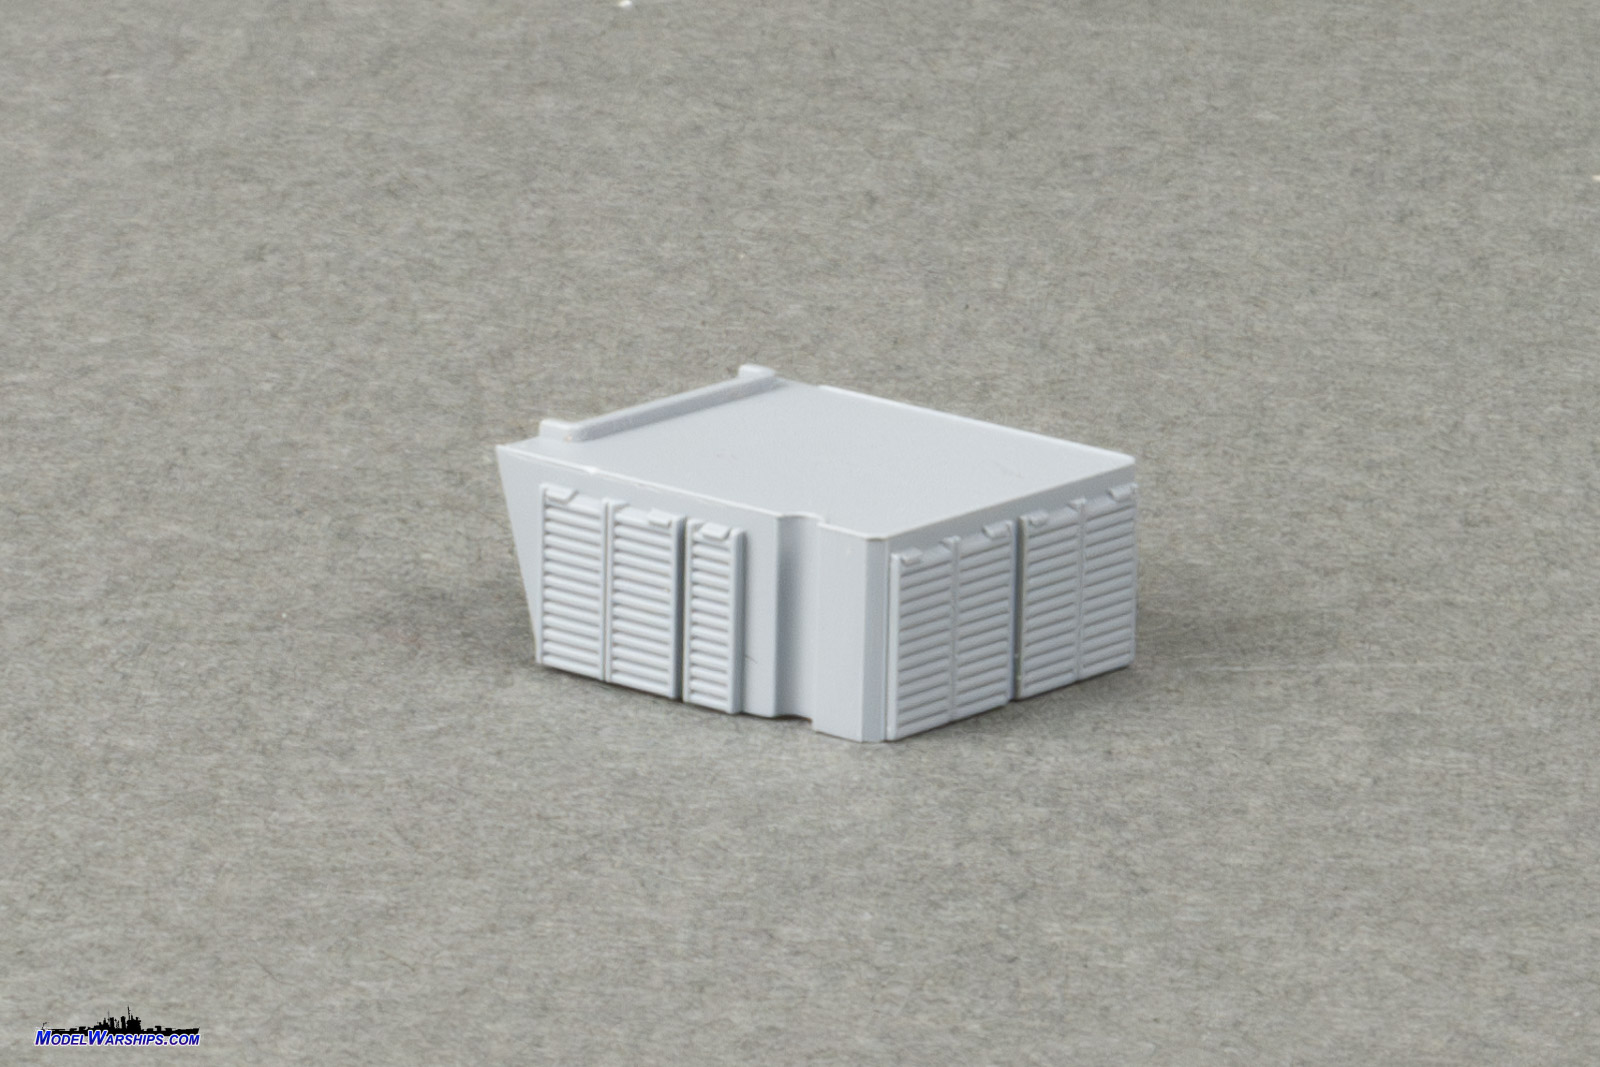
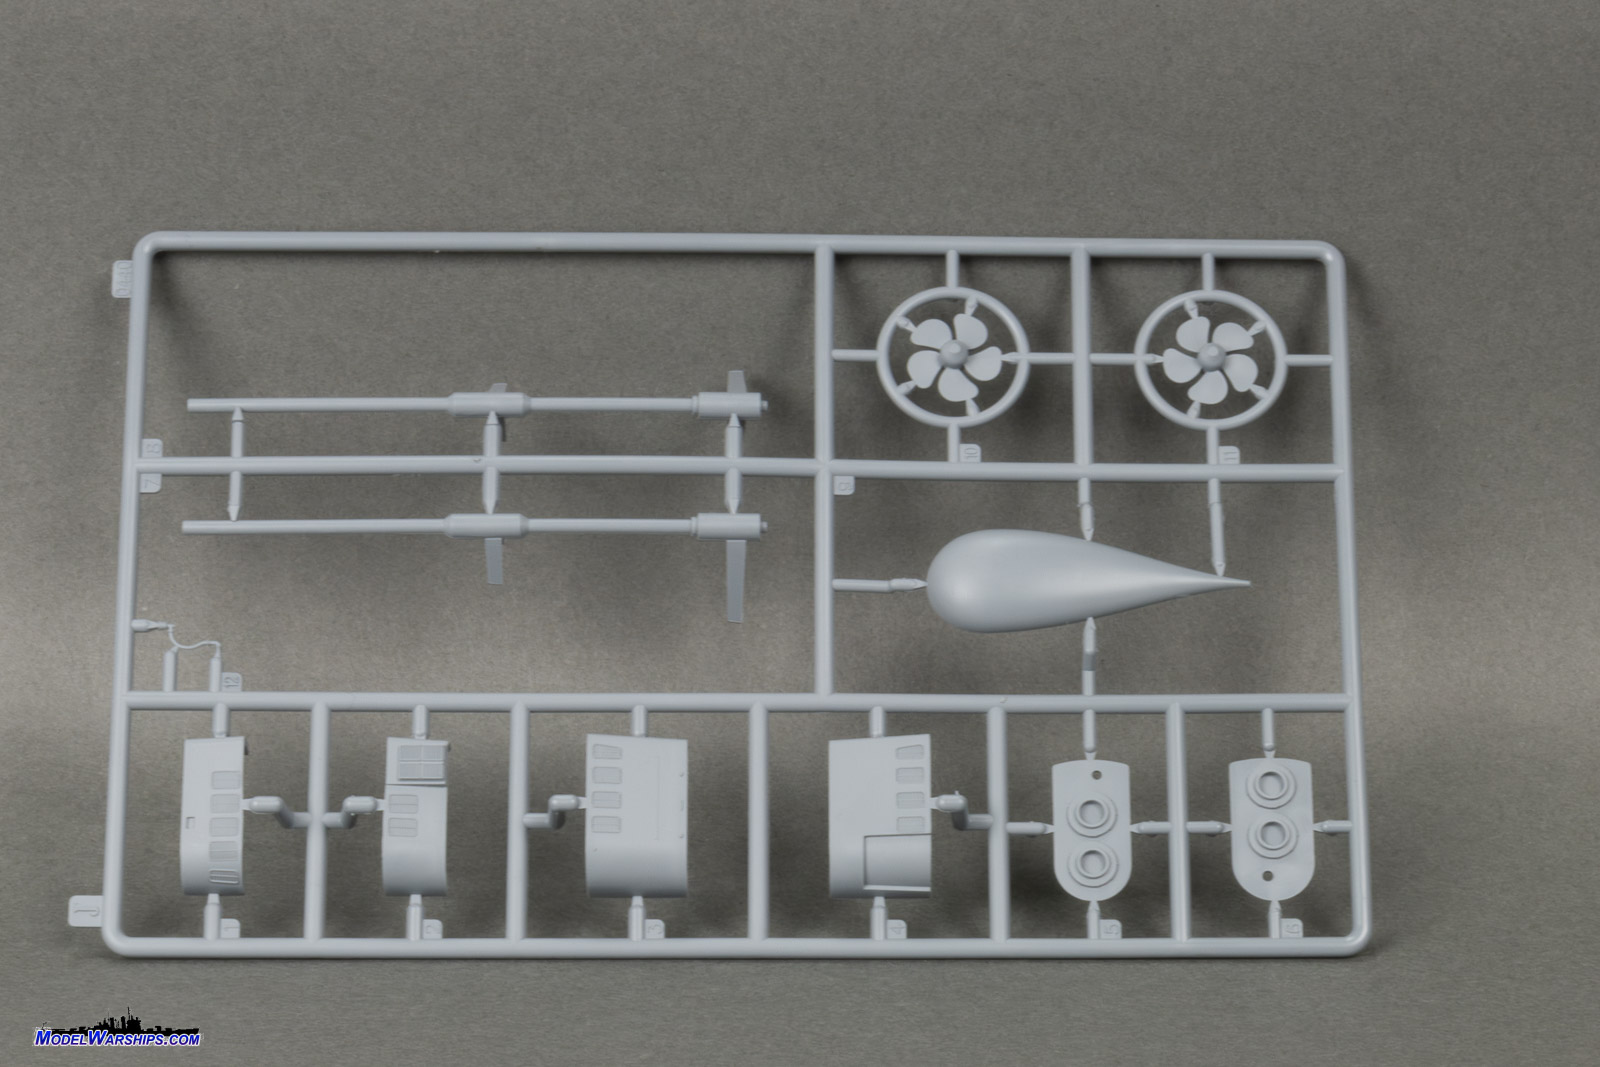
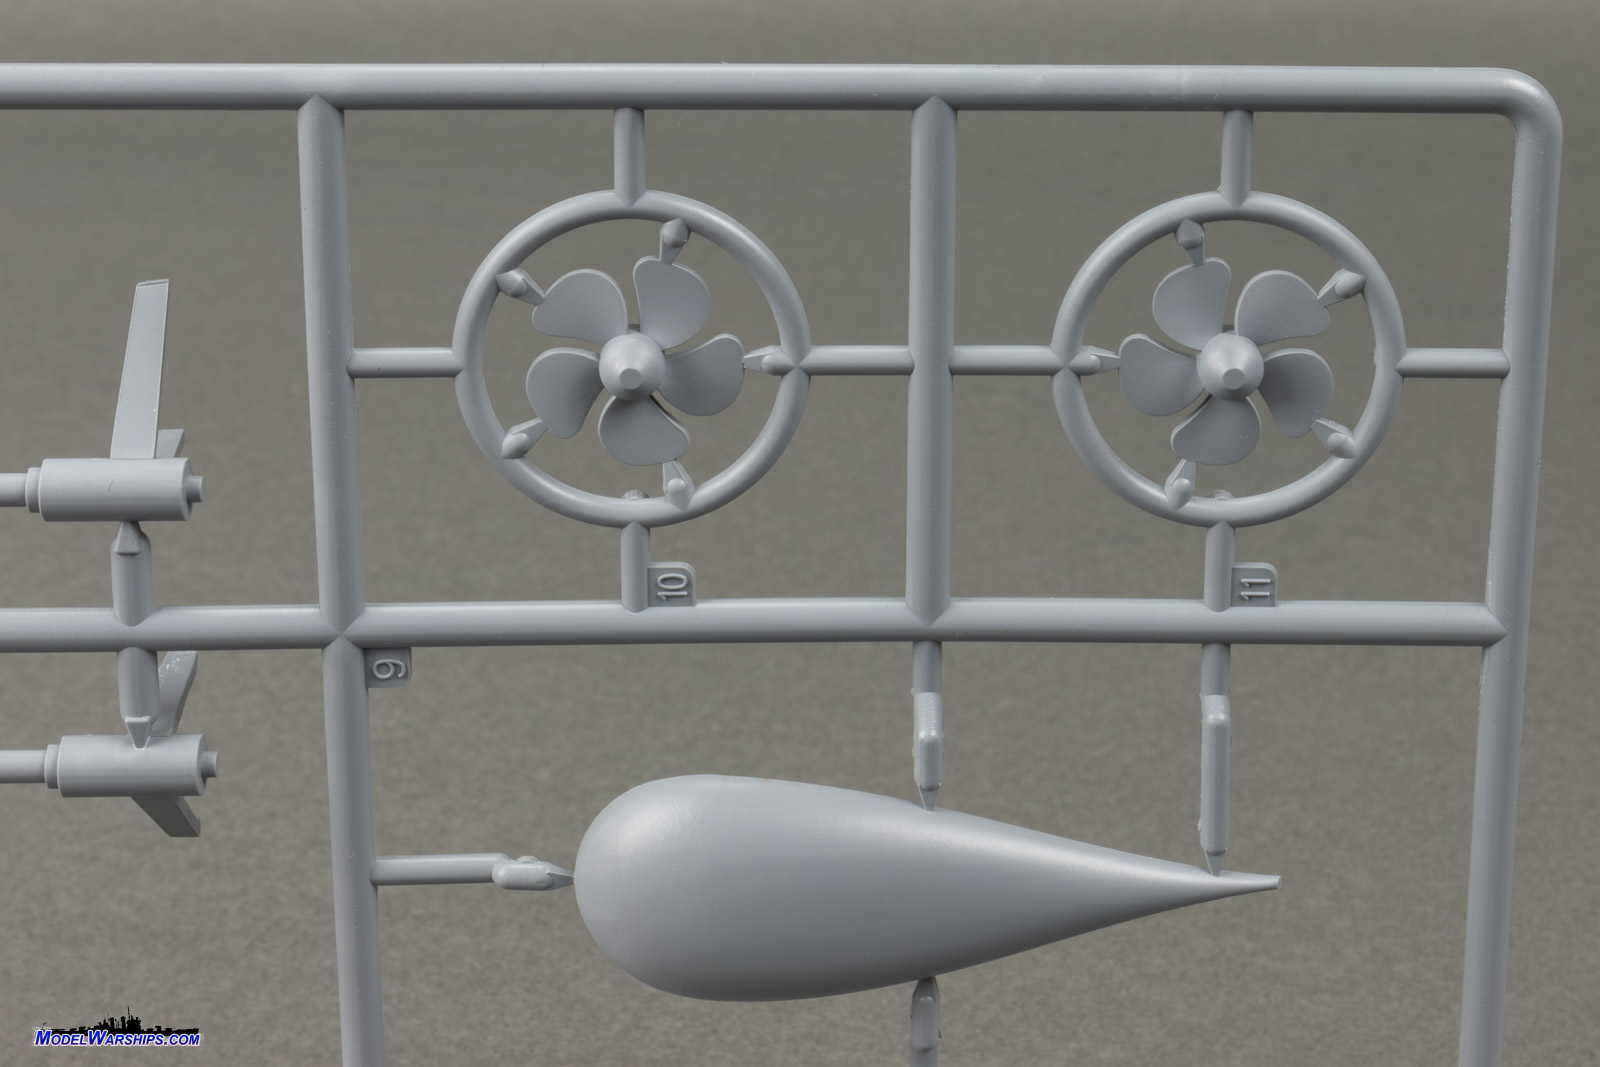
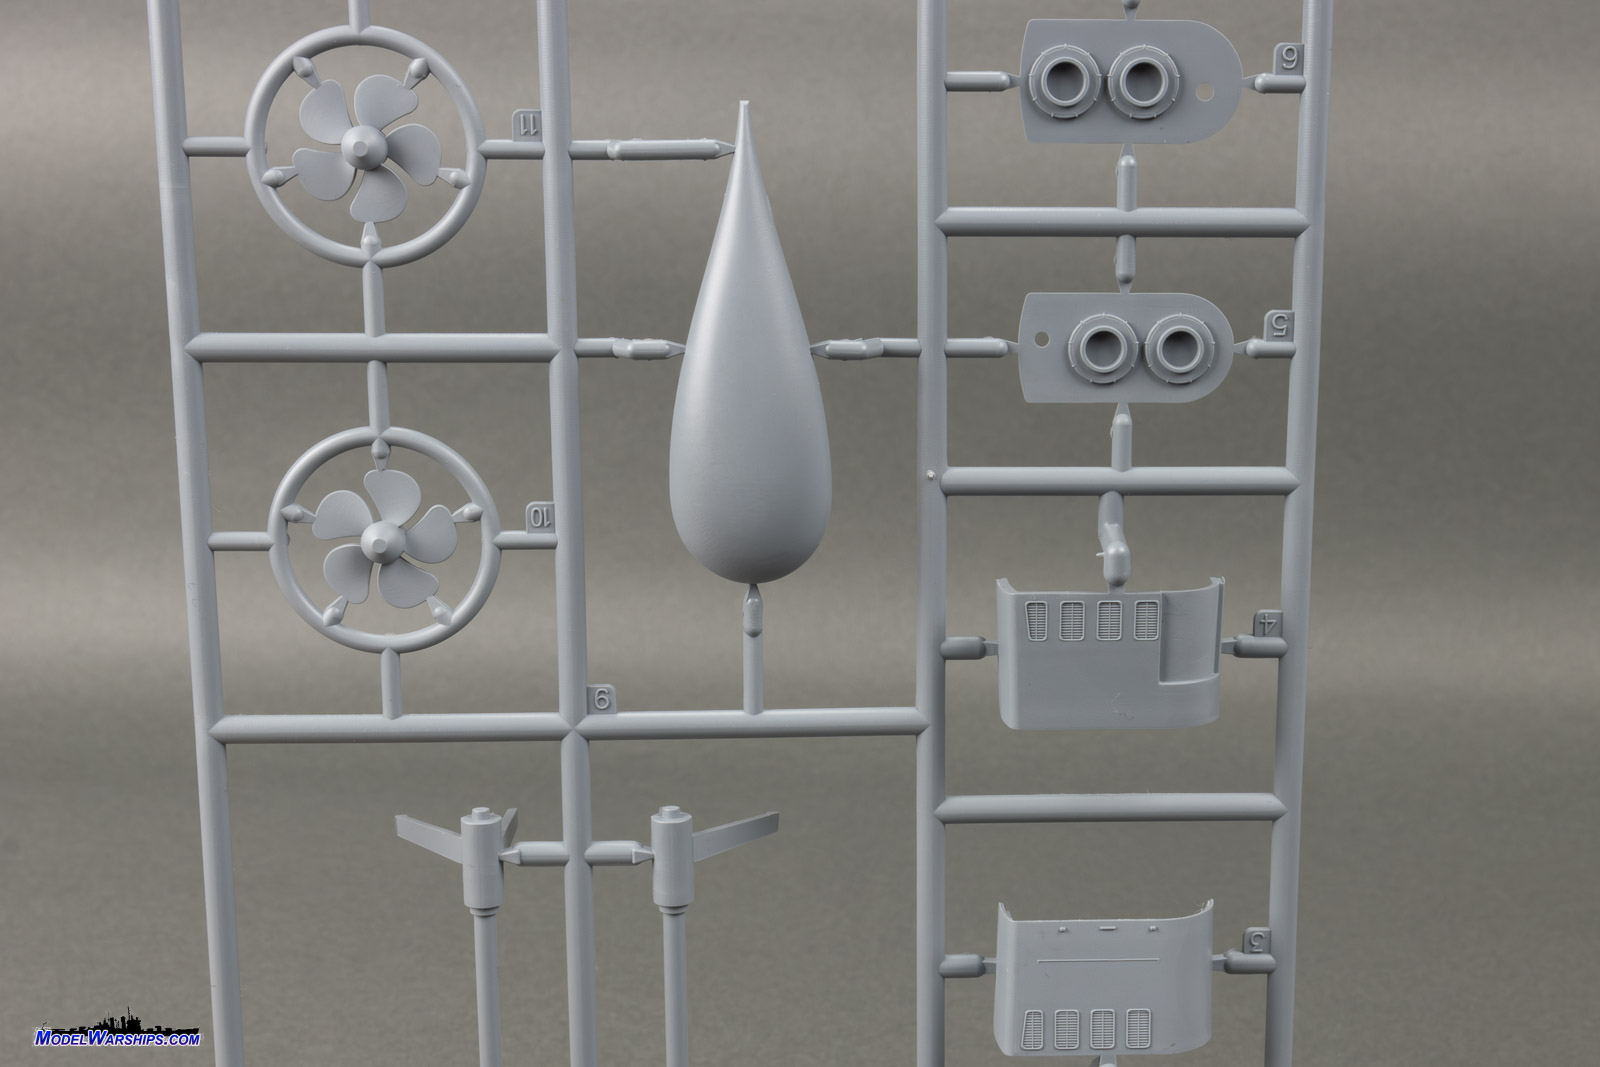
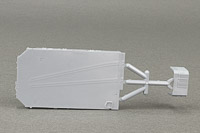
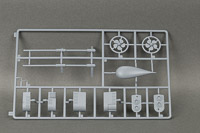
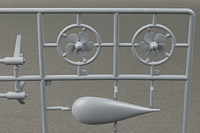
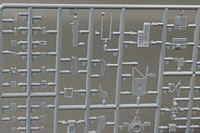
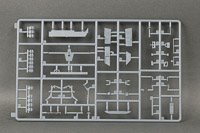
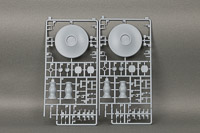
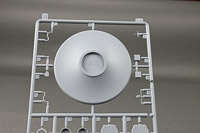
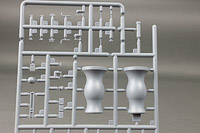
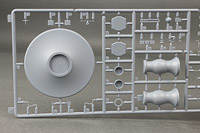
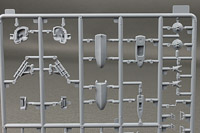
| SPRUE J |
| Sprue J has the parts for the top and the bottom of the
ship: the screws, shafts and sonar dome bottom, while the other end is
covered by the sides and the tops of the stack assemblies. Prop shafts
look straight, the screws are the correct contra-rotating orientation,
and the sonar dome bottom is... well it's there, and it's smooth. Not much
detail on those things.
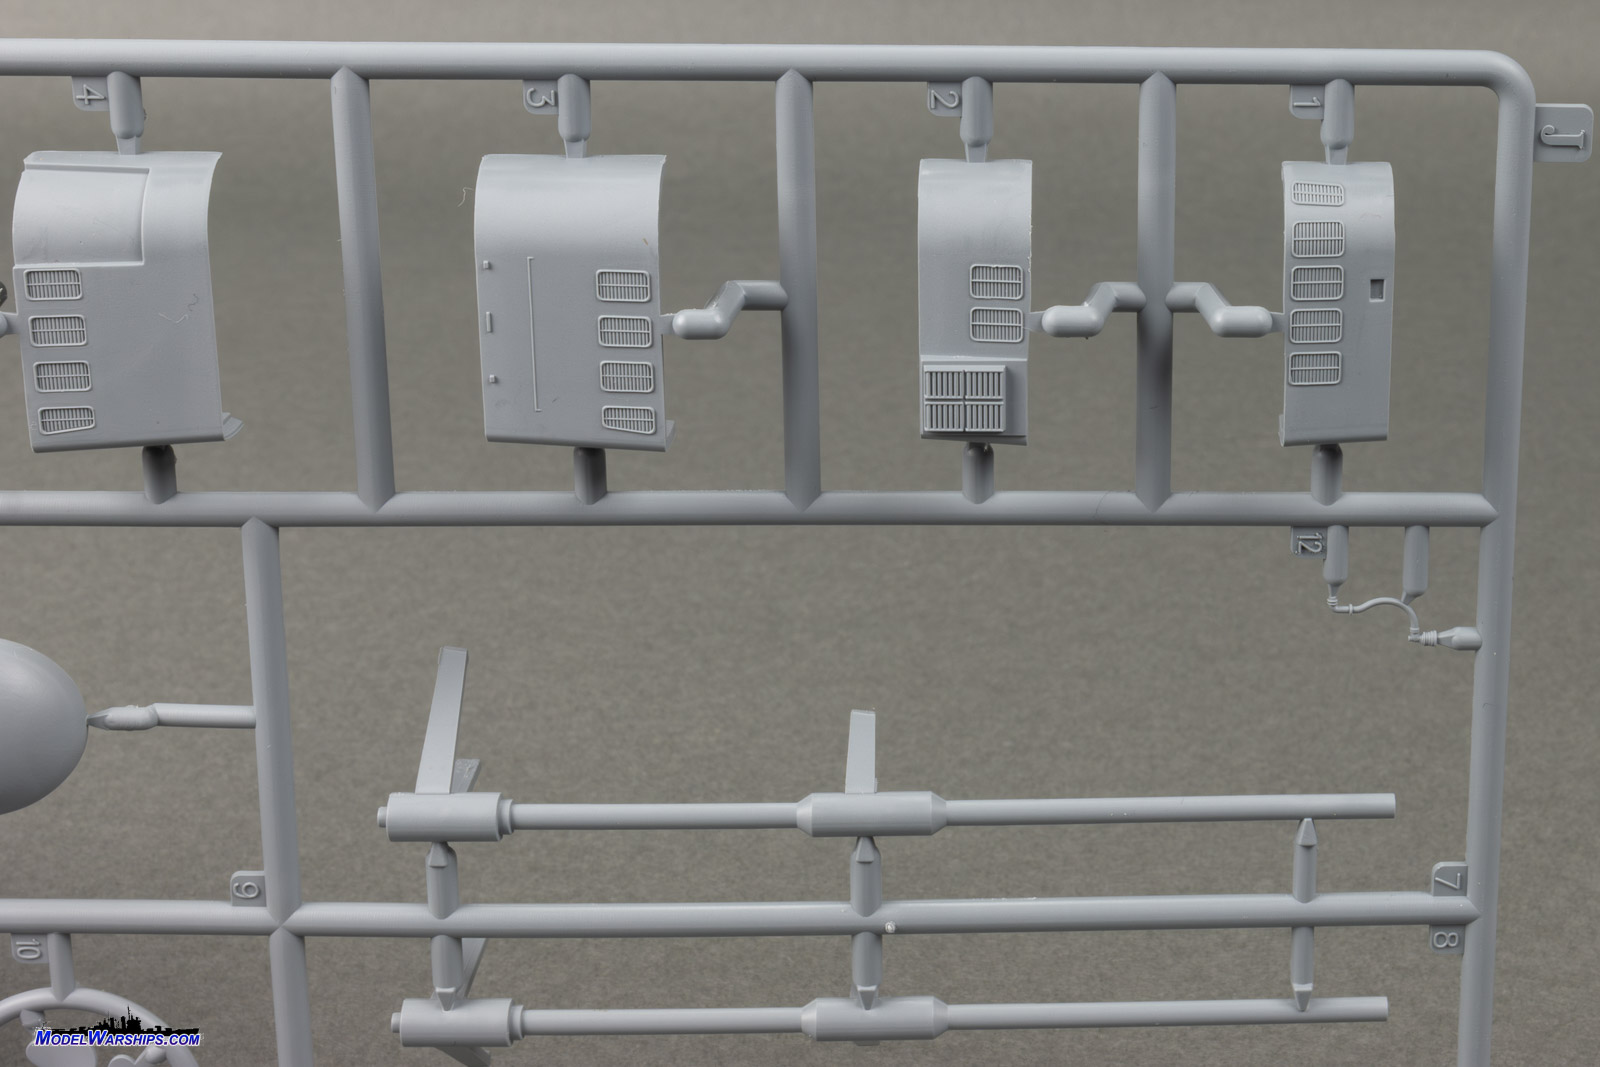
The stack assemblies are two pieces for the sides, which have sharp
vent grating, while the tops have some detail around the stack connection
bases. The stacks themselves are separate pieces, either on another injection
molded sprue, or as 3D printed details. |
 |
 |
 |
 |
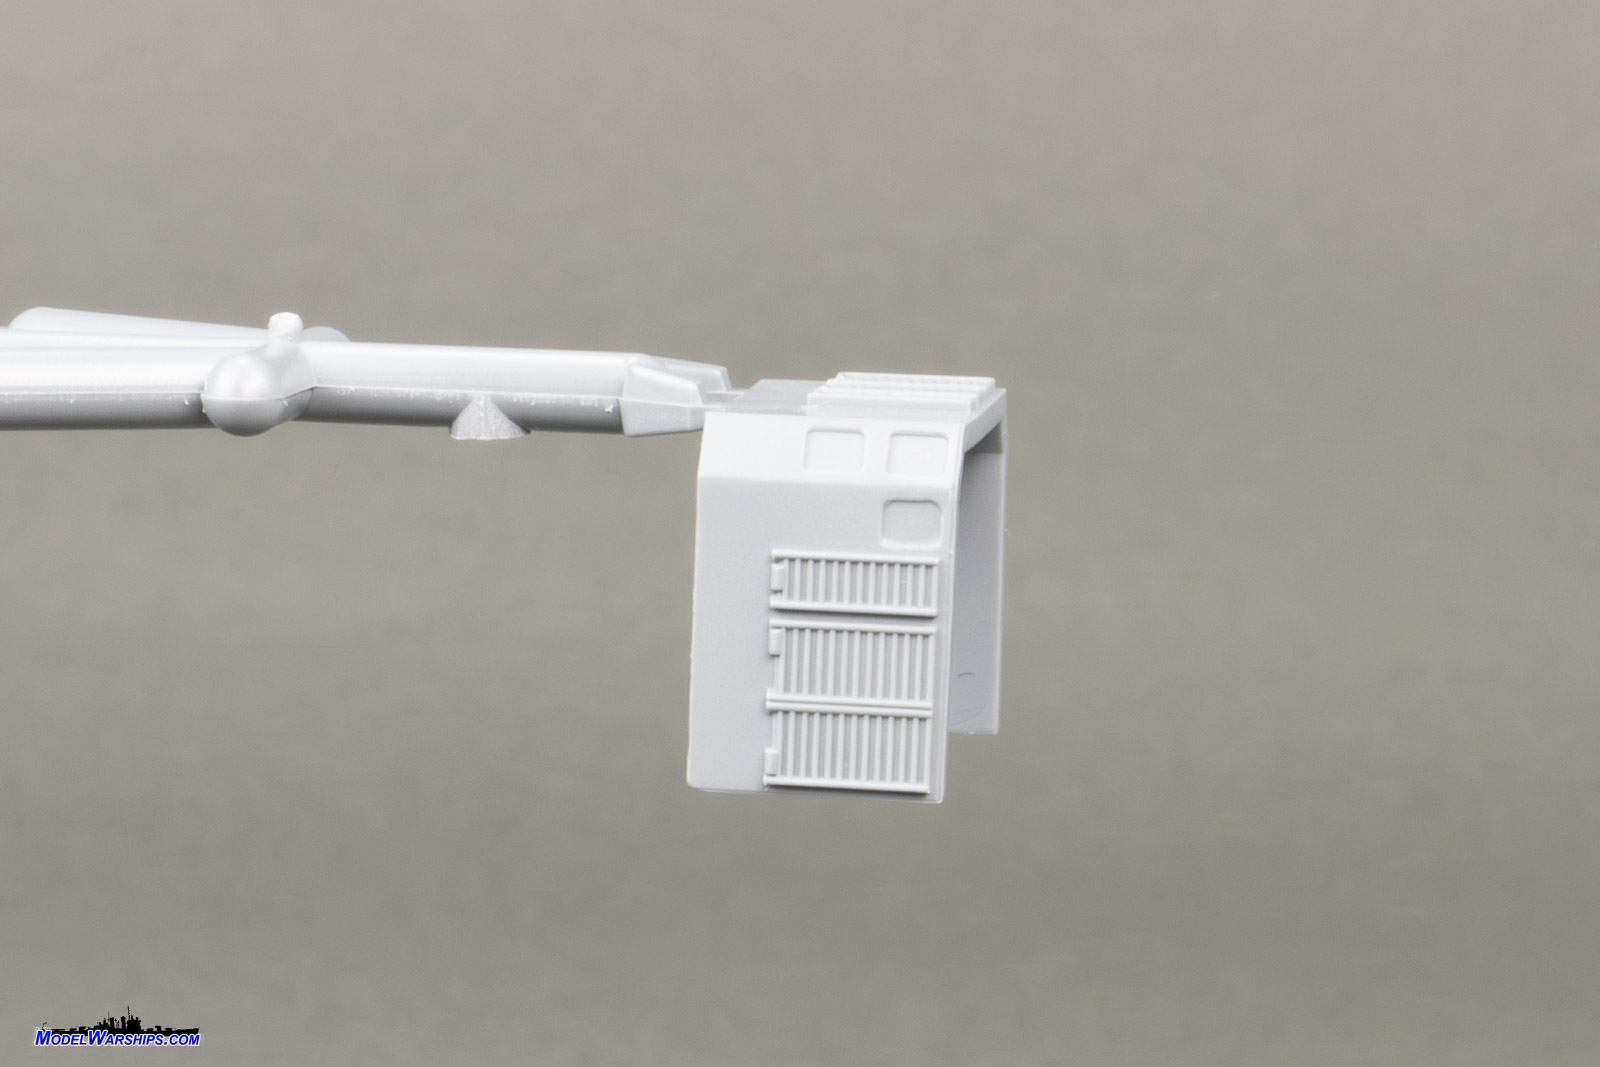
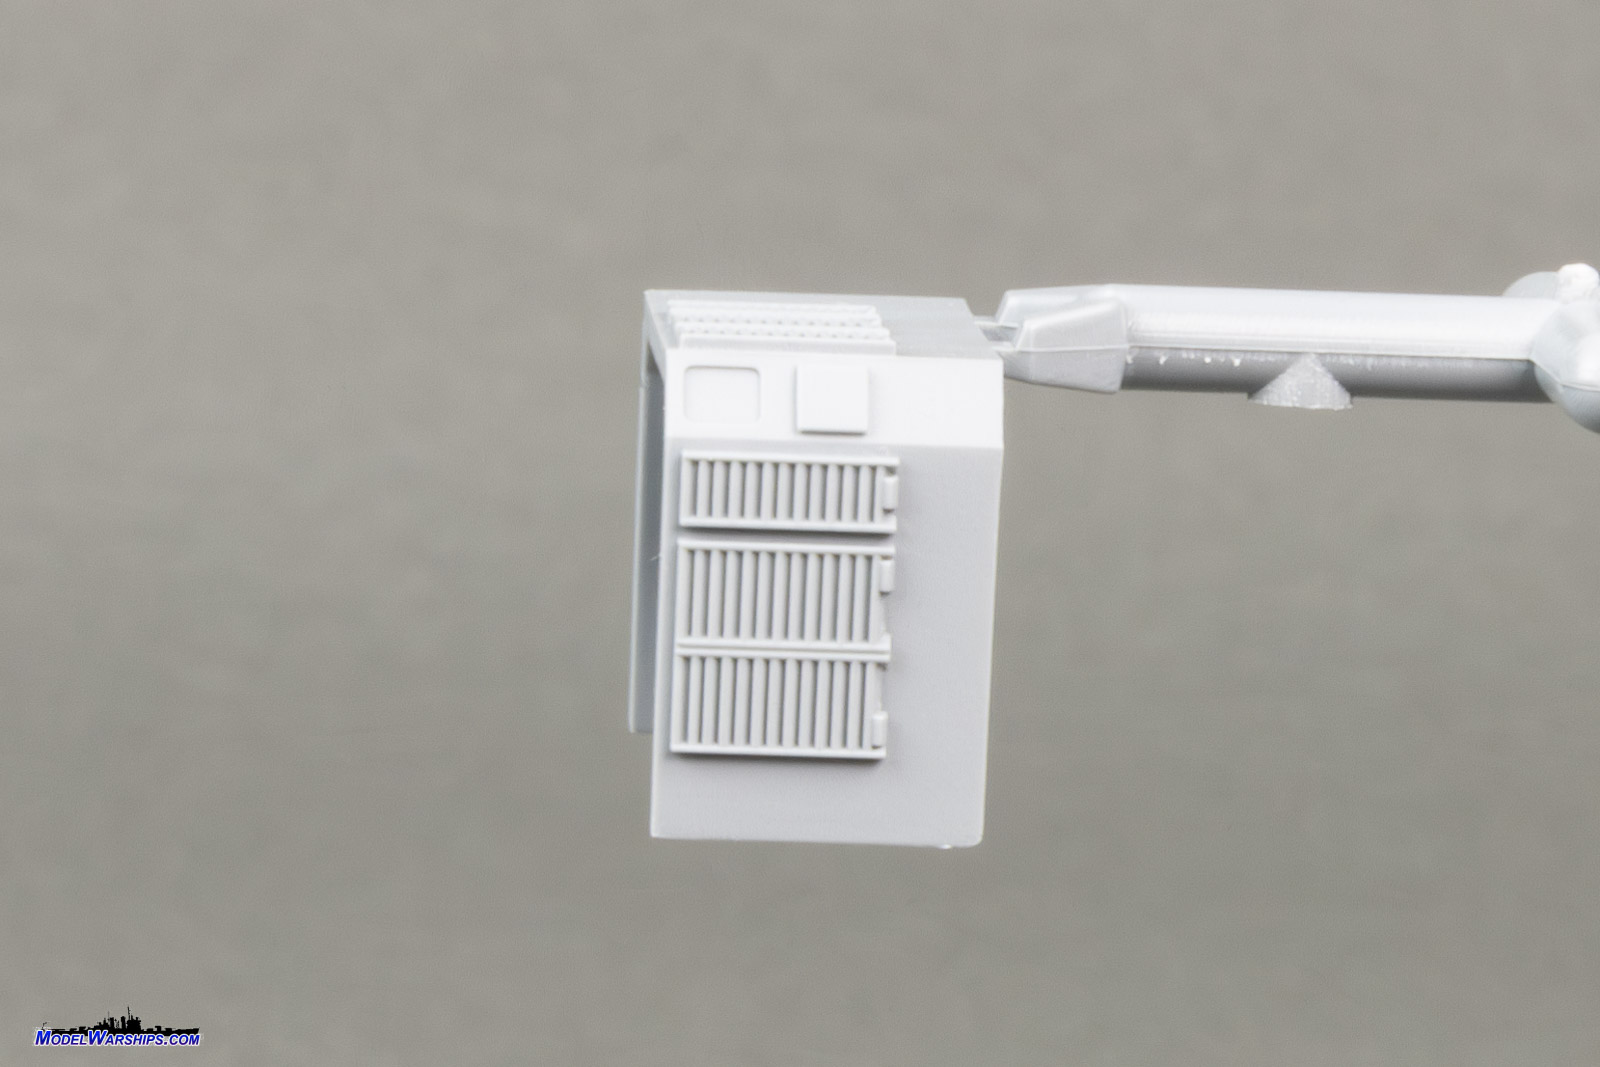
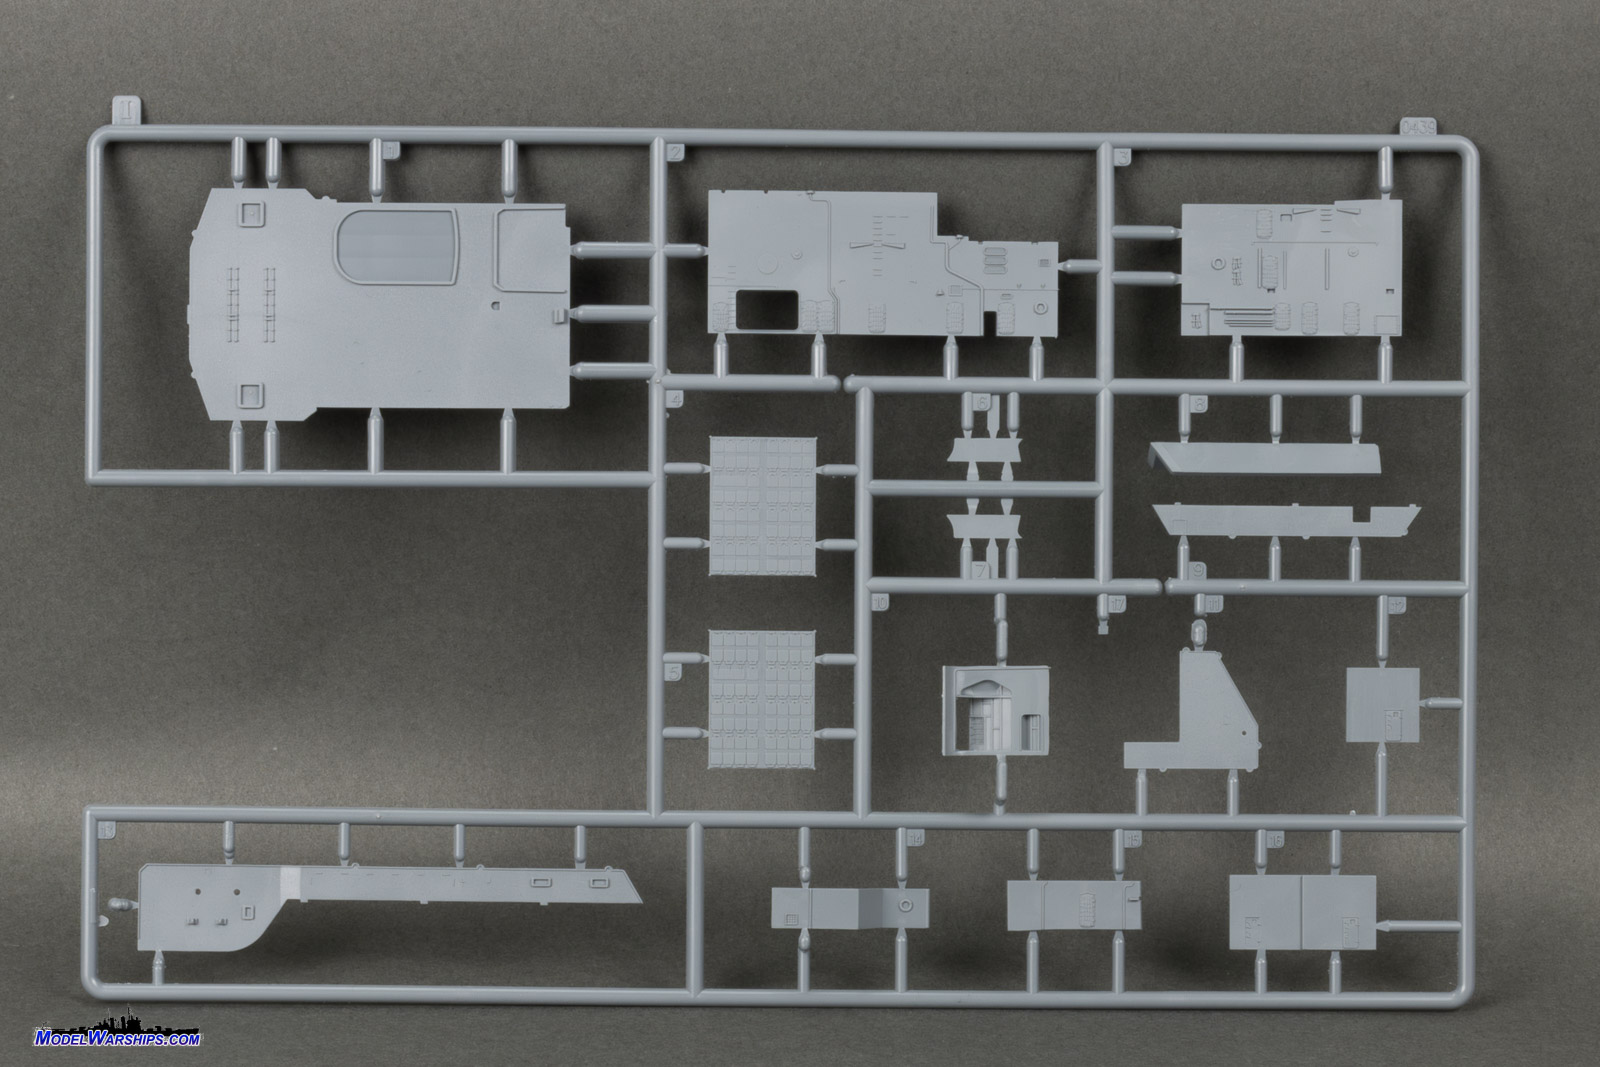
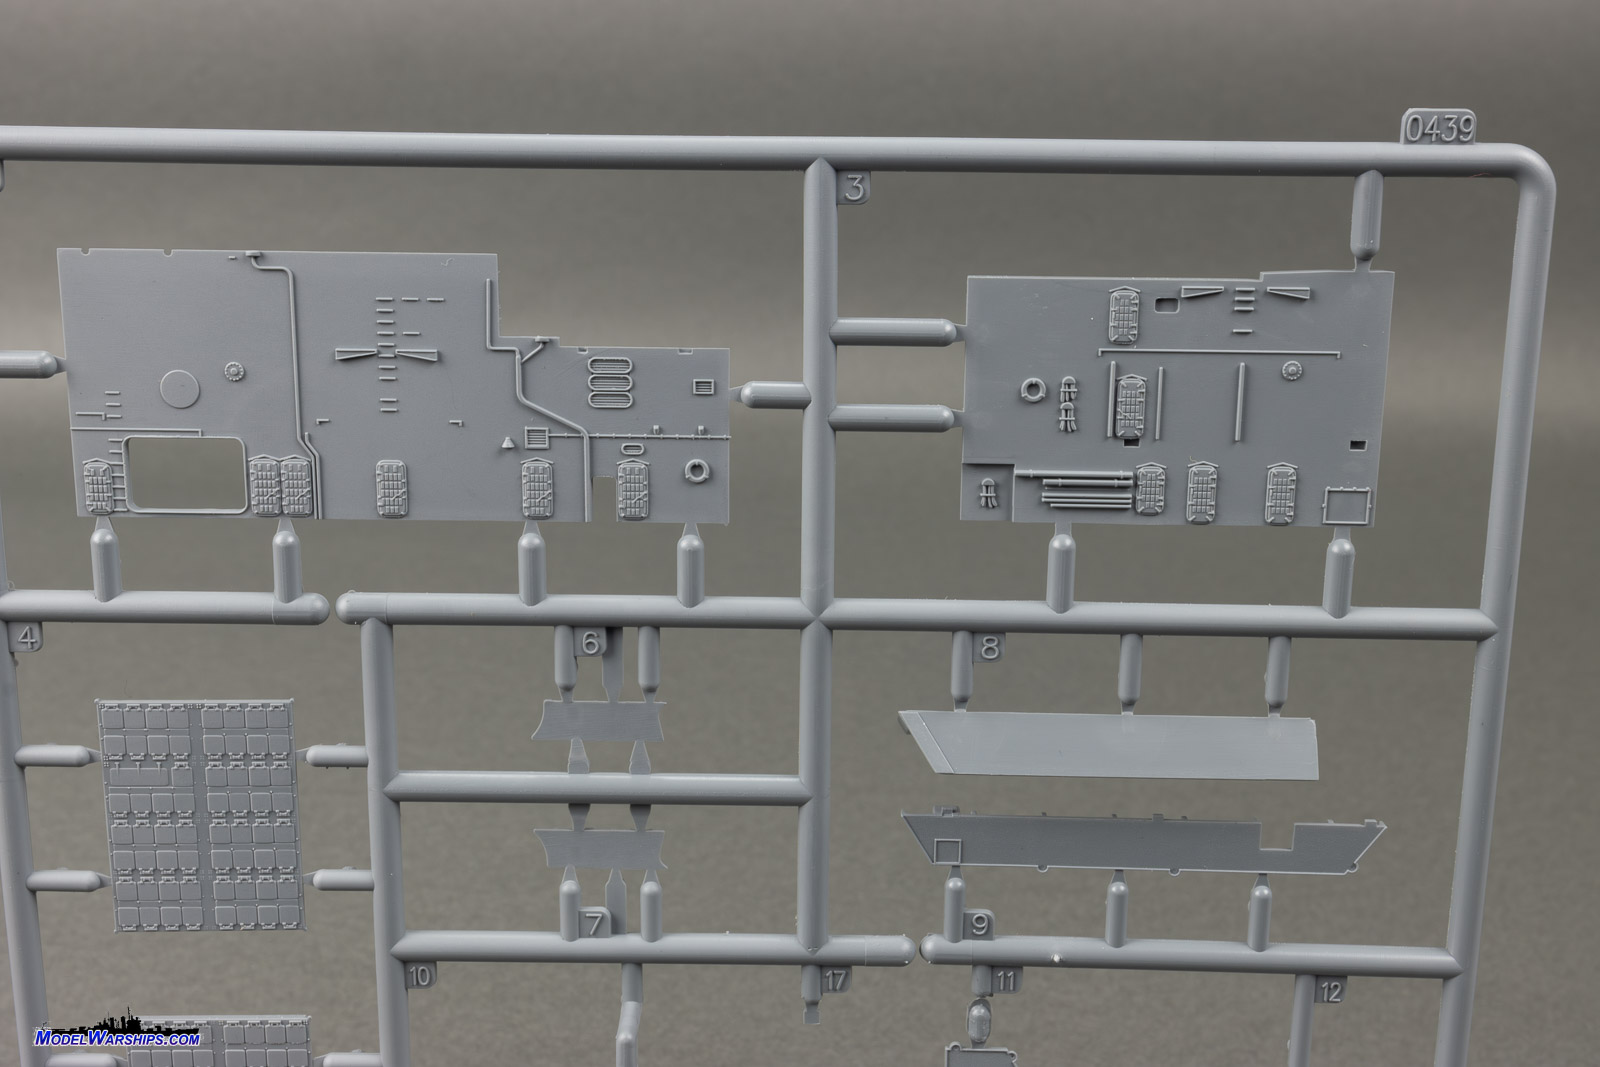
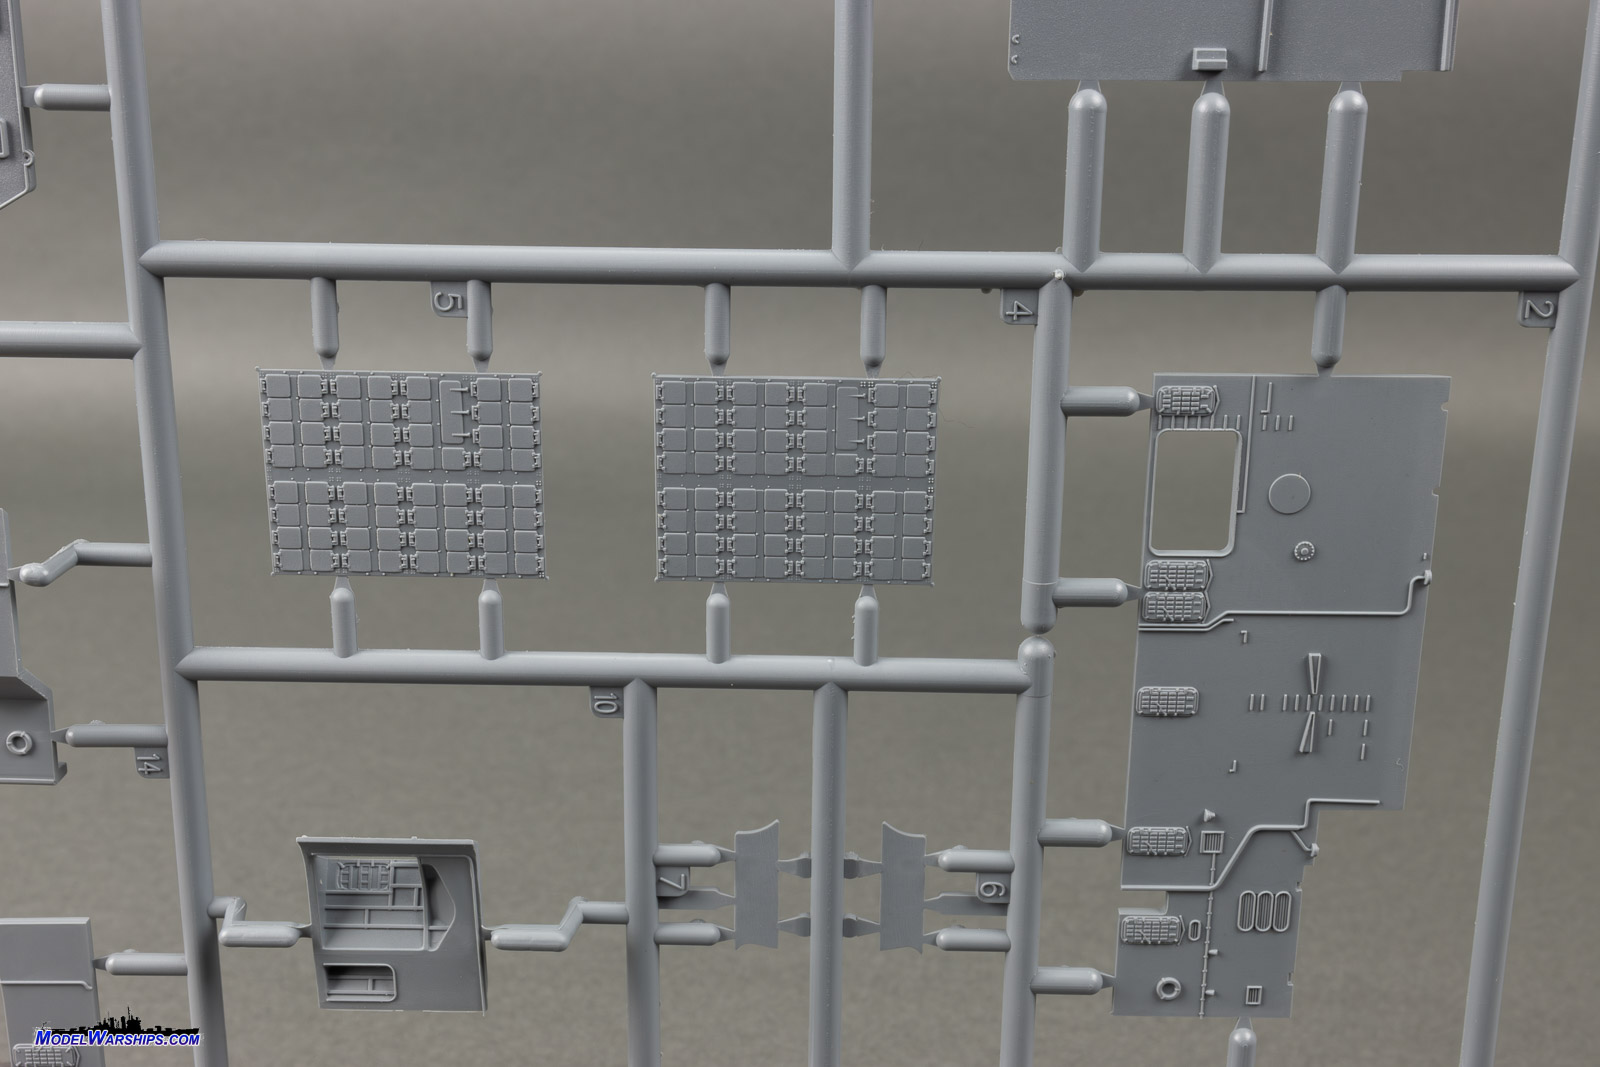
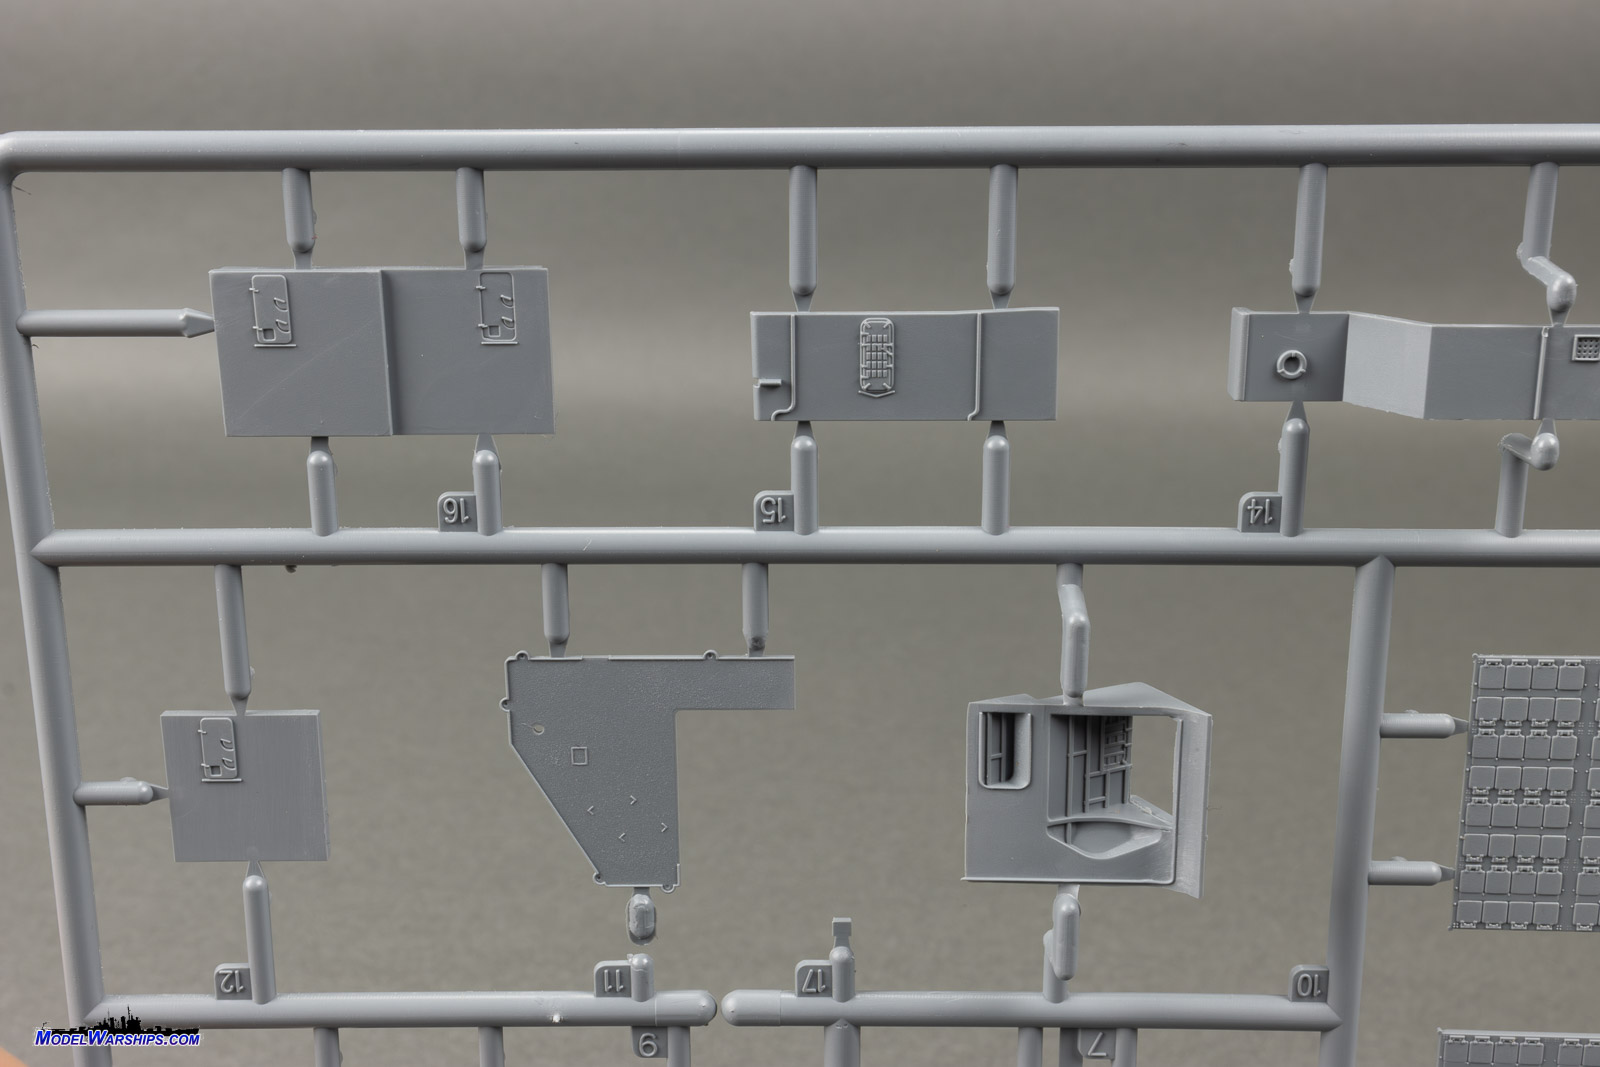
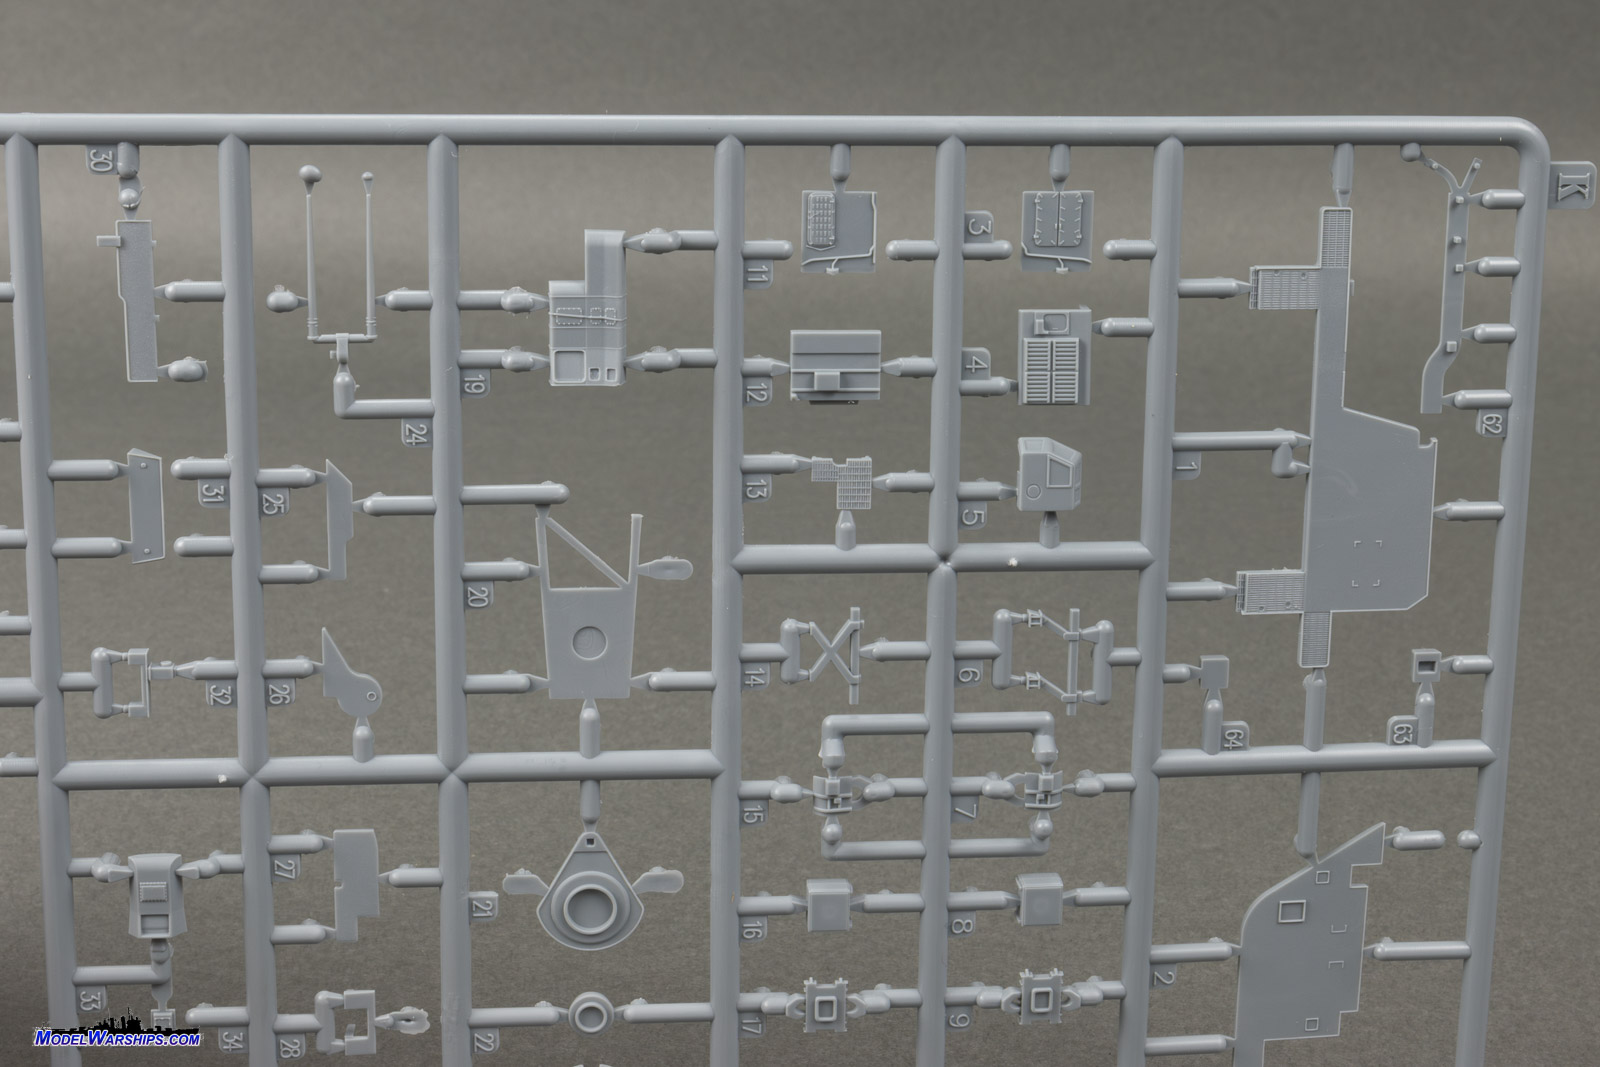
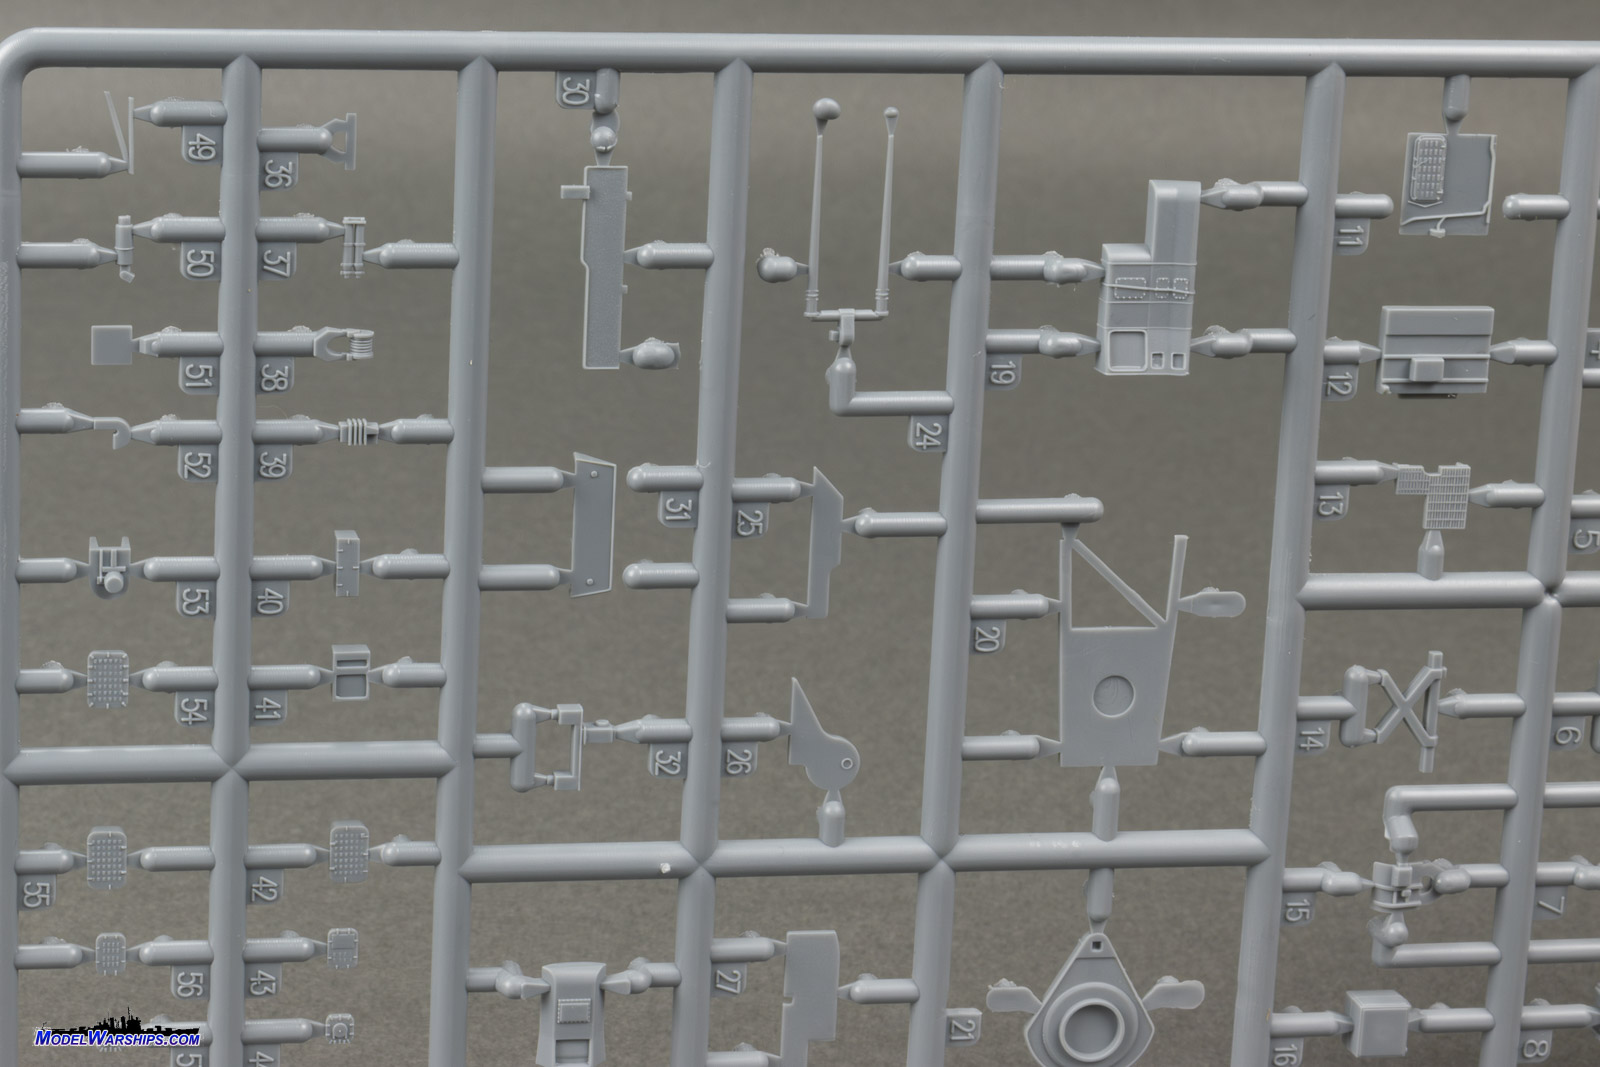
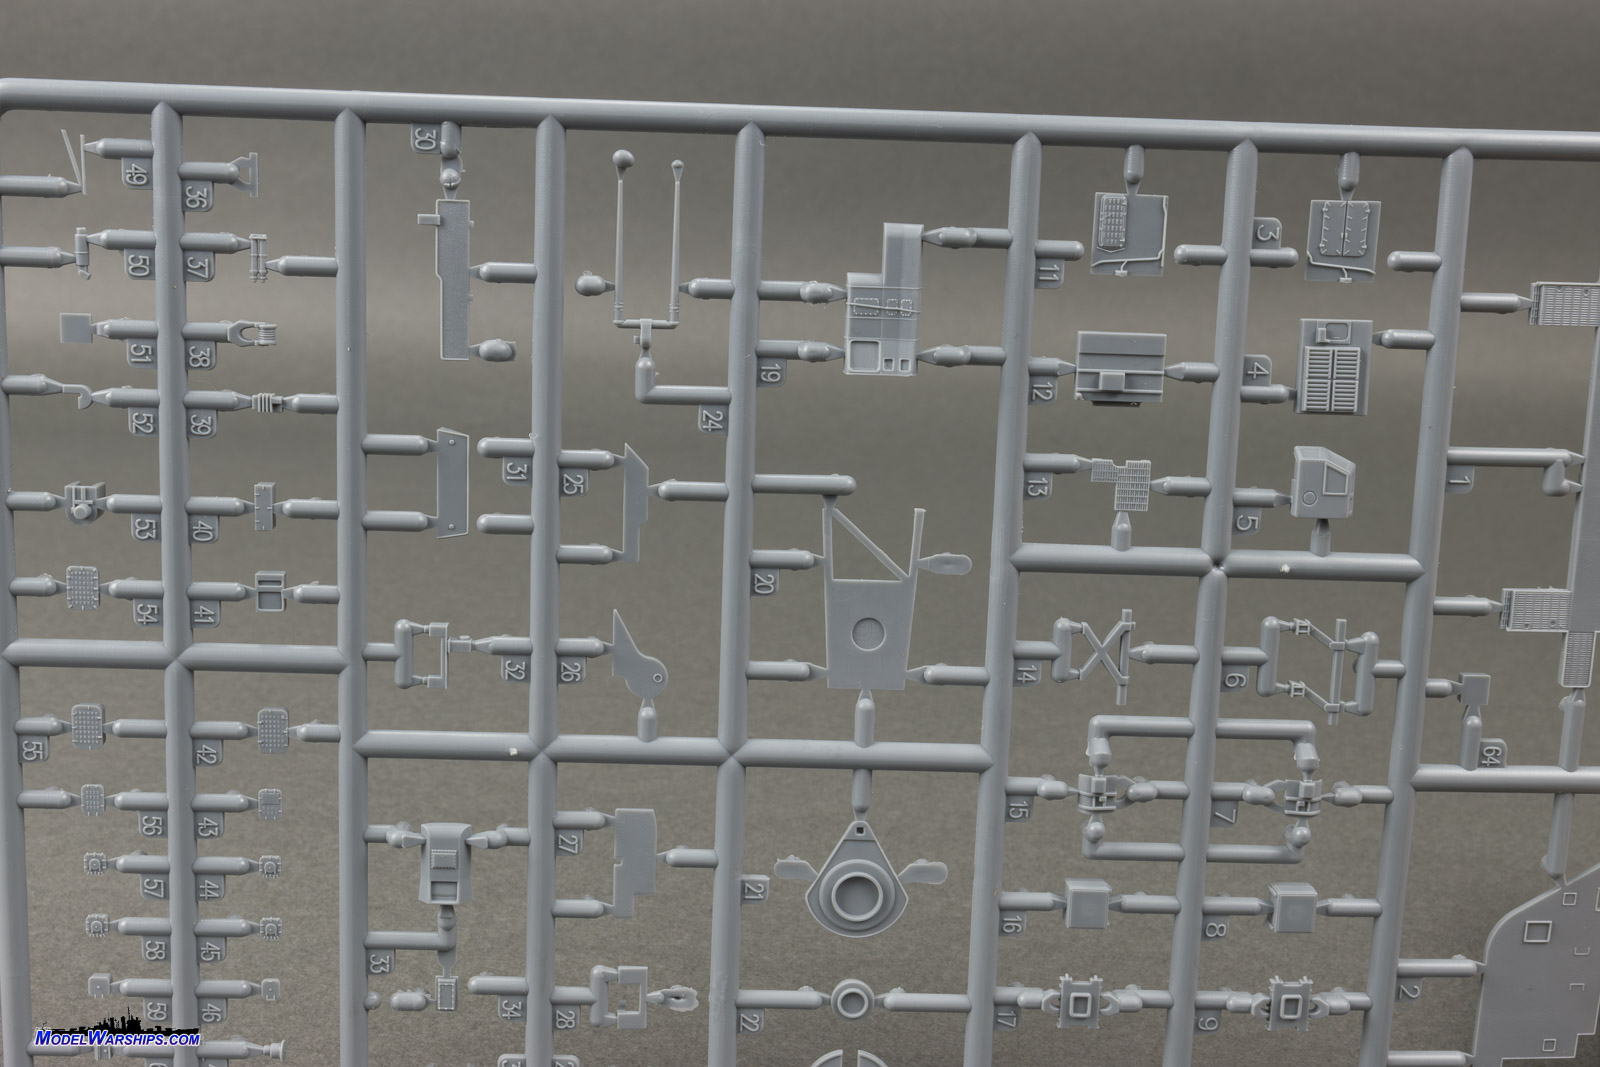
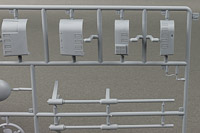
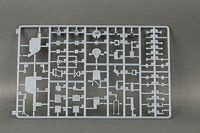
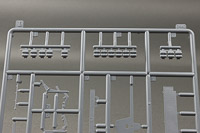
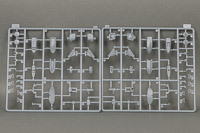
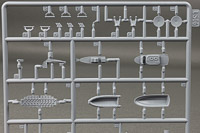
| SPRUE K |
| Lots of tiny pieces make up sprue K: hatches, superstructure
external decks and bulkheads, the helo deck control pit, ready service
lockers, boat davits, and much more. There's so much stuff on this sprue
that it's hard to identify it all, but what's there is sharp and well molded.
Paying attention to the smallest of the parts, the sprue gates don't
appear too large and removal should go smoothly. Get yourself a single
blade sprue cutter, go slow, and you'll be fine. |
 |
 |
 |
 |
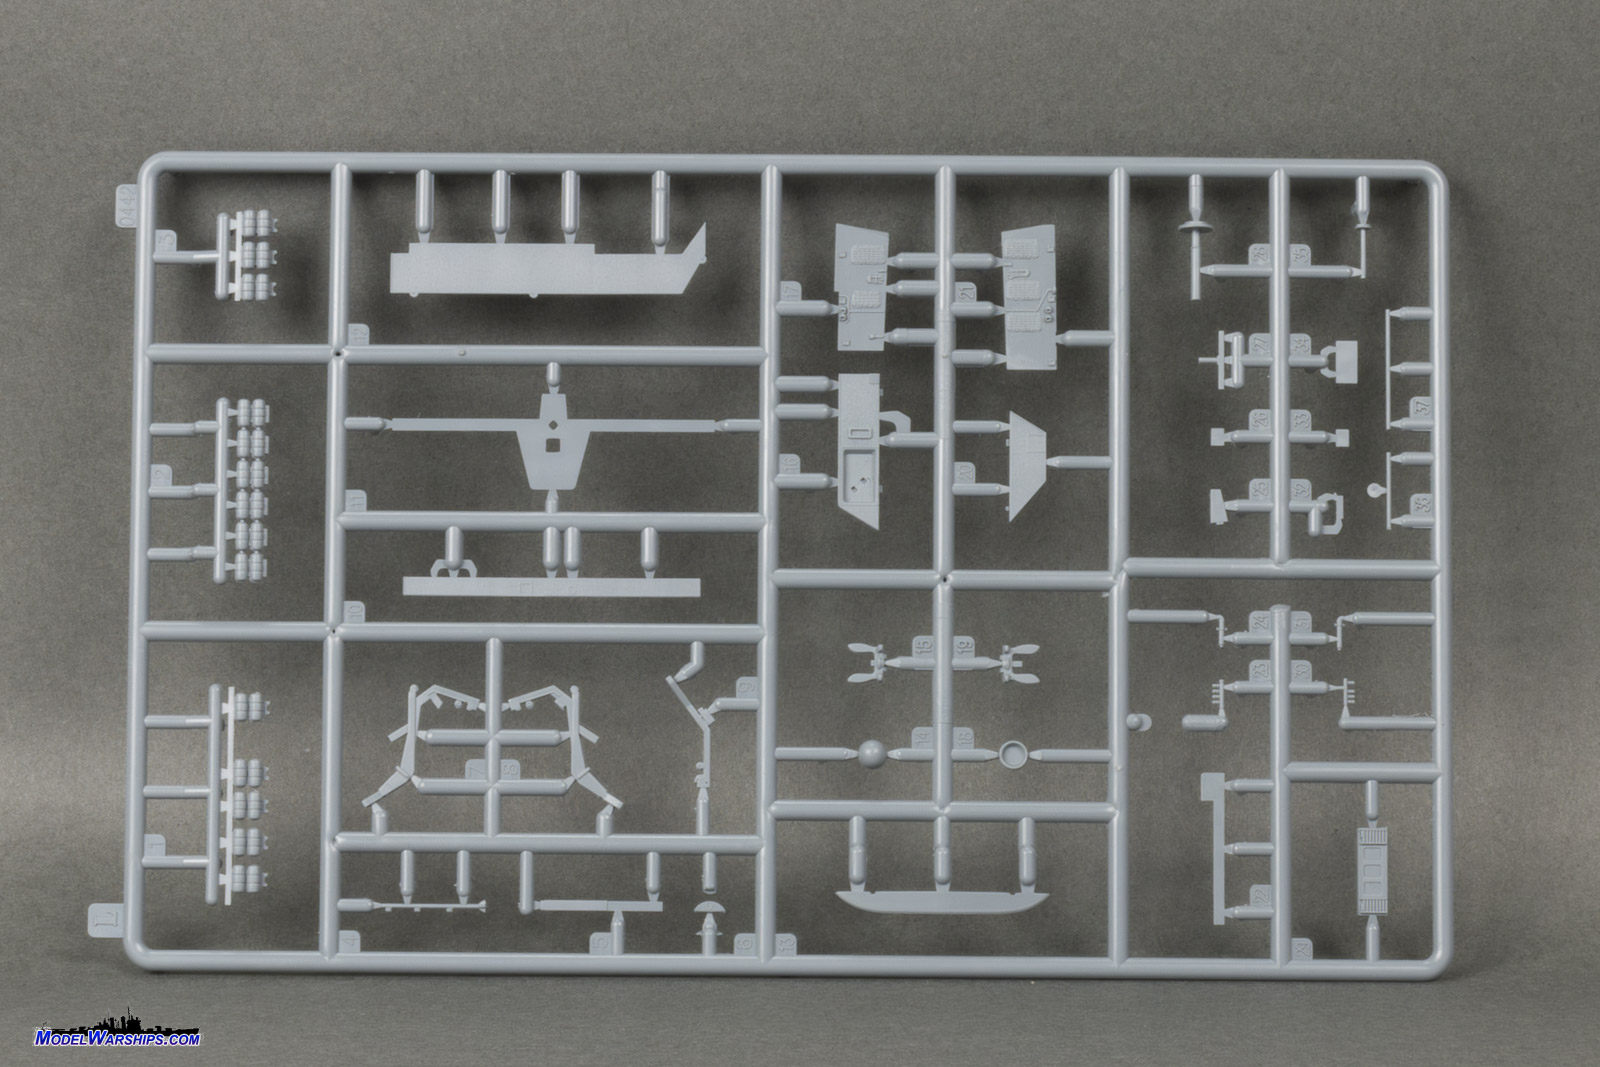
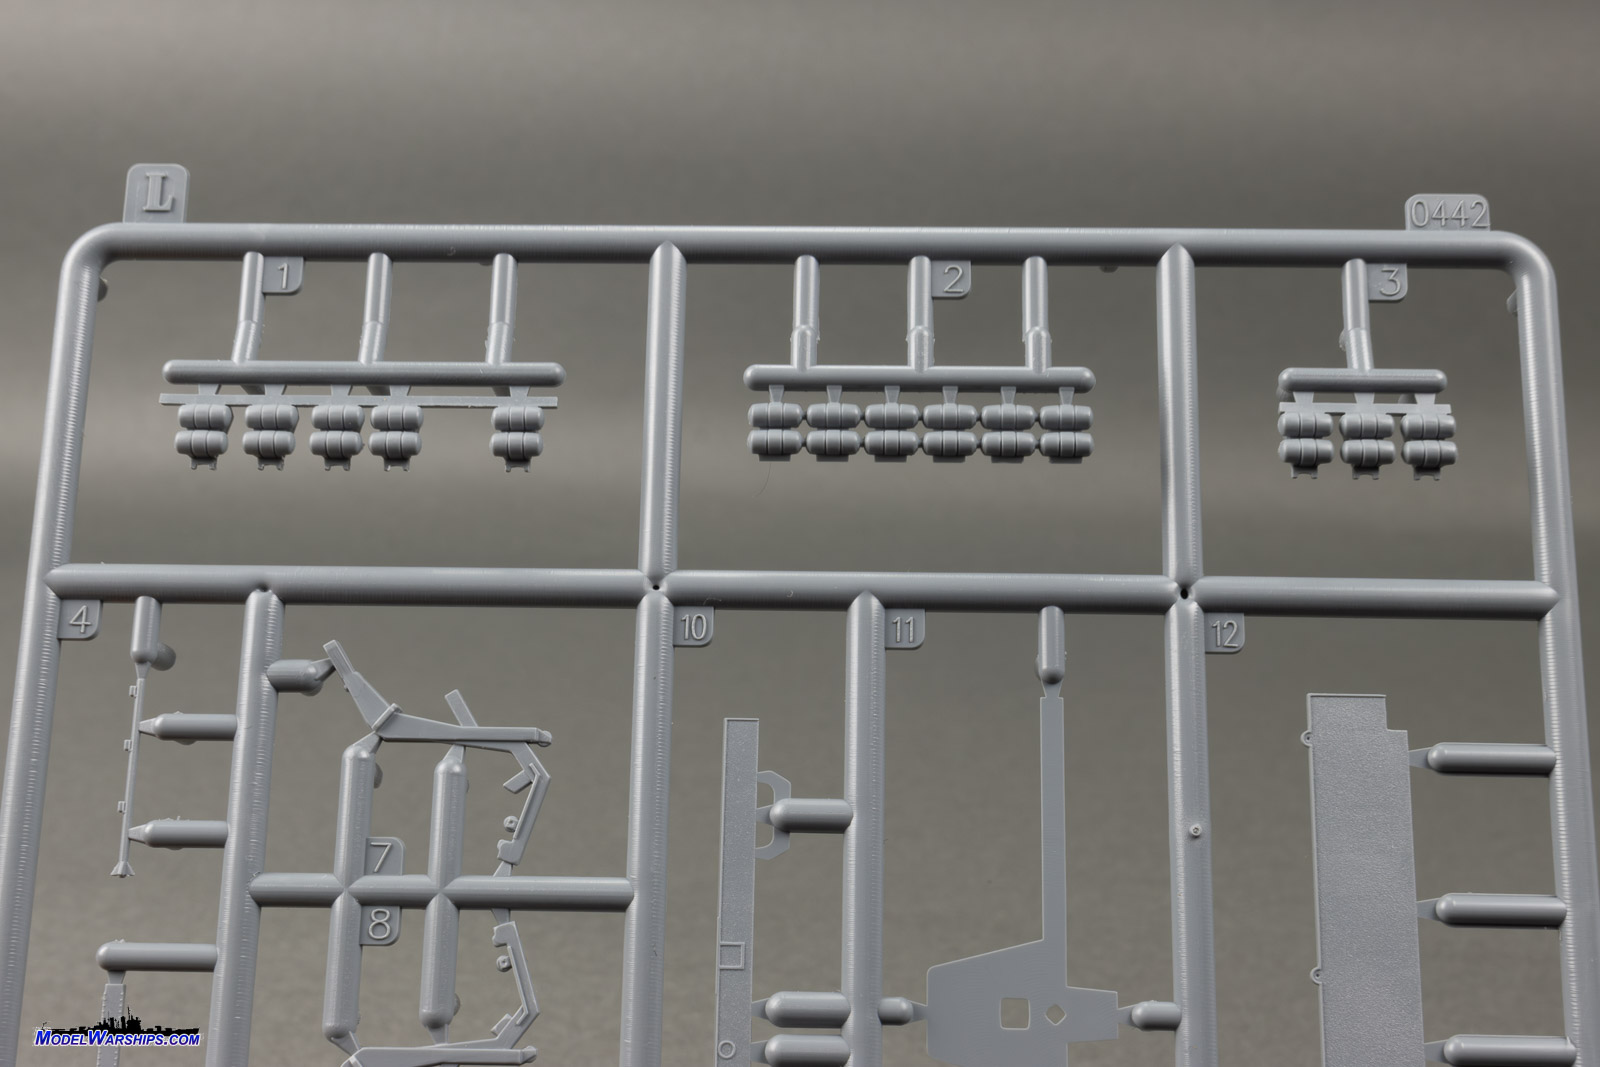
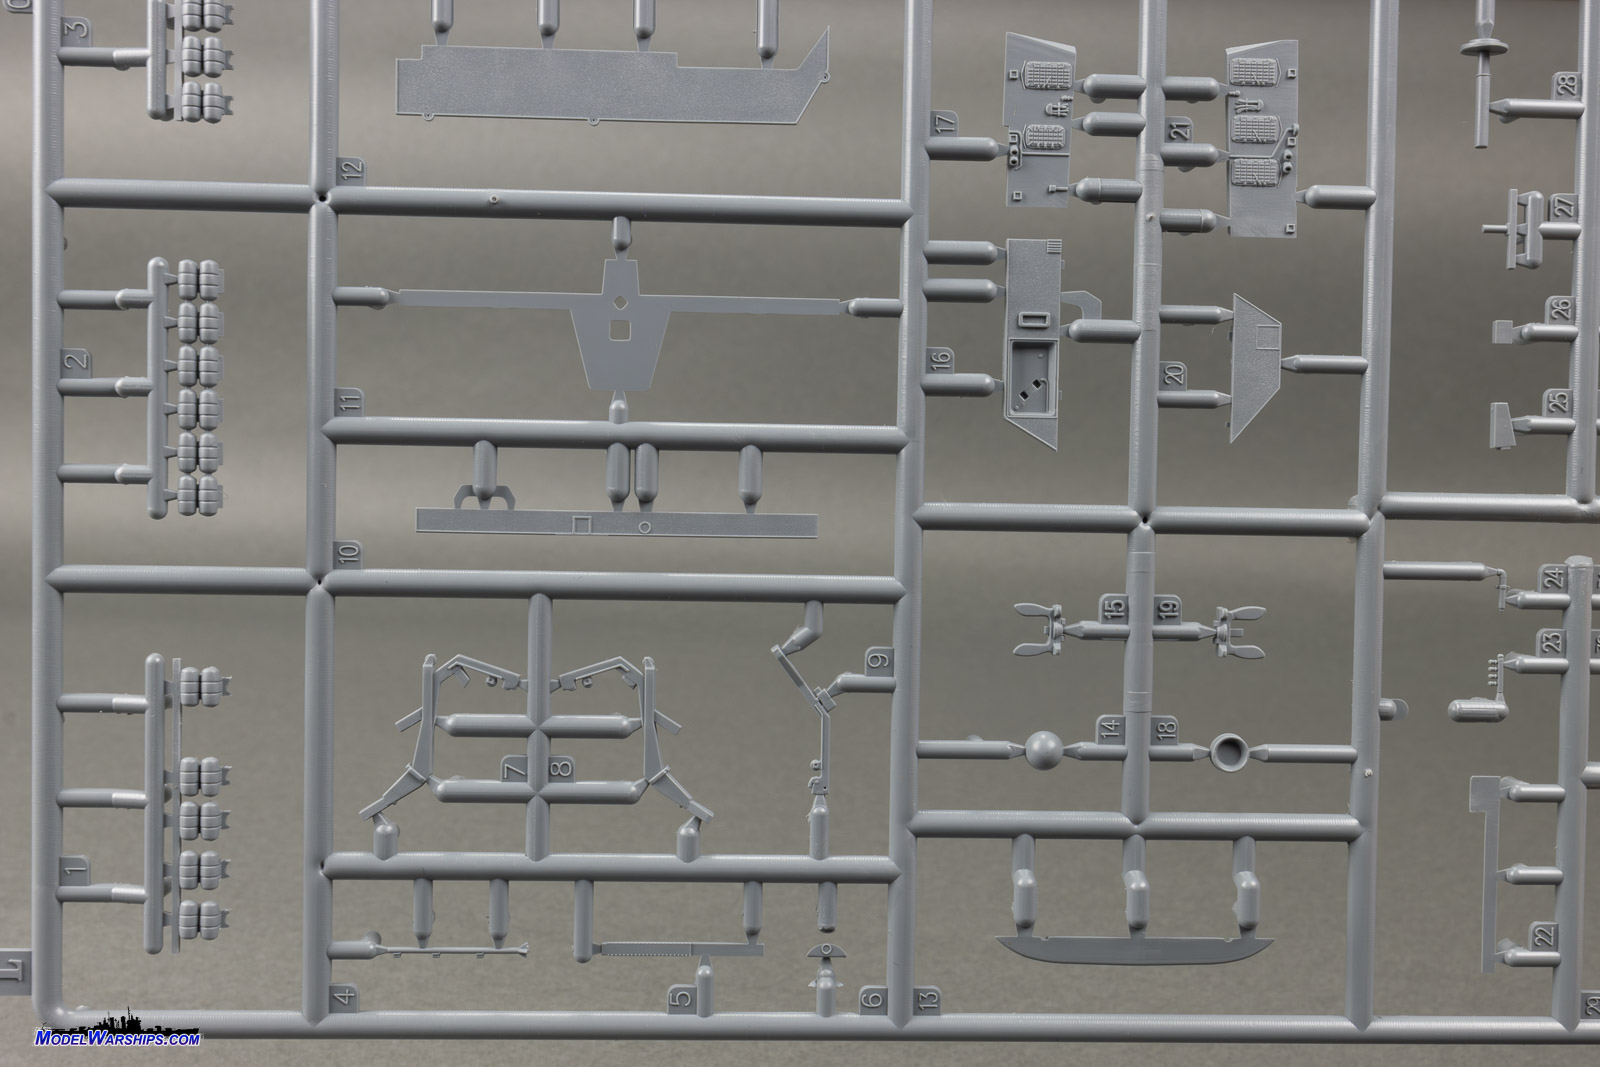
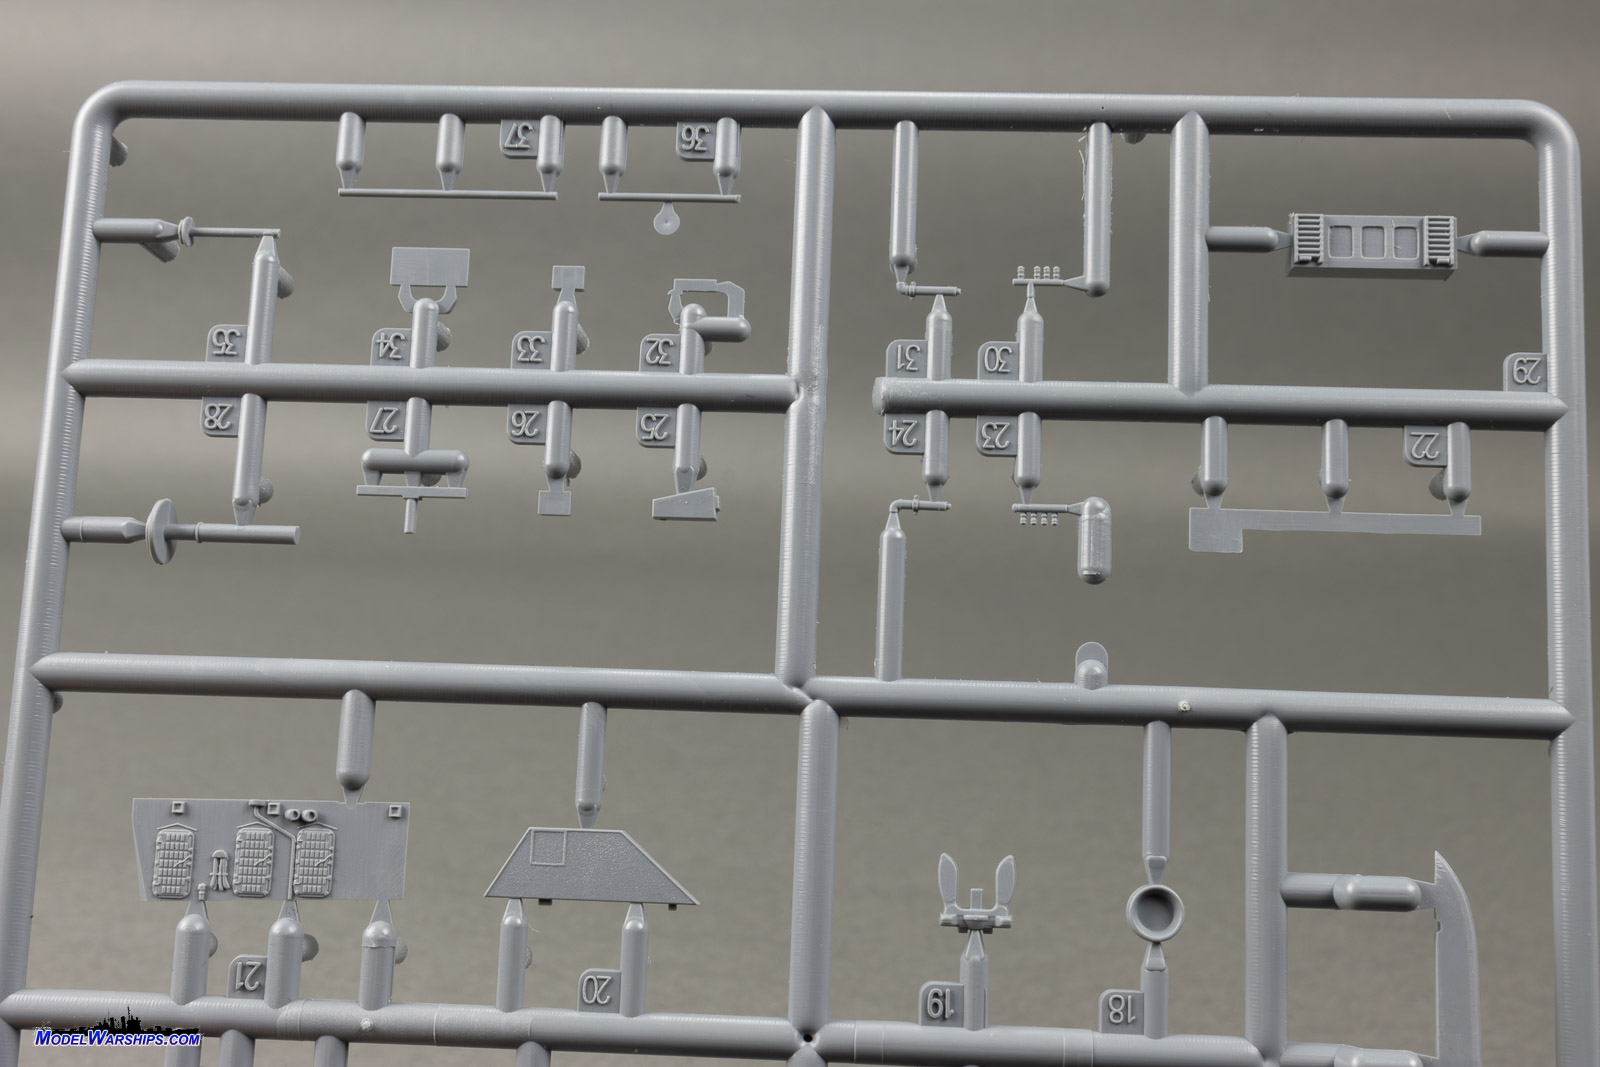
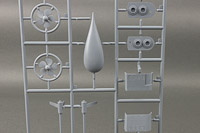
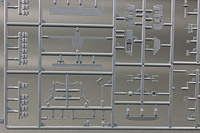
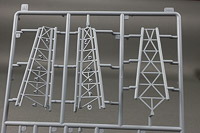
| SPRUE L |
| Sprue L contains more small parts
such as external bulkheads and decks, etc. Life raft canisters are molded
in groups, which should make attaching them fairly easy. Boat gravity davits
have adequate detail which should pop with a bit of a wash. The anchors
look the part. |
 |
 |
 |
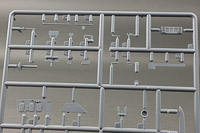 |
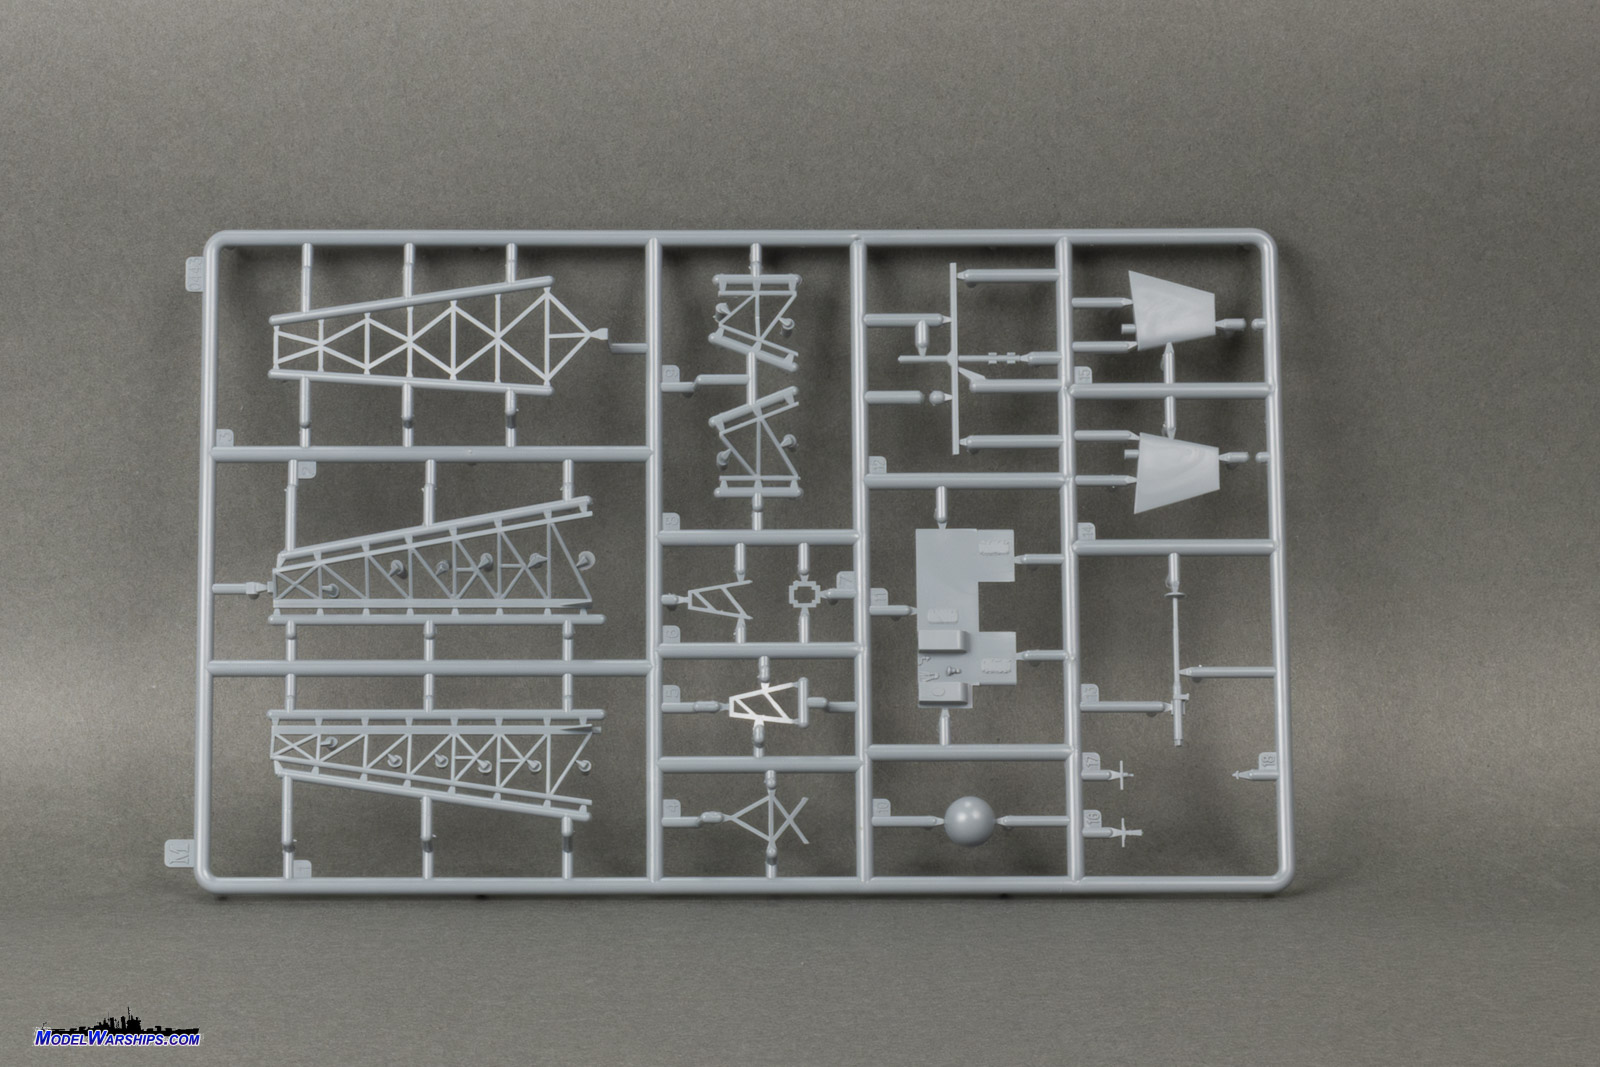
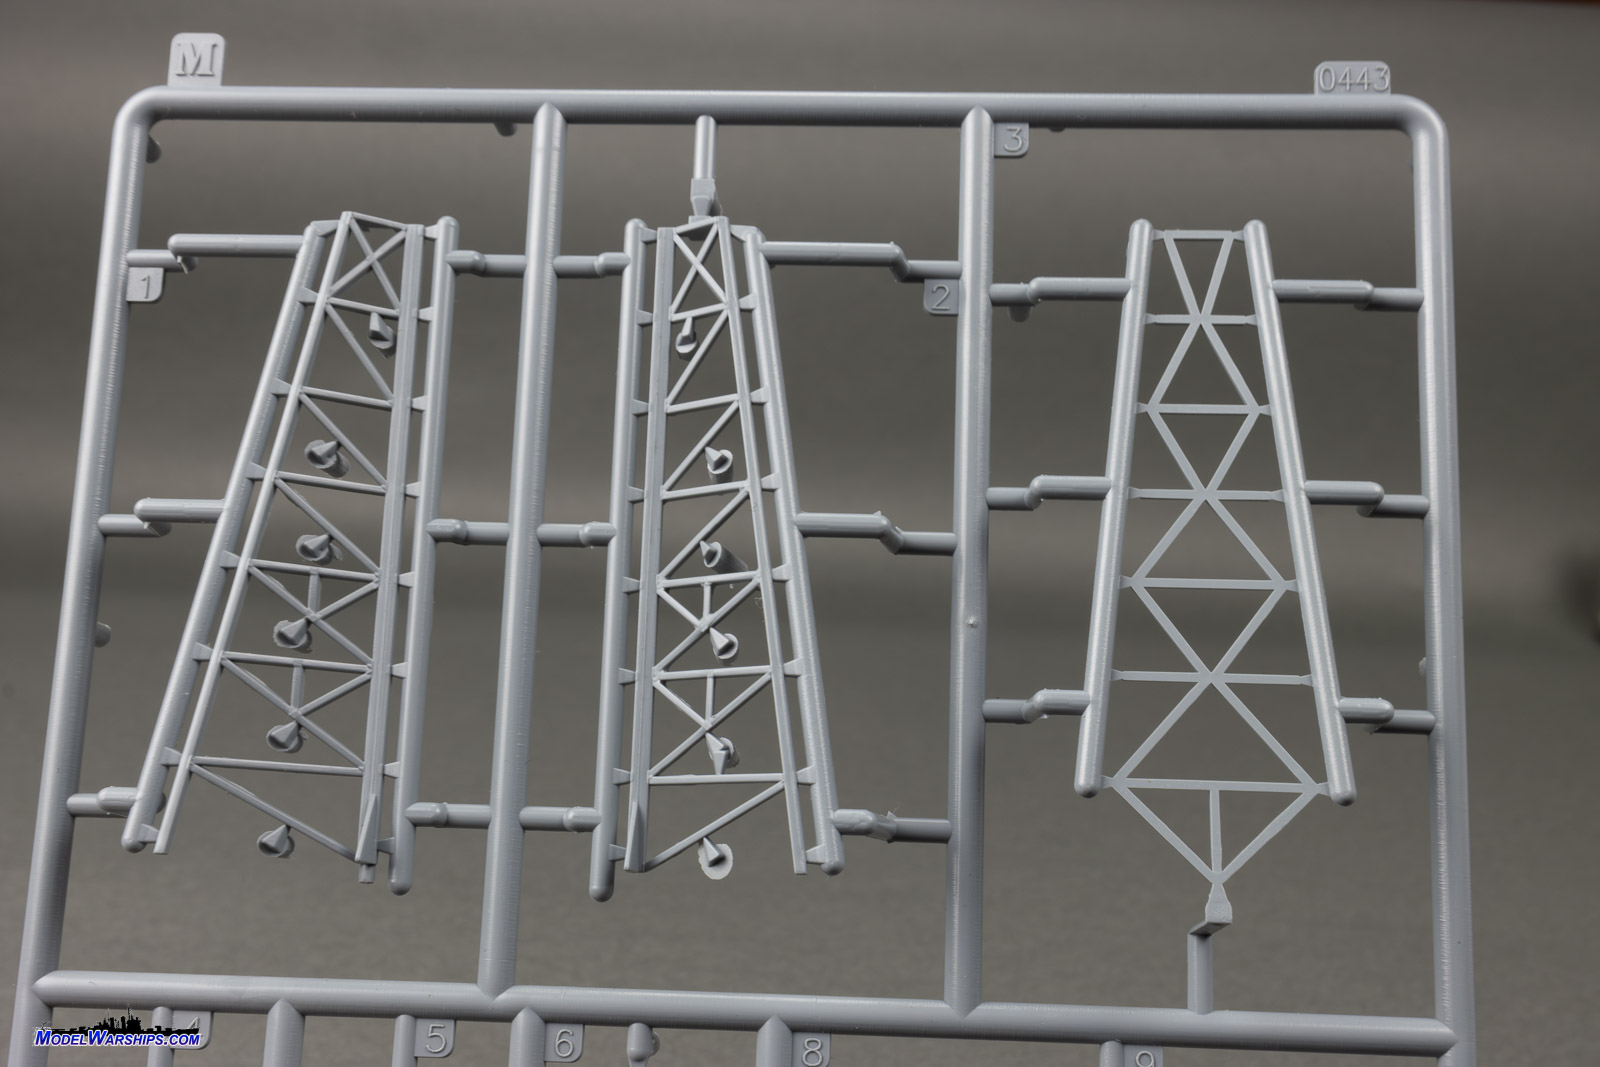
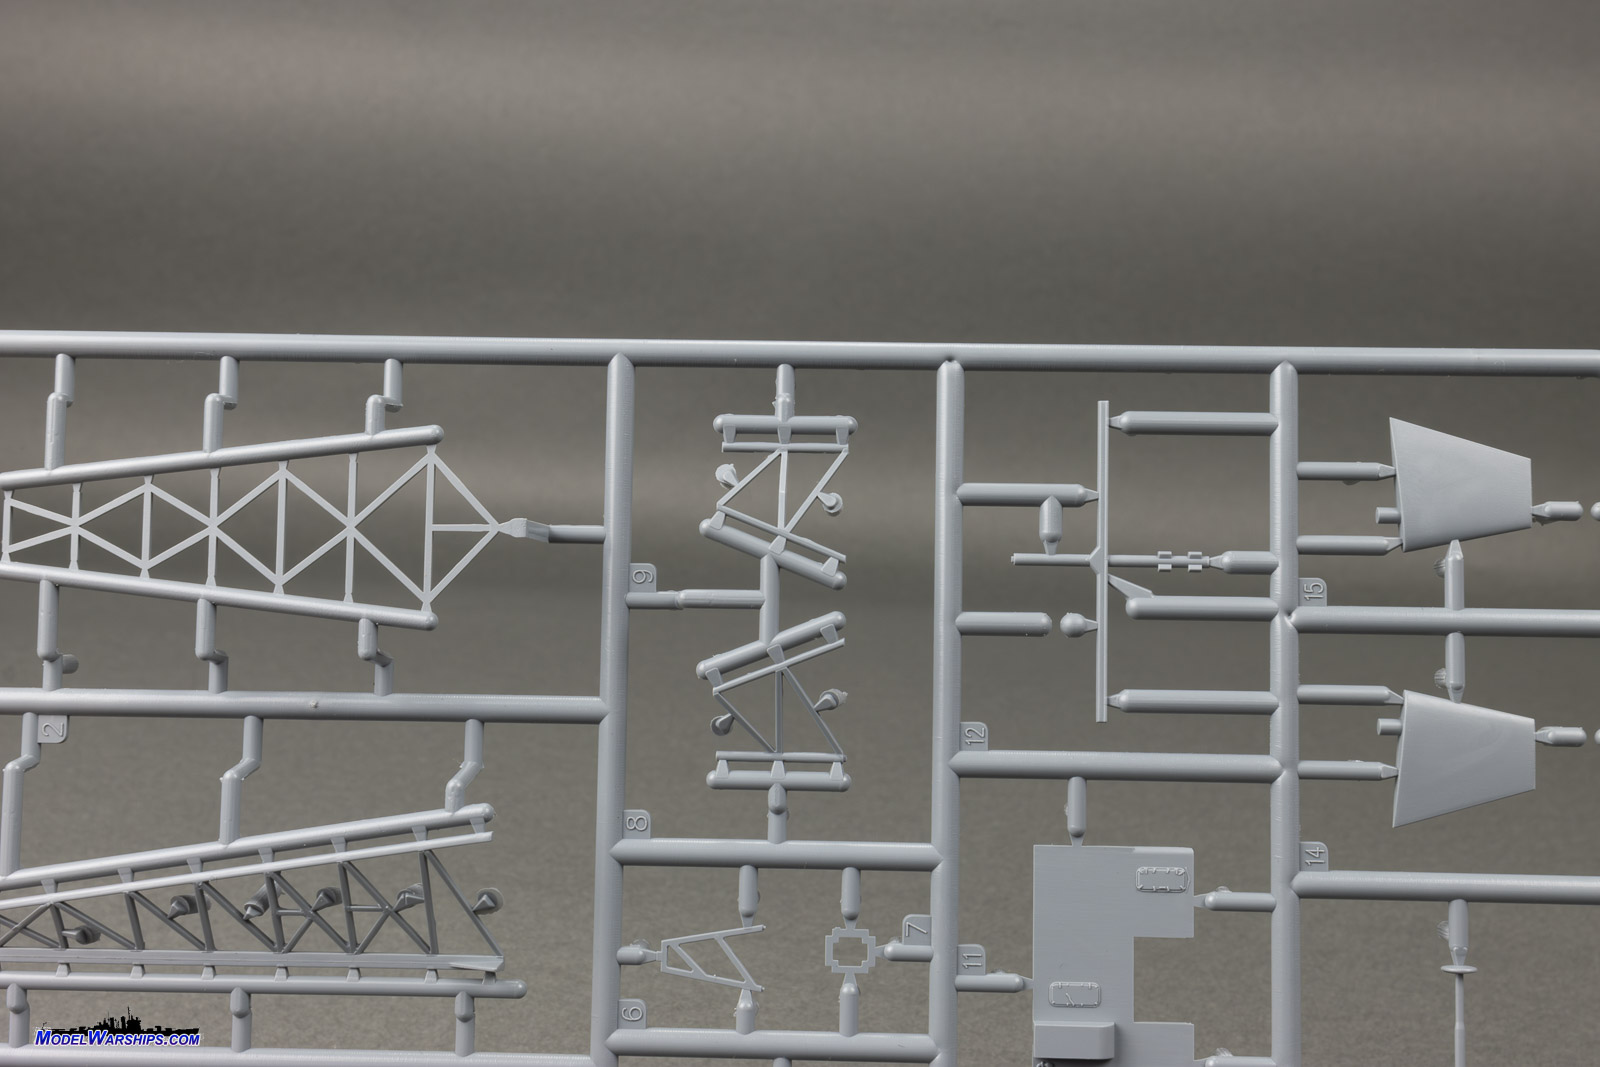
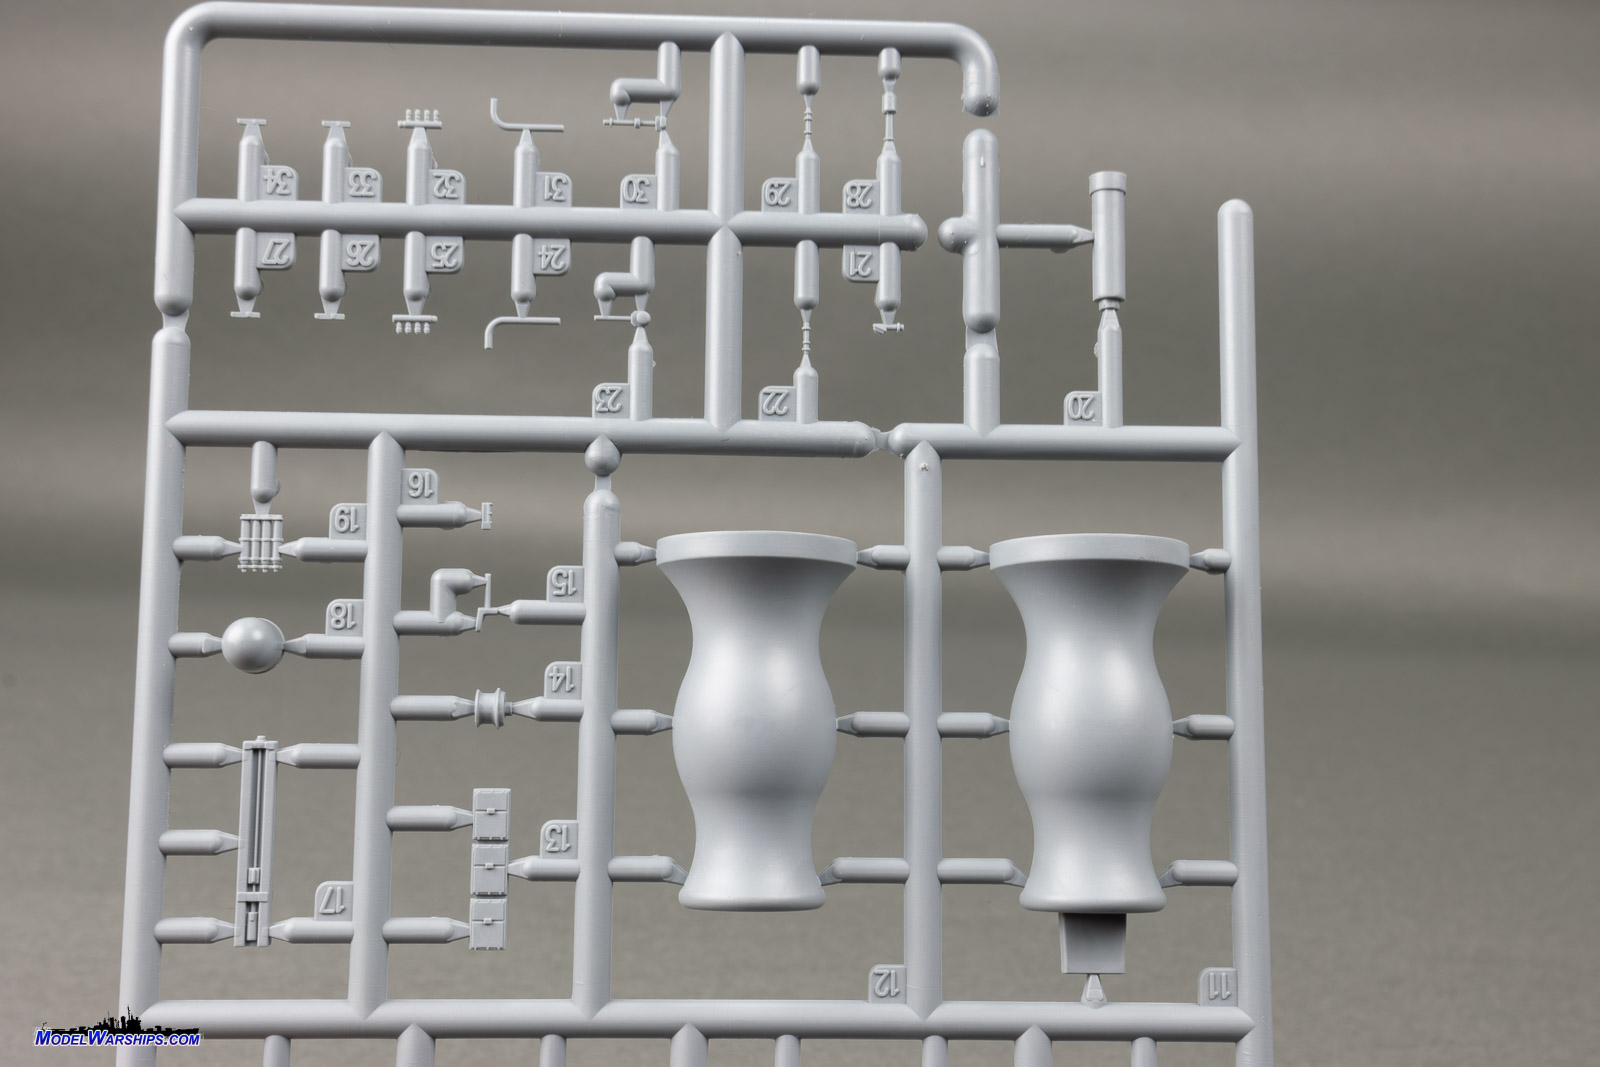
| SPRUE M |
| Mast sections and rudders make up the majority
of sprue M. The main mast and the shorter mast on top of the superstructure
(not sure if main mast and fore mast are applicable terms anymore), will
require care when cutting these components free, as small ejection sprue
nubs are attached to most of the fine cross-members.
Rudders are sharp and straight. Other pieces on the sprue show good
detail. The watertight doors on this bulkhead do not exhibit the waffle
structure of the other doors, and they look much better for it. |
 |
 |
 |
 |
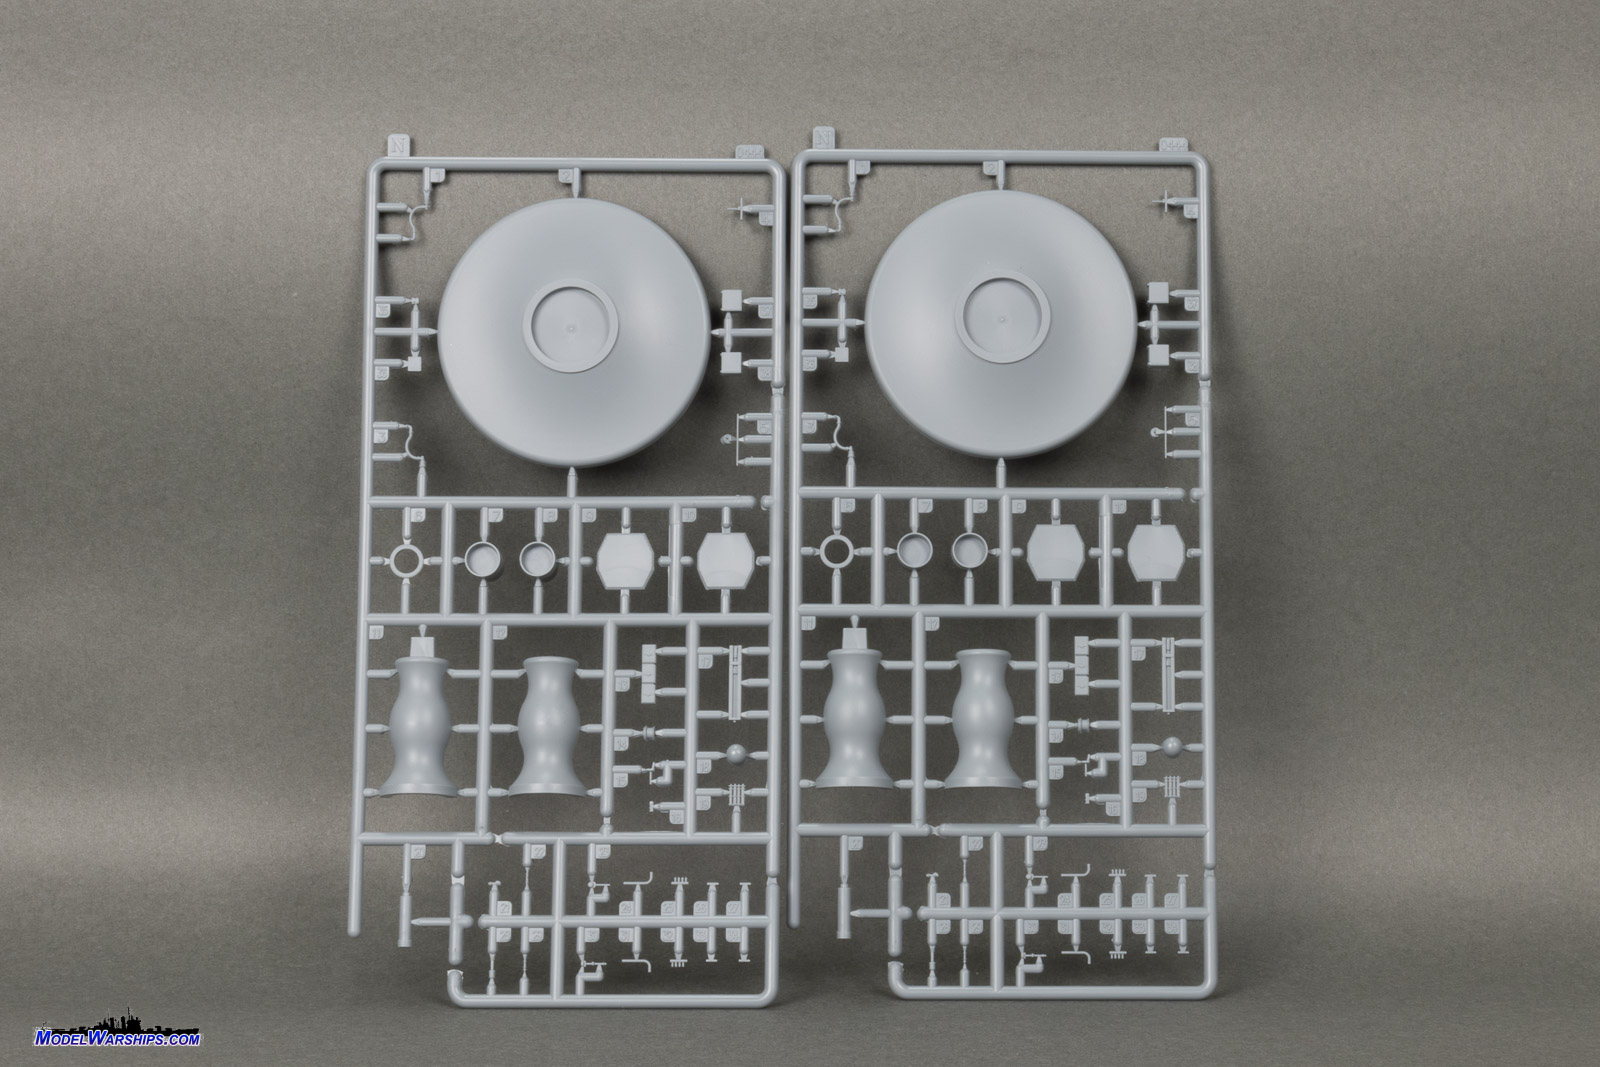
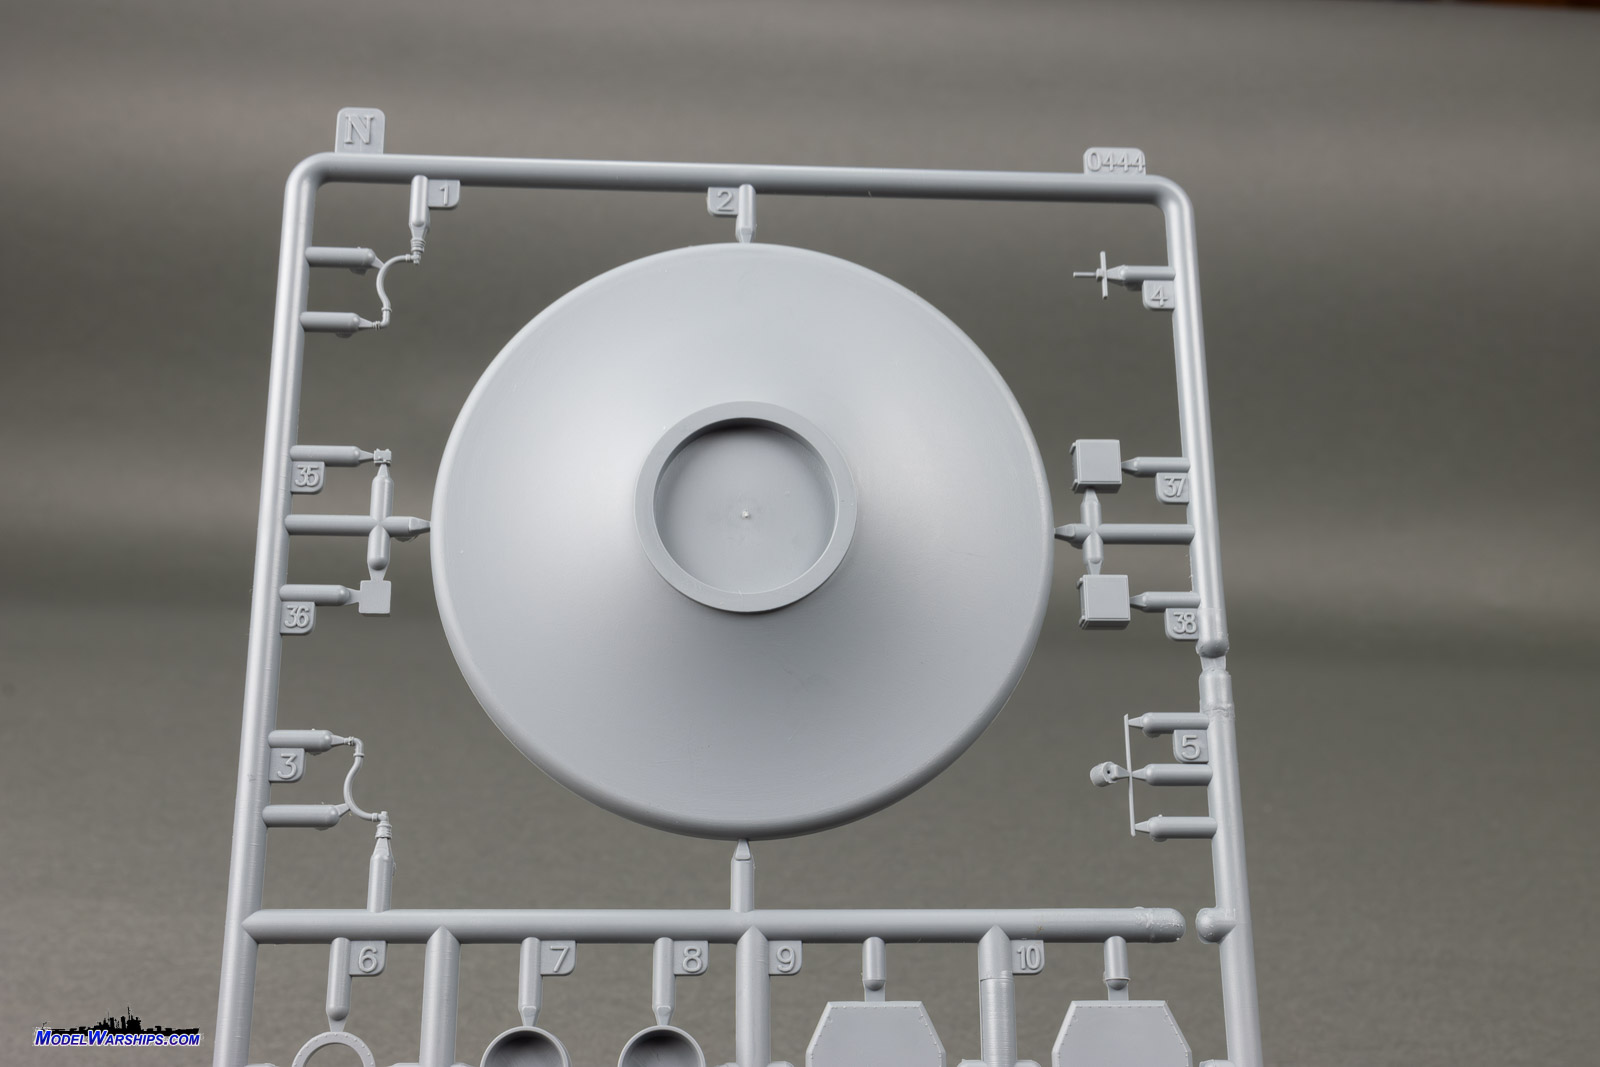
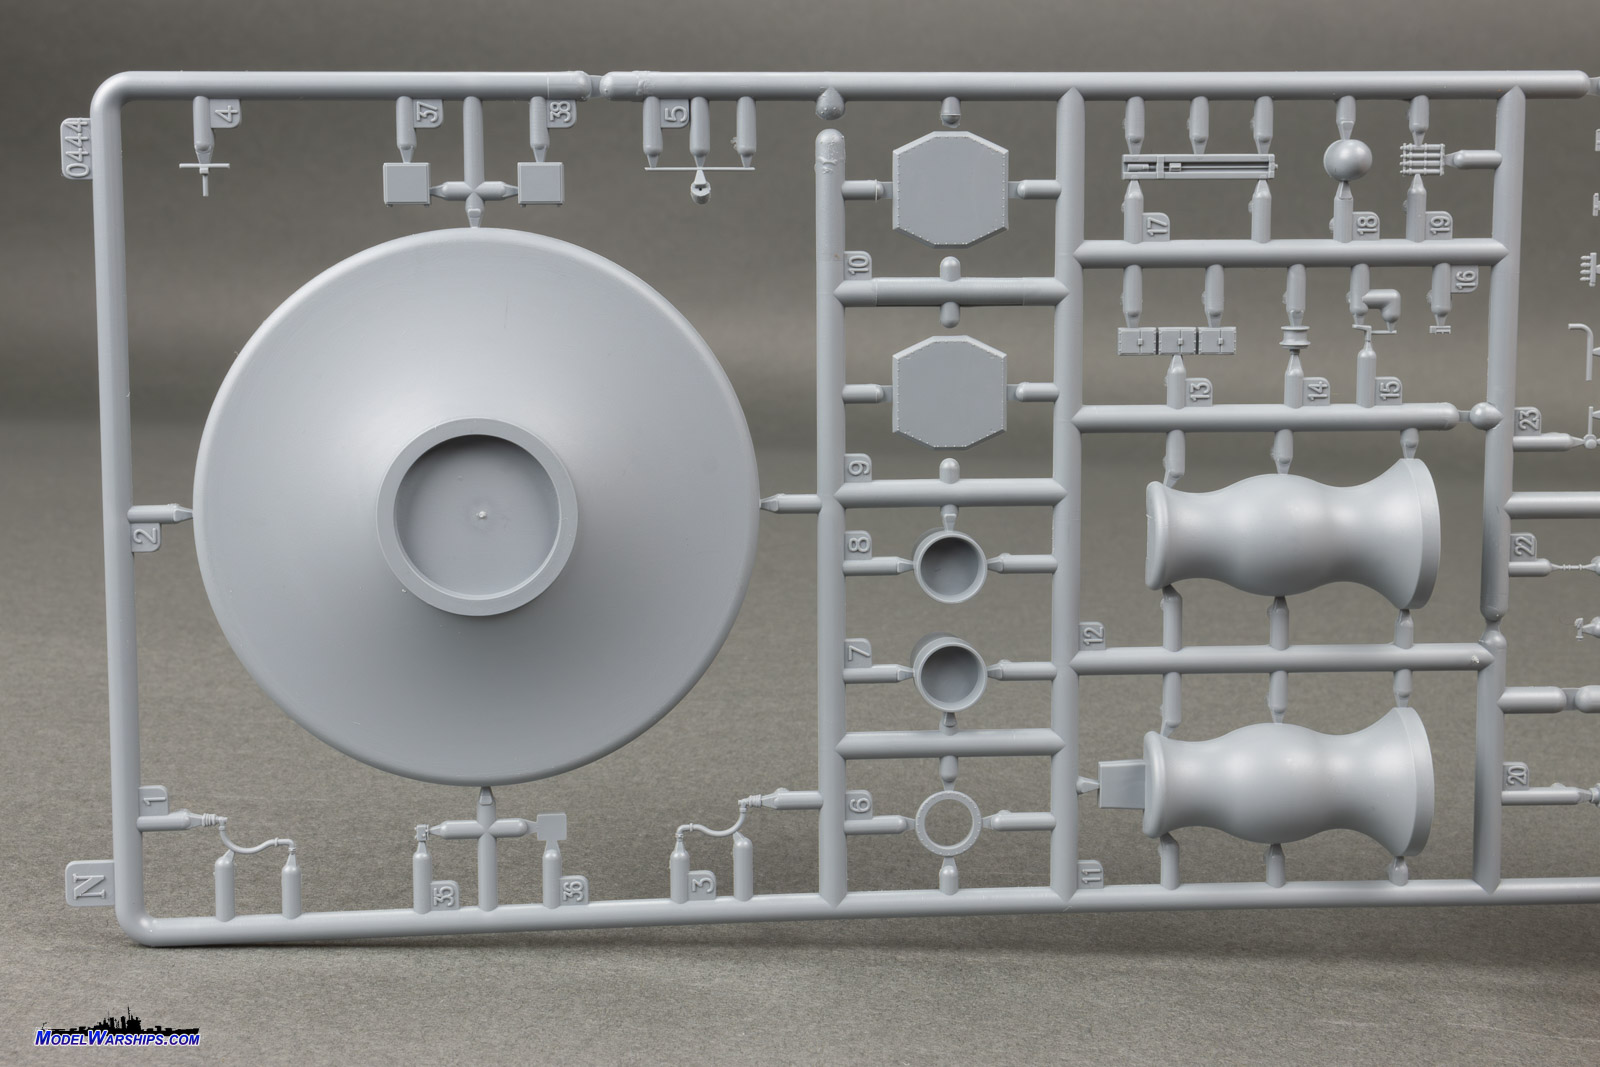
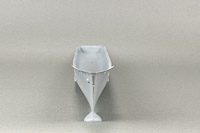
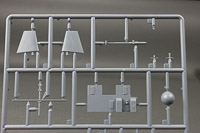
| SPRUE N x 2 |
| The main components of sprue N, there are two
in the kit, are the stands (finials) for the model. Each is made of a base
and two-halves of the support. Depending on how the seam looks on the vertical
portion of the support, these could be quite effective.
The SPY-1 antenna faces are nicely detailed with subtle bolt detail
around the perimeter. Having these as separate pieces will aid in painting,
as these structures are an unpainted RTV compound that's a different shade
of gray than the hull. Other parts here include a sliding padeye, various
small davits, and a rack of gas bottles (acetylene, CO2, etc). |
 |
 |
 |
 |
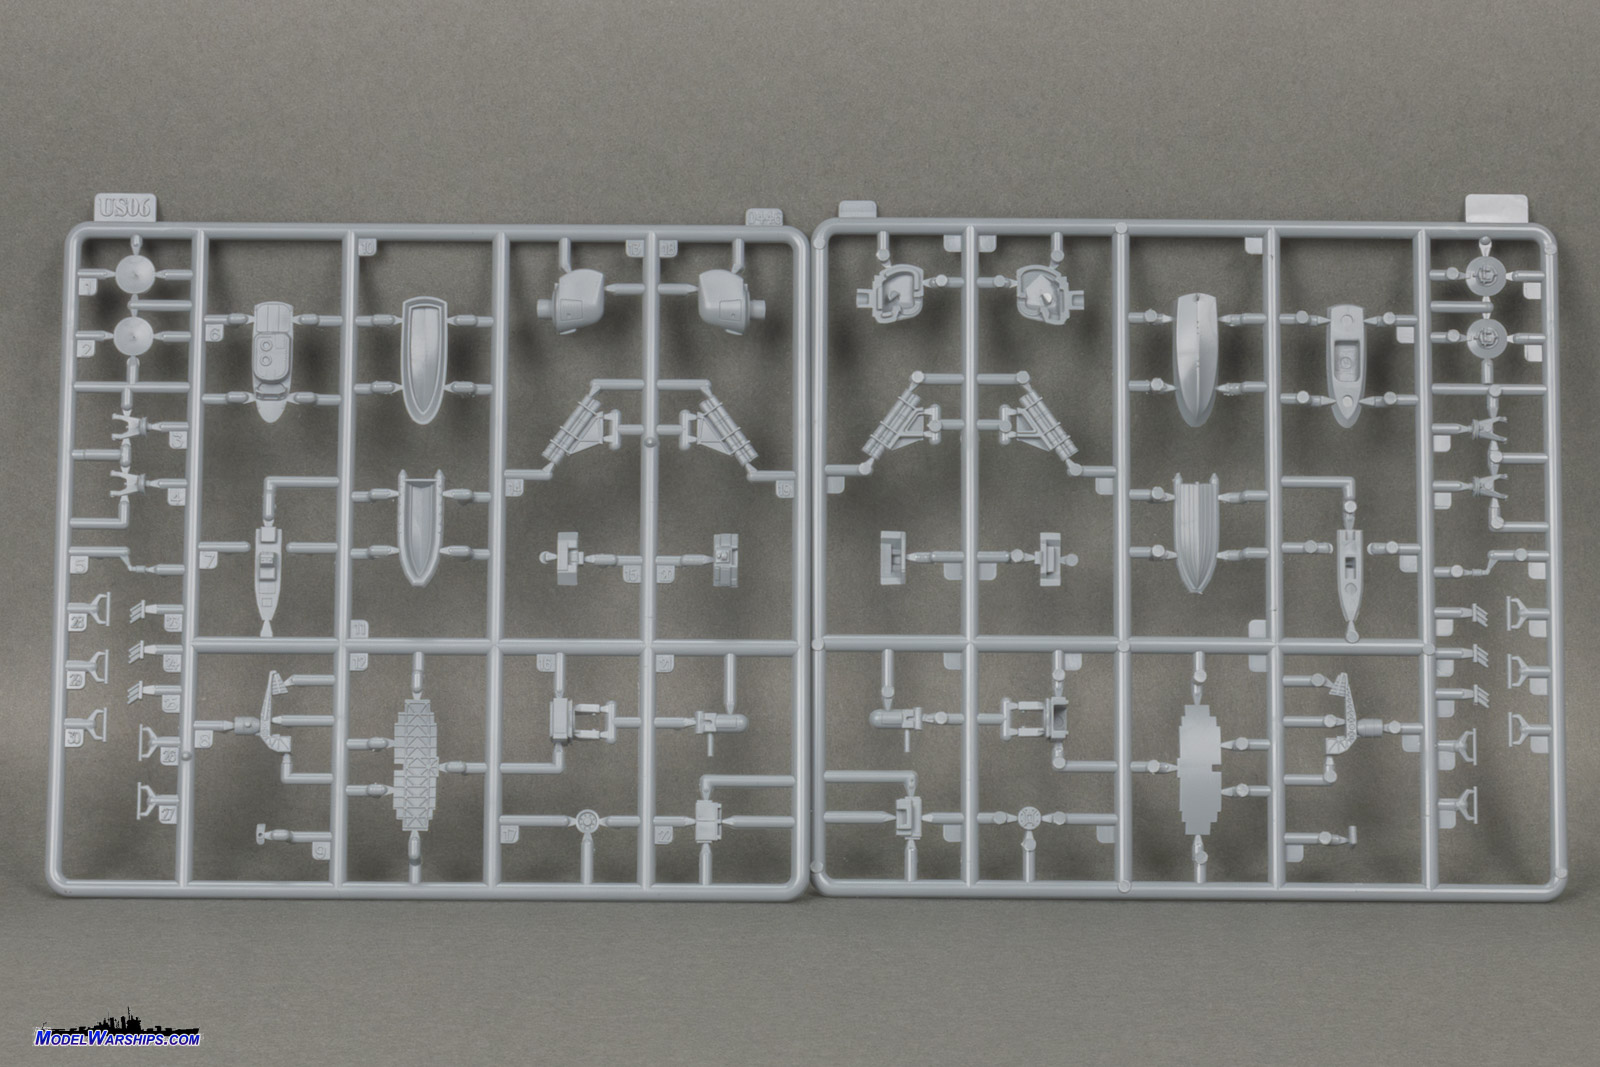
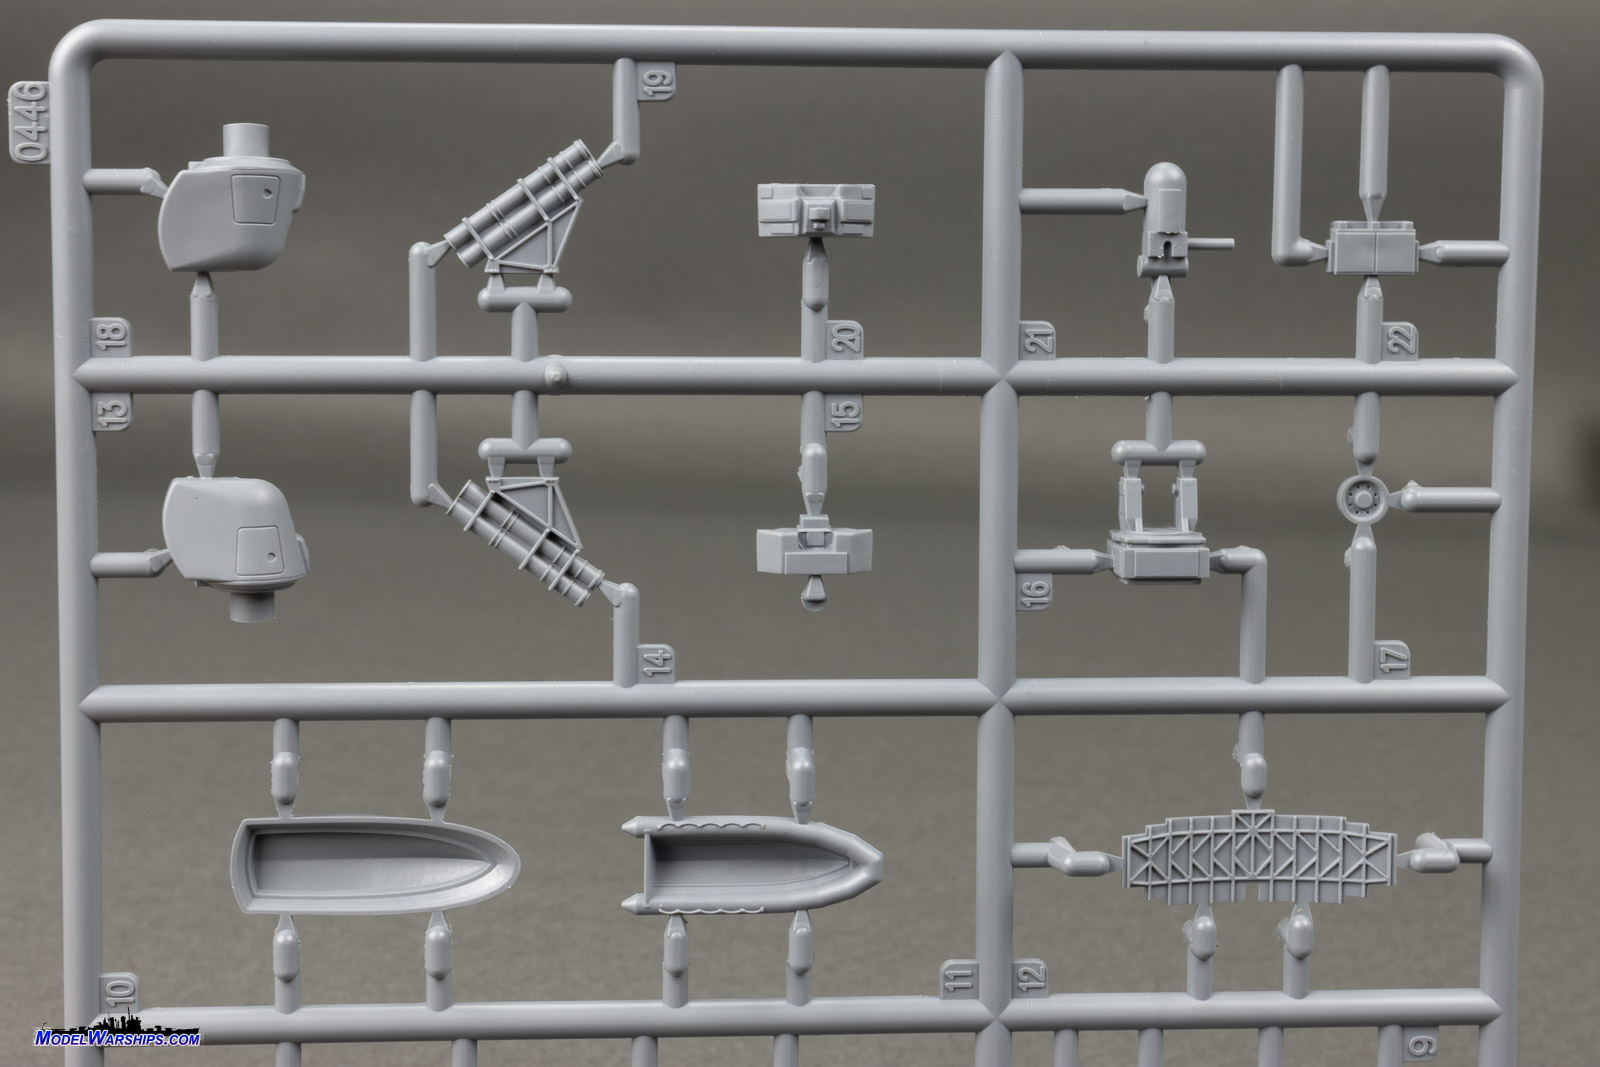
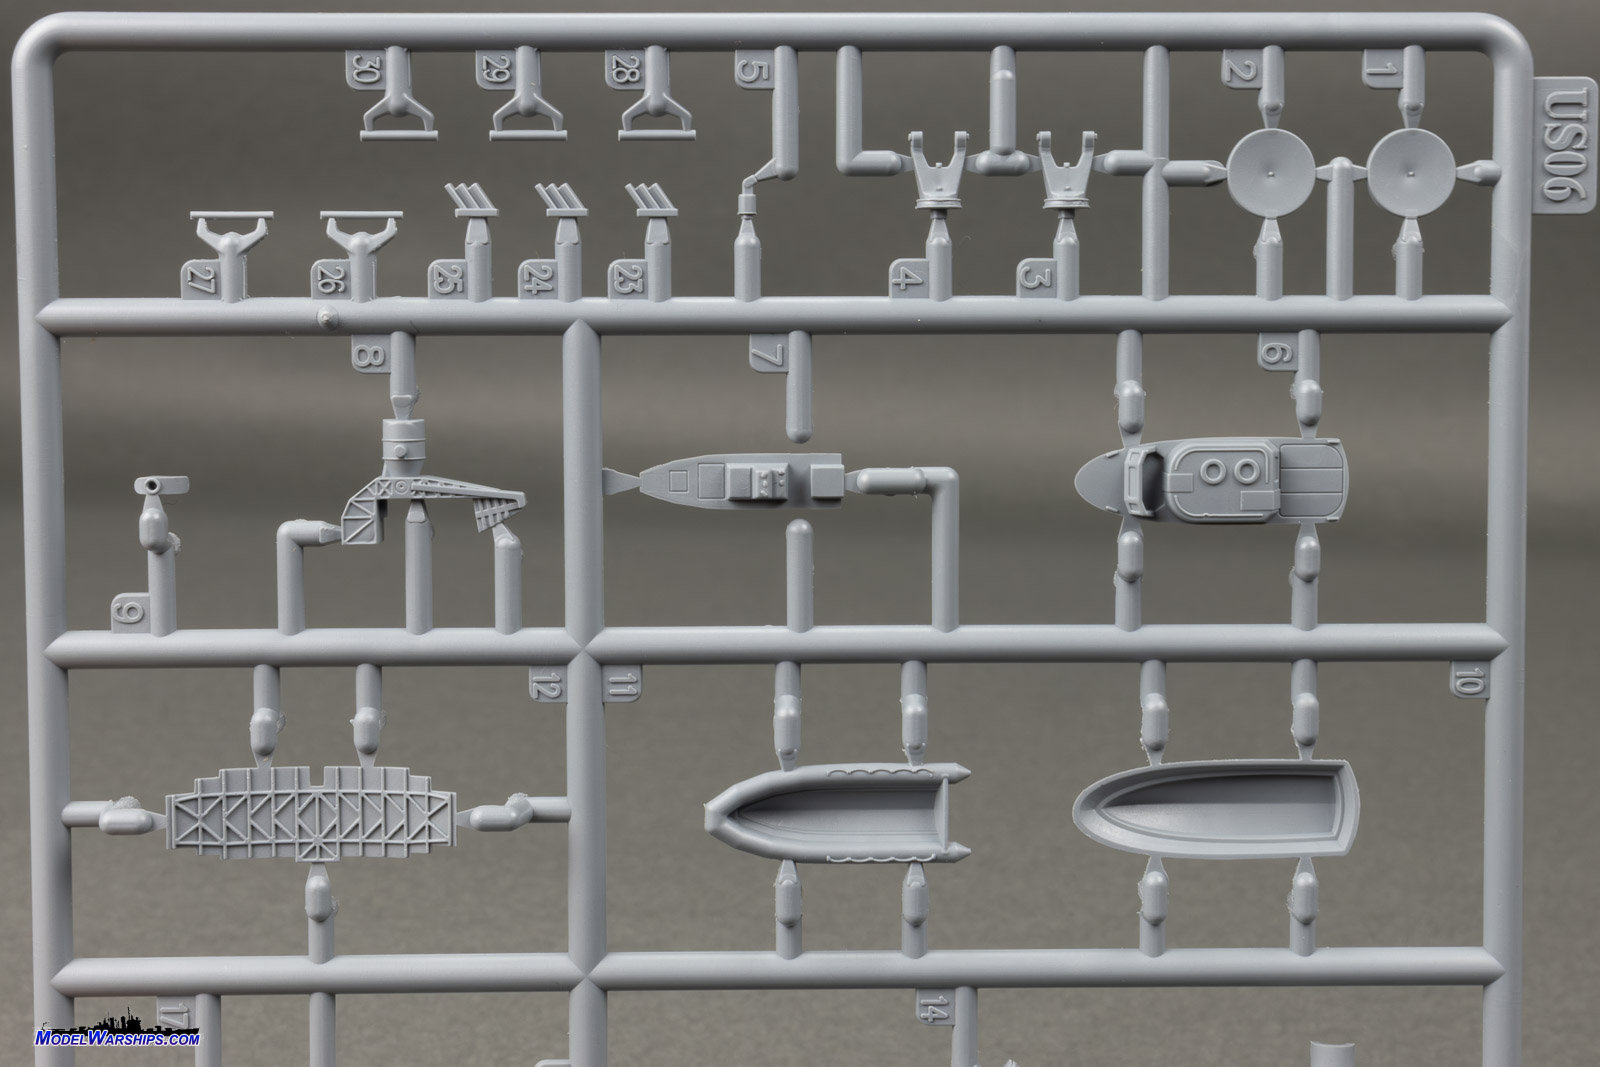
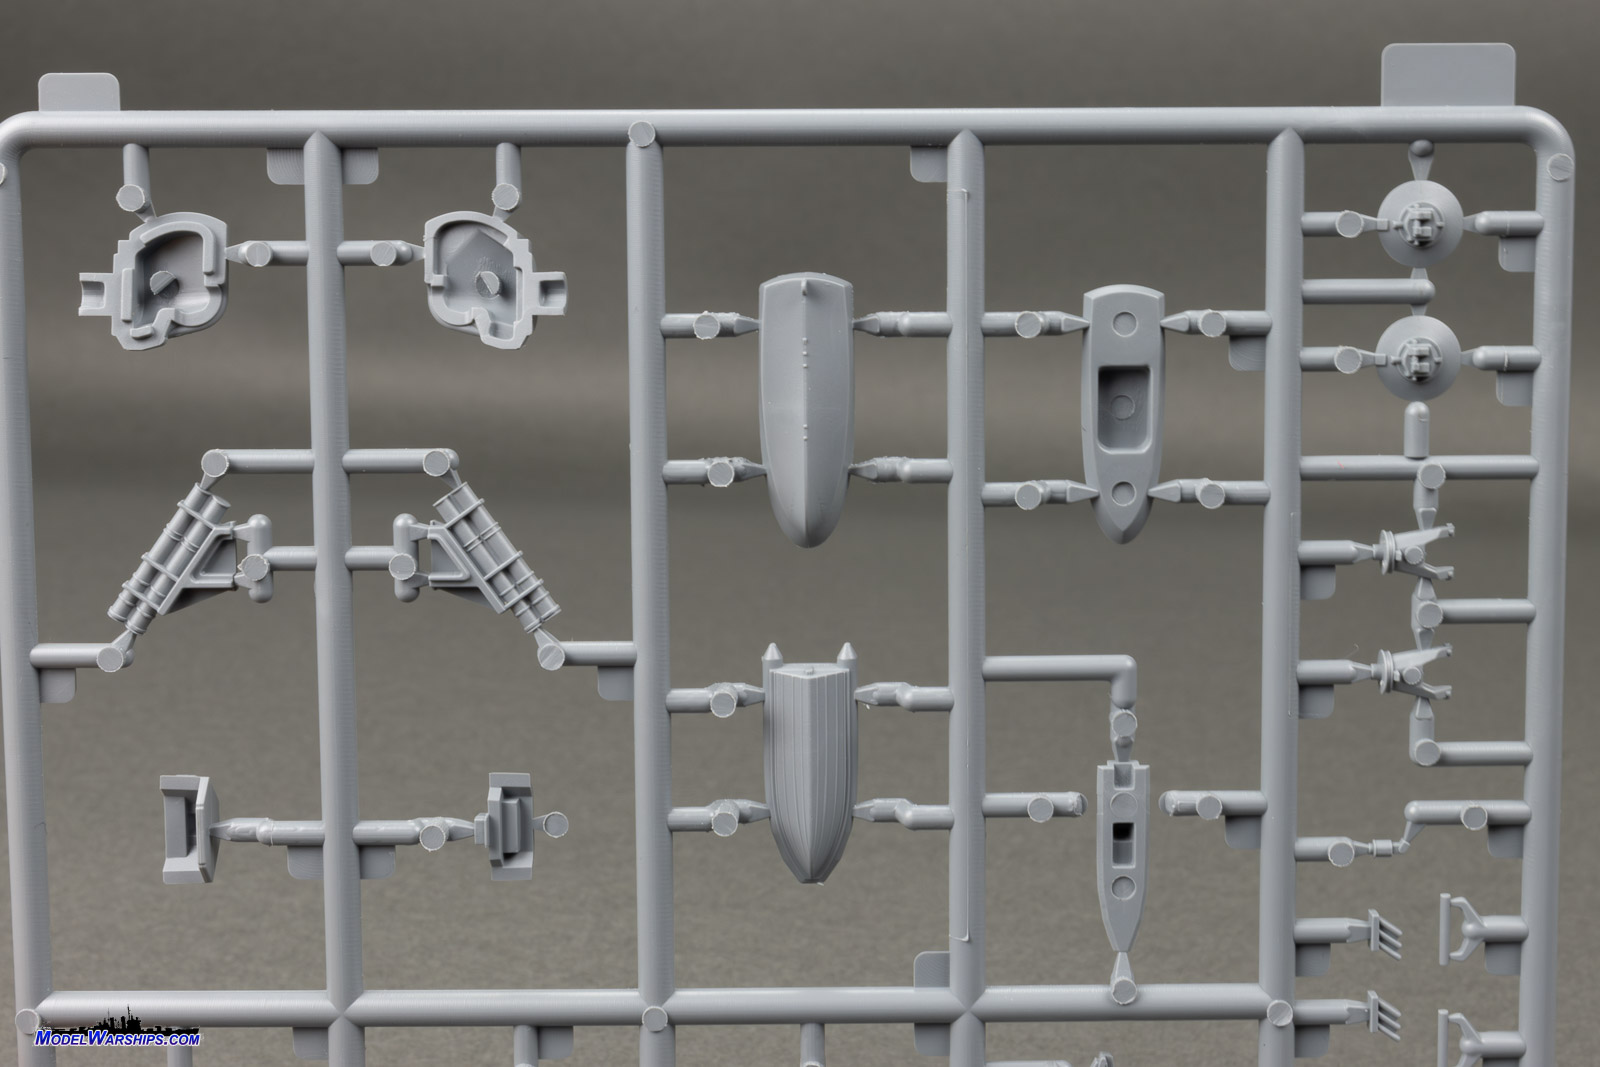
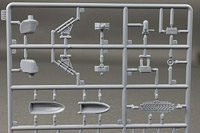
| SPRUE US06 x 2 |
| Sprue US06 is a somewhat generic fittings set, of which
two are included in the kit. Boats, RHIBs, SPS-49 search radar screen,
and the MK 62 missile radar illuminators, CIWIS, MK 45 5" gun mounts, and
other modern US Navy fittings are represented. Detail on the boats and
RHIB are excellent, with even hand hold lines depicted on the RHIB. Nice
detail on the Harpoon canister launchers, but the CIWS barrel detail is
a bit lacking, as to be expected at this scale. The SPS-49 radar body is
acceptable for styrene, but most will want to replace is with the open
structure PE; fortunately that's included with this deluxe version of the
Cowpens kit.
Overall this is a nice bit of kit for 1/350th scale modern warships.
I hope it points to Flyhawk doing more ships in this scale. **cough
cough Adams class DDG cough cough** |
 |
 |
 |
 |
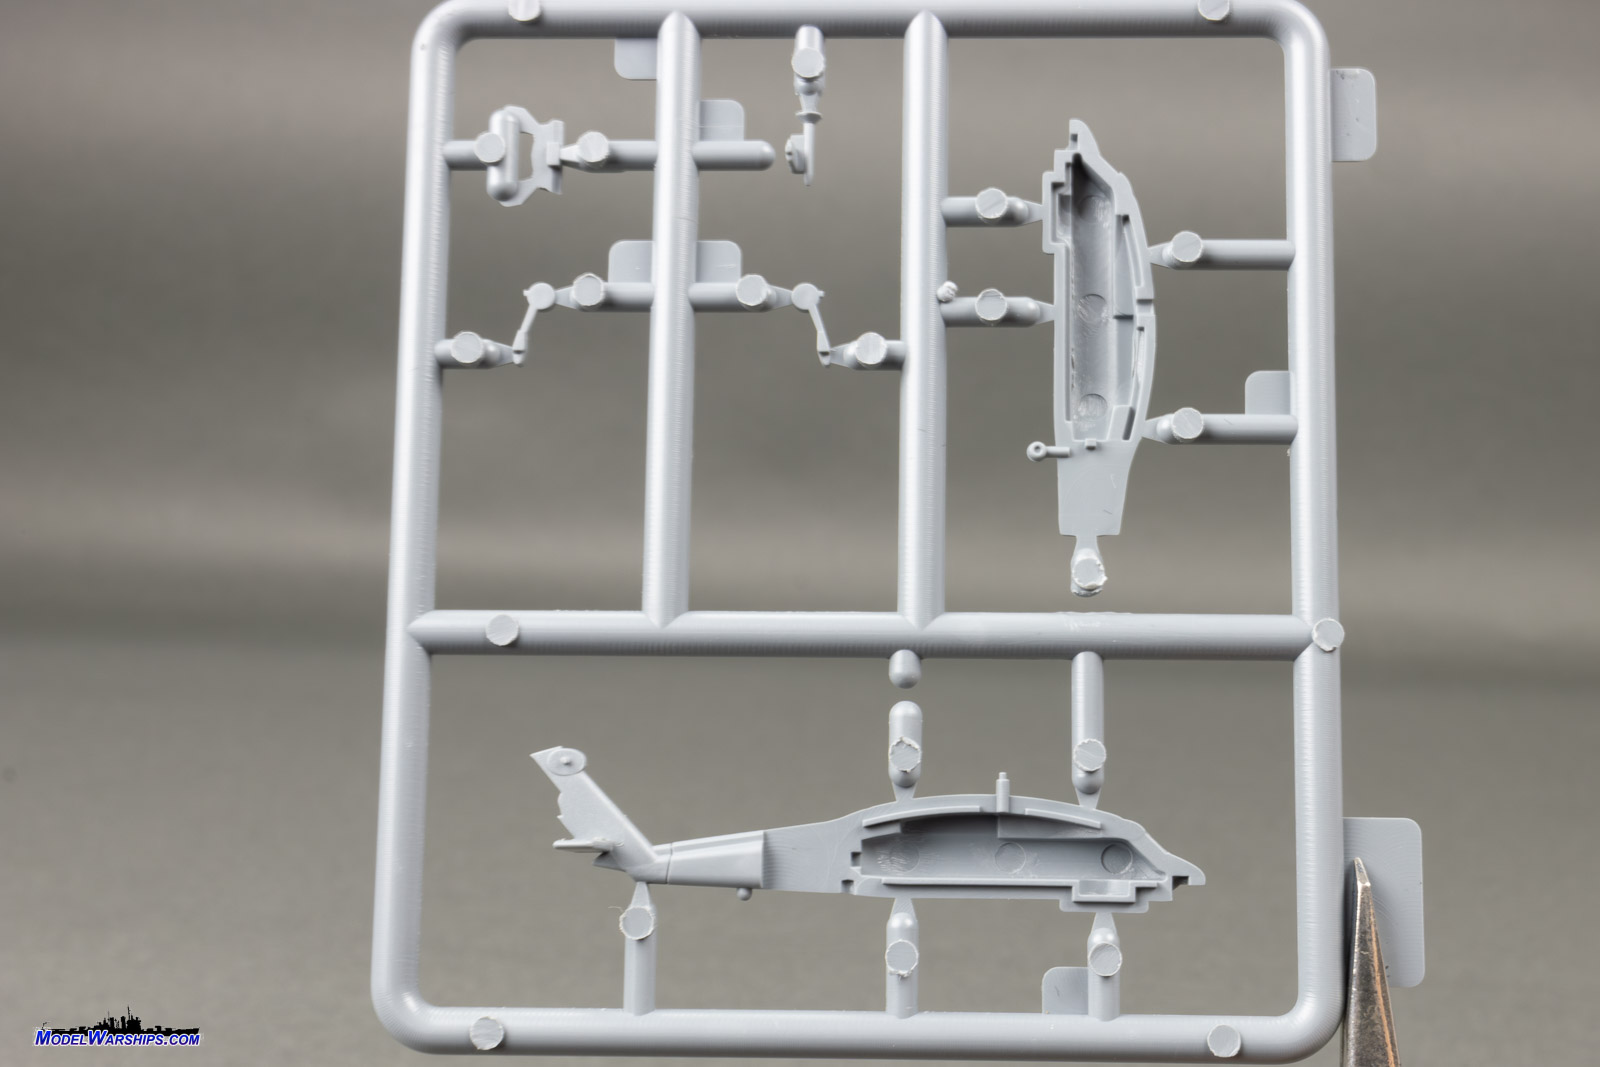
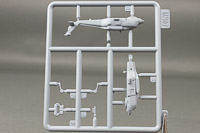
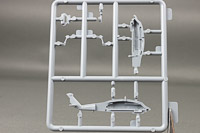
| SPRUE US07 x 2 |
| Two SH-60 Seahawks are included, both on individual sprues
labeled US07. The fuselage is split down the middle for the bulk of the
helo, with the tail being a solid piece attached to the port side. Landing
gear, the "chin" assembly, and dipping sonar are separate pieces. Detail
on the fuselage is good for injection molded in this scale, with windows
and windscreen depicted with scribes. The sonobuoy dispenser on the port
side looks decent, but could do with a slight twist of an appropriately
sized drill to sharpen the buoy chutes. |
  |
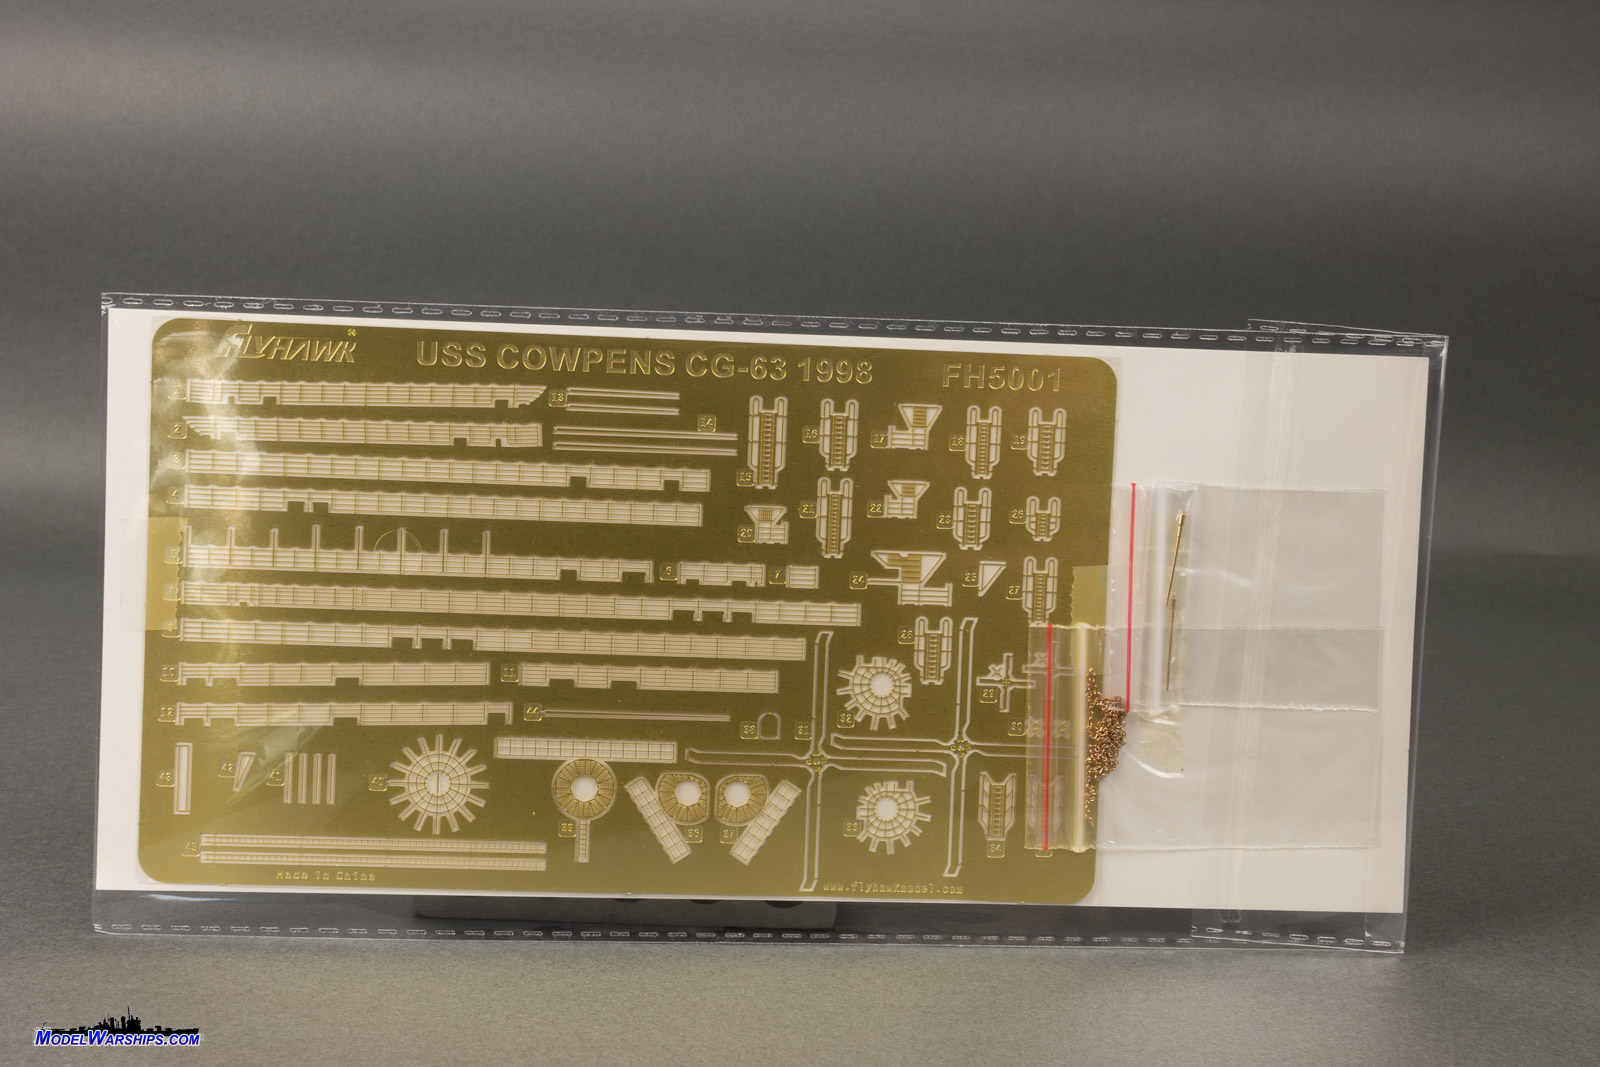
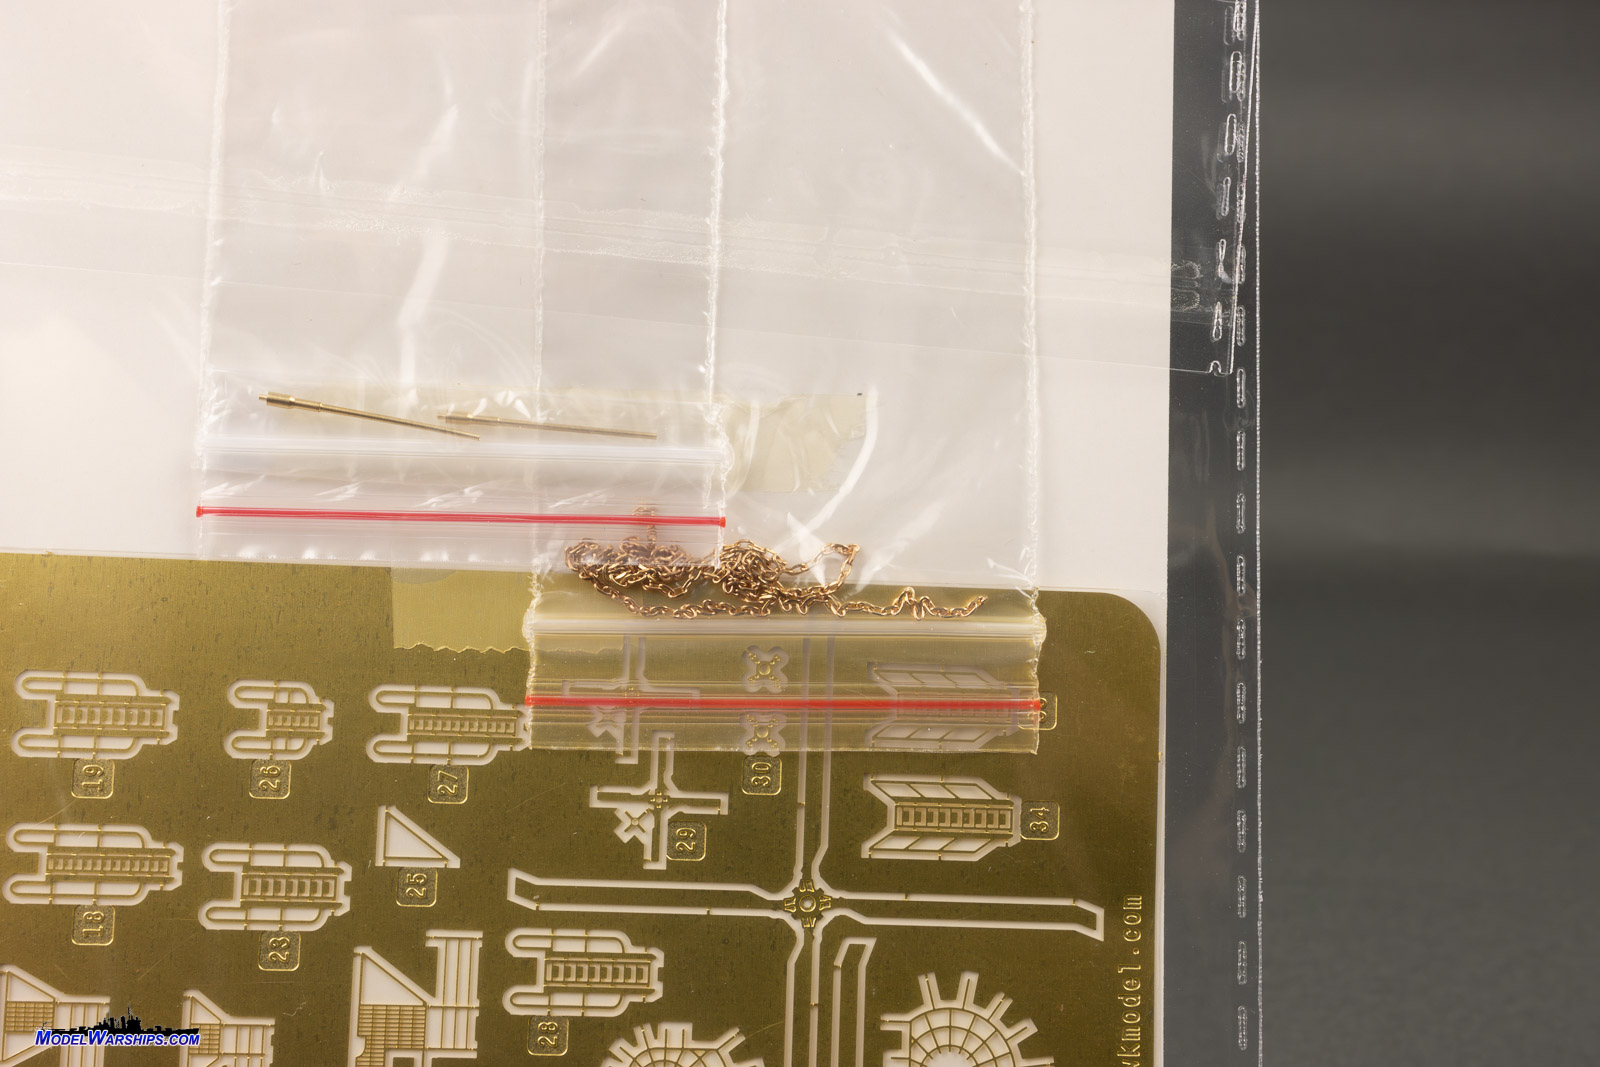
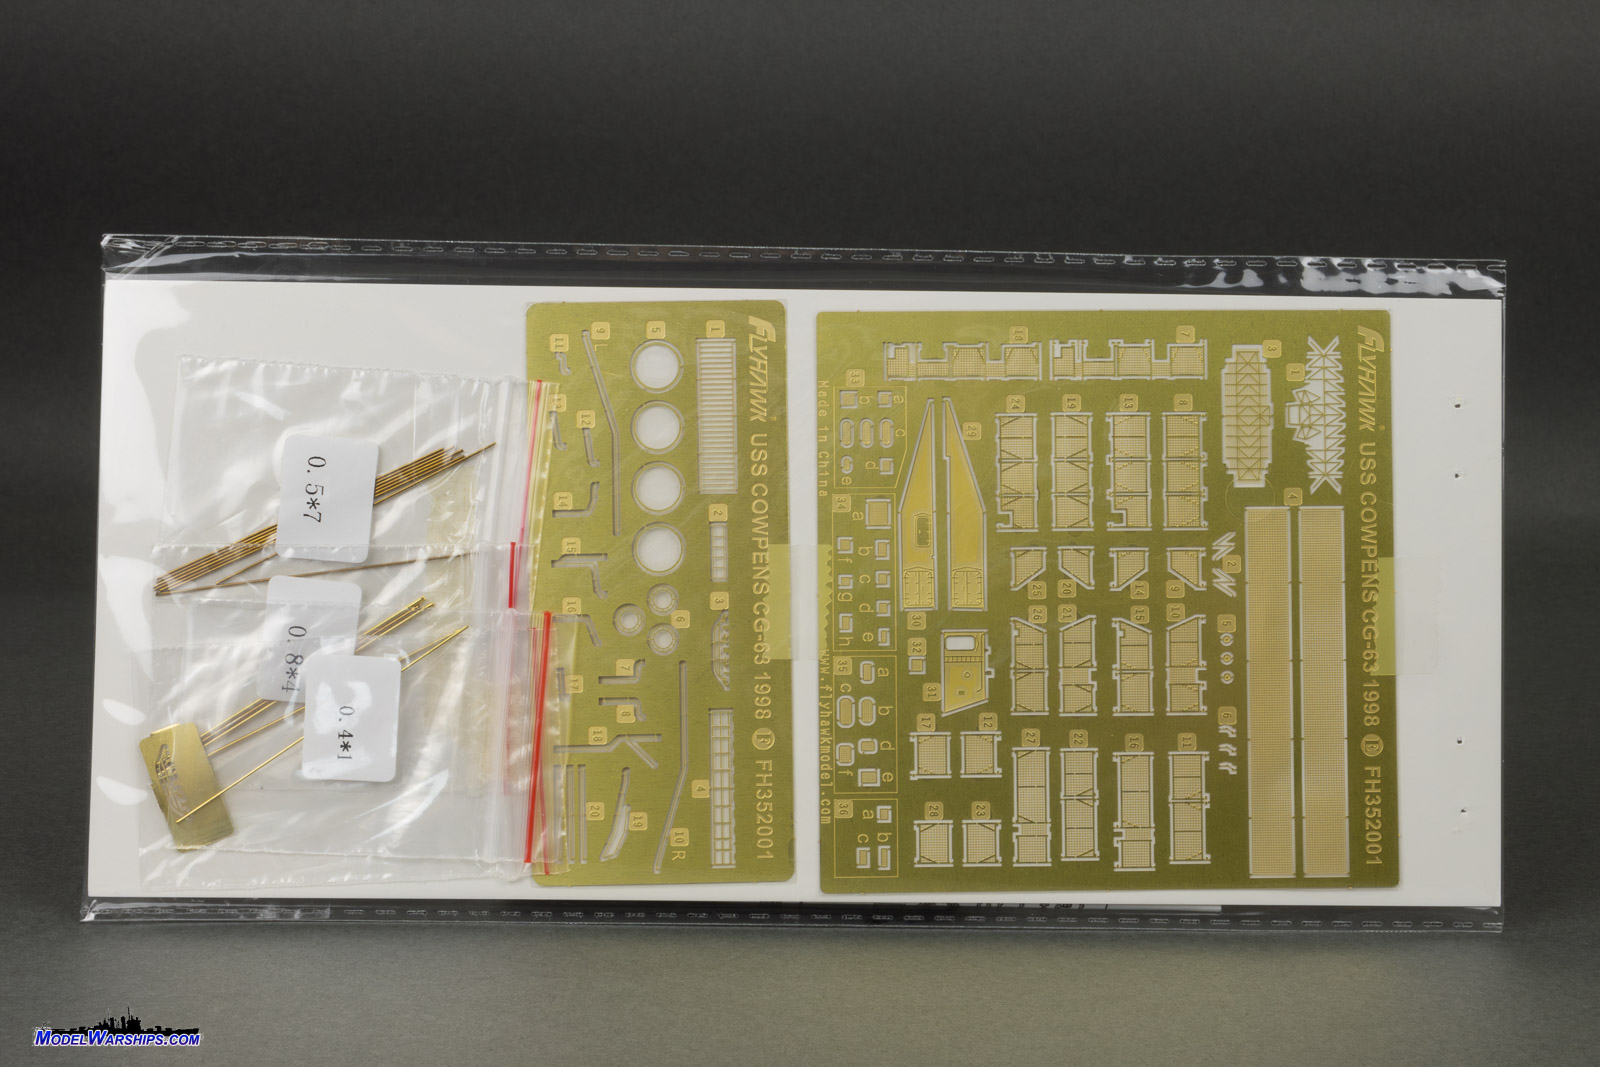
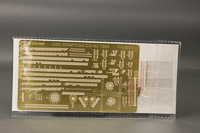
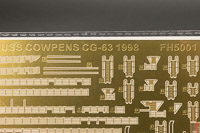
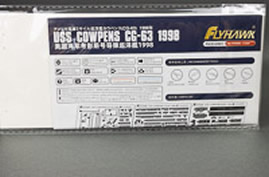
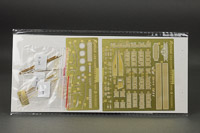
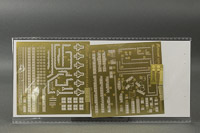
| PHOTOETCHED BRASS |
| The brass set contains custom-sized railings for the main
deck and fantail... but that's it. The deluxe set included with this boxing
has railings for the superstructure, but I assume those buying the standard
version of this kit will only get this one PE sheet. A very odd omission.
Other details include the platforms for the missile illuminators, with
their attached railings, inclined ladders with handrails, along with main
and tail rotors for the Seahawks. The brass is finely etched and feels
sturdy enough.
Also included are two turned-brass gun barrels for the MK 45 5" mounts,
and a length of brass chain. |
 |
 |
 |
 |
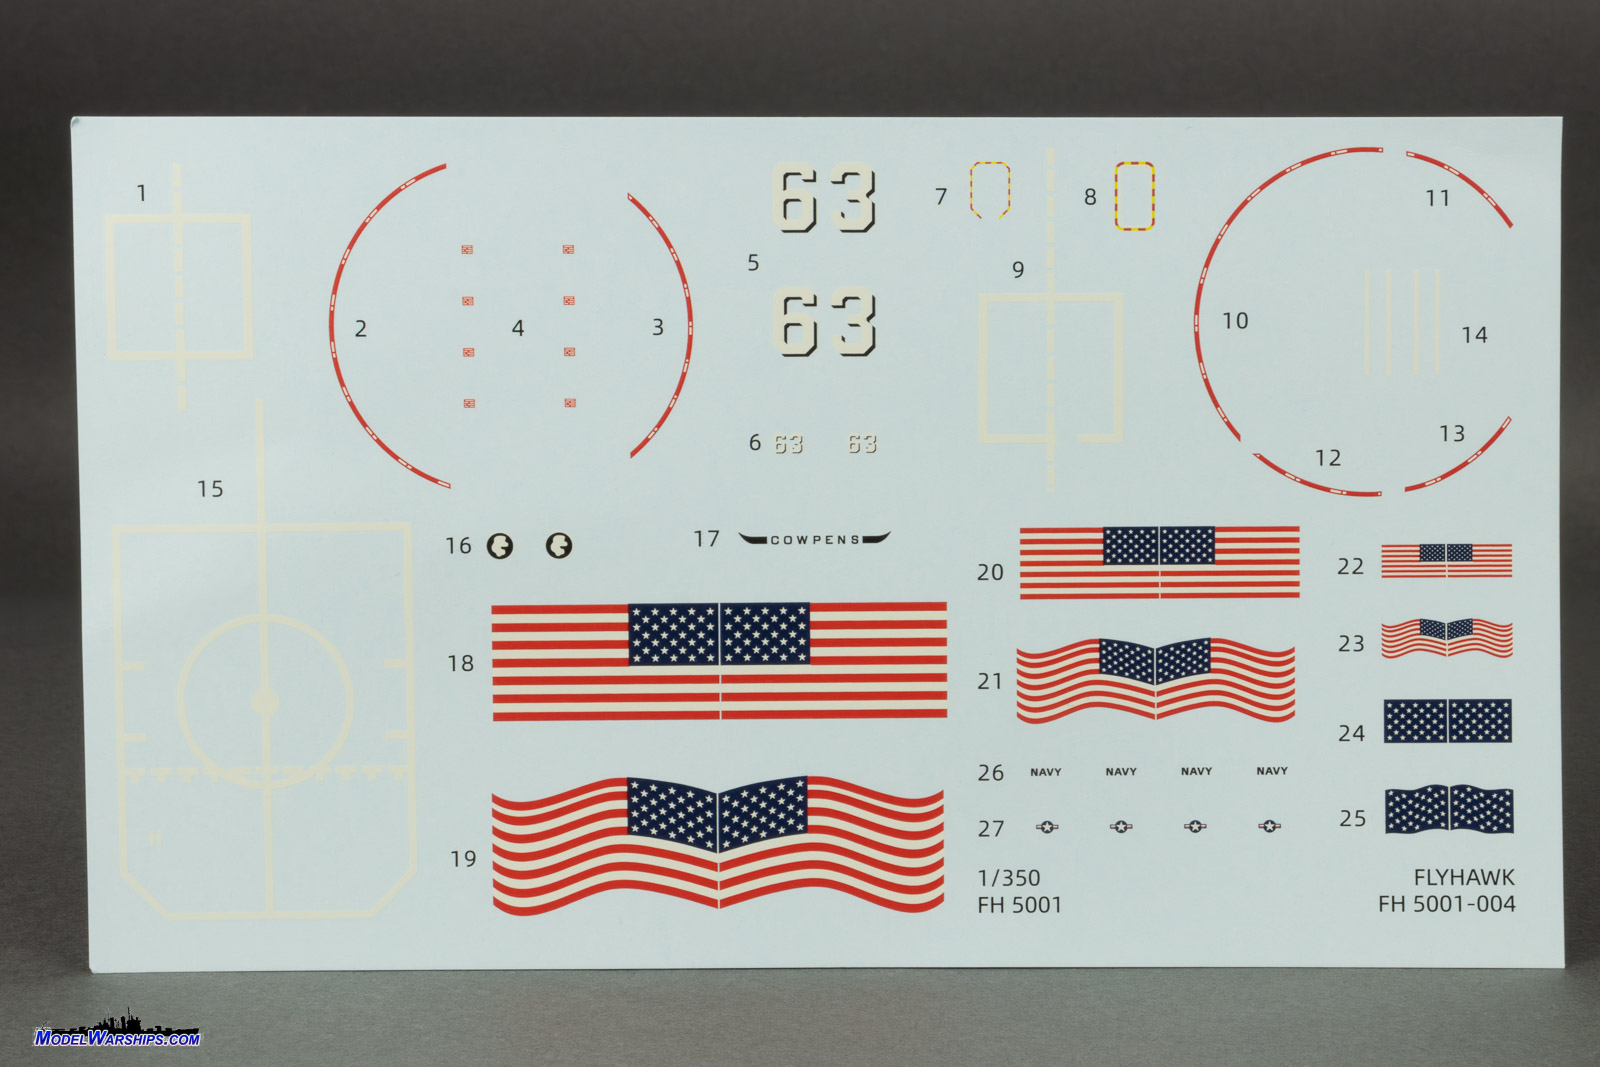
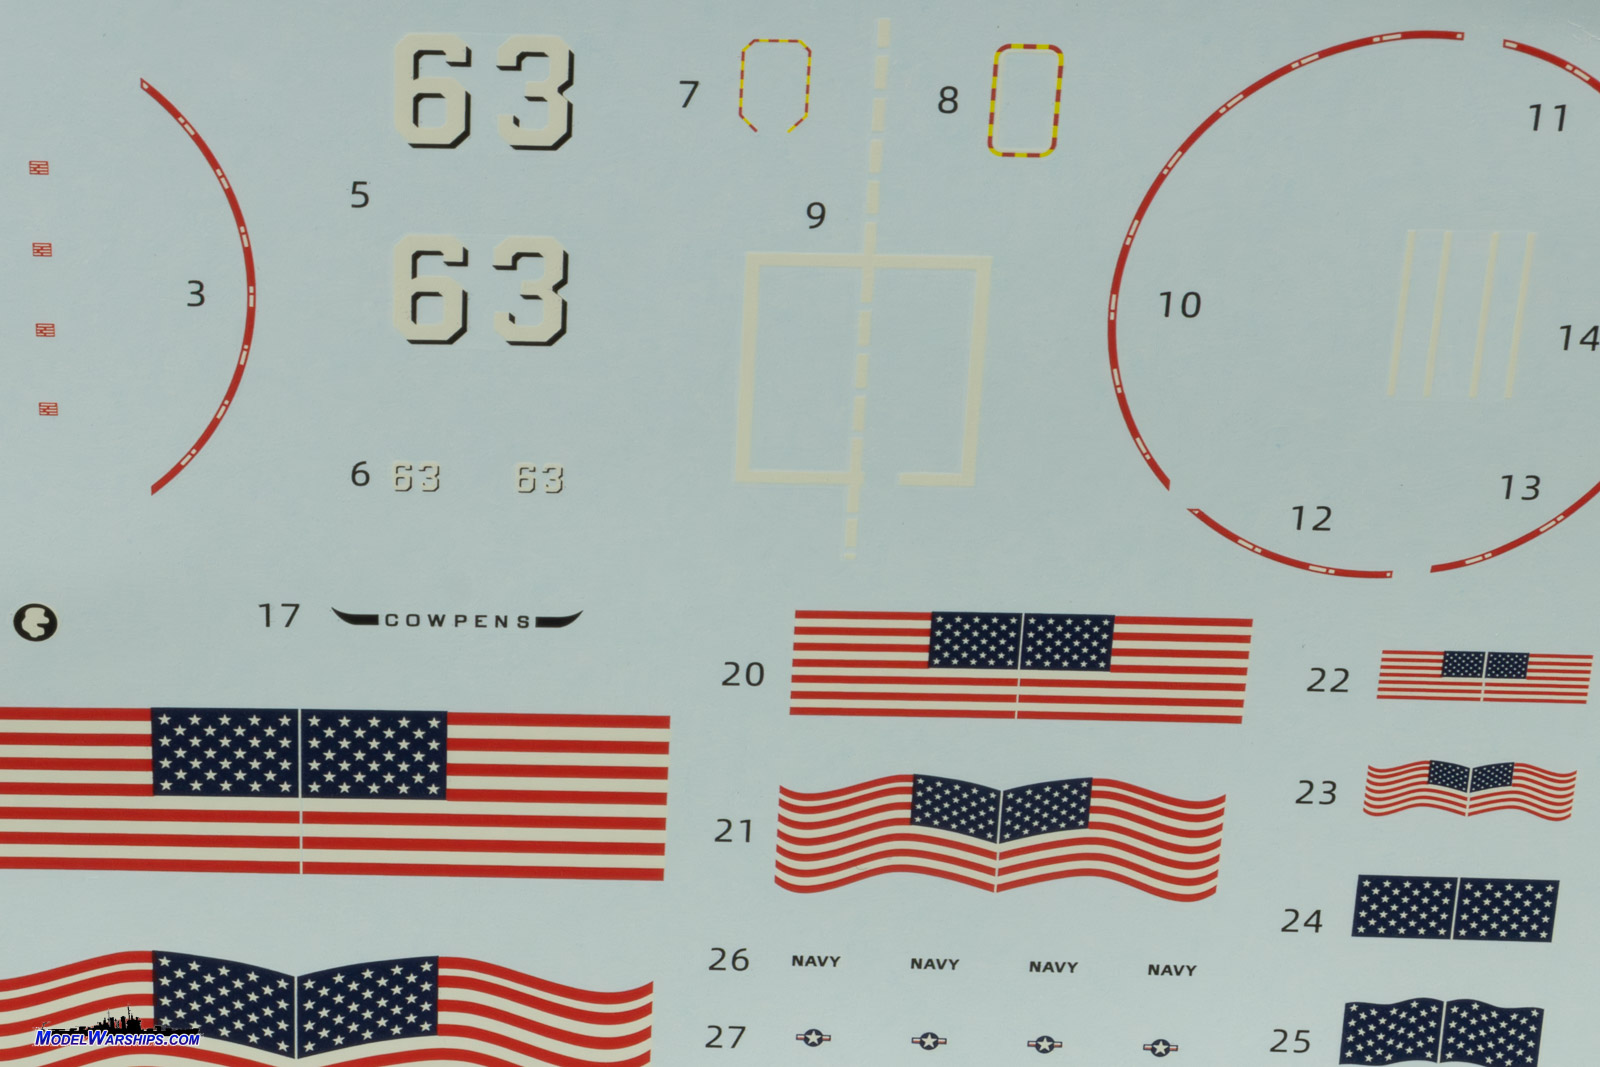
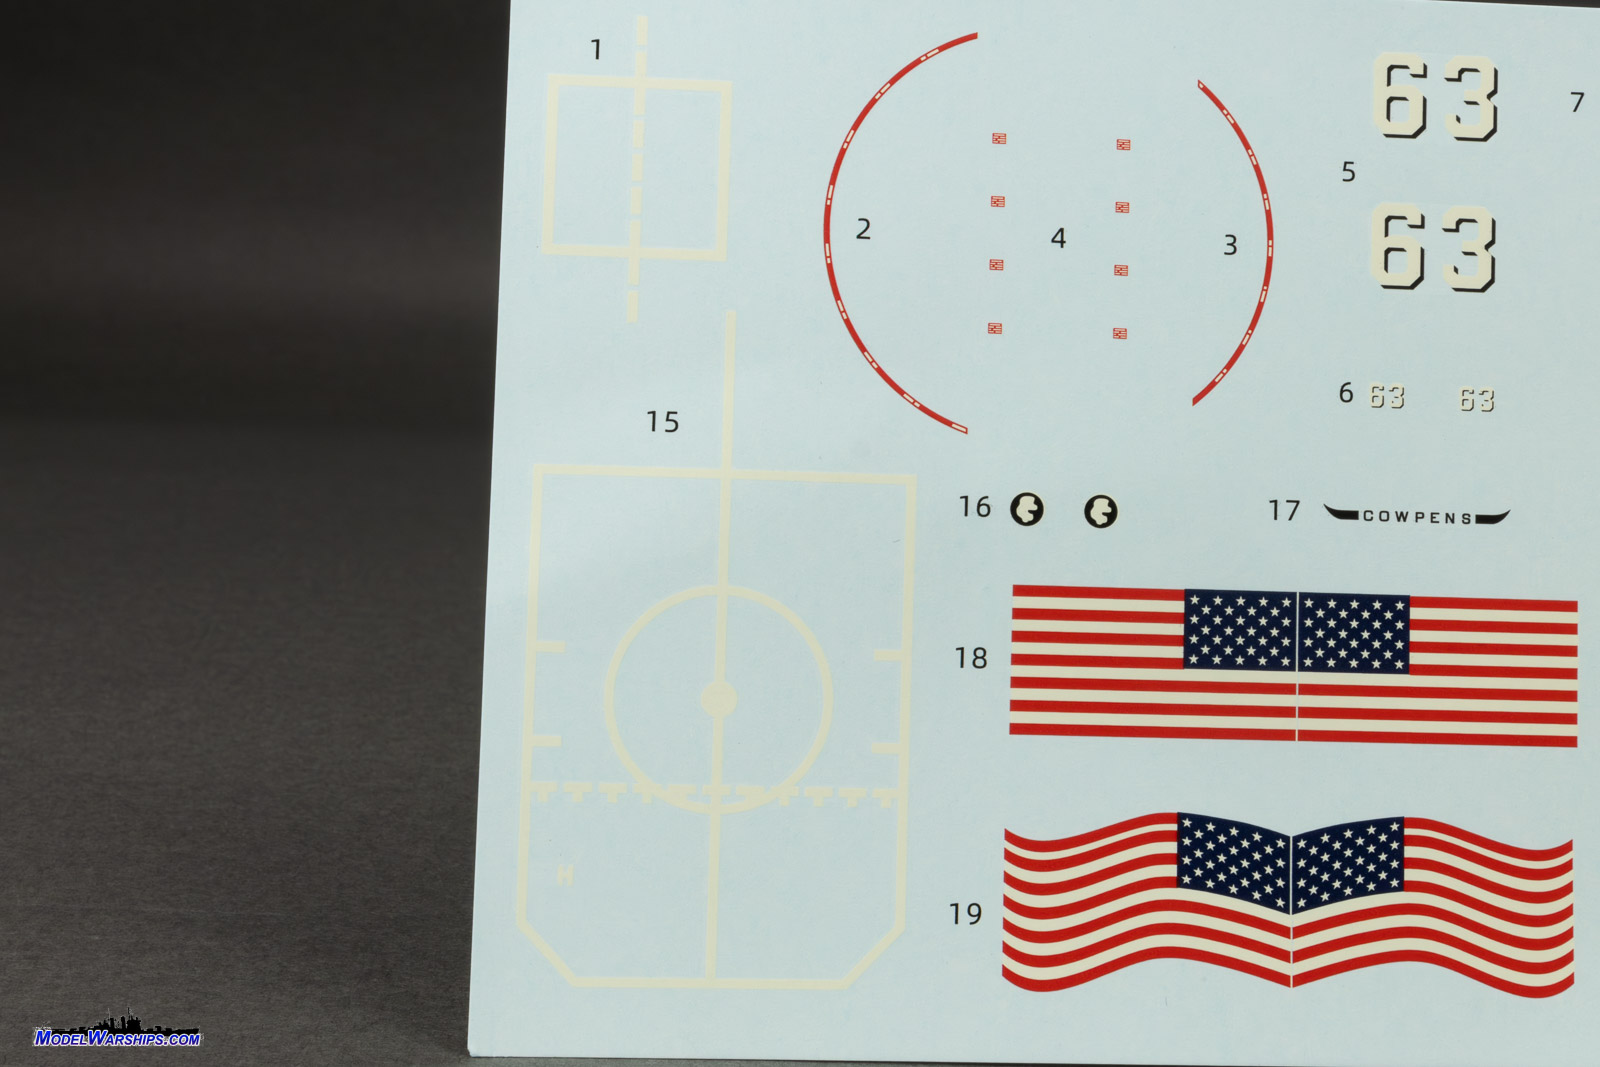
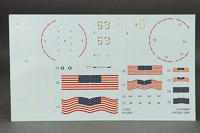
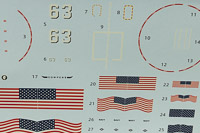
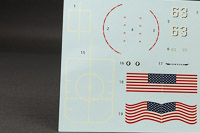
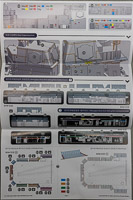
| DECALS |
| A decal sheet includes everything needed to
add markings to Cowpens: gun traverse warning circles, hull numbers,
placards and white deck striping. Also included are three different sizes
of national insignia, two of each size, one straight and one wavy. The
ship's name on the stern includes Cowpens' trademark steer horns
on either side. Markings for the two Seahawk helicopters are also included,
but the insignia have a red bar; if I'm not mistaken, for the 1998 time
frame, they should be a monotone dark gray.
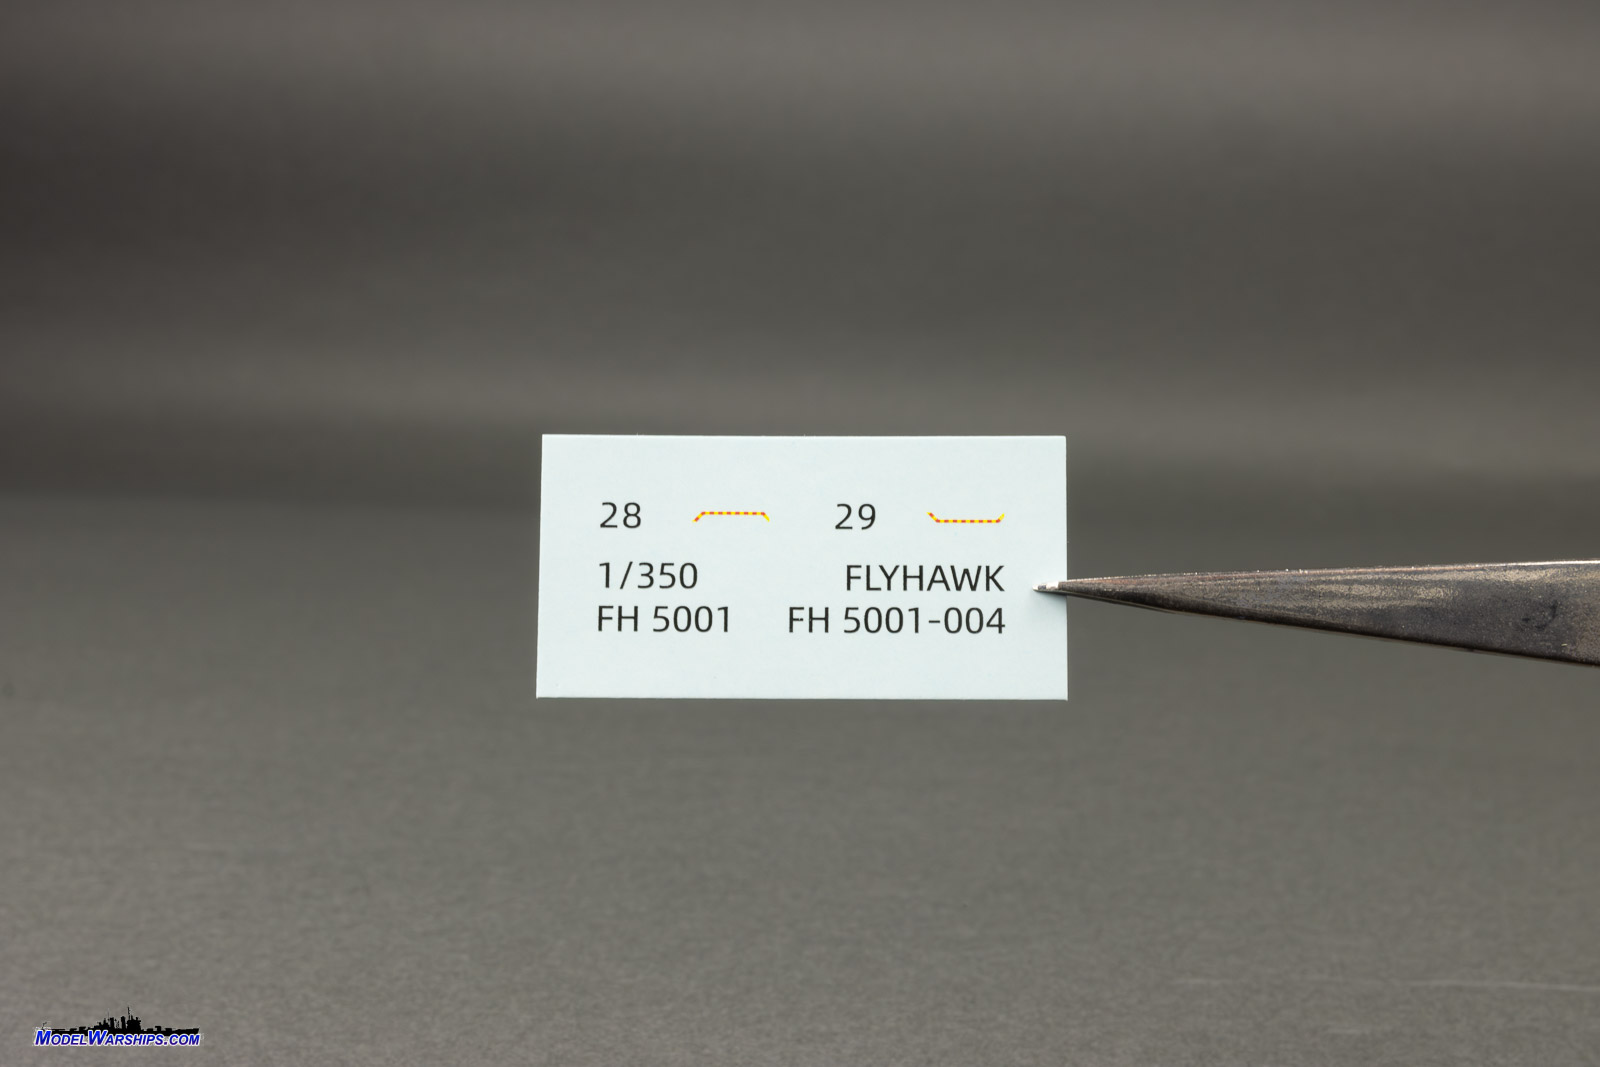
There's also a smaller additional sheet with two small warning stripes
that were apparently missed on the main decal sheet. |
 |
 |
 |
 |
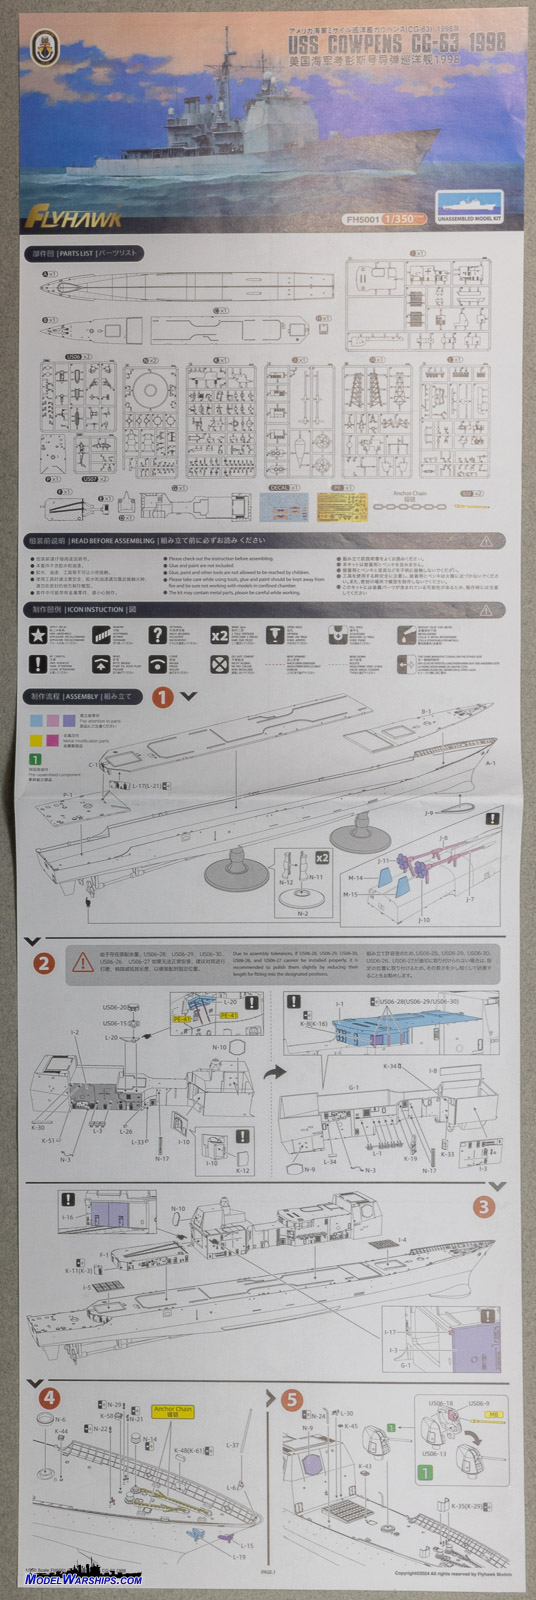
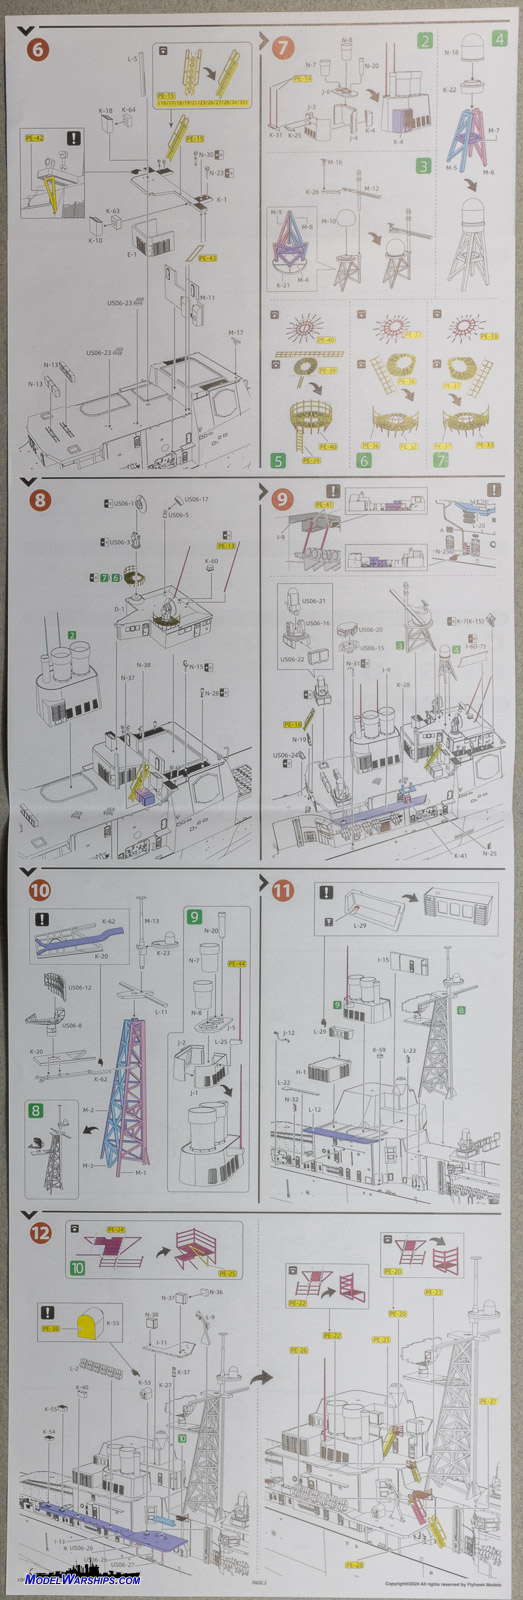
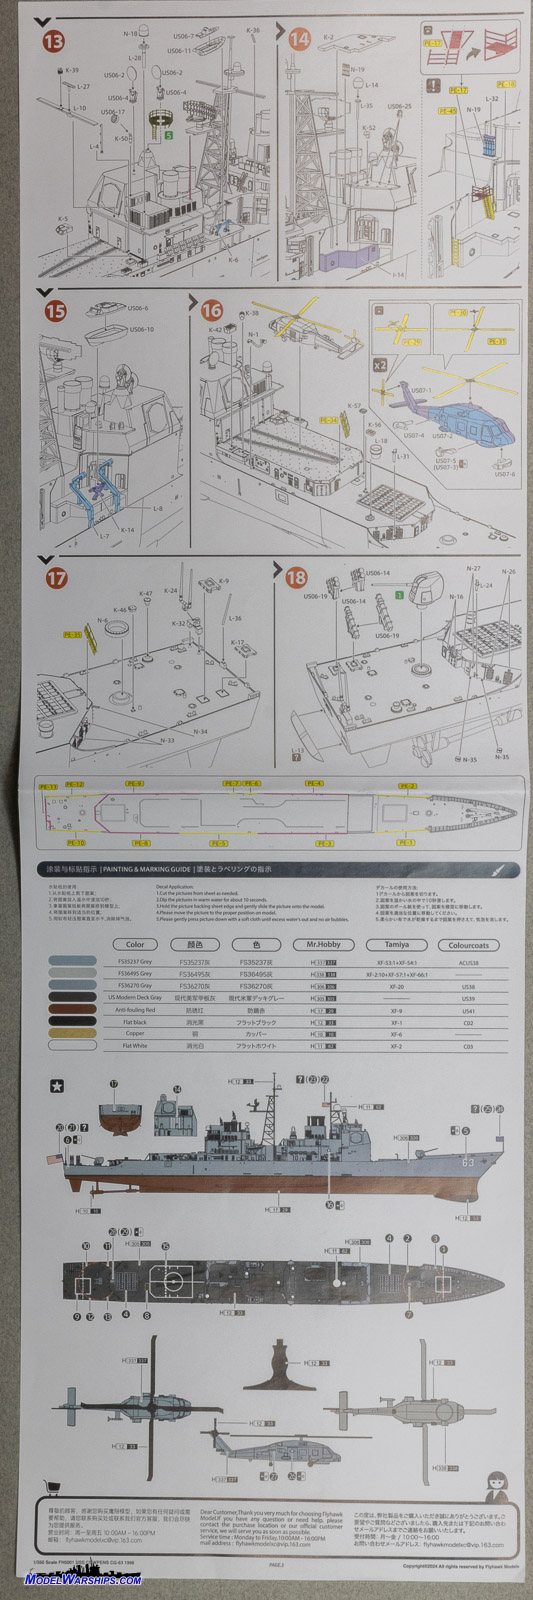
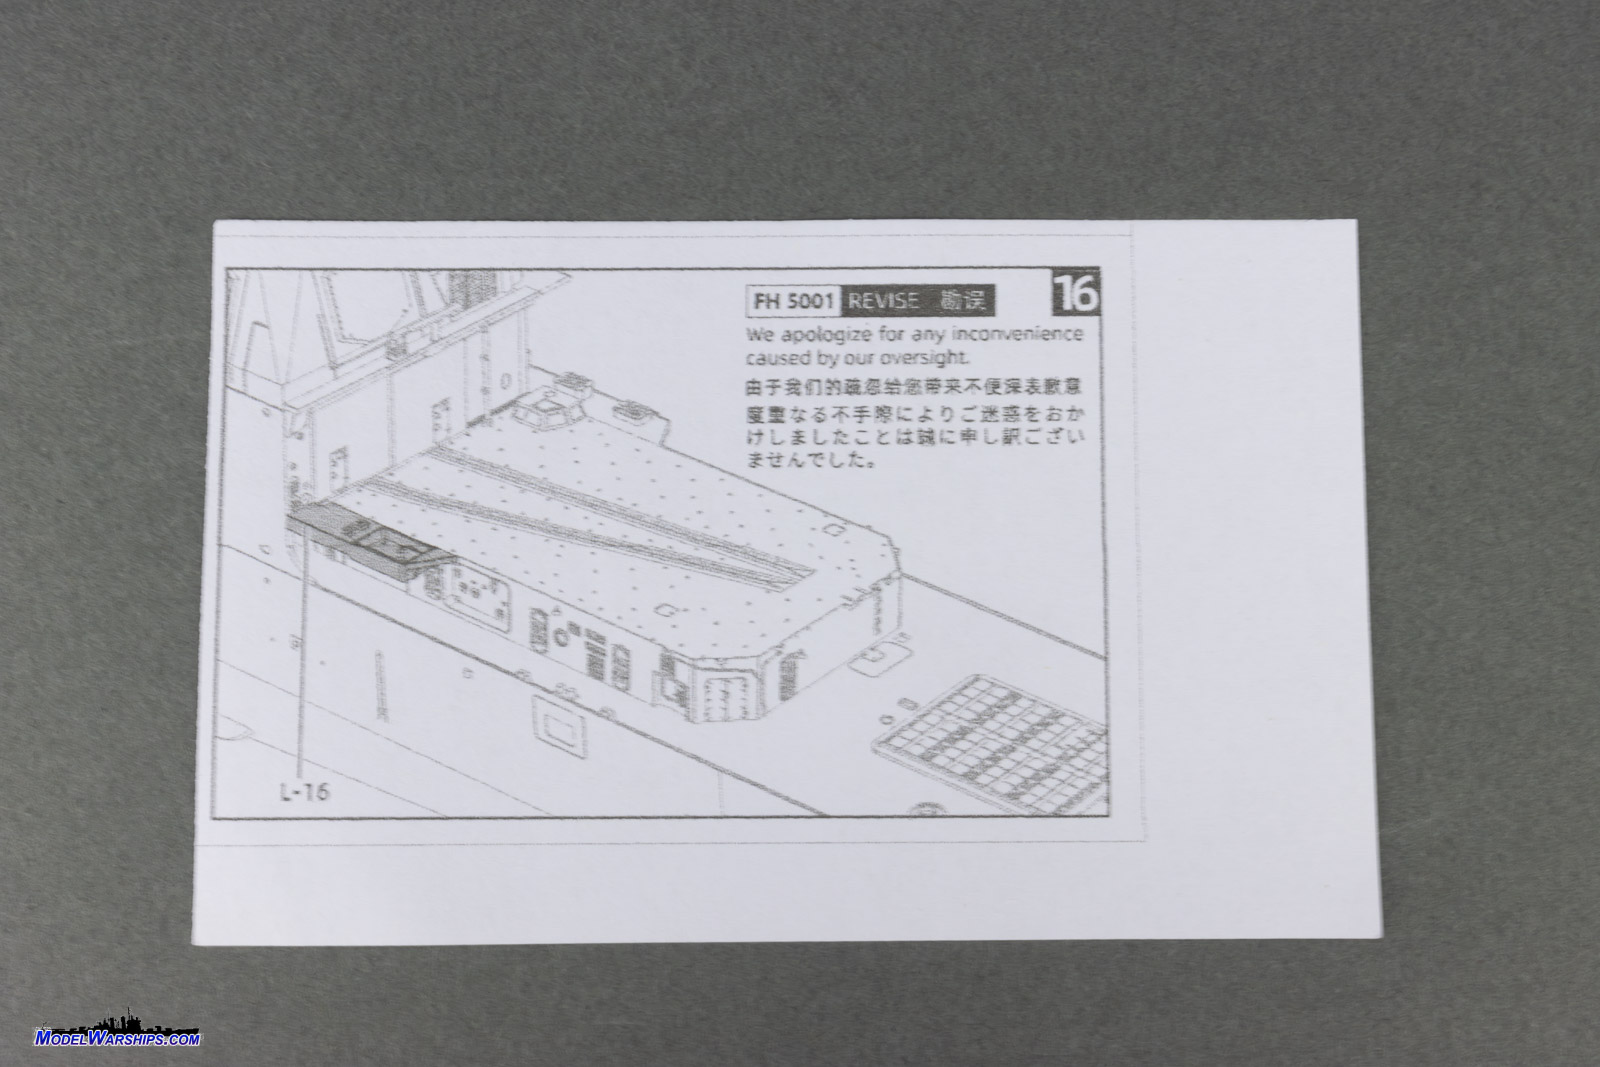
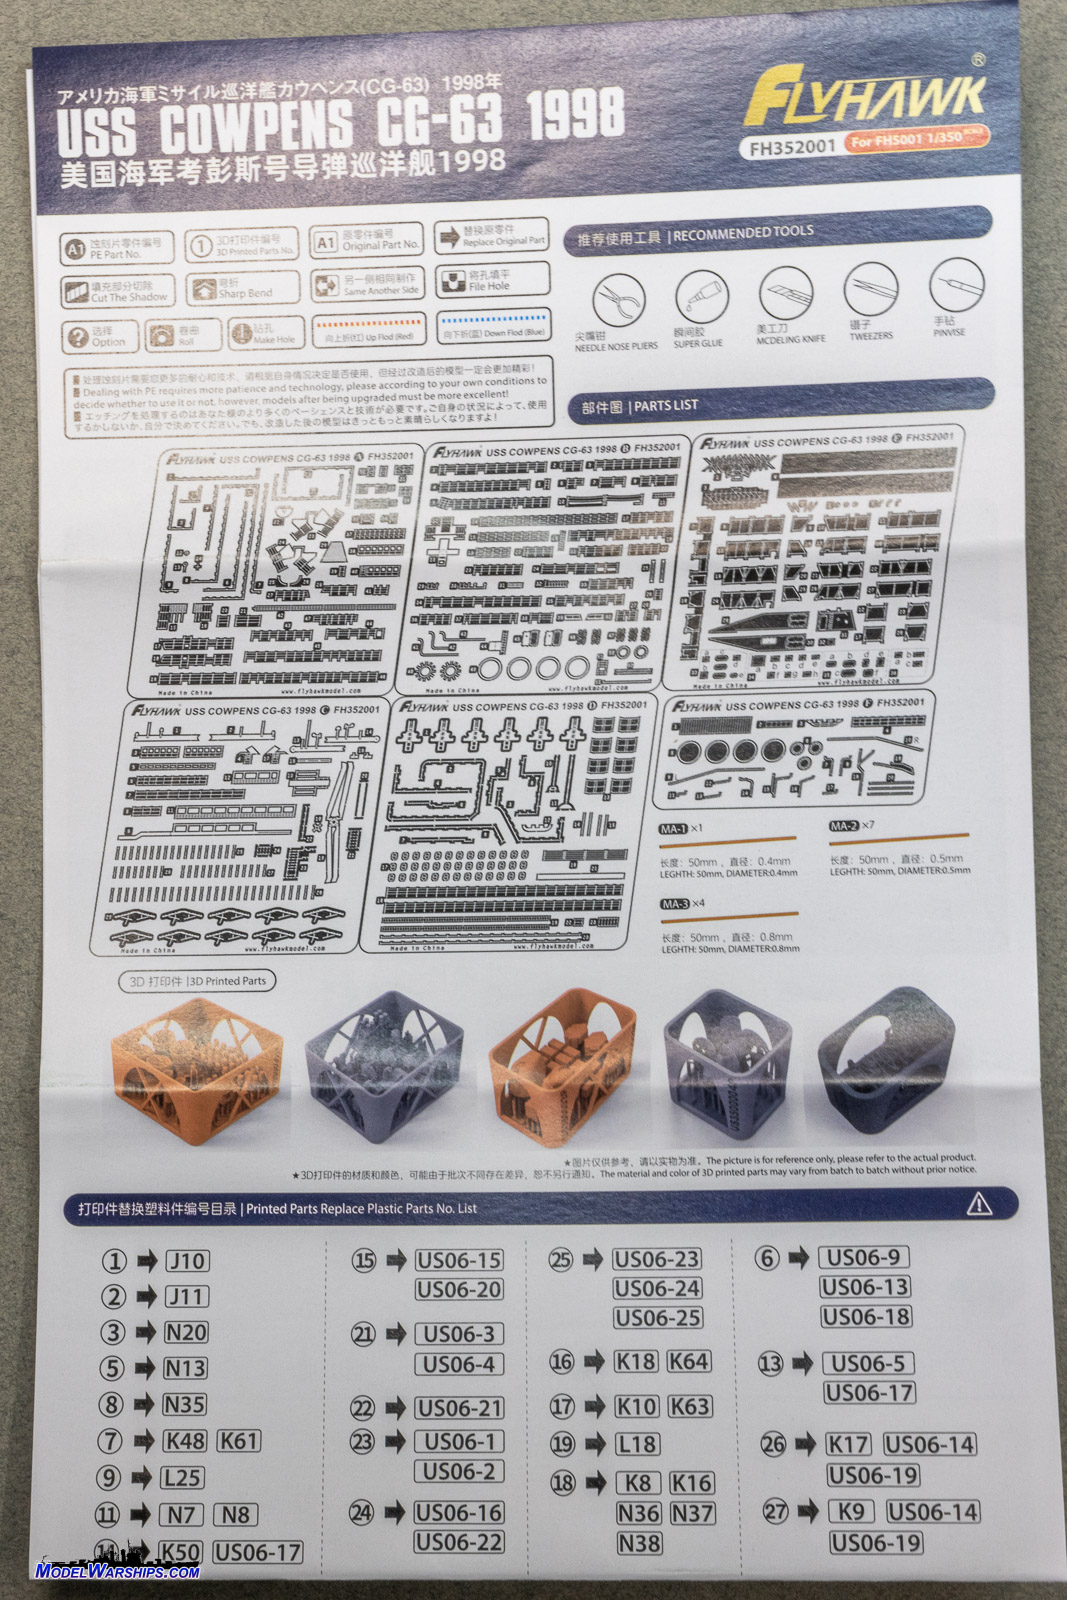
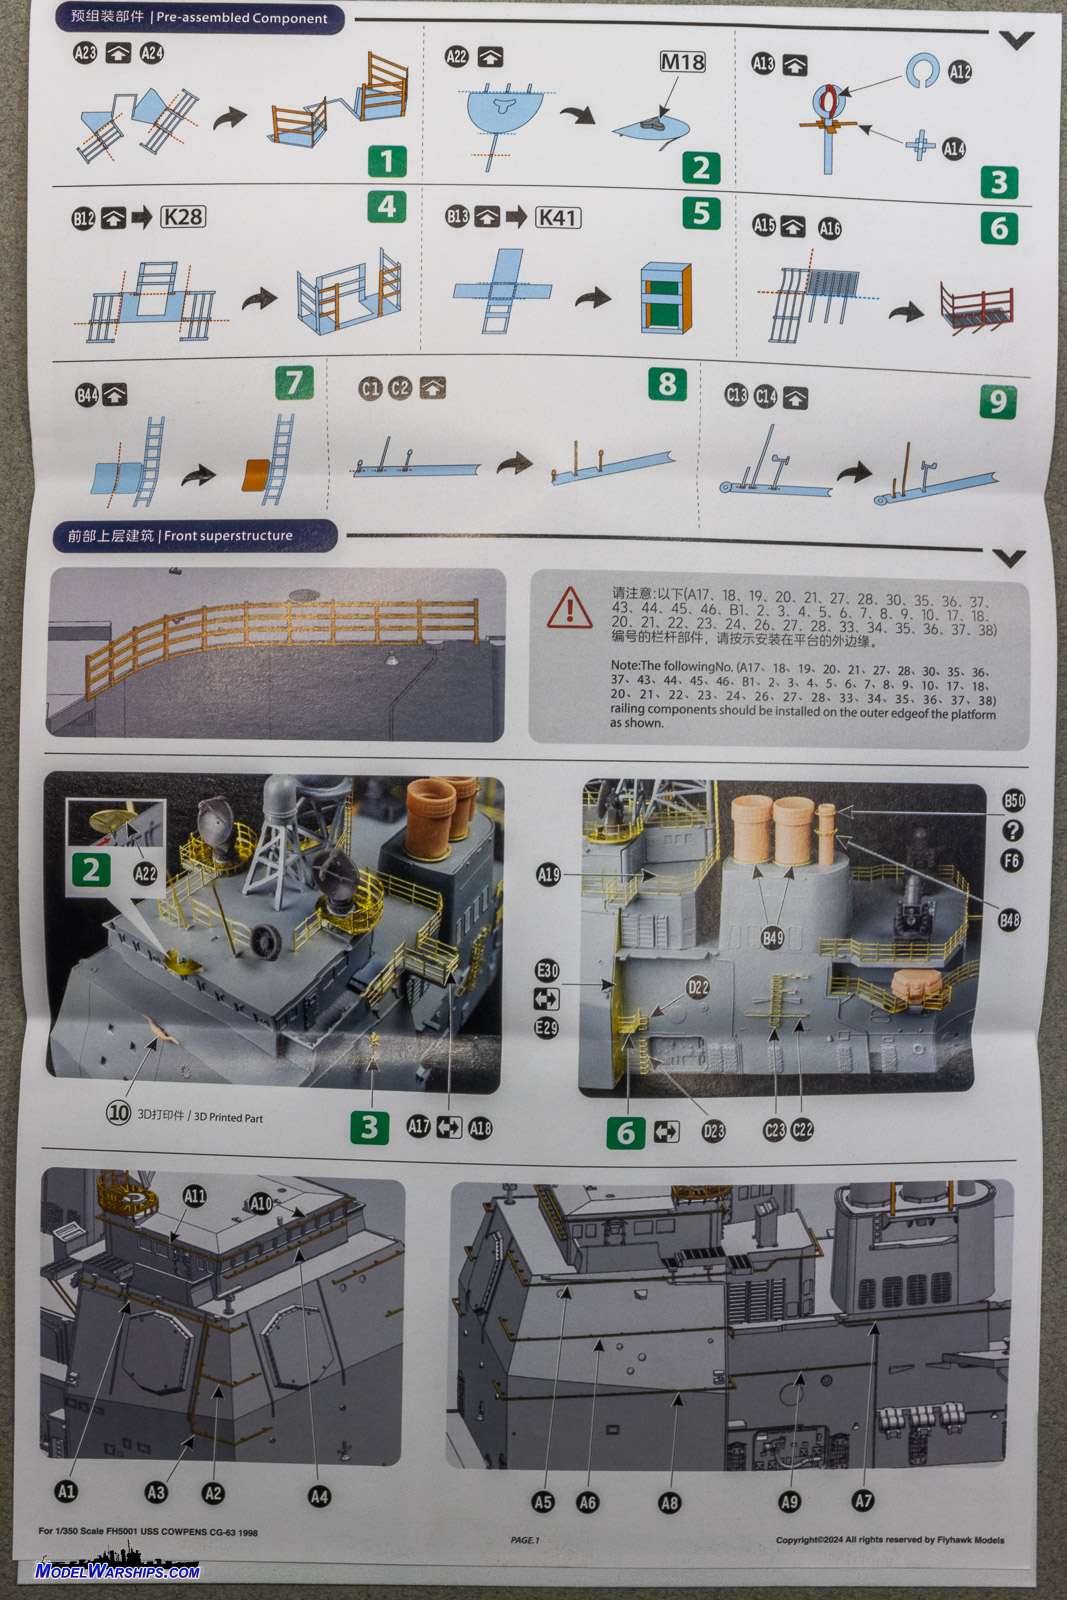
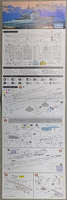
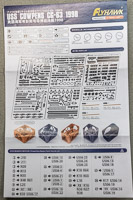
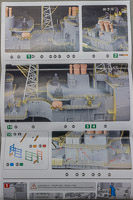
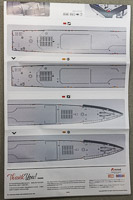
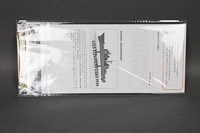
| INSTRUCTIONS |
| The instructions are printed on two full color,
glossy sheets. Seven inches wide by 22 inches long, they have a parts inventory
for everything in the basic kit. 18 steps walk the modeler through the
stages of construction, beginning with installing the decks and adding
the superstructures, and then going into adding details. All steps are
show in exploded-view close-ups, with styrene and brass parts called out
clearly. Step 2 has a note about parts possibly being too tight of a tolerance
and that sanding may be required. I like that touch, as it shows someone
at the company has likely built the kit. There's also a small errata sheet
included, calling out a change for part L-16.
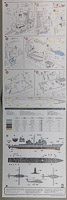
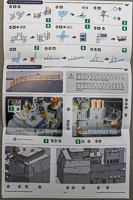
The final page has a color profile and plan of the ship and helicopters.
Decal placement is shown, and colors are given in Federal Standard where
applicable, and recommend paints from five different paint lines are included,
two of which that look to be Chinese, so I can't read them, followed by
Mr. Hobby, Tamiya, and Colourcoats. |
 |
 |
 |
 |
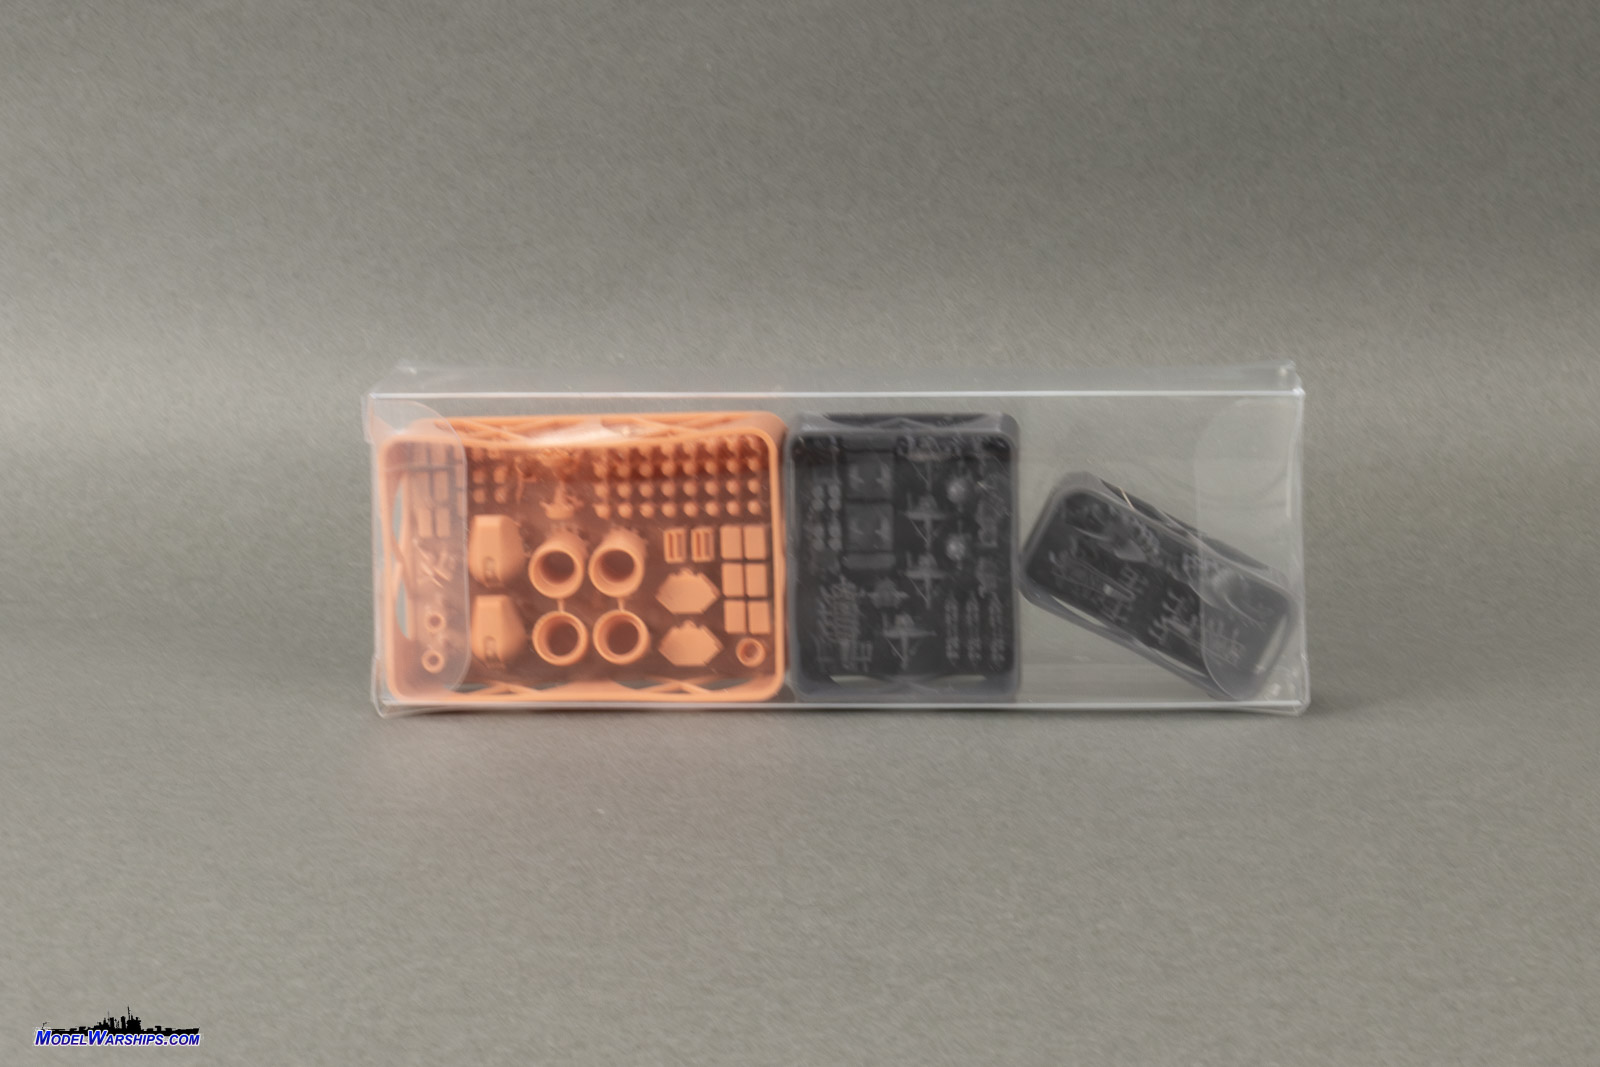
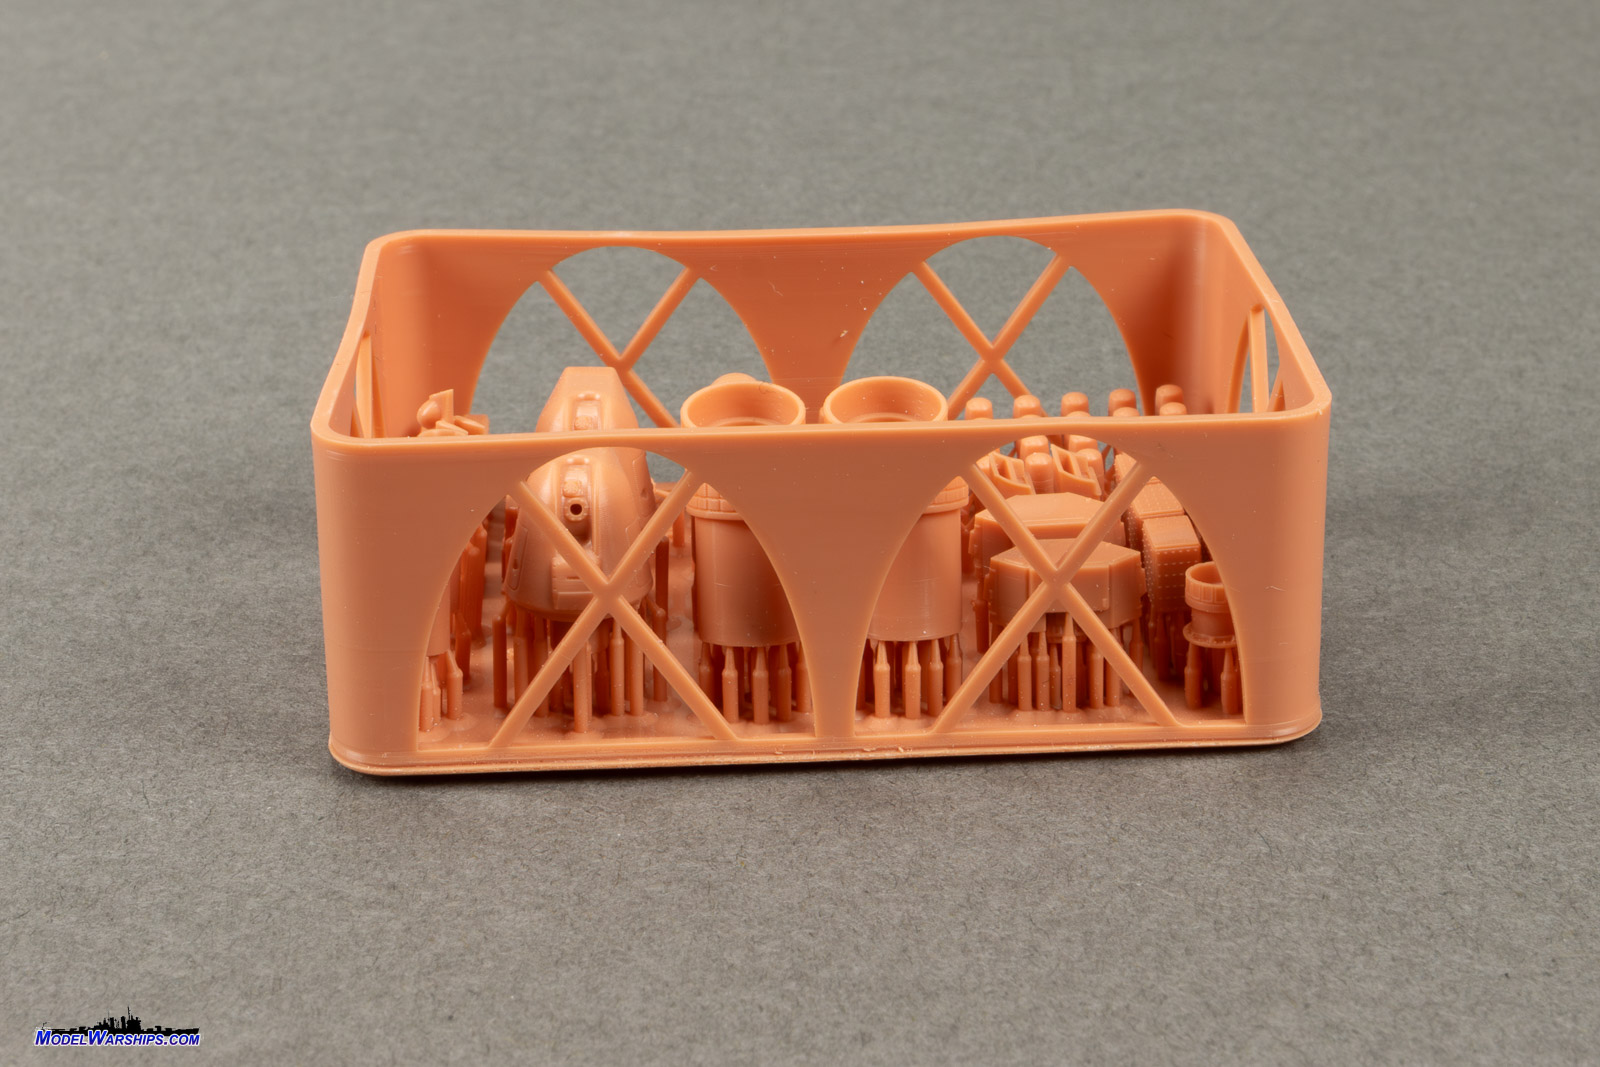
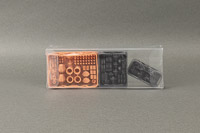
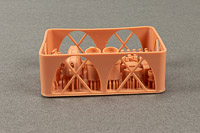
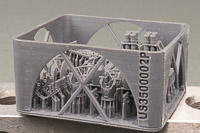
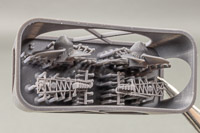
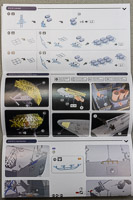
| DELUXE KIT: 3D PRINTED
COMPONENTS |
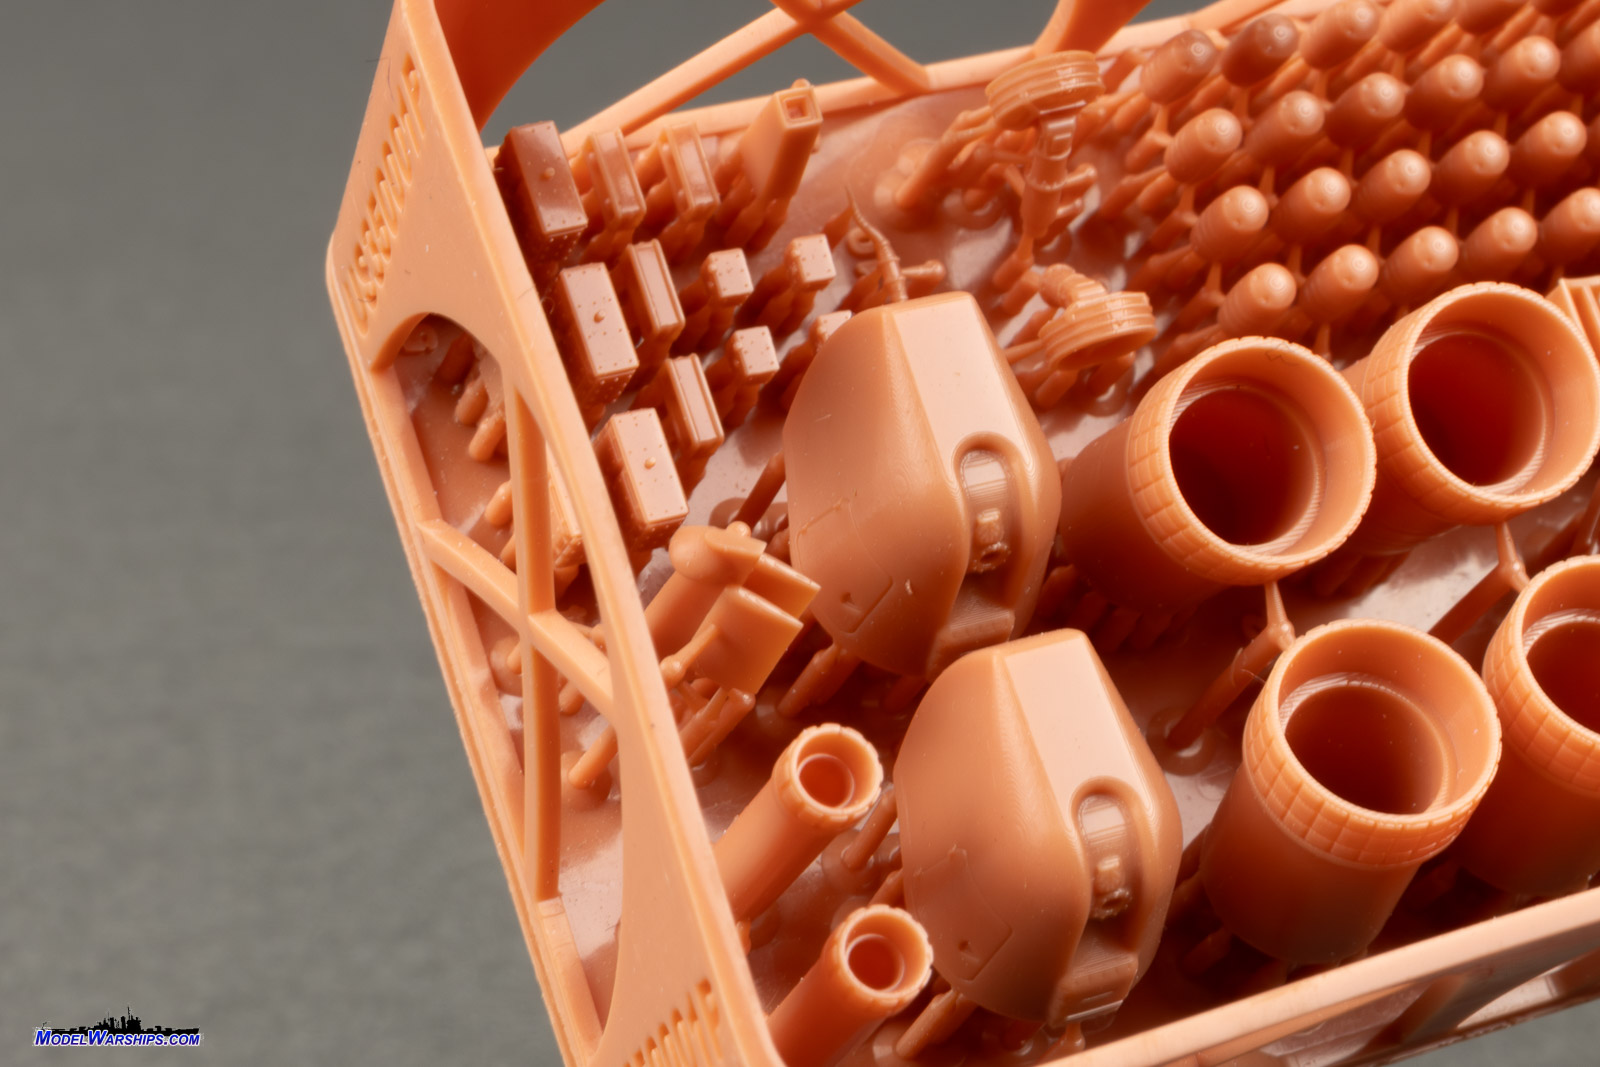
| Now we're onto the parts that make this the Deluxe version
of the USS Cowpens kit. First up are the 3D printed components.
There's a lot of stuff here, from one-piece MK 45 gun mounts, stacks, SLQ32,
flag bags, individual life raft canisters, and more.
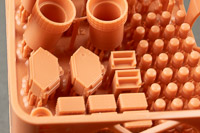
There are three rafts of parts (even though the instructions show five,
smaller rafts, but all the parts appear the same). The first is printed
in orange, which included the gun mounts, stacks, flag bags, life raft
canisters, Satcom antennas, etc. Even the steer horns for above the bridge
are included! The parts in this group are absolutely flawless, with layer
lines only appearing in the trunnions of the gun mounts and on the inside
of the parallel surfaces in the stacks, and even those artifacts aren't
detectable by feel. I don't know what kind of resin they used to print
these things, but I want some of it!
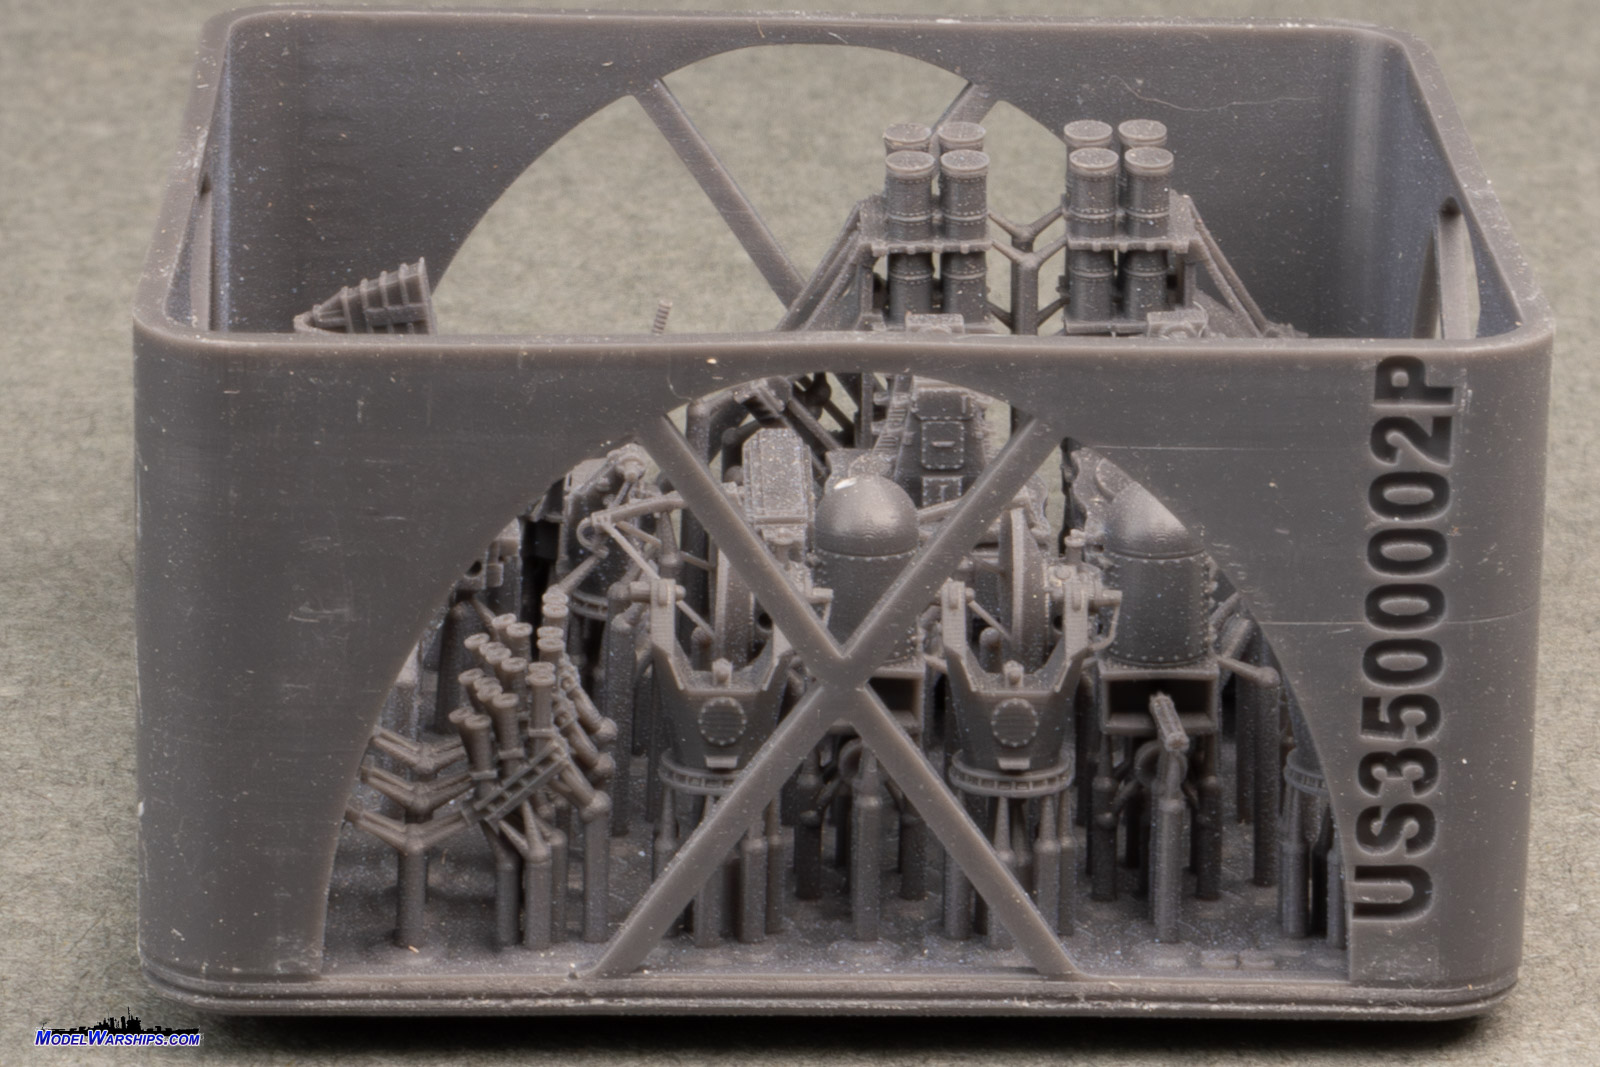
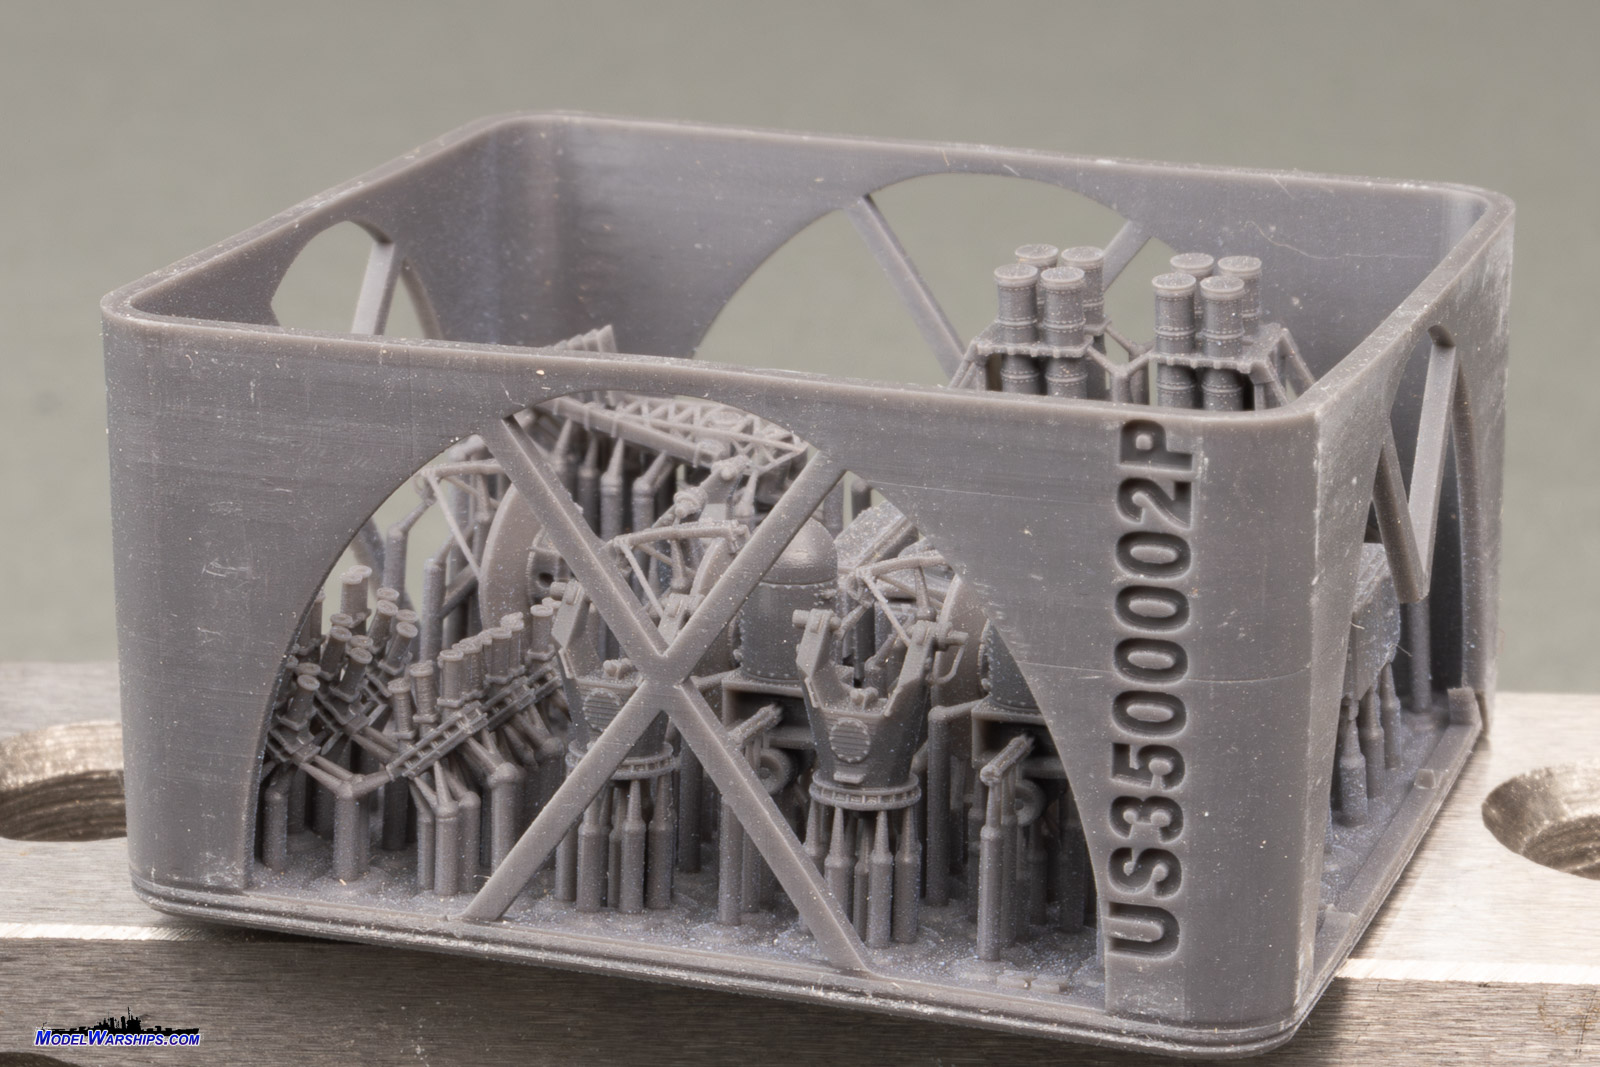
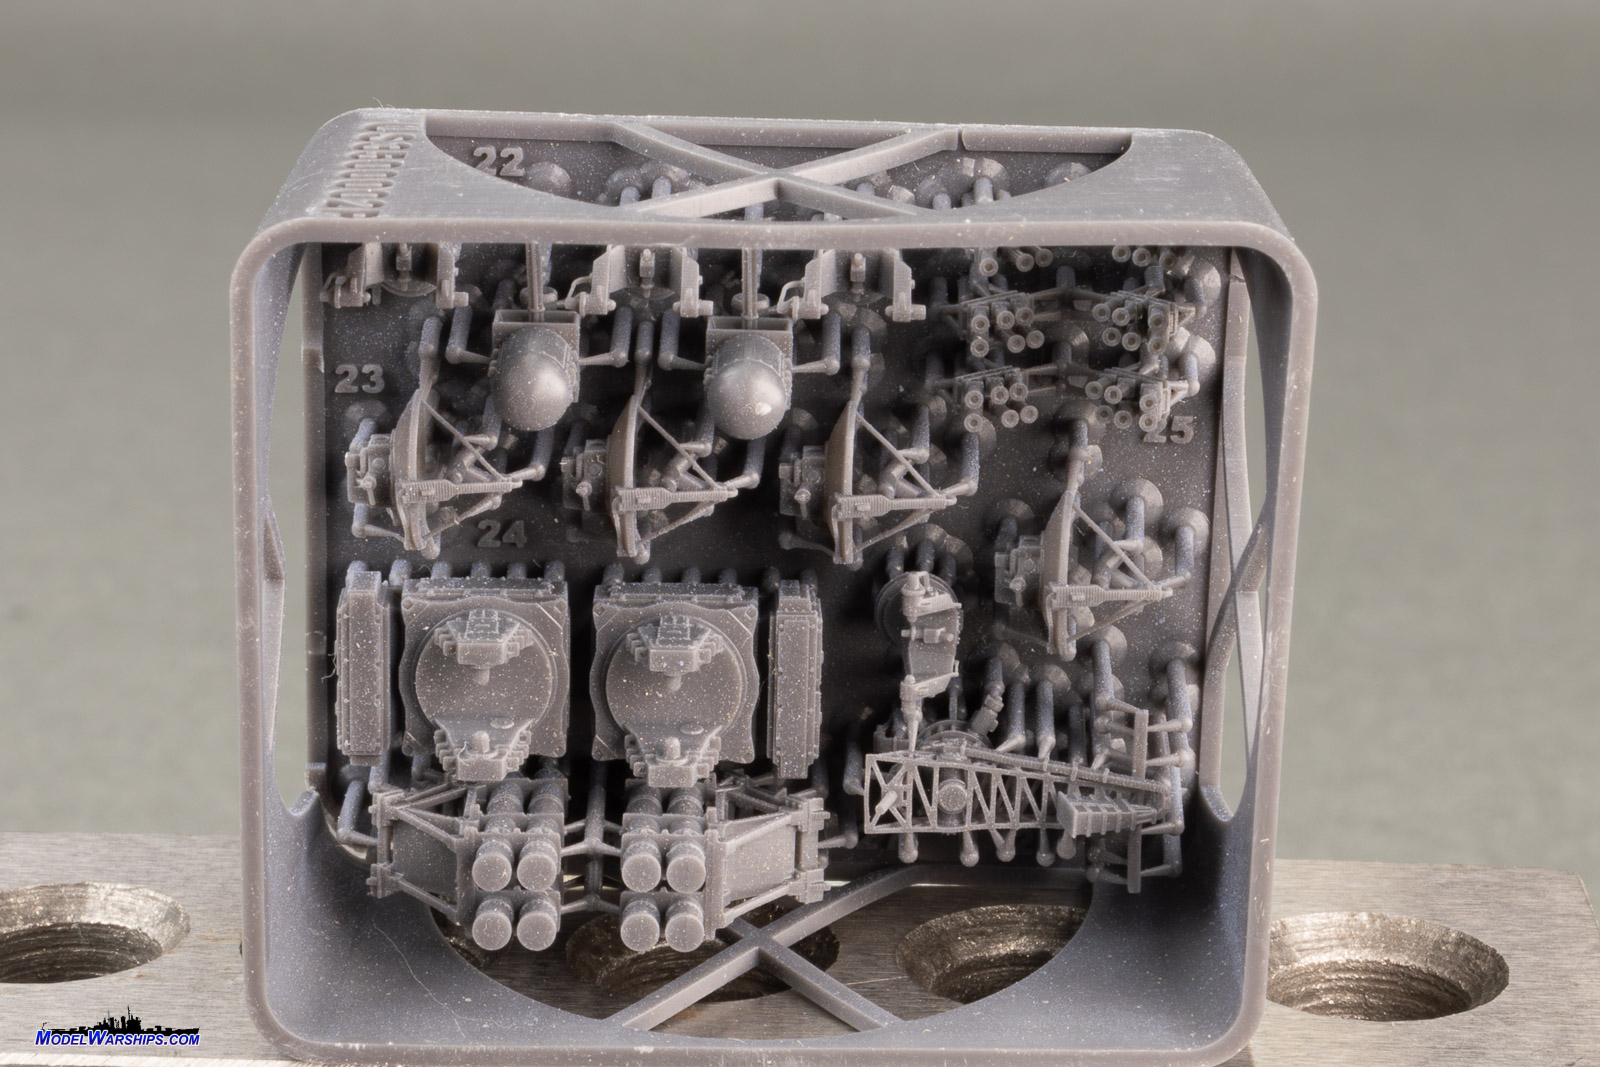
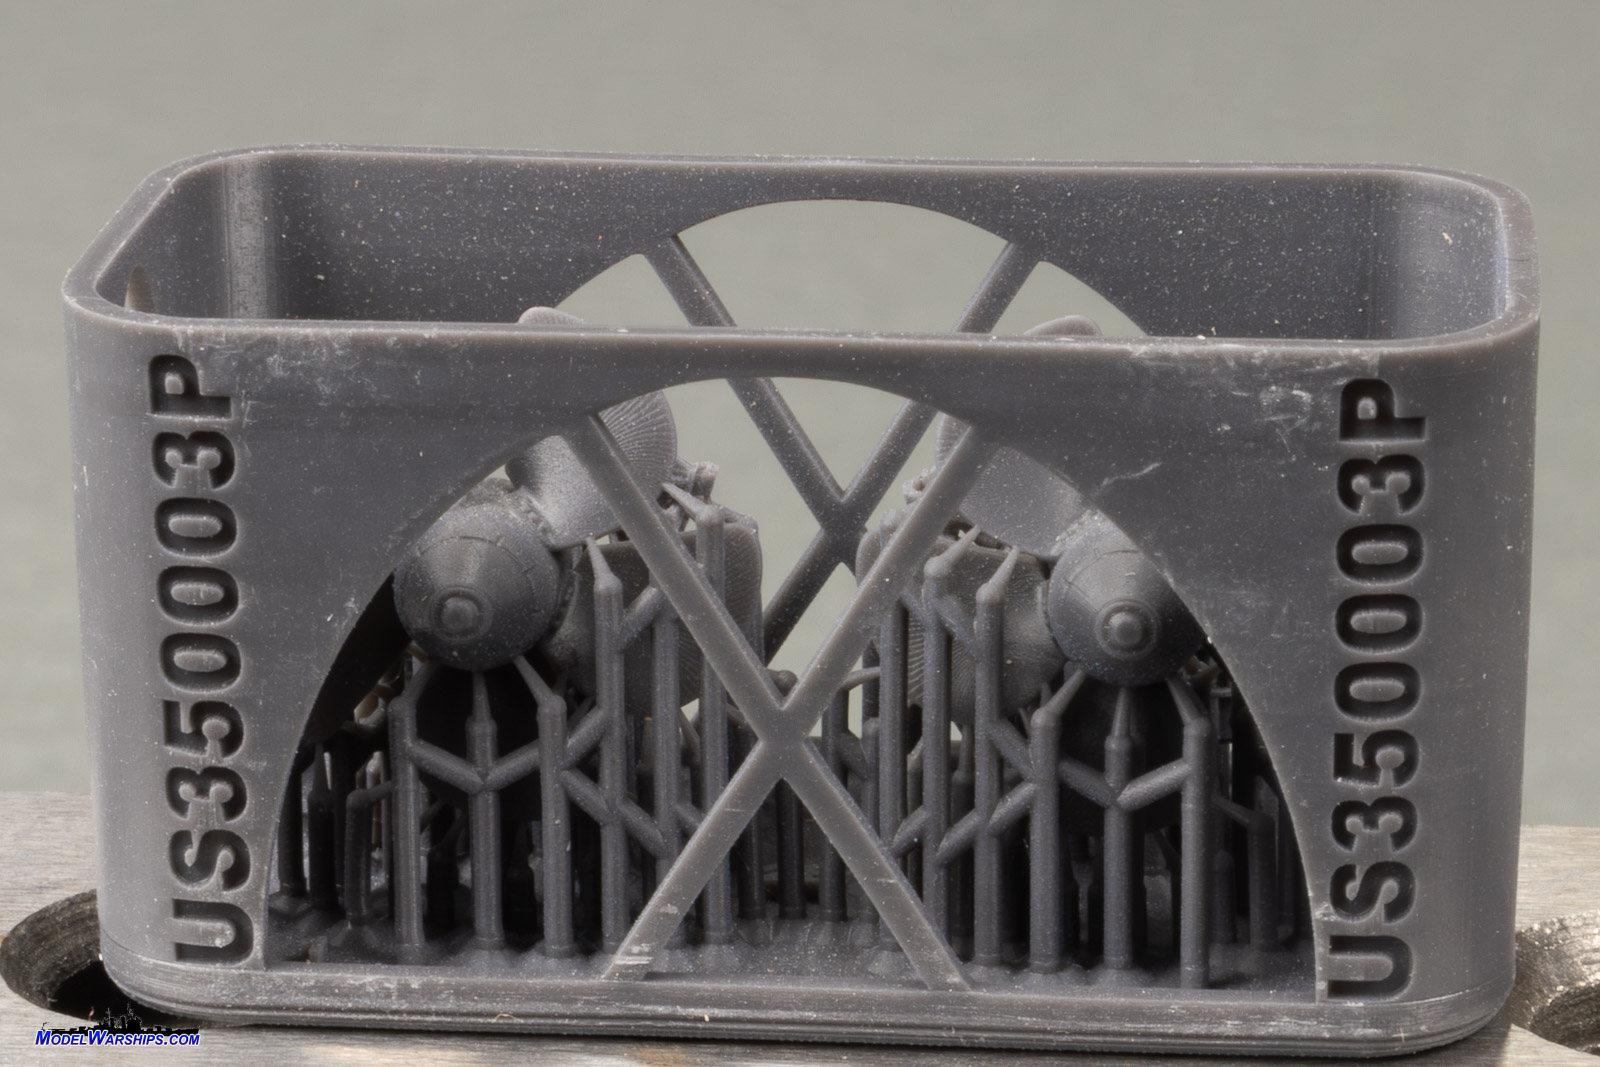
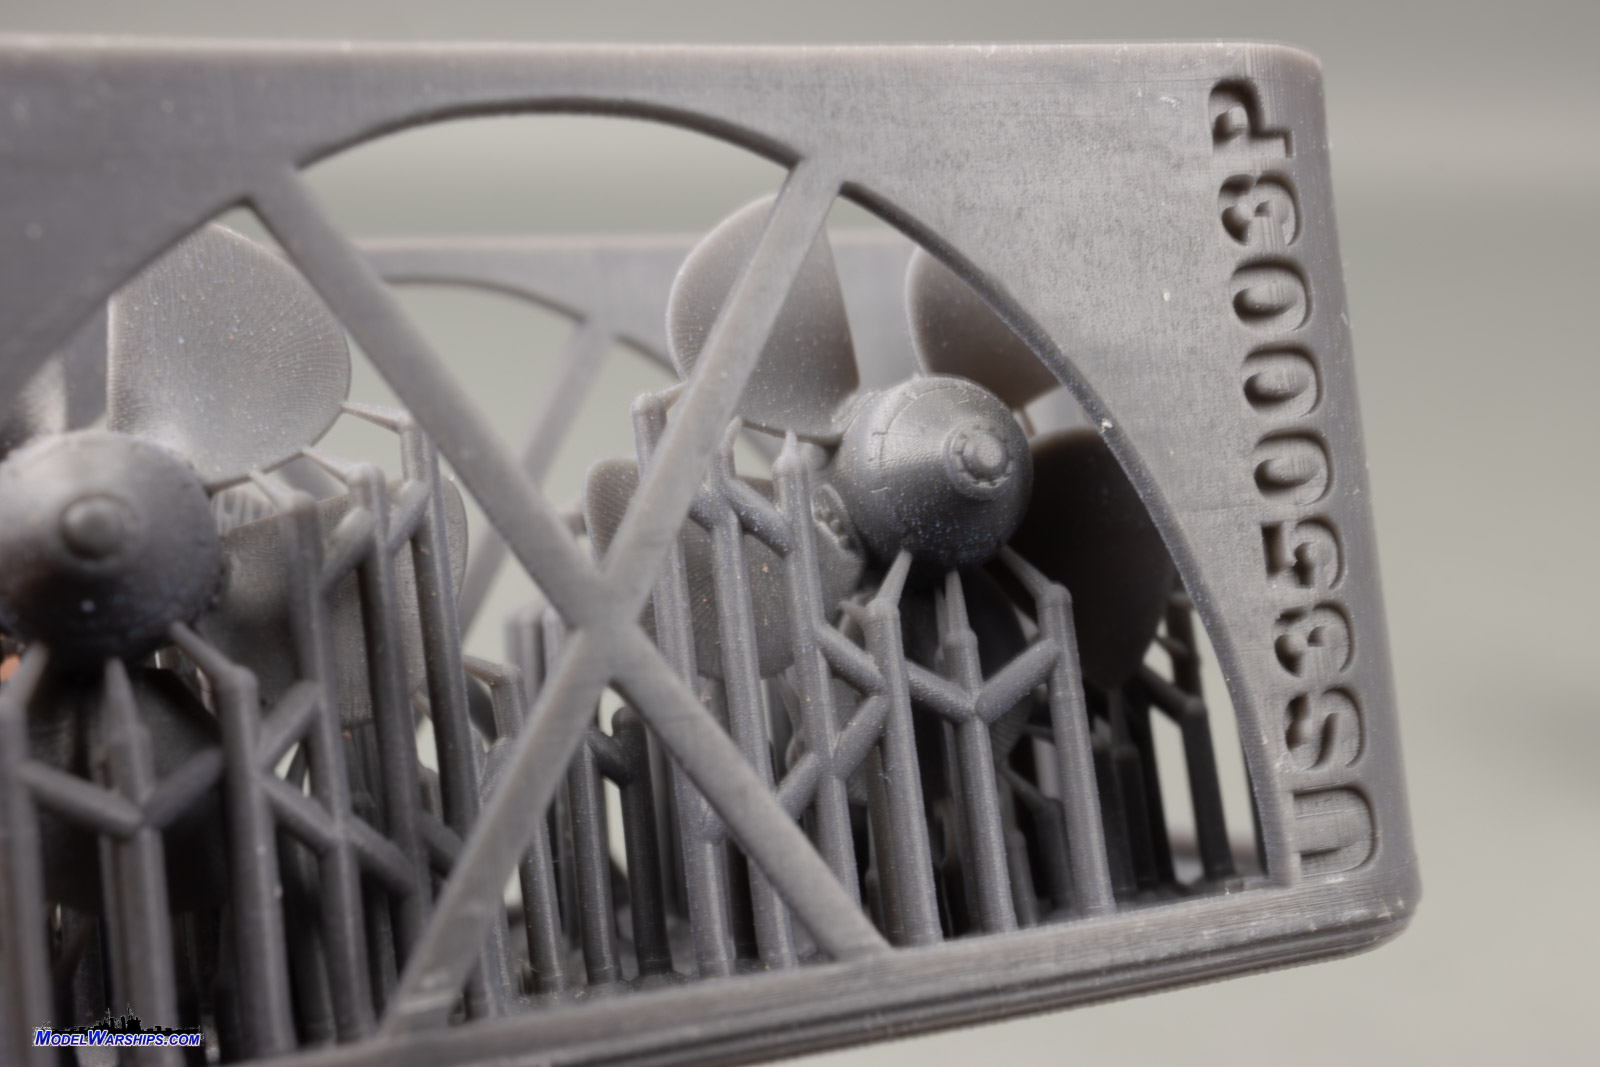
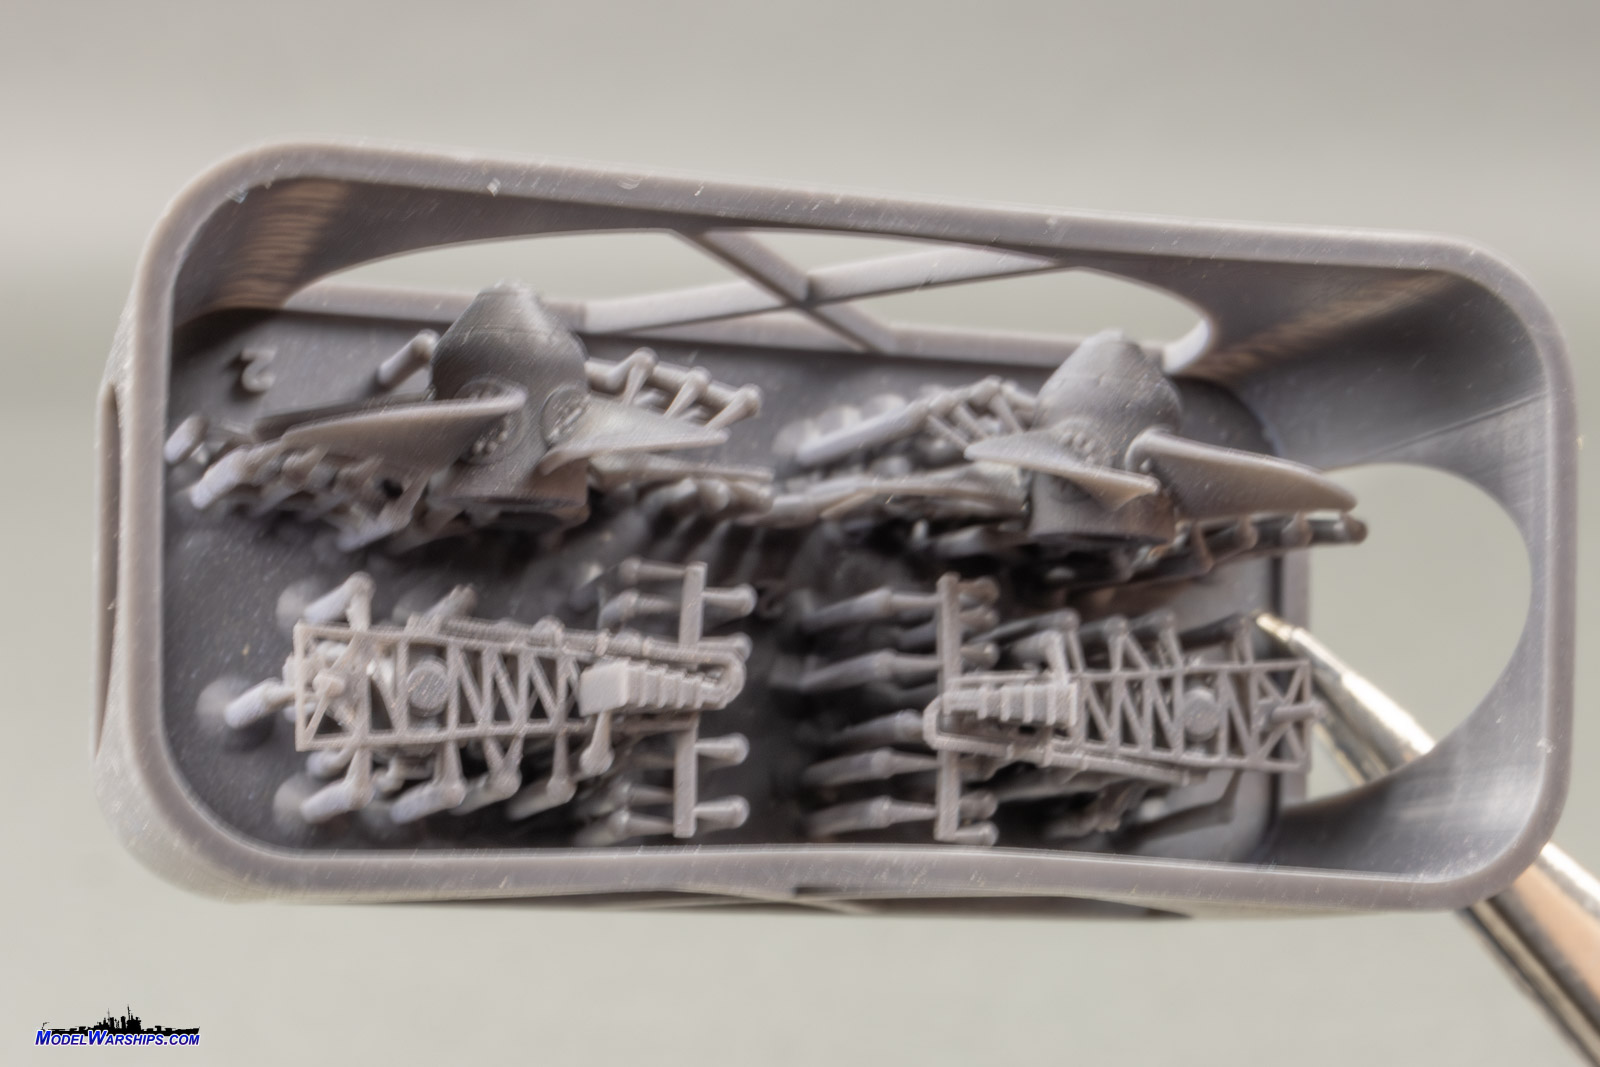
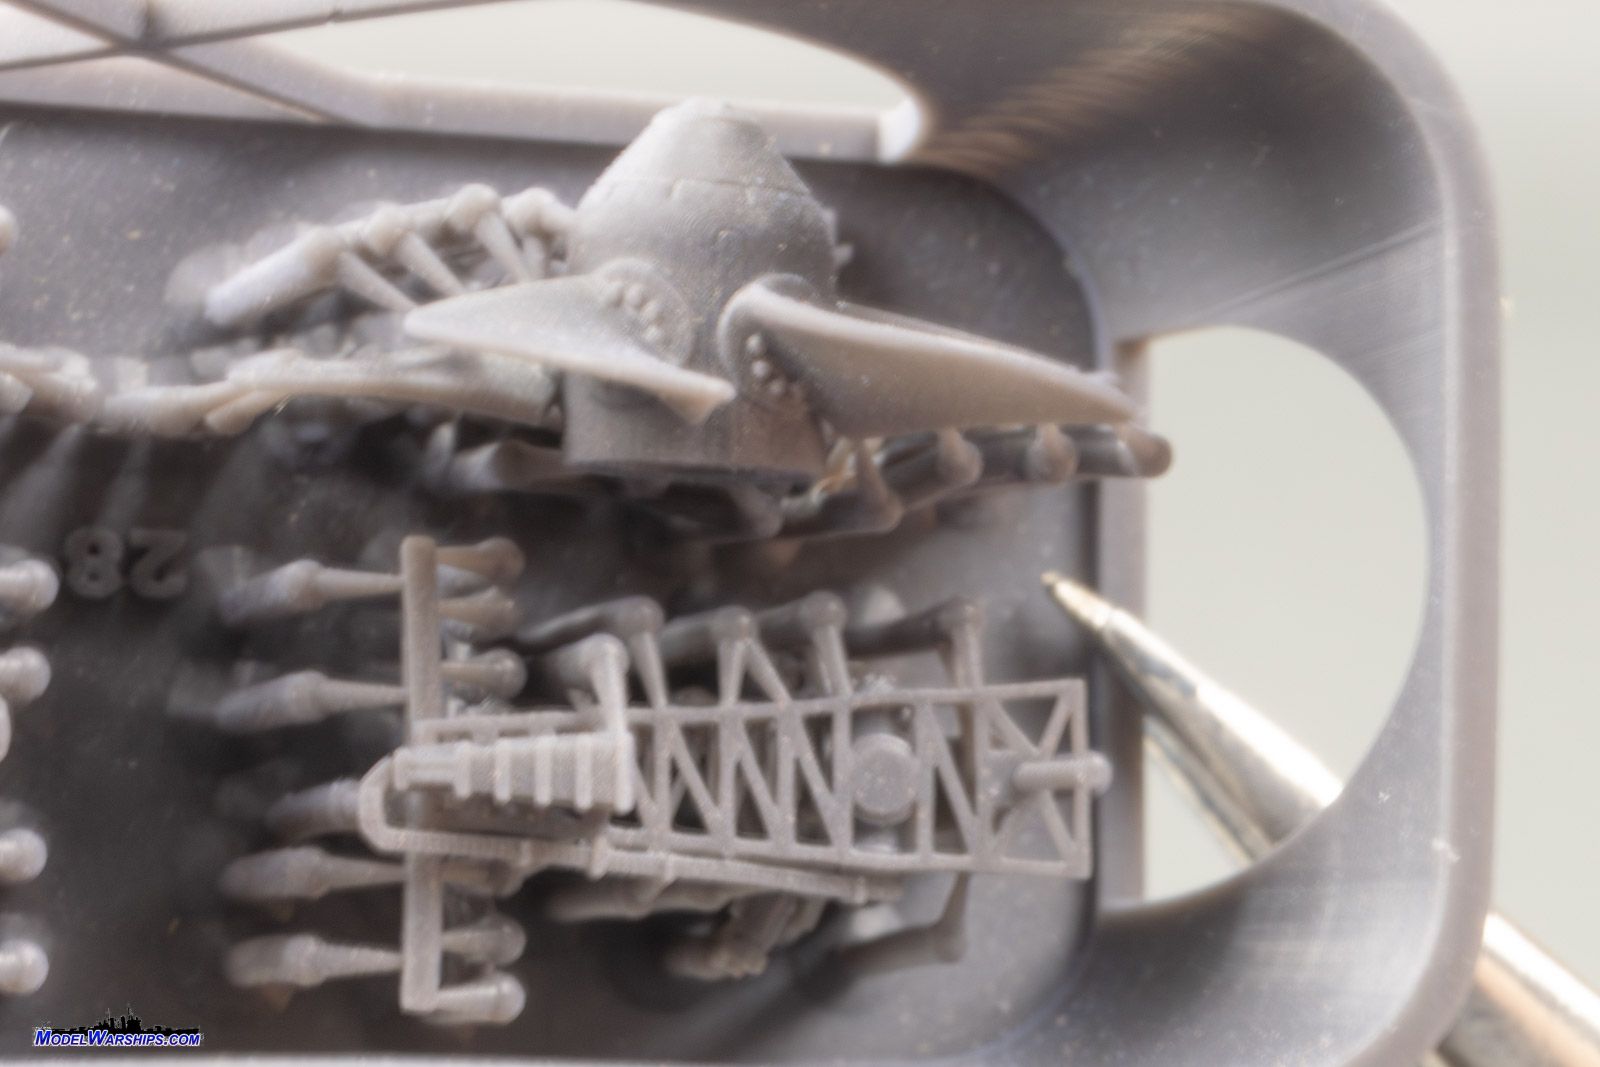
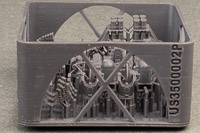
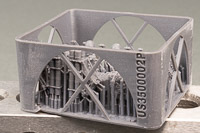
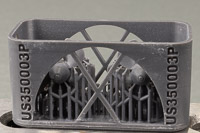
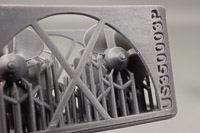
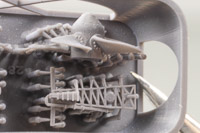
The other two rafts contain parts such as screws, CIWS, missile illuminators,
Harpoon canisters, chaff launchers, and the feed horn assembly for the
MK 49 search radar. As can be seen in the photos, these parts exhibit more
layer lines. How much they'll show under a coat of primer I don't know,
but they are apparent in these shots, which makes me wonder if it's the
resin that was used, and also makes me wonder why didn't they just use
the orange resin for everything. That being said, details on items like
the CIWS are definite improvements over the injection molded kit parts.
Overall, the 3D printed resin parts look excellent. I look forward to
getting a coat of primer on them and comparing them to their injection
molded counterparts. |
 |
 |
 |
 |
 |
 |
 |
 |
 |
 |
 |
|
 |
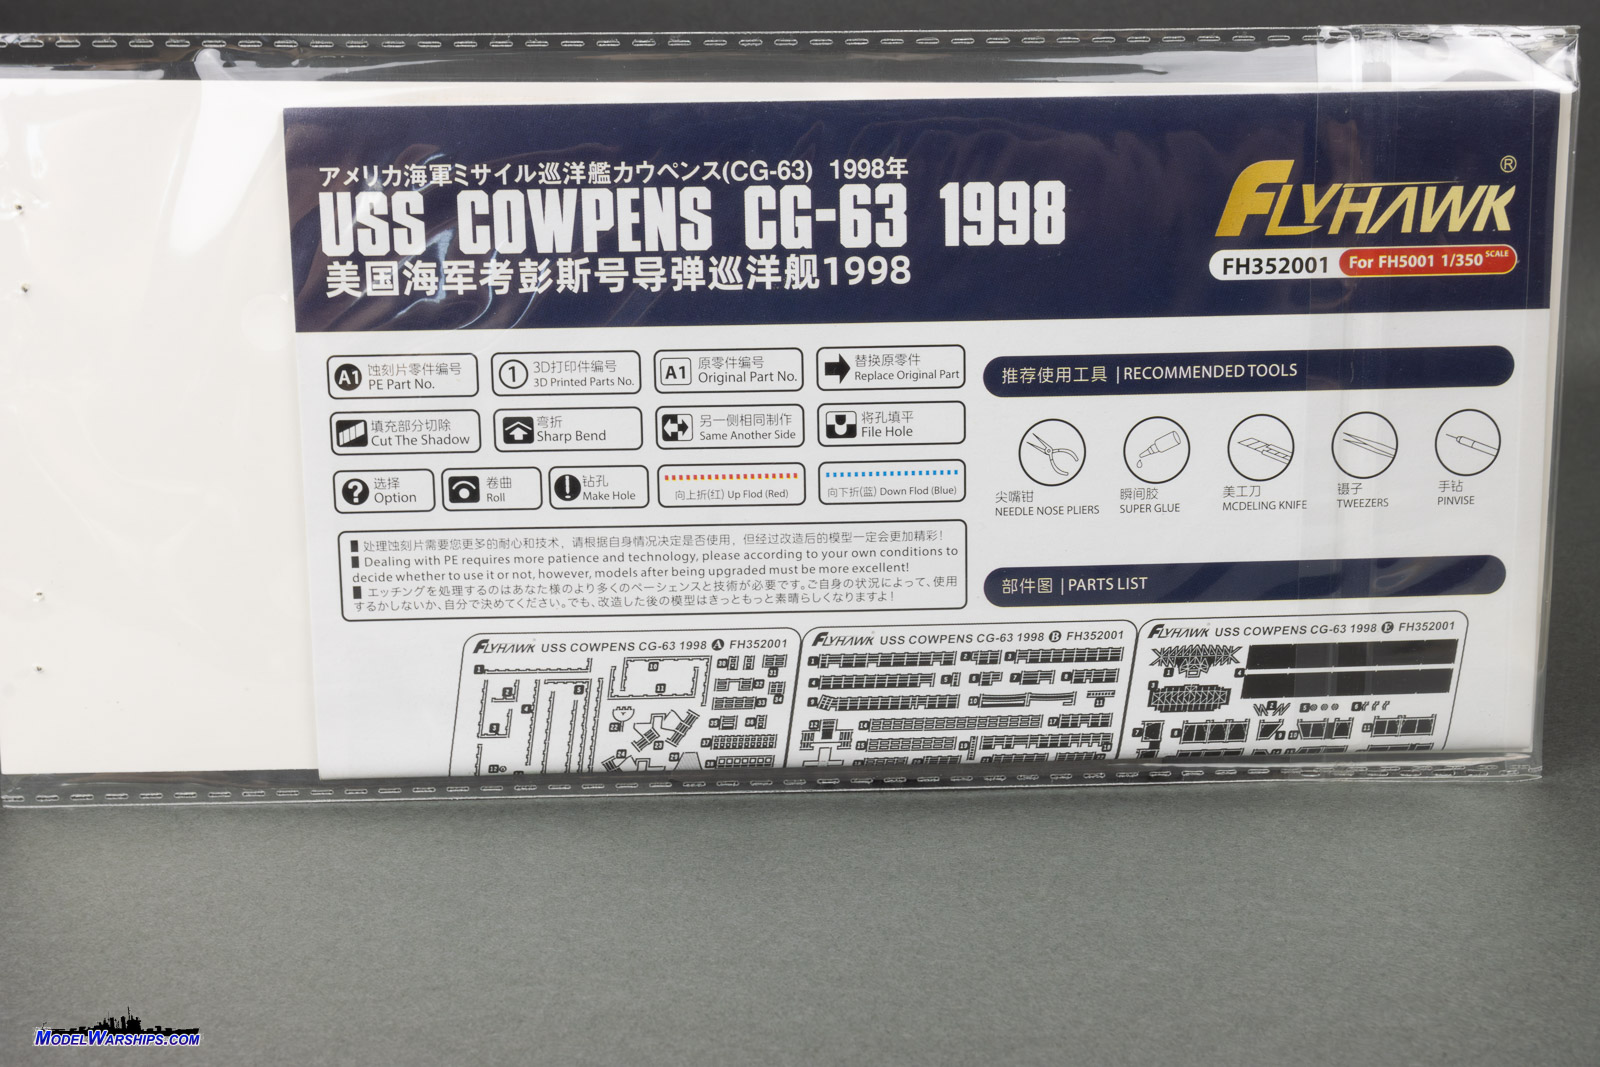
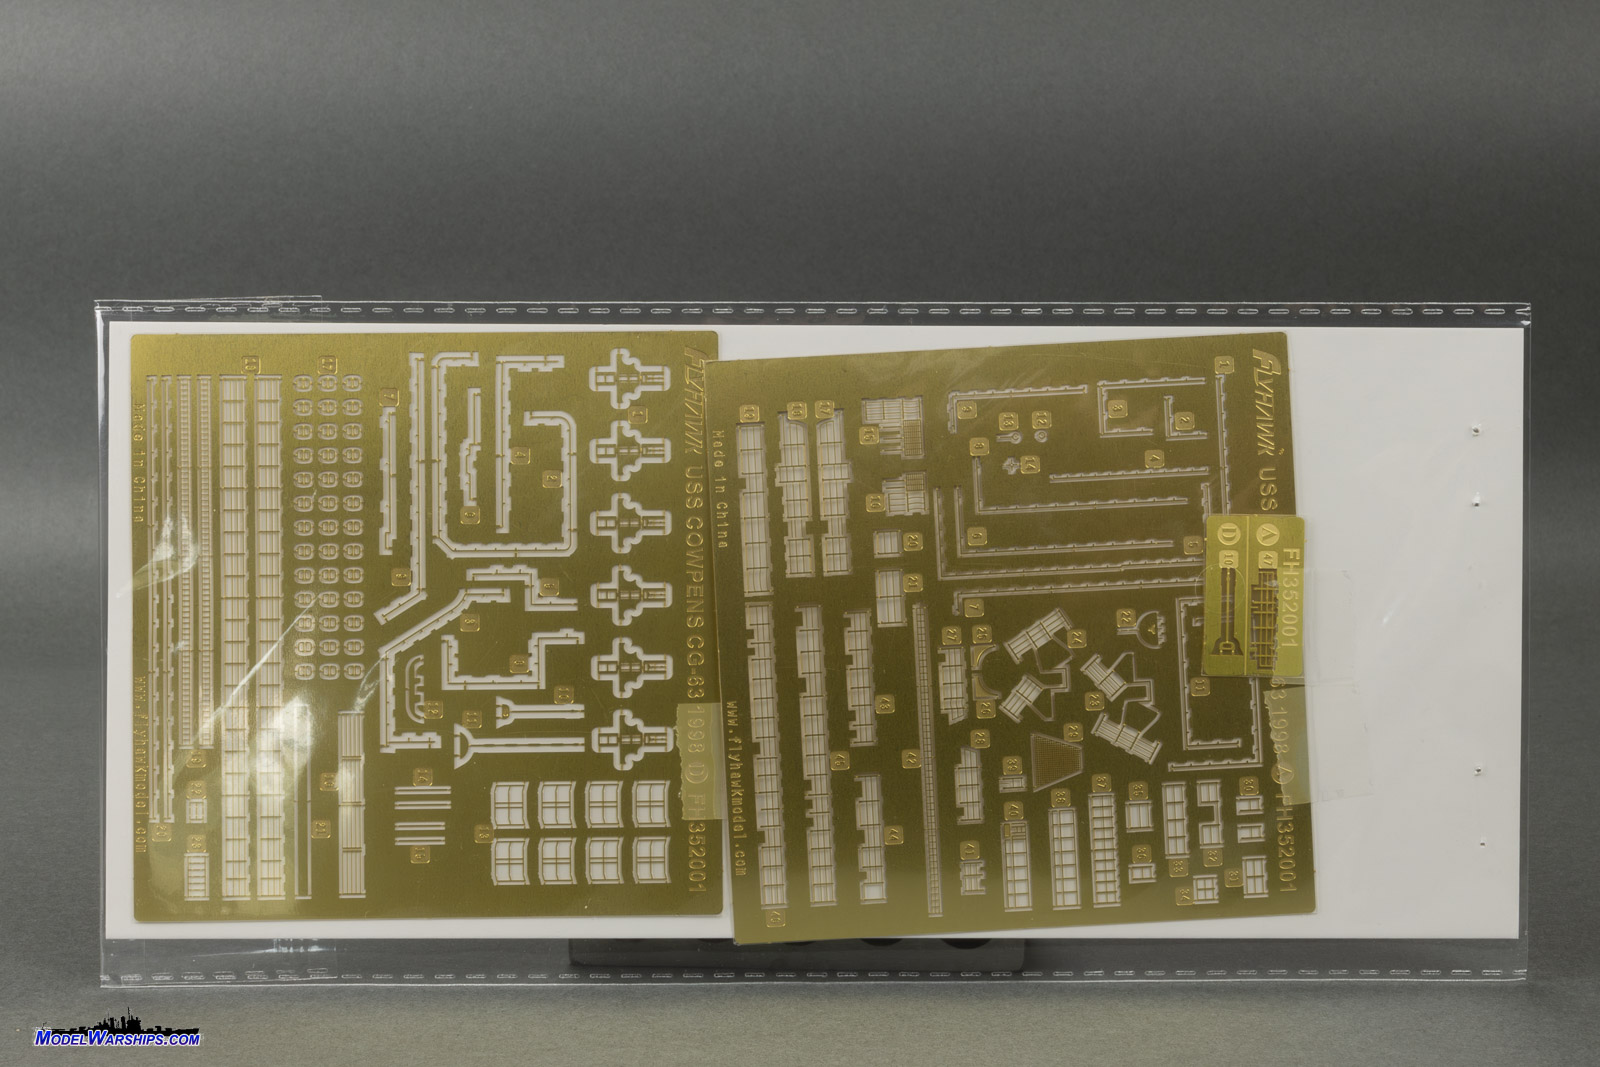
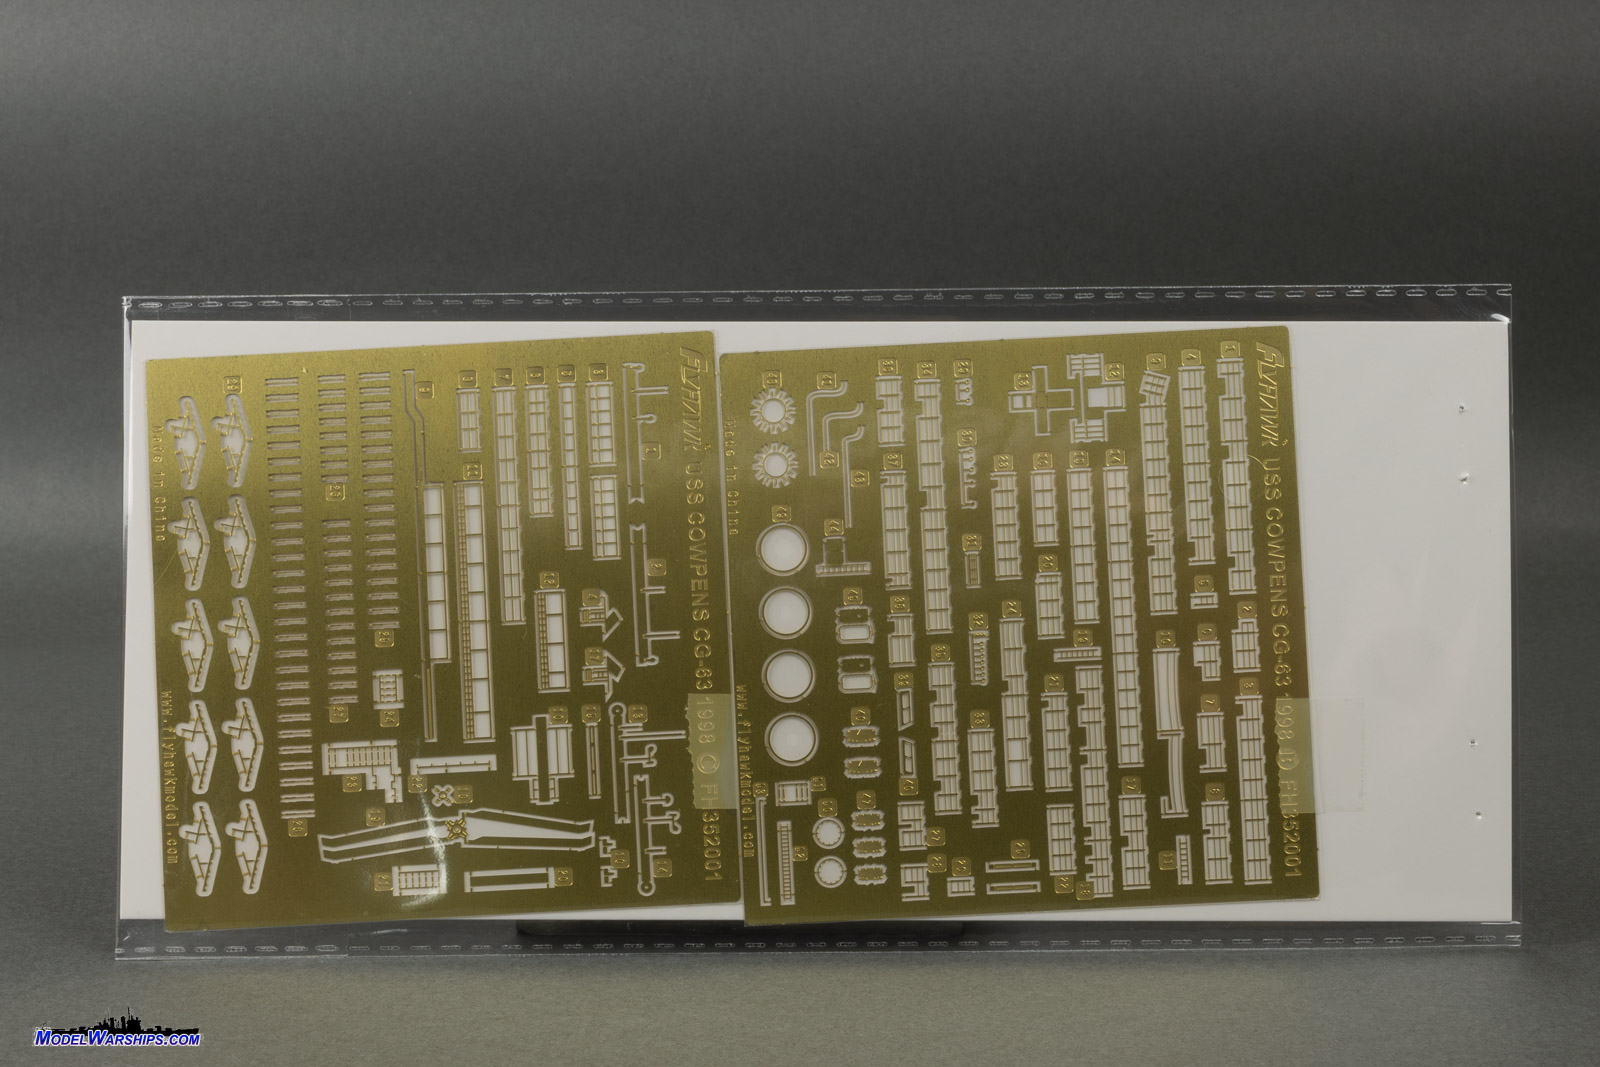
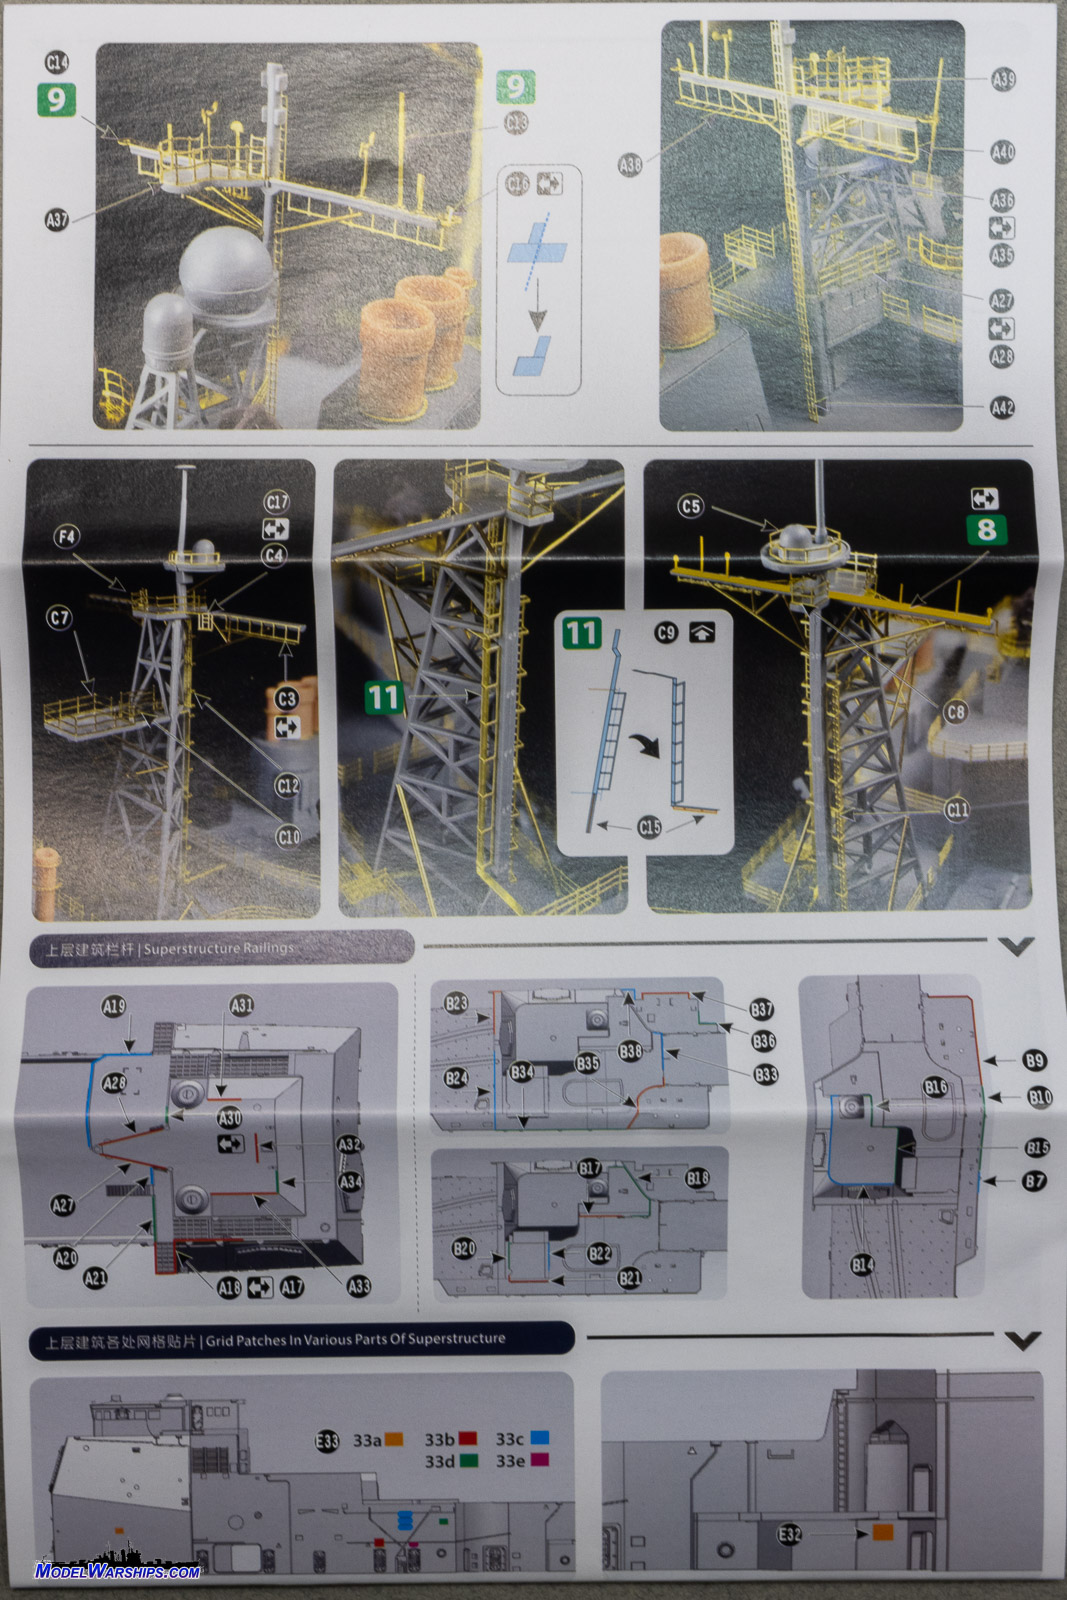
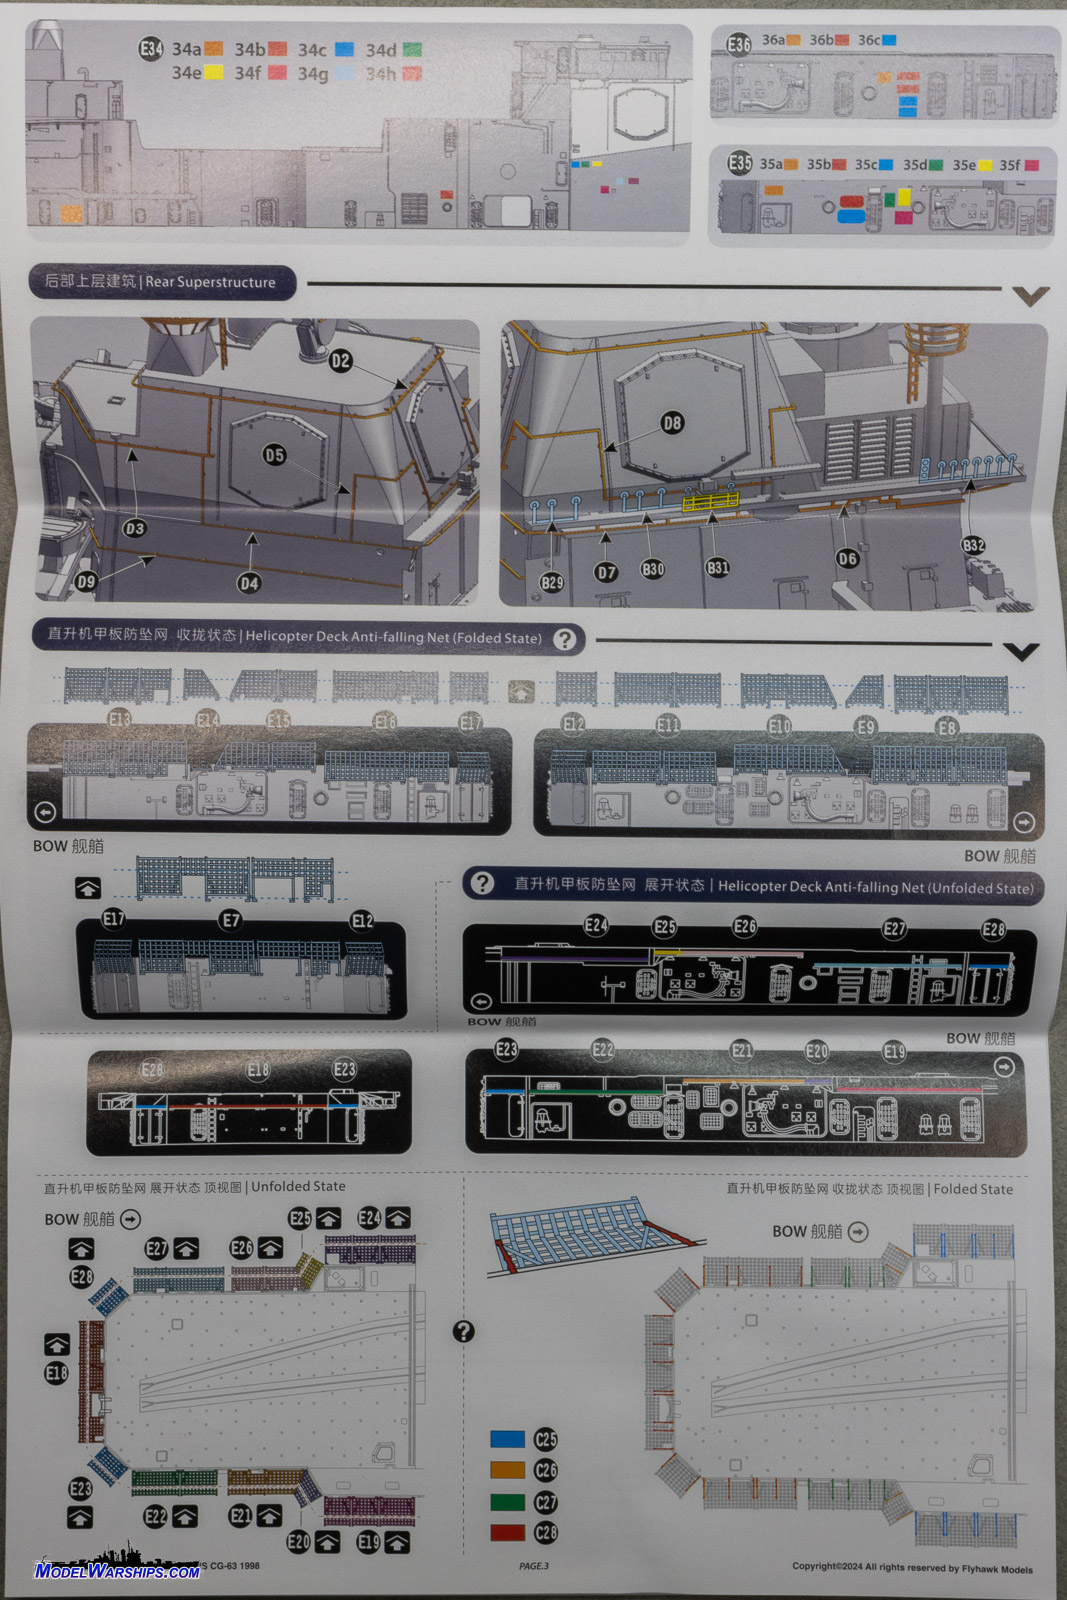
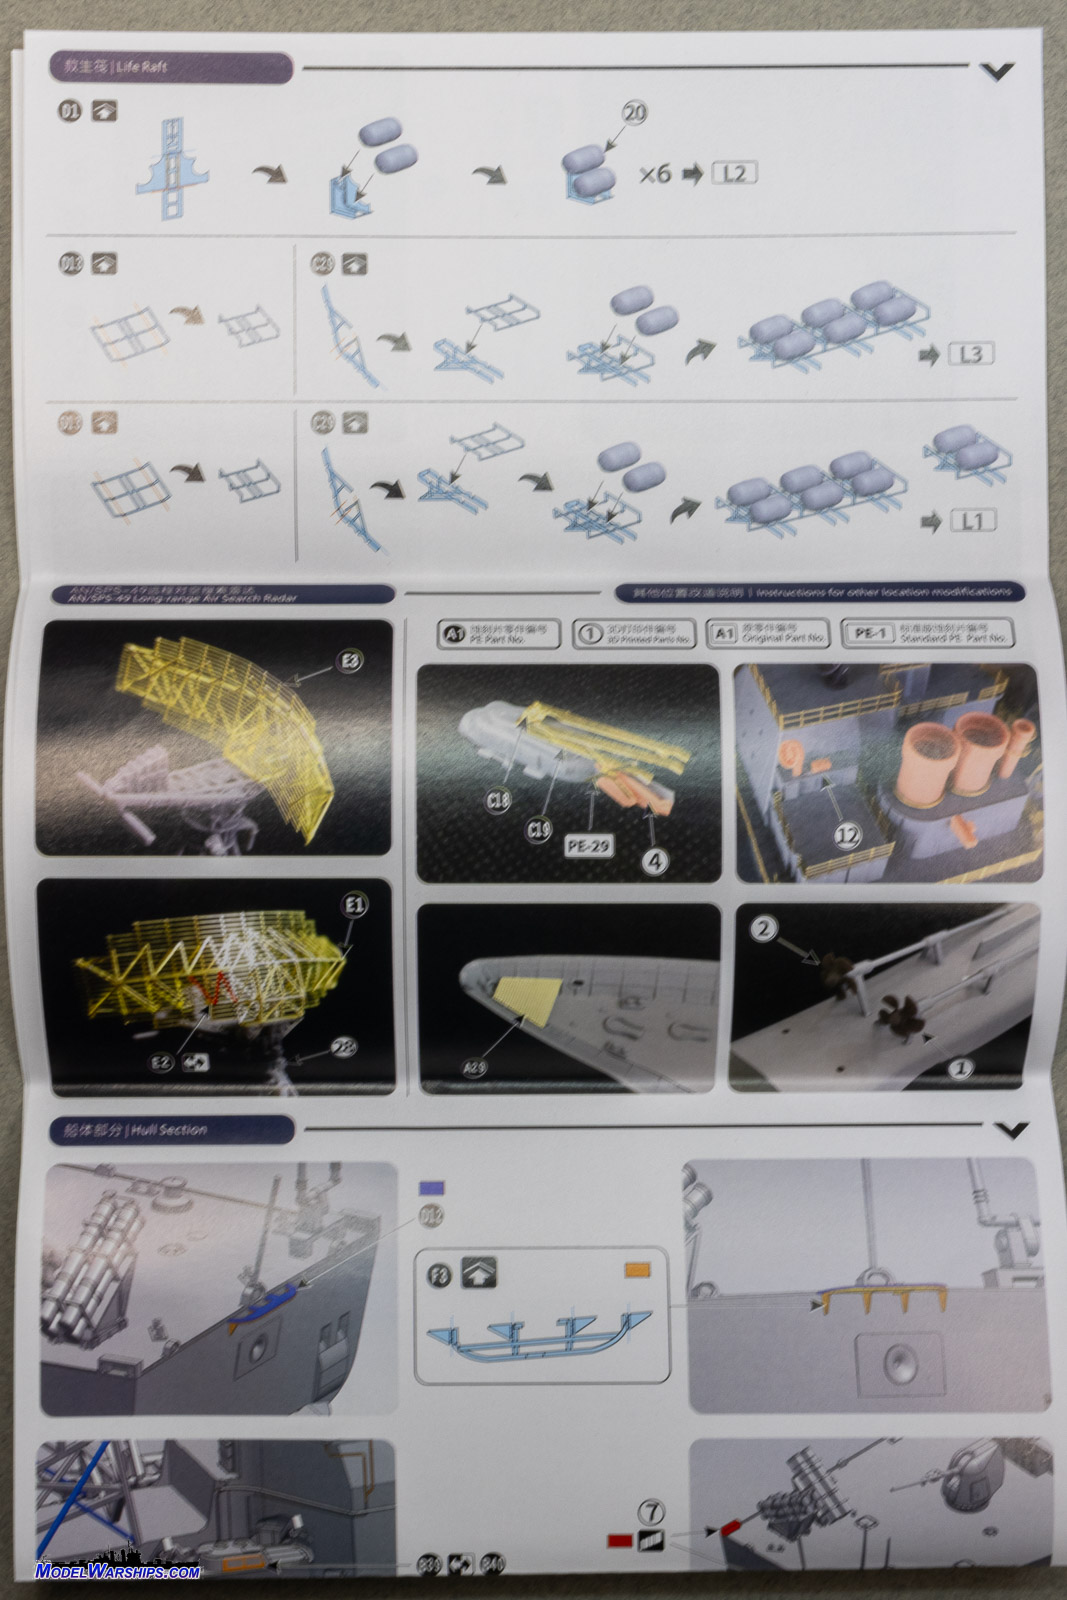
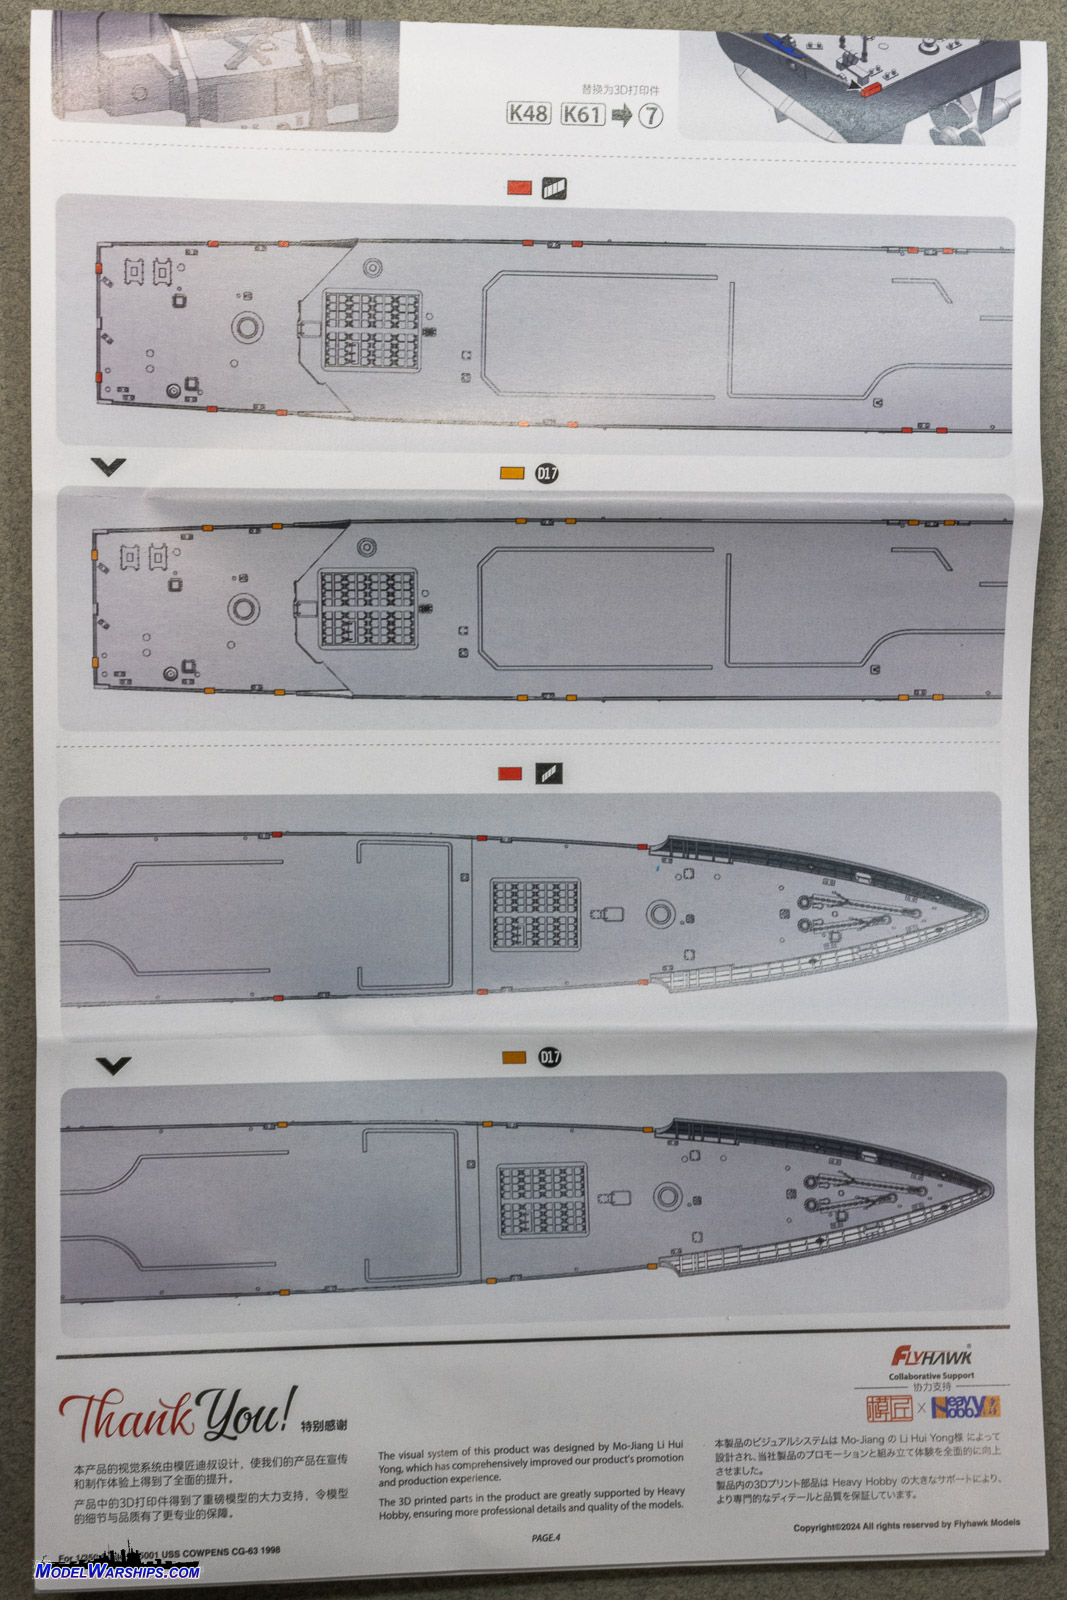
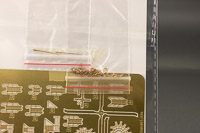
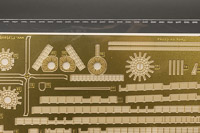
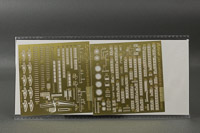
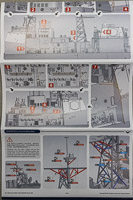
| DELUXE KIT: ADDITIONAL
PHOTOETCHED BRASS |
| The rest of the Deluxe additions come in the for of photo
etched brass, six sheets of it to be precise. These sheets include all
of that aforementioned missing railing for the superstructures. Long runs
of piping for the countermeasure wash down system pipes that line the ship
are included, although I think those would be better represented by wire
instead of flat brass. Several open door assemblies are included. All of
the mooring chocks that I mentioned as being molded closed? You can remove
them and replace them with the brass equivalents in this set. Components
for the SPS-49 radar are depicted in the much more realistic open brass
structure. Folded Skyhawk rotors go with the folded tail 3D printed part
so you can depict a helo stowed in the hangar. There's a ton of items on
these sheets; fortunately the instructions give a direct list of what brass
part replaces what styrene part, so it should be easy to make the swaps.
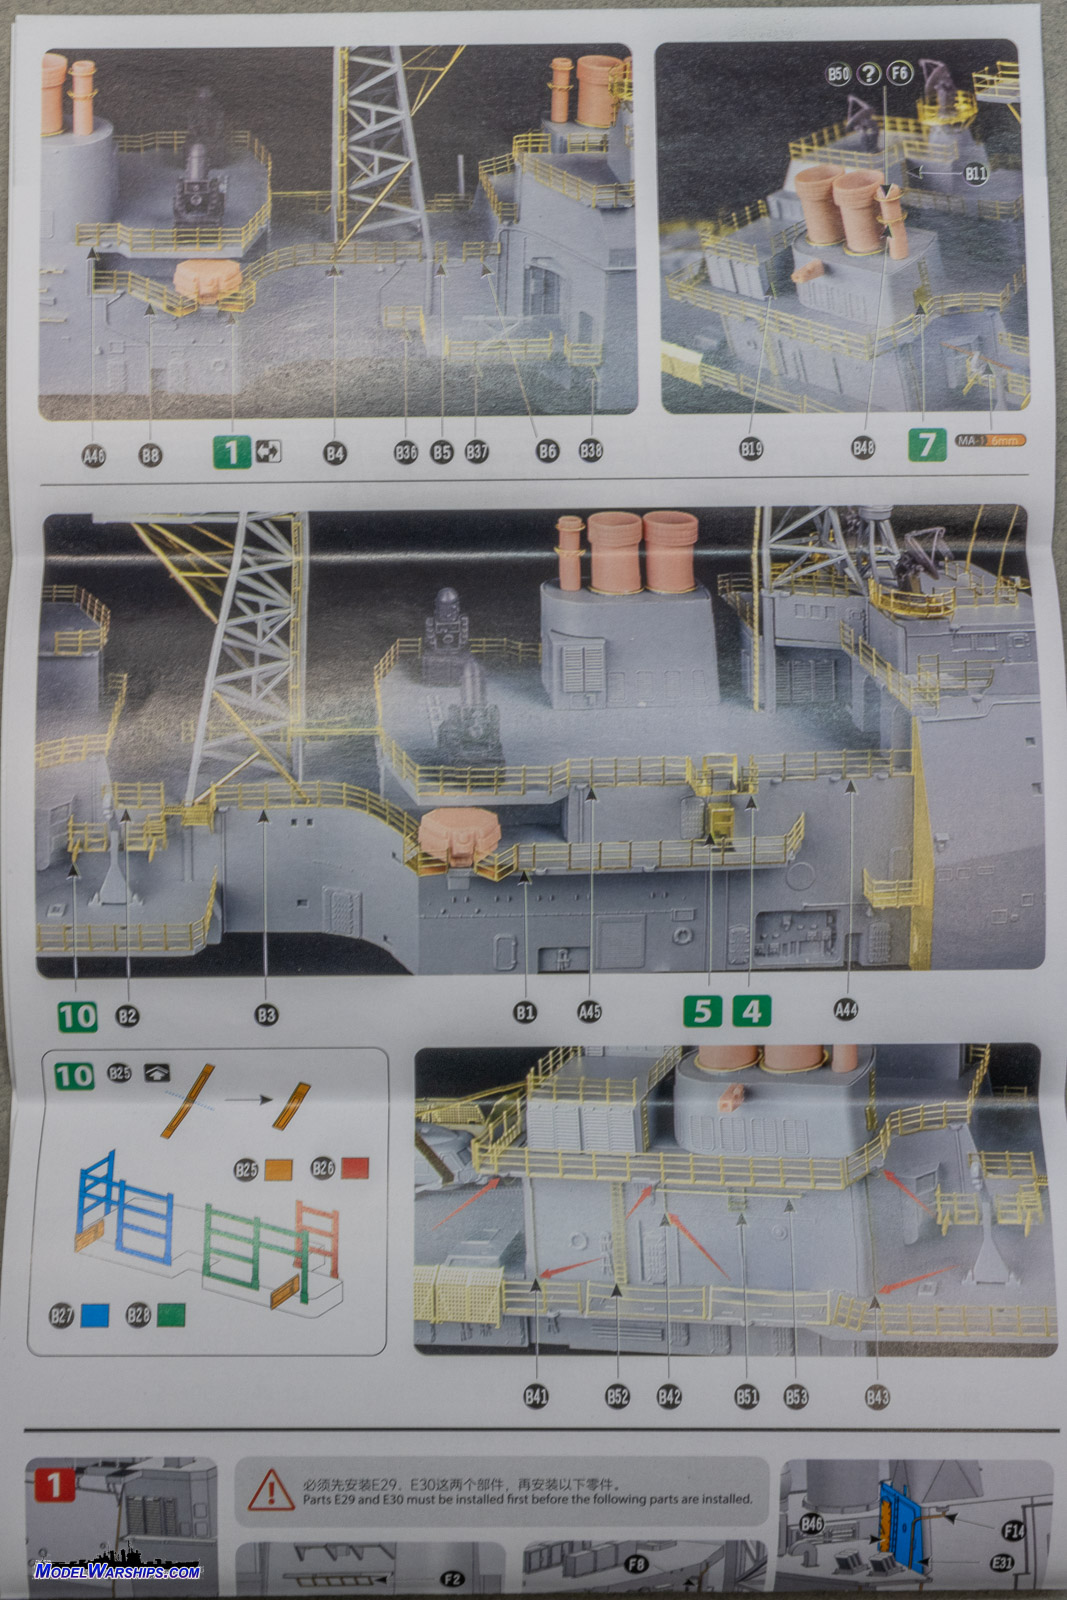
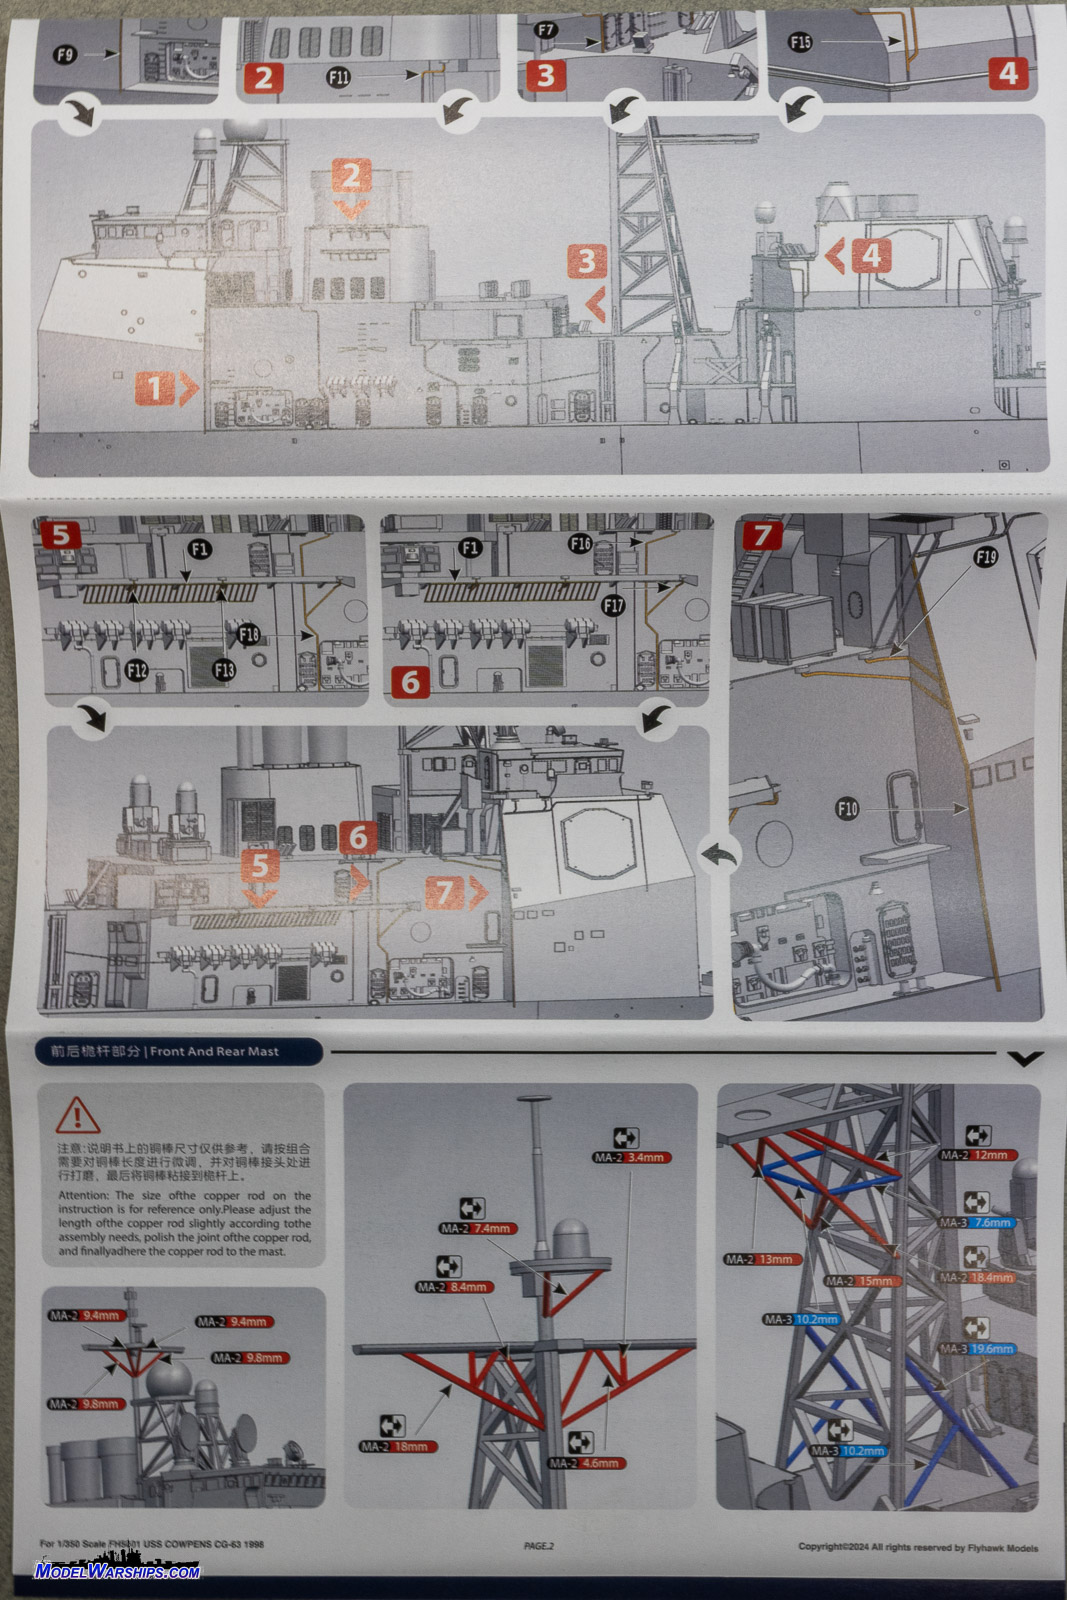
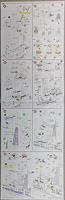
The other part of this pack of PE are four long pages of instructions,
which cover the implementation of both the brass and 3D parts. The steps
are about half CAD renderings like the the main instructions, with the
other half being annotated photos, showing the brass and resin parts in
place on the model. One thing to notice is that just after step 8 in the
instructions, there's an illustration that shows the railings are to be
installed with the lowest run attached to the OUTSIDE of the deck/structure,
and not sitting on top of it. If tolerances are tight, which I assume they
are knowing Flyhawk, that could make a big difference between a railing
fitting or not.
Also included in the brass upgrade package are lengths of brass wire.
It seems that these are to be cut to specific lengths and added as additional
braces/supports to the mast assembly. This will take some careful study
to make sure the lengths are cut correctly, and to figure out how to get
a clean join between brass and styrene. It looks as if the wire intersects
at joints of the styrene mast cross members, so it may not be a big issue.
I guess I'm surprised they didn't just included a fully printed mast as
part of the deluxe upgrade, as they did for their 1/700 USS Bunker Hill
Deluxe Version. Maybe in future releases? |
 |
 |
 |
 |
 |
 |
 |
 |
 |
 |
 |
|
 |
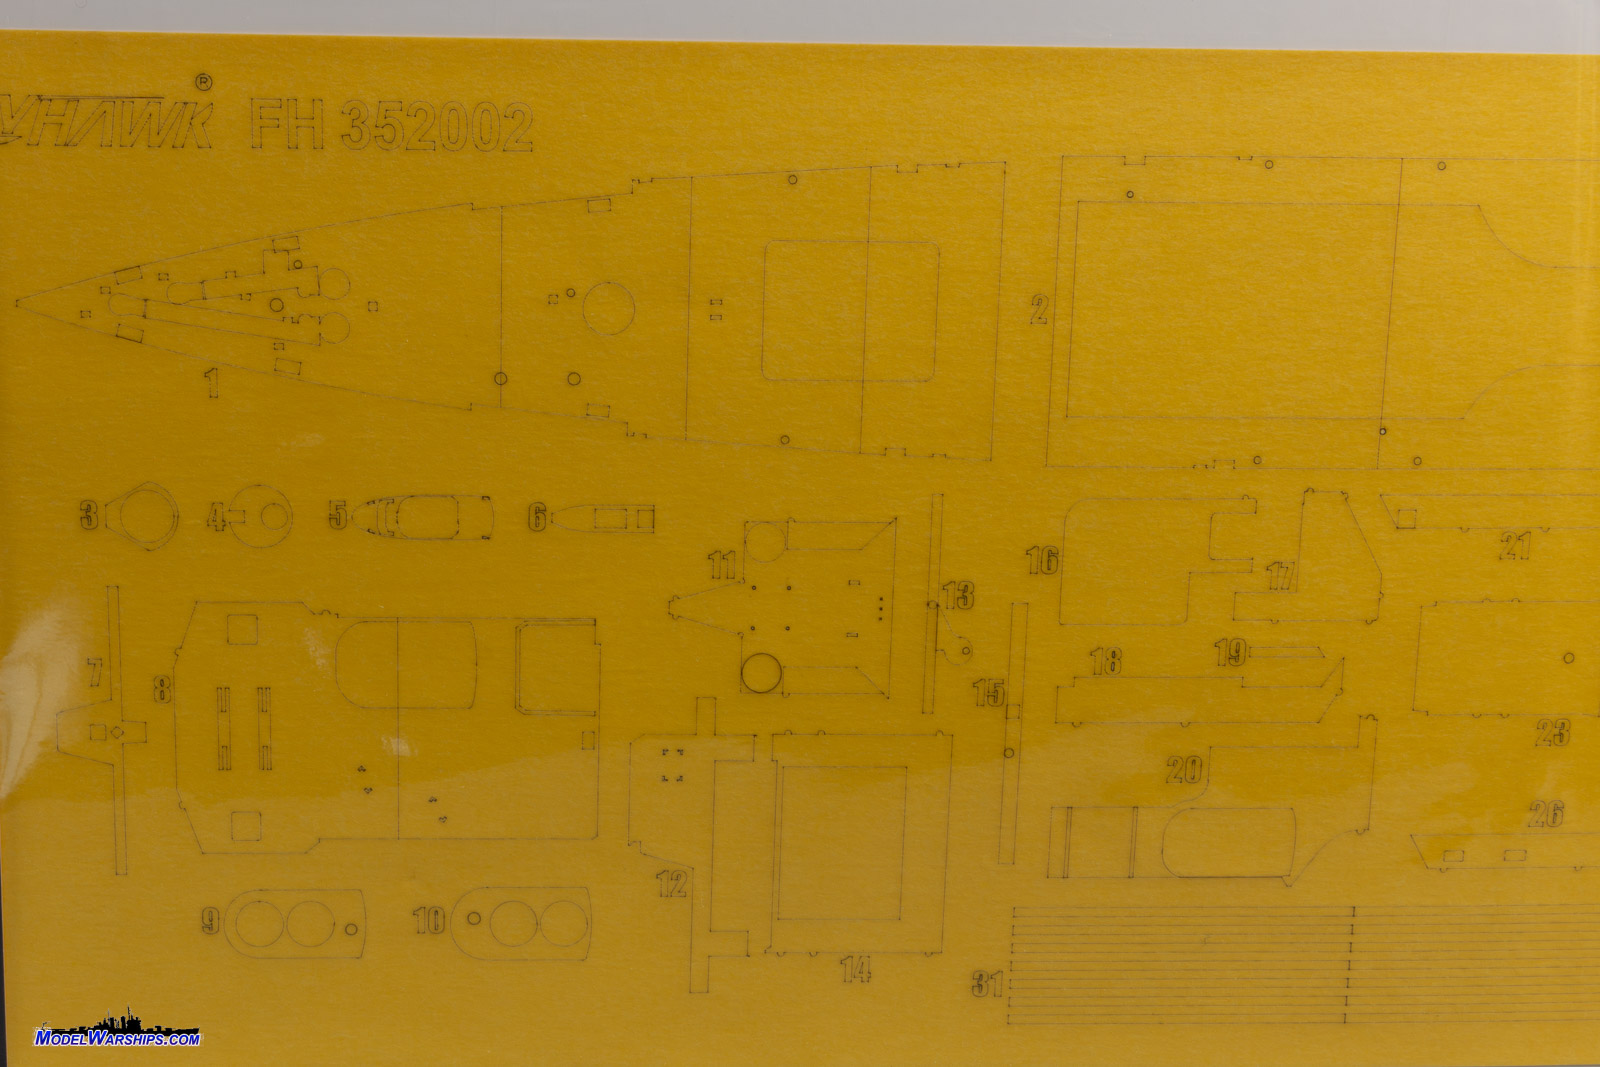
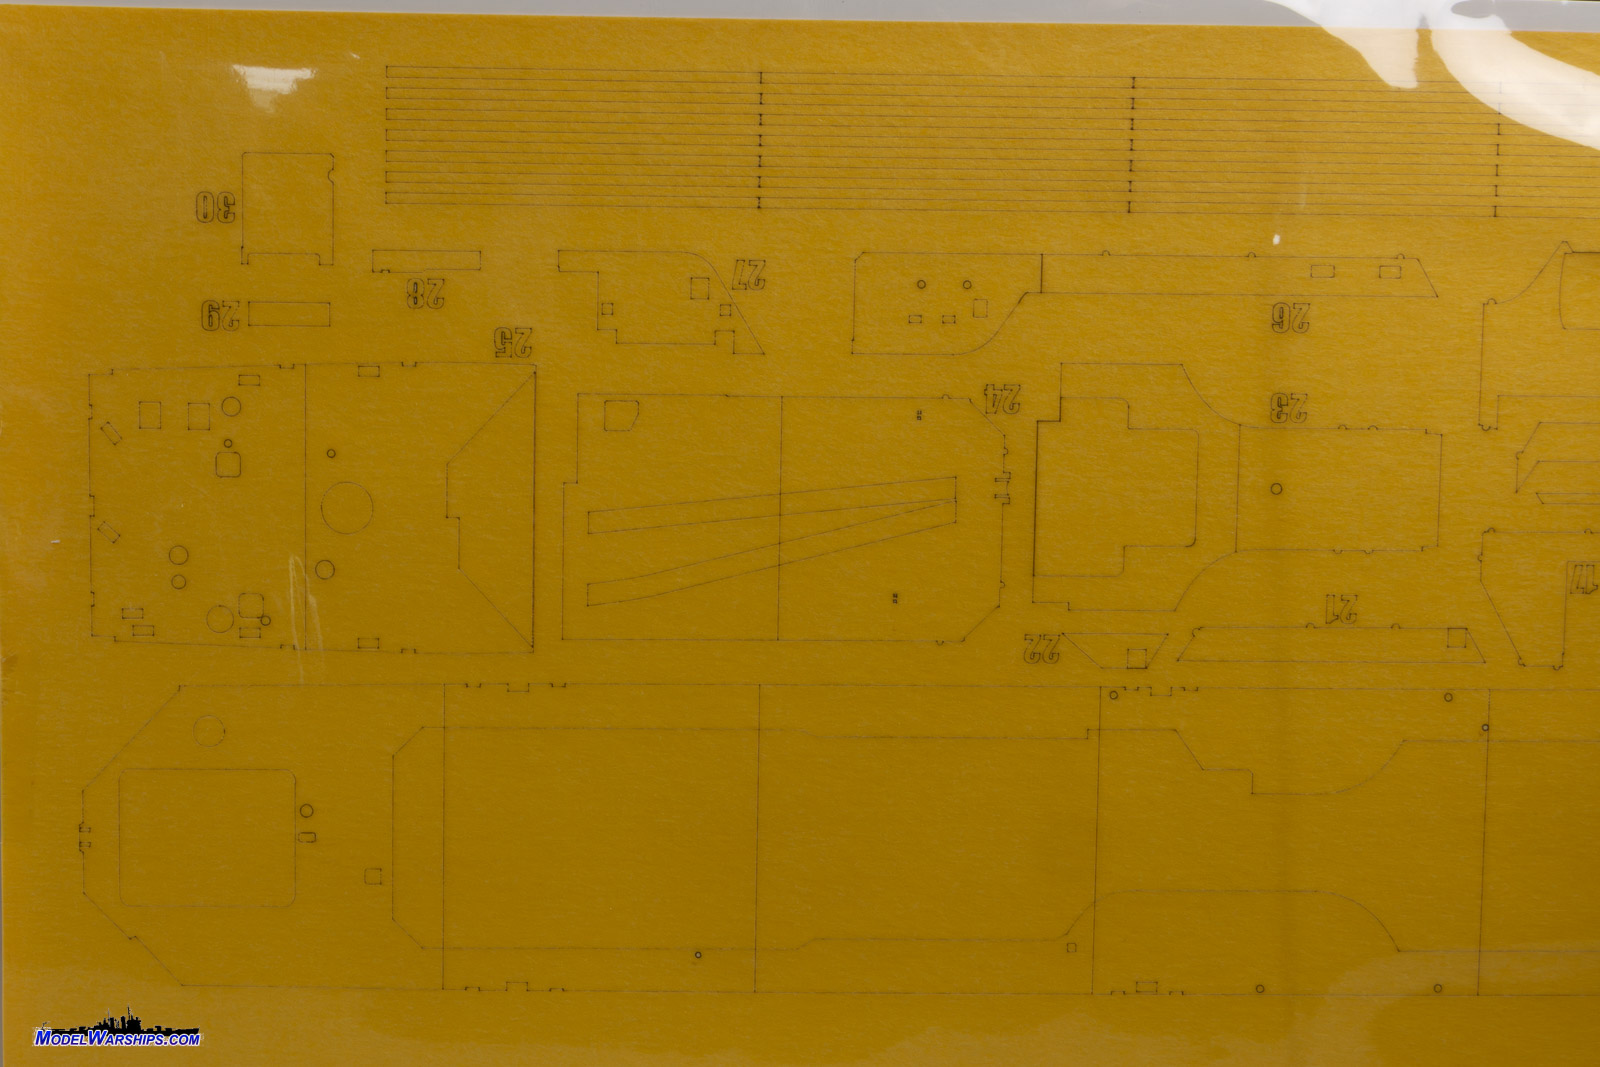
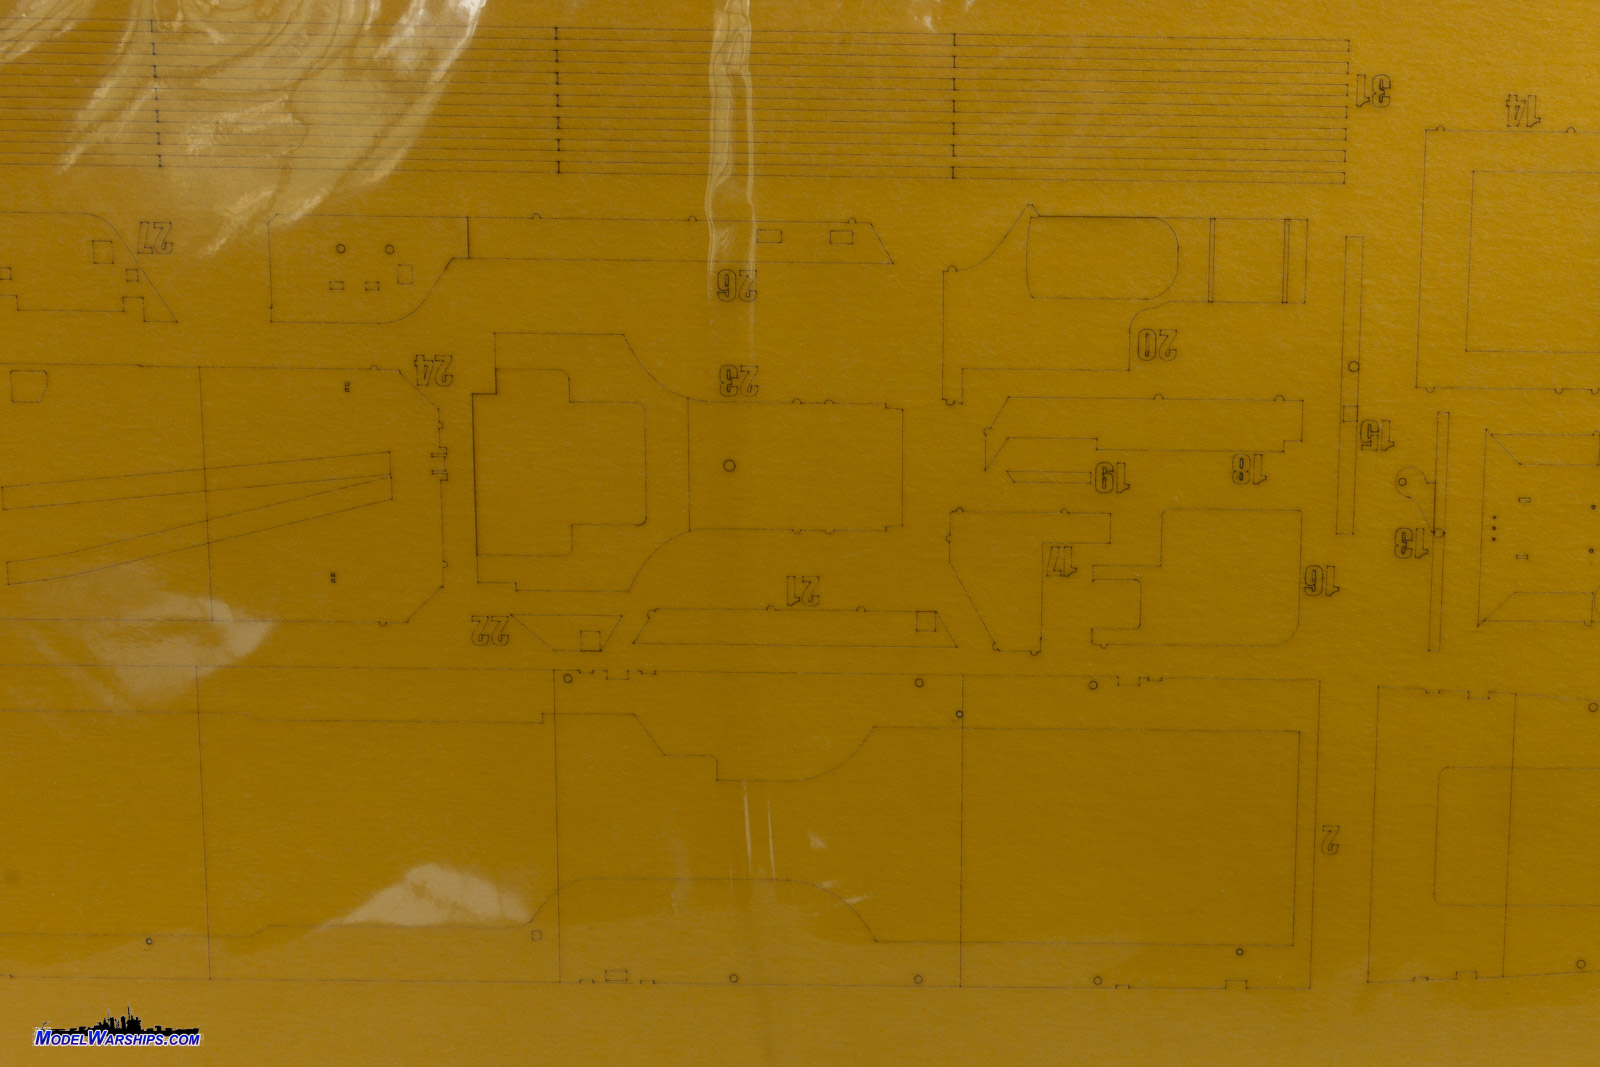
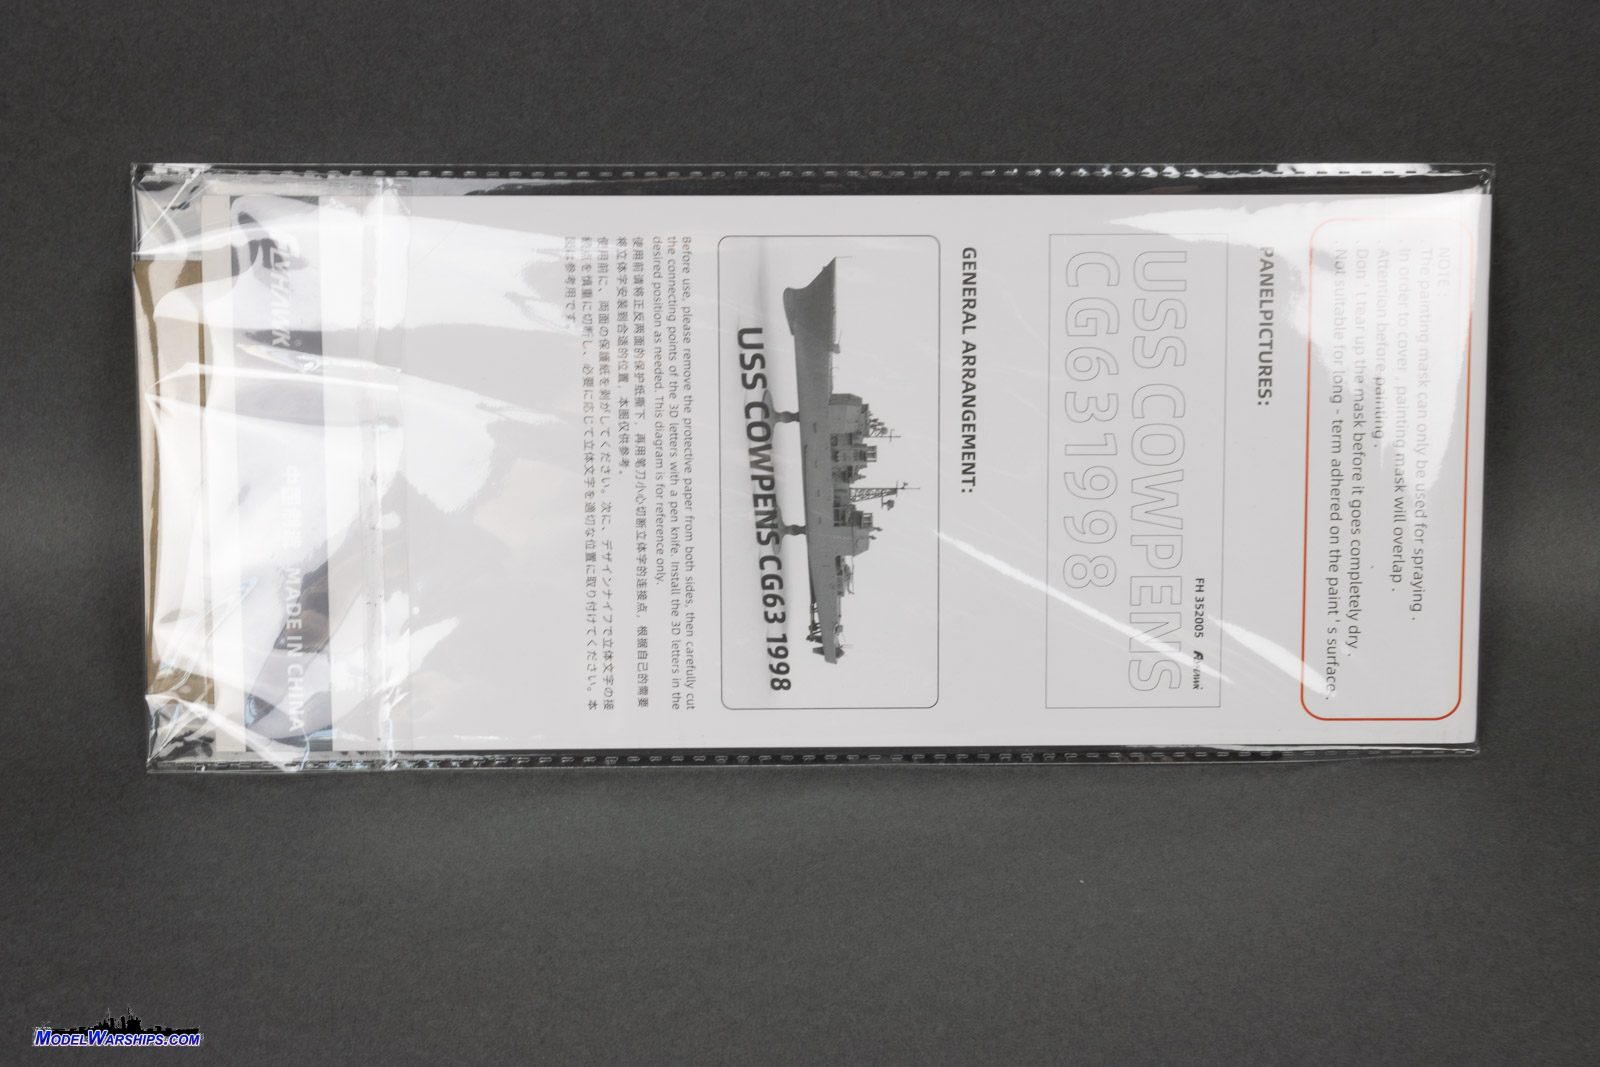
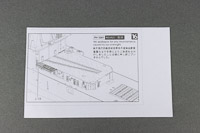
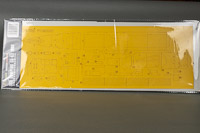
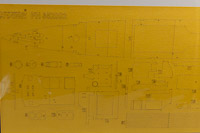
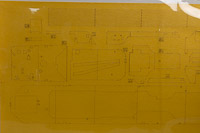
| DELUXE KIT: DECK MASKS |
| Anyone that knows me knows that I'm all about
painting masks. Cowpens comes with a a full sheet, approximately 18" x
7" of pre-cut goodness. The main deck sections, tops of superstructures,
mast platforms, tops of the stacks, and roof of the bridge are all included.
The larger sections, such as for the bow and the main deck are divided
into multiple sections -- four for the bow, five for the main deck -- which
keep one from having to lay down and align a 10" section of adhesive masks
in one shot. A very well-thought-out touch. The material looks to be the
same rice paper material, (think Tamiya and Nichiban tape), that I used
in their HMS Lively masking set, and that worked beautifully. In
addition to all of the custom-cut pieces, there are 28 separate strips
included, for use in covering any seams that may appear between sections.
For placement, the back of the package header (that I forgot to photograph)
shows a line drawing of the masks, each annotated by number, as well as
photos of the actual kit parts with the masks applied, denoting both the
mask number and the kit part number, leaving little to confuse the modeler
while placing them. |
 |
 |
 |
 |
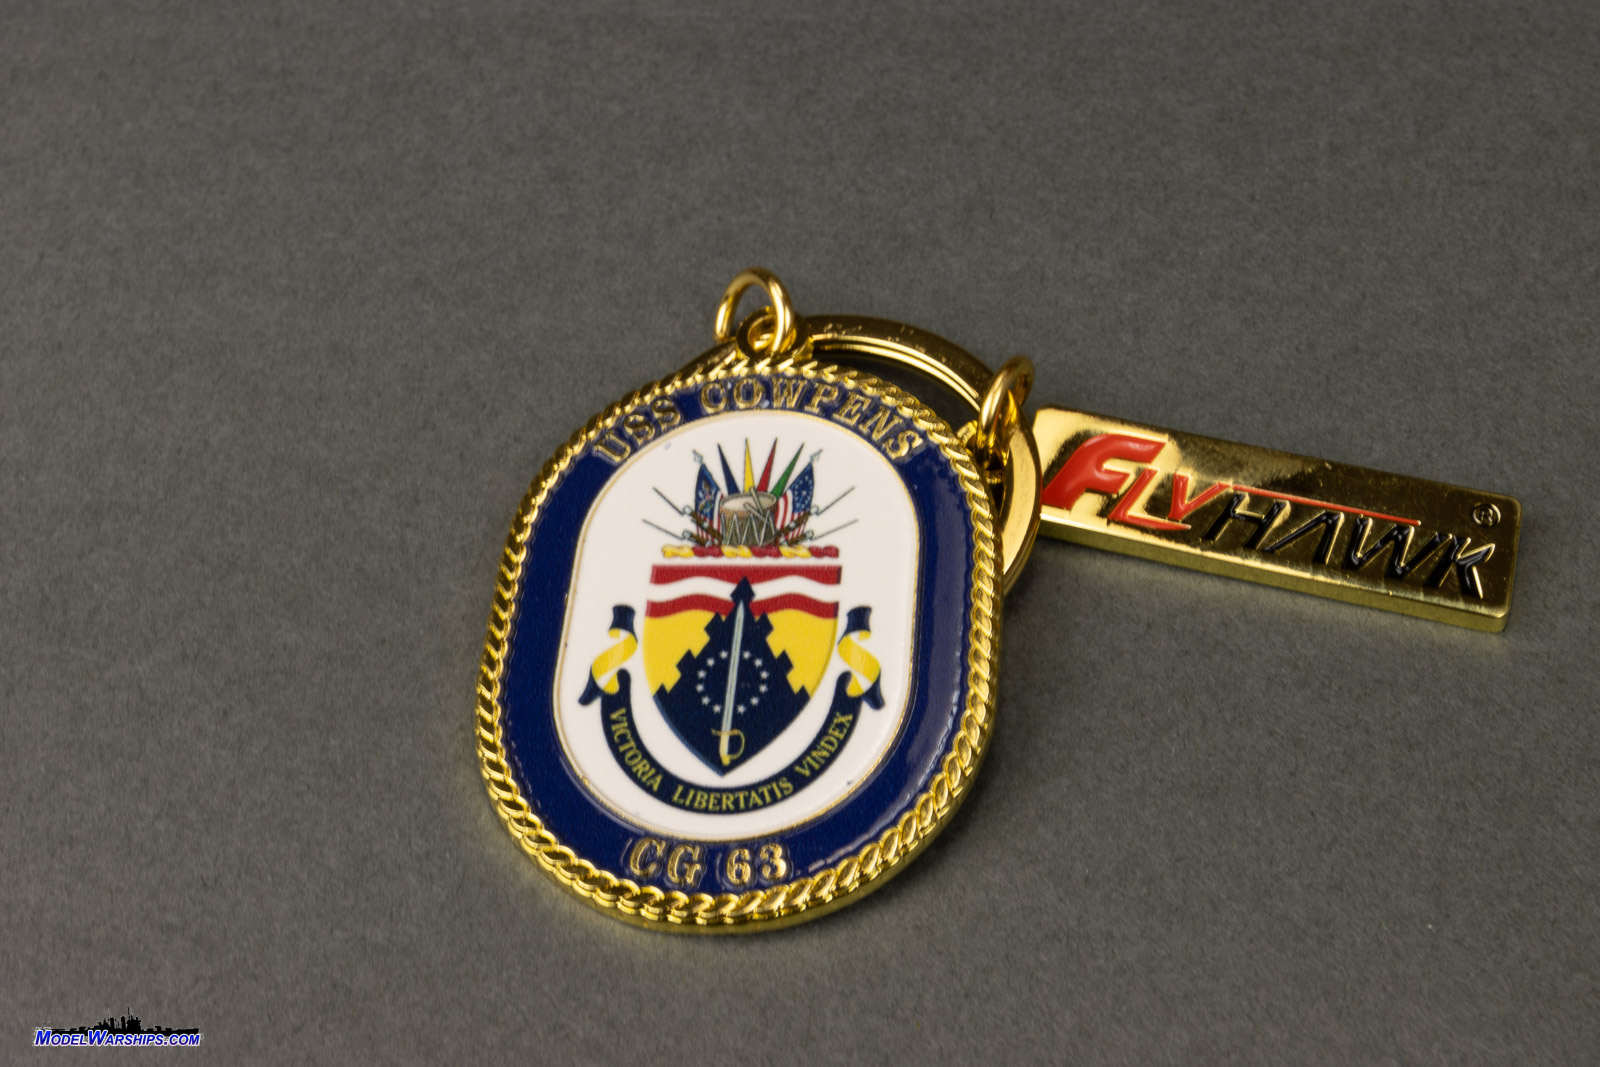
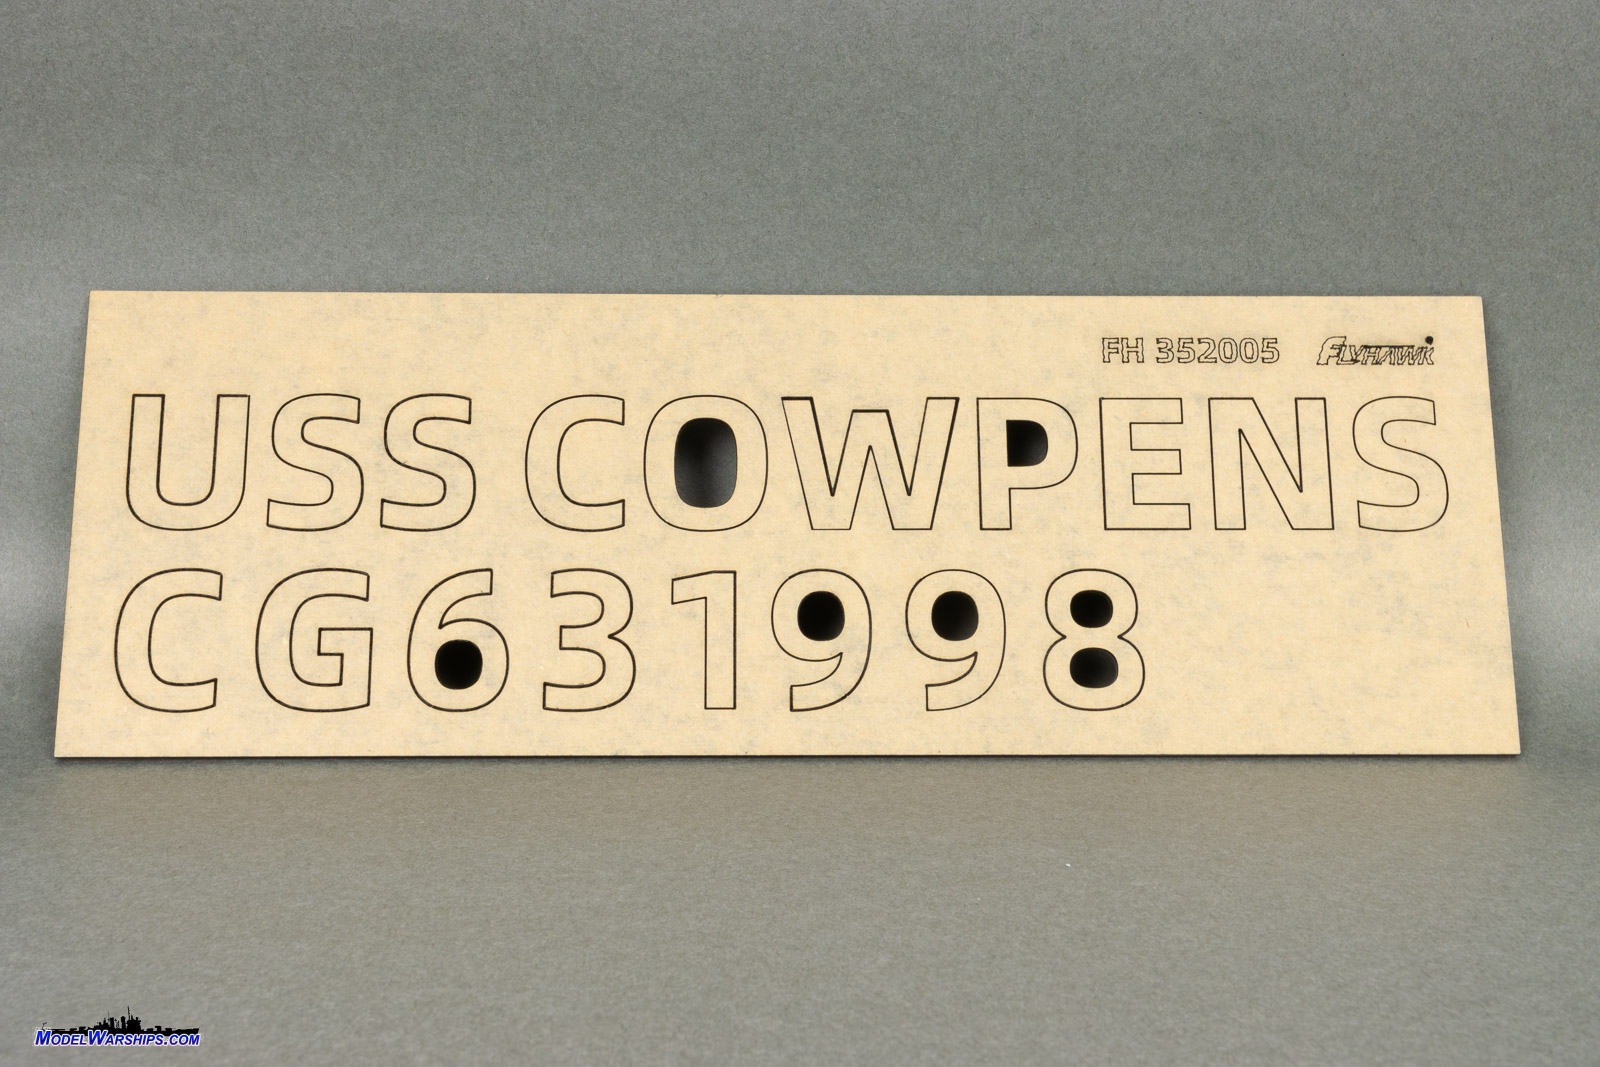
| DELUXE KIT: ADDITIONAL
GOODIES |
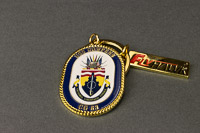
| There are a few extra items included with the
deluxe kit that don't impact the assembly of the kit. The first is a key
ring that includes a miniature brass and enamel rendition of the ship's
crest, along with a brass tag of the Flyhawk logo. It's a really cool little
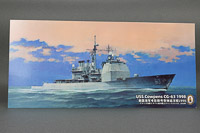
extra. Next is a cardboard "print" of the box art, with a ship's history
on the reverse side.
The third part included is a bit of a head-scratcher to me. The name
USS Cowpens, CG63, and 1998 are included, laser-cut out of black
acrylic. It's not a base or stand, as it's only the letters and numbers
cut out of acrylic. They won't stand freely on their own, so maybe one
could attach them to whatever base one uses for the model. I'm not really
sure what the intended purpose of this is. Since it's an added extra to
this boxing, it's not a big deal, but they could have just as easily laser
cut a nameplate out of the black acrylic, or even 3D printed an even nicer
nameplate as more useful additions. |
 |
 |
 |
 |
| CONCLUSIONS |
| There's a lot to like about the Flyhawk USS Cowpens.
It's the first 1/350th scale kit from the company, and it proves that they
can take their finesse for detail in 1/700 scale and build on it in a larger
format. This is the first new tool Ticonderoga class kit in 1/350th
scale since the Dragon kit of 1989. I built that kit while in AEGIS school
back in 1991, and can still remember the frustration of trying to get rid
of that seam between the superstructure and hull. As mentioned, a quick
tape-up of the Flyhawk parts show that won't be an issue here. Overall
the detail and fit are excellent, and it looks like it'll build into a
beautiful model, but that's not saying there aren't issues. The basic PE
set is lacking a lot of railings for the superstructure, which, of course,
is not an issue if you have this deluxe version. Other than that lack of
railing, after proof-reading this review a half-dozen times, I find it
telling that the only thing I can really ping on this kit is the
overdone waffle detail on the doors. That's such a minor issue, and while
it's something that'd be nice if it wasn't there, it's almost nothing in
such a complex kit with so many parts. (Studio Blue Ocean on YouTube
has built
this kit and while you can see those door patterns, they're not egregious).
Highly recommended. I'm really happy to see this new kit, and I hope
it sells well so that Flyhawk will do more Ticonderoga class cruisers,
and other modern US warships (again, Adams class DDG???). Thank
you to site sponsor Squadron Models for this review sample. You
can find them online, linked at their website via their logo to the right. |


|

© ModelWarships.com
|